
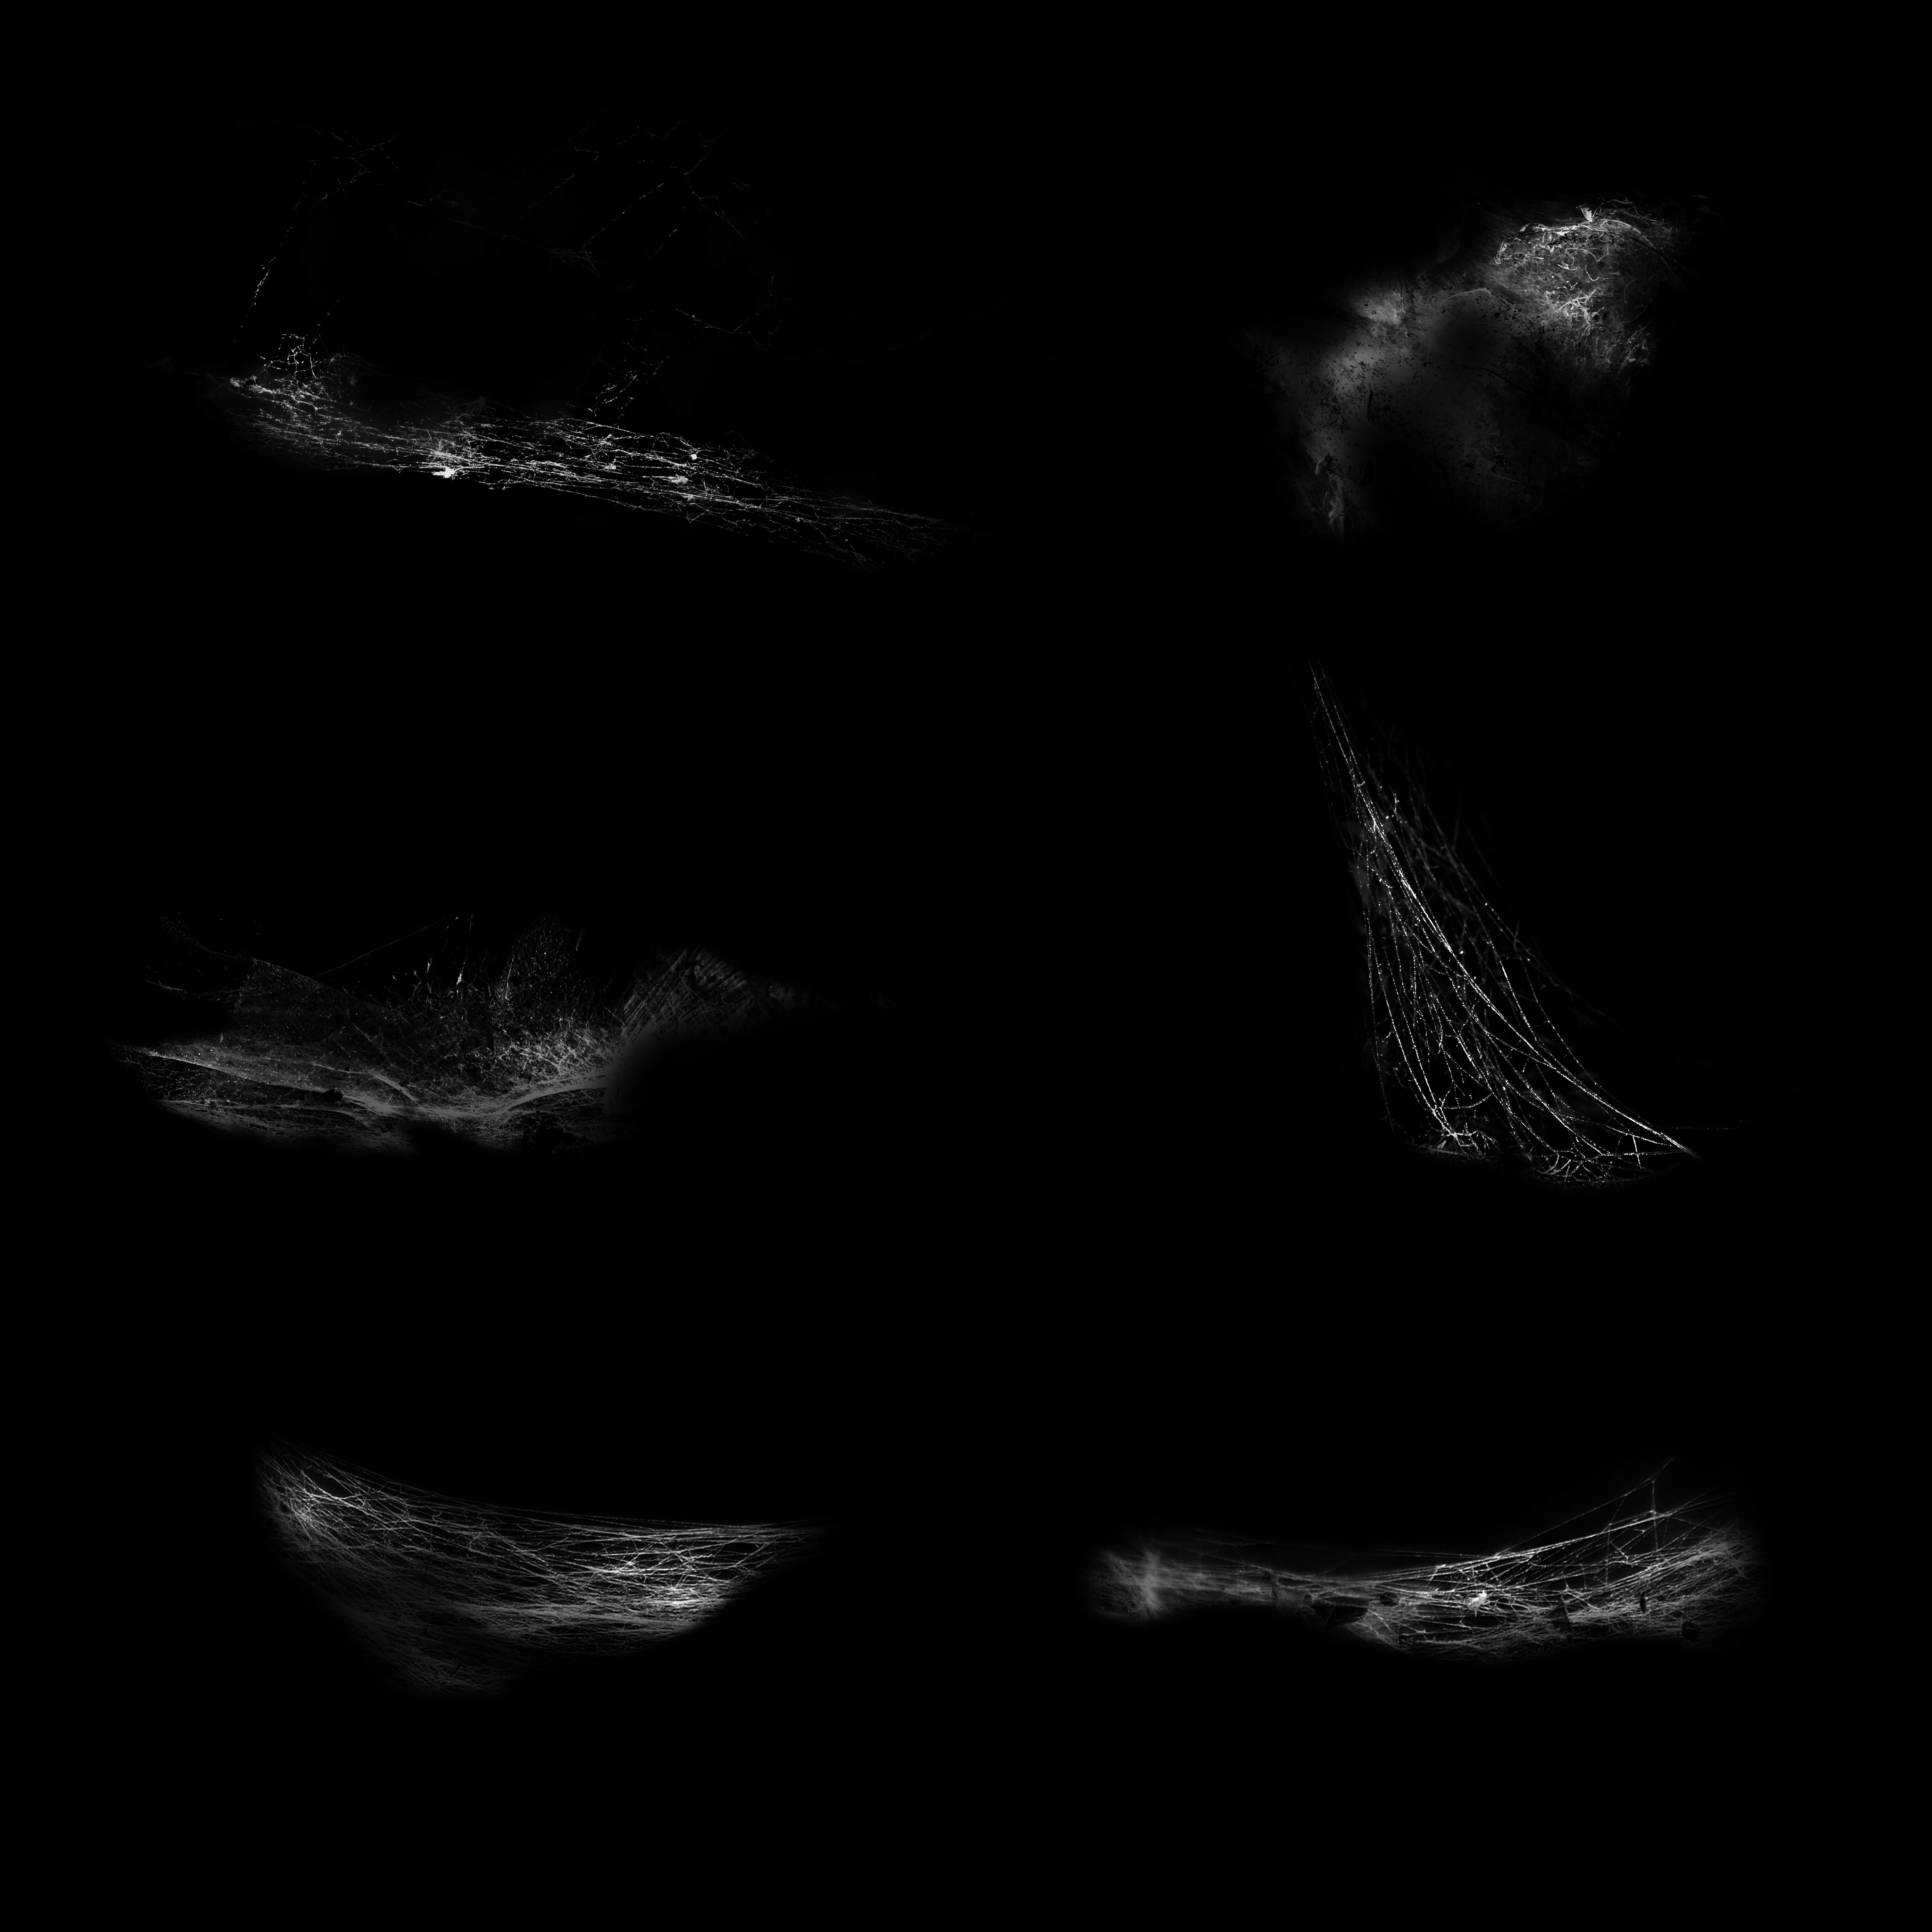
Watch this super quick Blender tutorial to learn how to create a spider web in Blender using alpha mapped planes. After you know this trick, creating webs, smoke, lightning effects doesn’t seem like a problem anymore. Pretty cool?
Let’s get started.
HOW TO MAKE A SPIDER WEB IN BLENDER
You can use this technique to add spider webs and other transparent things to your grungy interiors.
Just imagine how spooky it will look! Mark Danielewski and Stephen King will envy you for sure.
Guillermo del Toro will shoot you an email with honest congratulations.That’s freaking awesome.
By the way, I still wait for Guillermo to contact me about this render. Oh dear, his version of Hobbit movie would have been much creepier (and better in general) than Peter Jackson’s.
5 BLENDER TUTORIALS FOR STEPHEN KING FANS

1. WHY ADDING DUST IS CRUCIAL IN CREATING GRUNGY INTERIORS
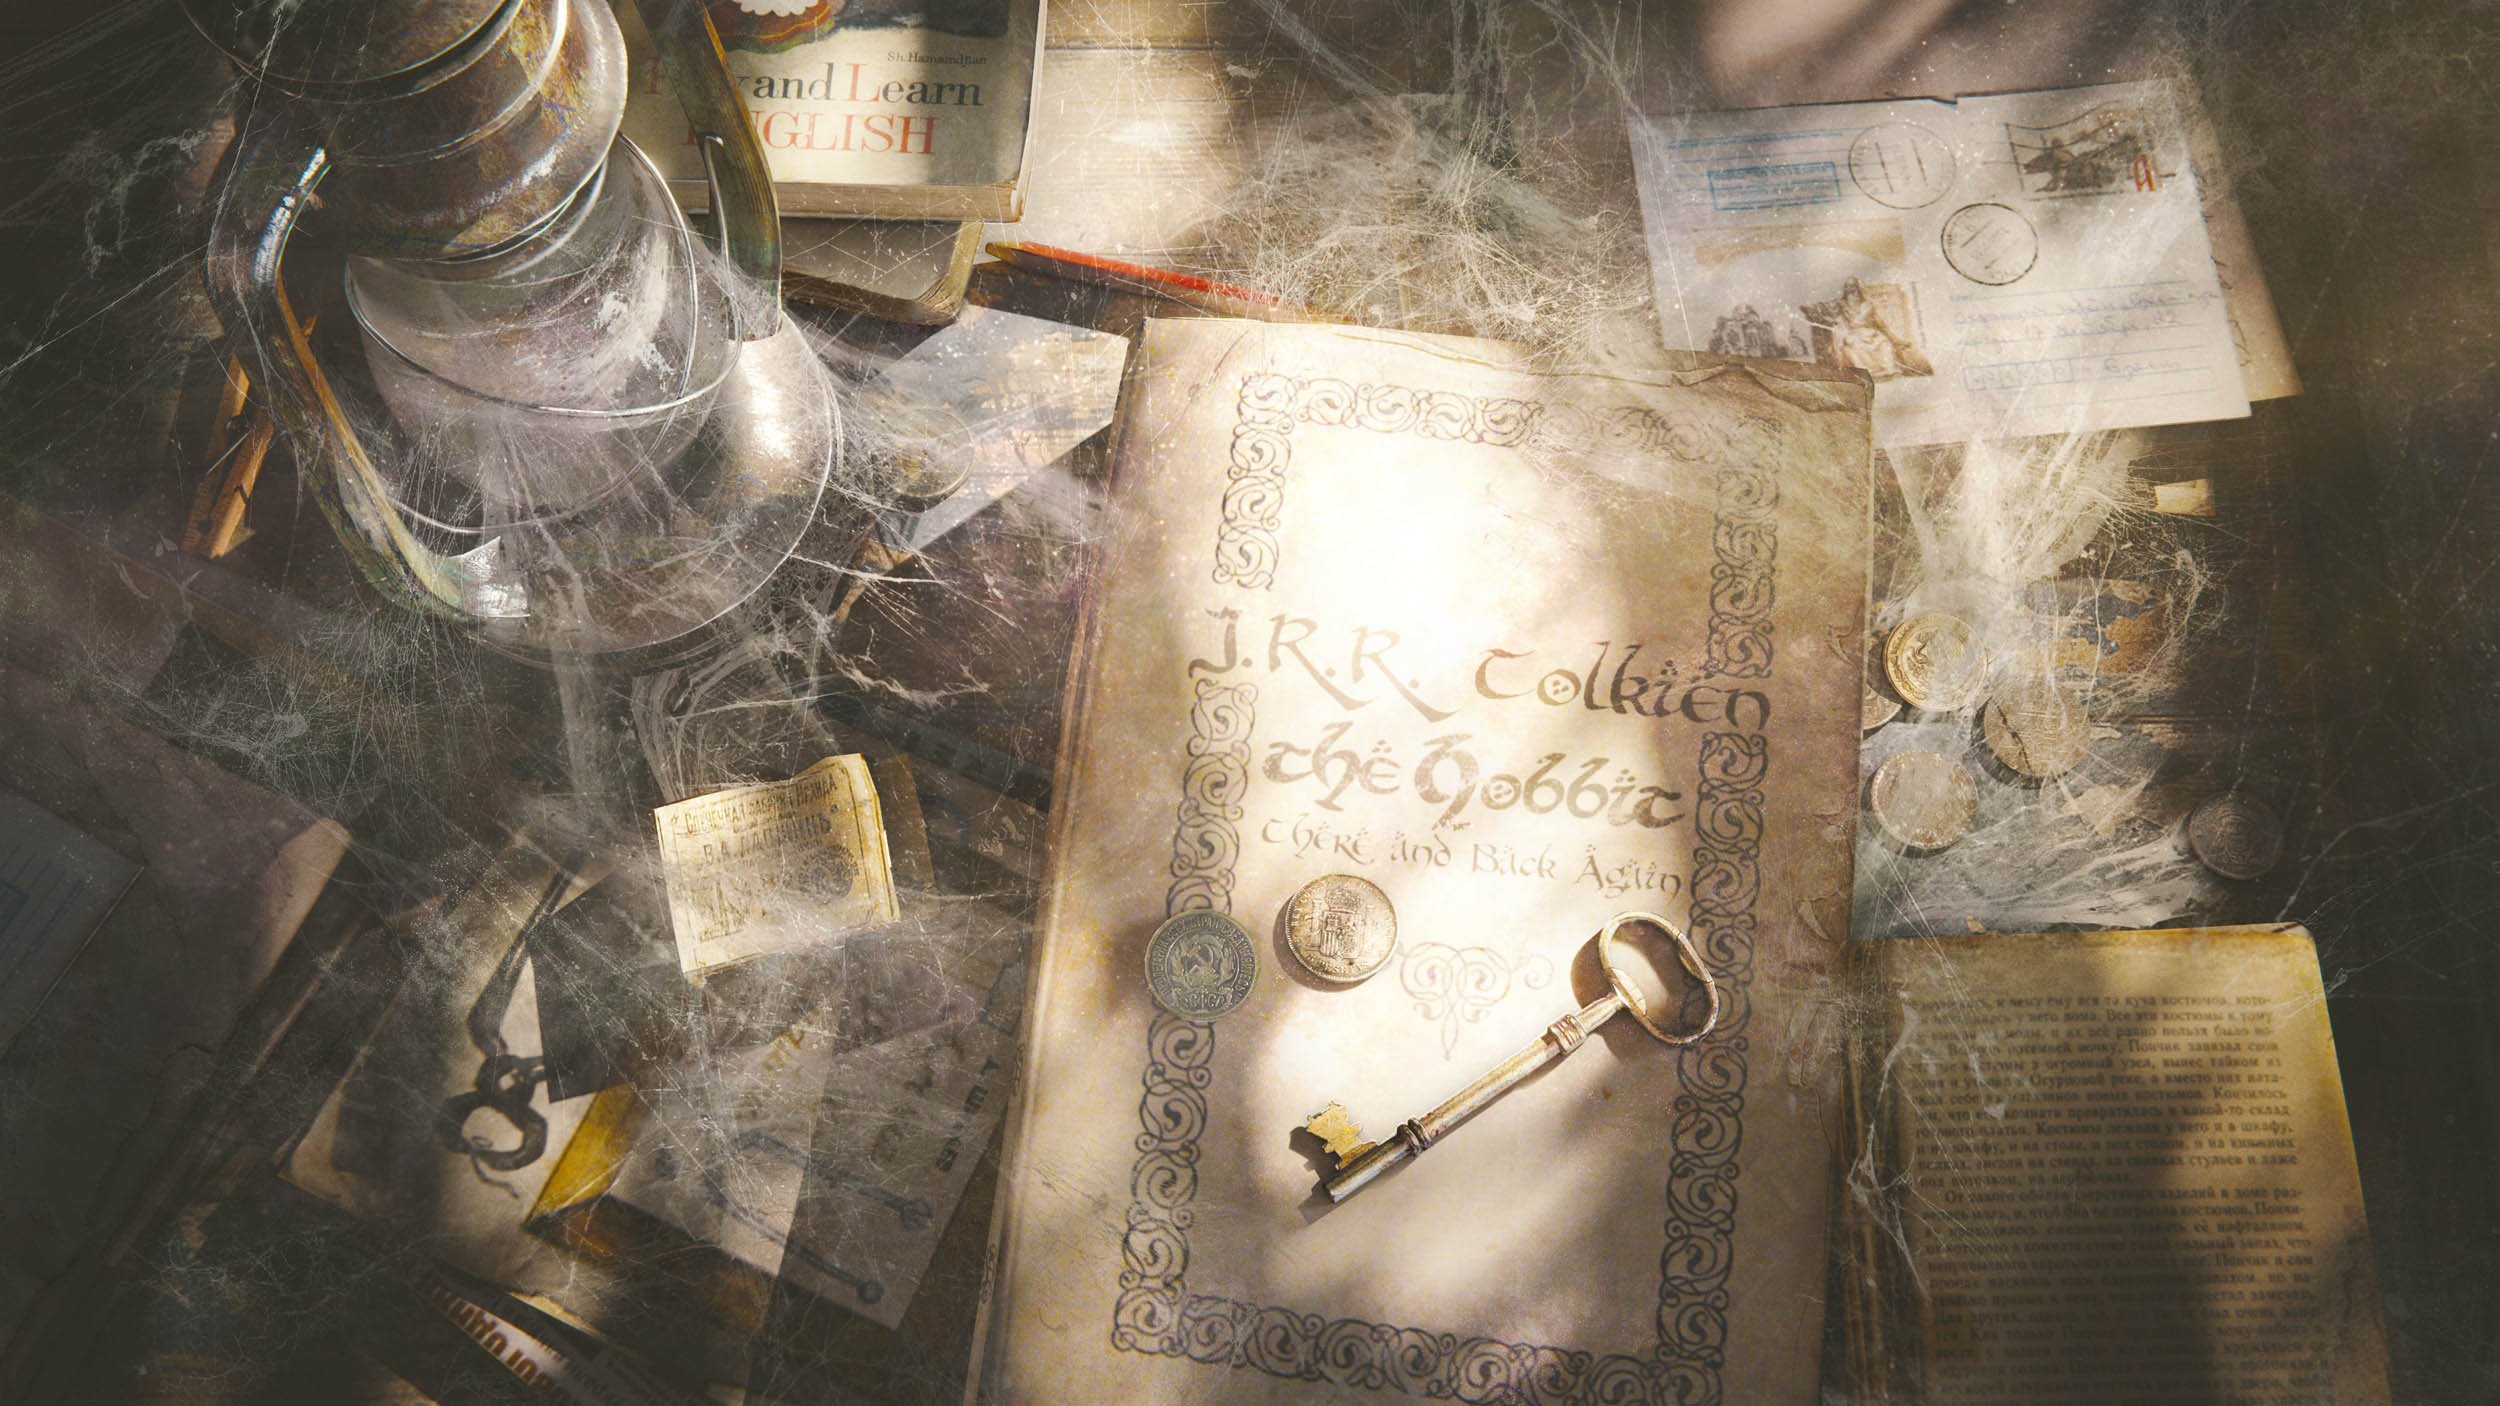
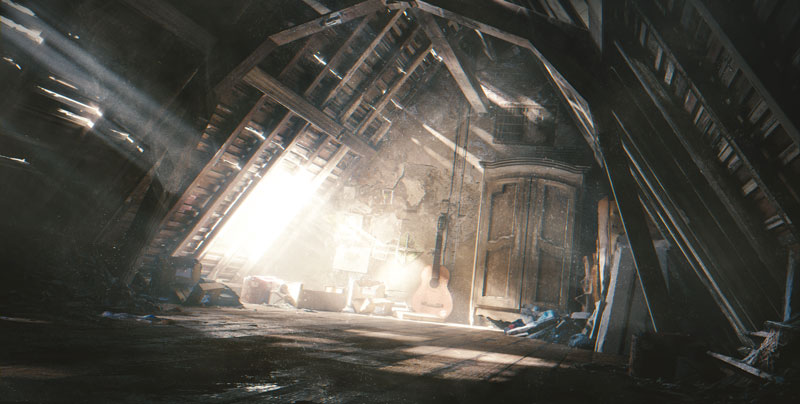
Imagine. You have created an awesome spooky cellar with meticulous lighting setup. Or you have created an attic. This attic could have been mentioned in Stephen King’s novel.
But something is not right about lighting.
And if you follow my blog, you know that I’m a lighting nerd (check my Lighting Book progress).It’s dust, my friend. It’s atmospheric effects. And after following this 4-steps tutorial, you will be able to create a decent grungy artwork.
2.INTRODUCTION TO LOW KEY LIGHTING
Learn the basics of Low Key Lighting to create dark scenes, full of drama and mystery.
Abandoned Blackwood Manor at night? Alien infested spaceship? Film Noir style close-up? Possibilities for this dark-side setup are endless, especially if you appreciate the constraints of less is more principle.
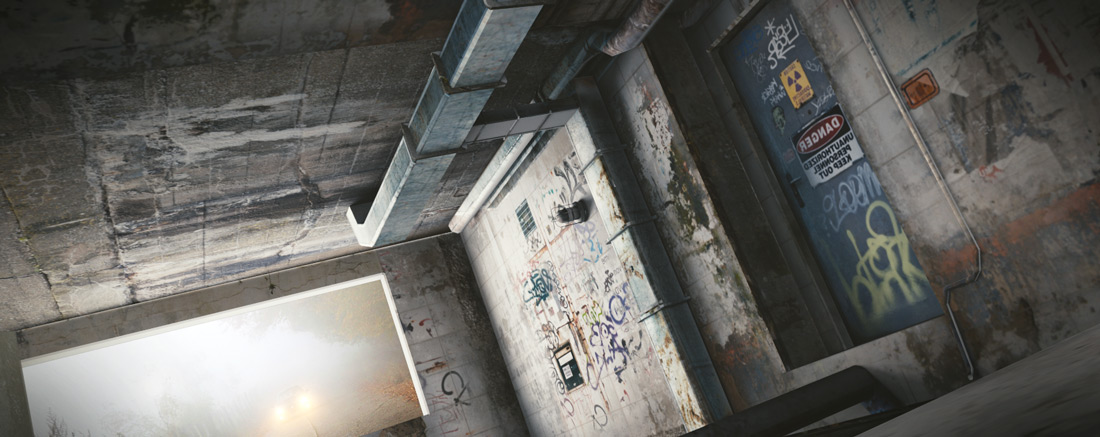
3. GAME LEVEL TEXTURING SERIES
This is the introduction to the set of tutorials, dedicated to game level texturing in Blender.
Discover how to texture the whole scene as one model using what can be called megatexture approach. One model, one big texture atlas plus your creativity, and that’s all!
Through the set of 5 tutorials, we’ll create a grungy environment in Blender.
• Block out the Model & Optimize it
• Make a Texture Atlas
• Paint and Project the Texture
• Clone Details from 2-nd UV Map
• Bake lighting

4. HALLOWEEN TUTORIAL: SCAN YOUR FACE AND CREATE 3D PUMPKIN
Discover how to turn the set of photos of your face into 3d pumpkin.
We need a camera, Blender, internet connection and 123d Catch free software. Oh, you’d better also have an ability to sit still while wearing a crazy face for 5 minutes, without laughing. I’m dead serious, you WILL laugh, because it’s ridiculous.
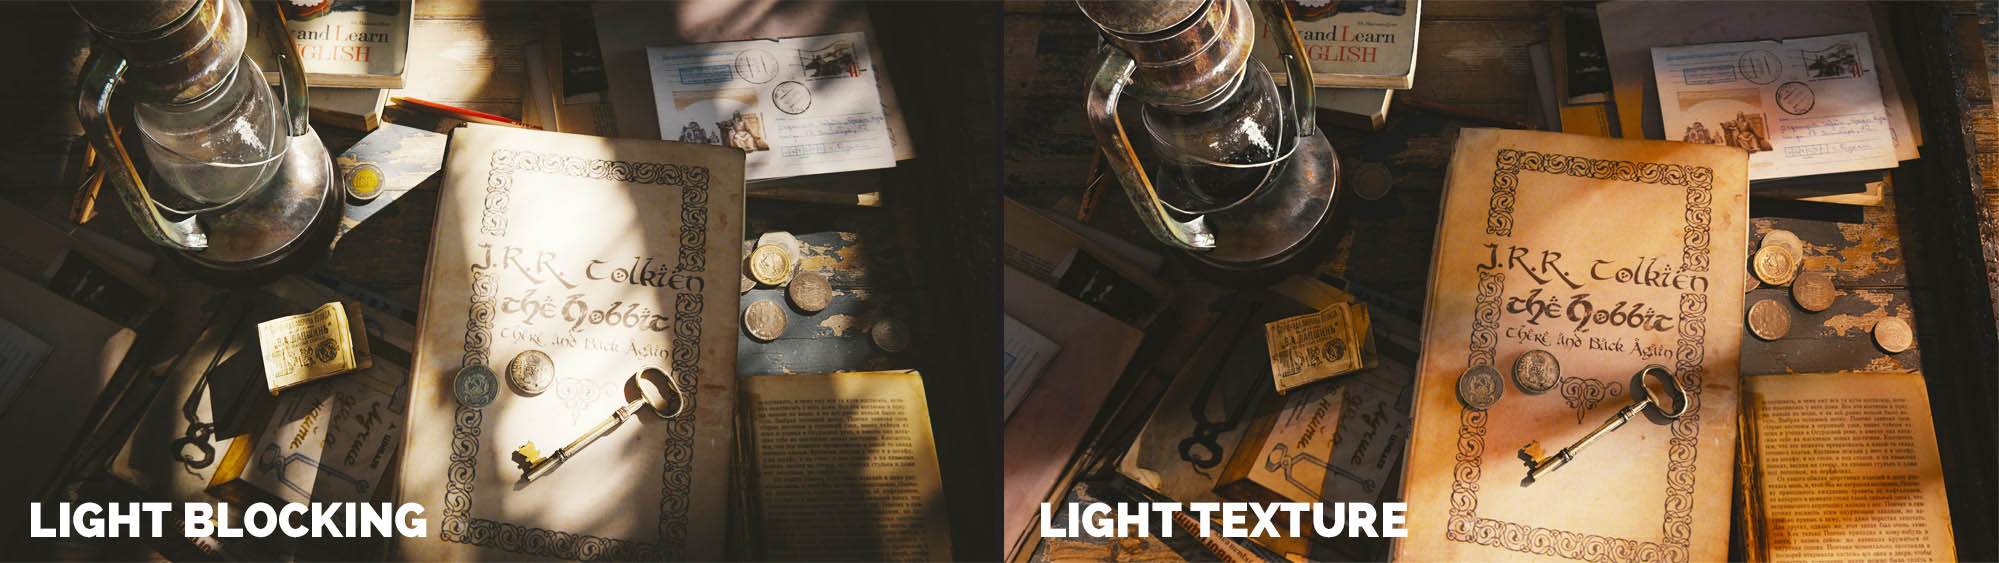
5.LIGHT TEXTURE OR HOW TO BREATHE LIFE INTO A DULL SCENE
Discover how to use Light Texture in Blender to create excruciatingly evocative pictures. Being boring is no good, and with Light Texture you will, hopefully, breathe life into renders that suck. I do it literally every day and I like this technique so much, that I want to share it with you, folks.

OVER TO YOU
By now you should have some ideas about creepy cellars and monsters hiding under your bed.
If you enjoyed this tutorial and know people who would benefit from it, share it by clicking beautiful buttons below the post.And as usual, feel free to post your images!
When Guillermo comes, I will forward everything to him. I promise.

Uncle Snail
Awesome tutorial! Simple and great result. 🙂 (I like the music too! You’re intro and outro are getting awesome.)
Gleb Alexandrov
Haha, thanks!
Niranjan Raghu
Hi, Gleb!
Hope you’re having a good day.
I’ve a question: I notice your light planes in the screenshot (low key lighting; difference between harsh and soft light) are either subdivided/beveled. Why? How does that make a difference to the scene? Does added geometry somehow affect the light?
Gleb Alexandrov
Hi Niranjan! Beveled planes is just my attempt to avoid jagged edges 🙂 Maybe it has a minor effect of smoothing out the lines in reflections, but it is barely noticeable. Though, if we apply the radial gradient to the emissive plane, that WILL make a difference to the scene.
Niranjan Raghu
Ah, I see! Thanks! =)
Prabhakaran.R
Hi gleb,
i create a summary of this tutorial on may month inspired from ur tutorial
here is a link
http://blenderartists.org/forum/showthread.php?371677-Make-a-Spider-web-using-Gleb-Alexandrov-Technique
Prabhakaran.R
Hi gleb,
i create a summary of this tutorial on may month inspired from ur tutorial
here is a link
http://blenderartists.org/forum/showthread.php?371677-Make-a-Spider-web-using-Gleb-Alexandrov-Technique
Greg Zaal
Instead of inverting the image with a colour ramp, just select the mix shader and press Alt-S to swap the two inputs 🙂 (as long as the Node Wrangler add-on is enabled)
Gleb Alexandrov
Good point, Greg! Funny enough, in Youtube comments I found yet another solution. In color ramp node there is a special button (looks like this ) that swaps the inputs. But your solution is elegant too :))
Greg Zaal
Ah yes! That’s a cool one too. You learn so much by teaching 🙂
Gleb Alexandrov
That’s the irony of life, learning by teaching 🙂 We are all “prosumers” as Elvin Toffler said. We produce, and we consume at the same time. We sell and we buy. We watch tutorials and we record our own tutorials.
Ticjun
I used some web for my scene :D.CnC are apreciated. Thanks a lot for all of your tutorials <3. You WEBsite is great (pun intended) and I learned a lot from you.
Sorry for the poor quality but 2MB limitation :/. I'll post a link to an HD version if you allow me to.
Gleb Alexandrov
Well done, Ticjun! This little touch adds a lot.
Ticjun
Thanks :D.
Nathan L.
Hello, I just thought I’d post this here for constructive critiques, its not quite finished
Gleb Alexandrov
Nathan, I like this procedural sci-fi image so much!
The composition is interesting, though it has 2 strong focal points. And it may cause the bouncing effect: we look at the ship, then we look at the planet (at the end of a tunnel), then we look back at ship. Maybe it would be even better if we emphasize one element to make it really attract the eye?
OR
We can re-position the elements according to a so called golden spiral. Maybe add some particles, rotate the ship and so on. To imply the spiral lines.
Just my suggestion.
Nathan L.
I like this idea to try to follow the golden spiral, just how well would particles work on a larger scale scene like this? thanks.
Gleb Alexandrov
By particles I mean some small objects (not necessarily the particles in Blender sense). 🙂 Some bright spots that will lead the eye into the spiral.
Jesus Correa
thx for tutorial its very nice, i make some mistakes but for me its nice (only 3 weeks with blender-sorry for my bad english)
Tomasz Jaśkowiec
I used same idea in the animation
karin svensson
I made this using your spiderwebb. It is also published at: https://cgcookie.com/image/the-old-chandelier/
Gleb Alexandrov
Karin, nice use of the webs technique! Really devil is in the details.
Muhammad Farooqi
i will kill you…………….. you man.. awesome 🙂
Pingback: MAYAとブレンダーでクモの糸を作るチュートリアル動画3選。無料テクスチャもあるよ。 – 3DCG最新情報サイト MODELING HAPPY
Pingback: Home sweet home – calaidea.com