Learn how to use texture projection in Blender. What is it? We make a matte-painting from certain camera angle – and project it back onto the geometry in Blender.
Set Up Cameras And Render
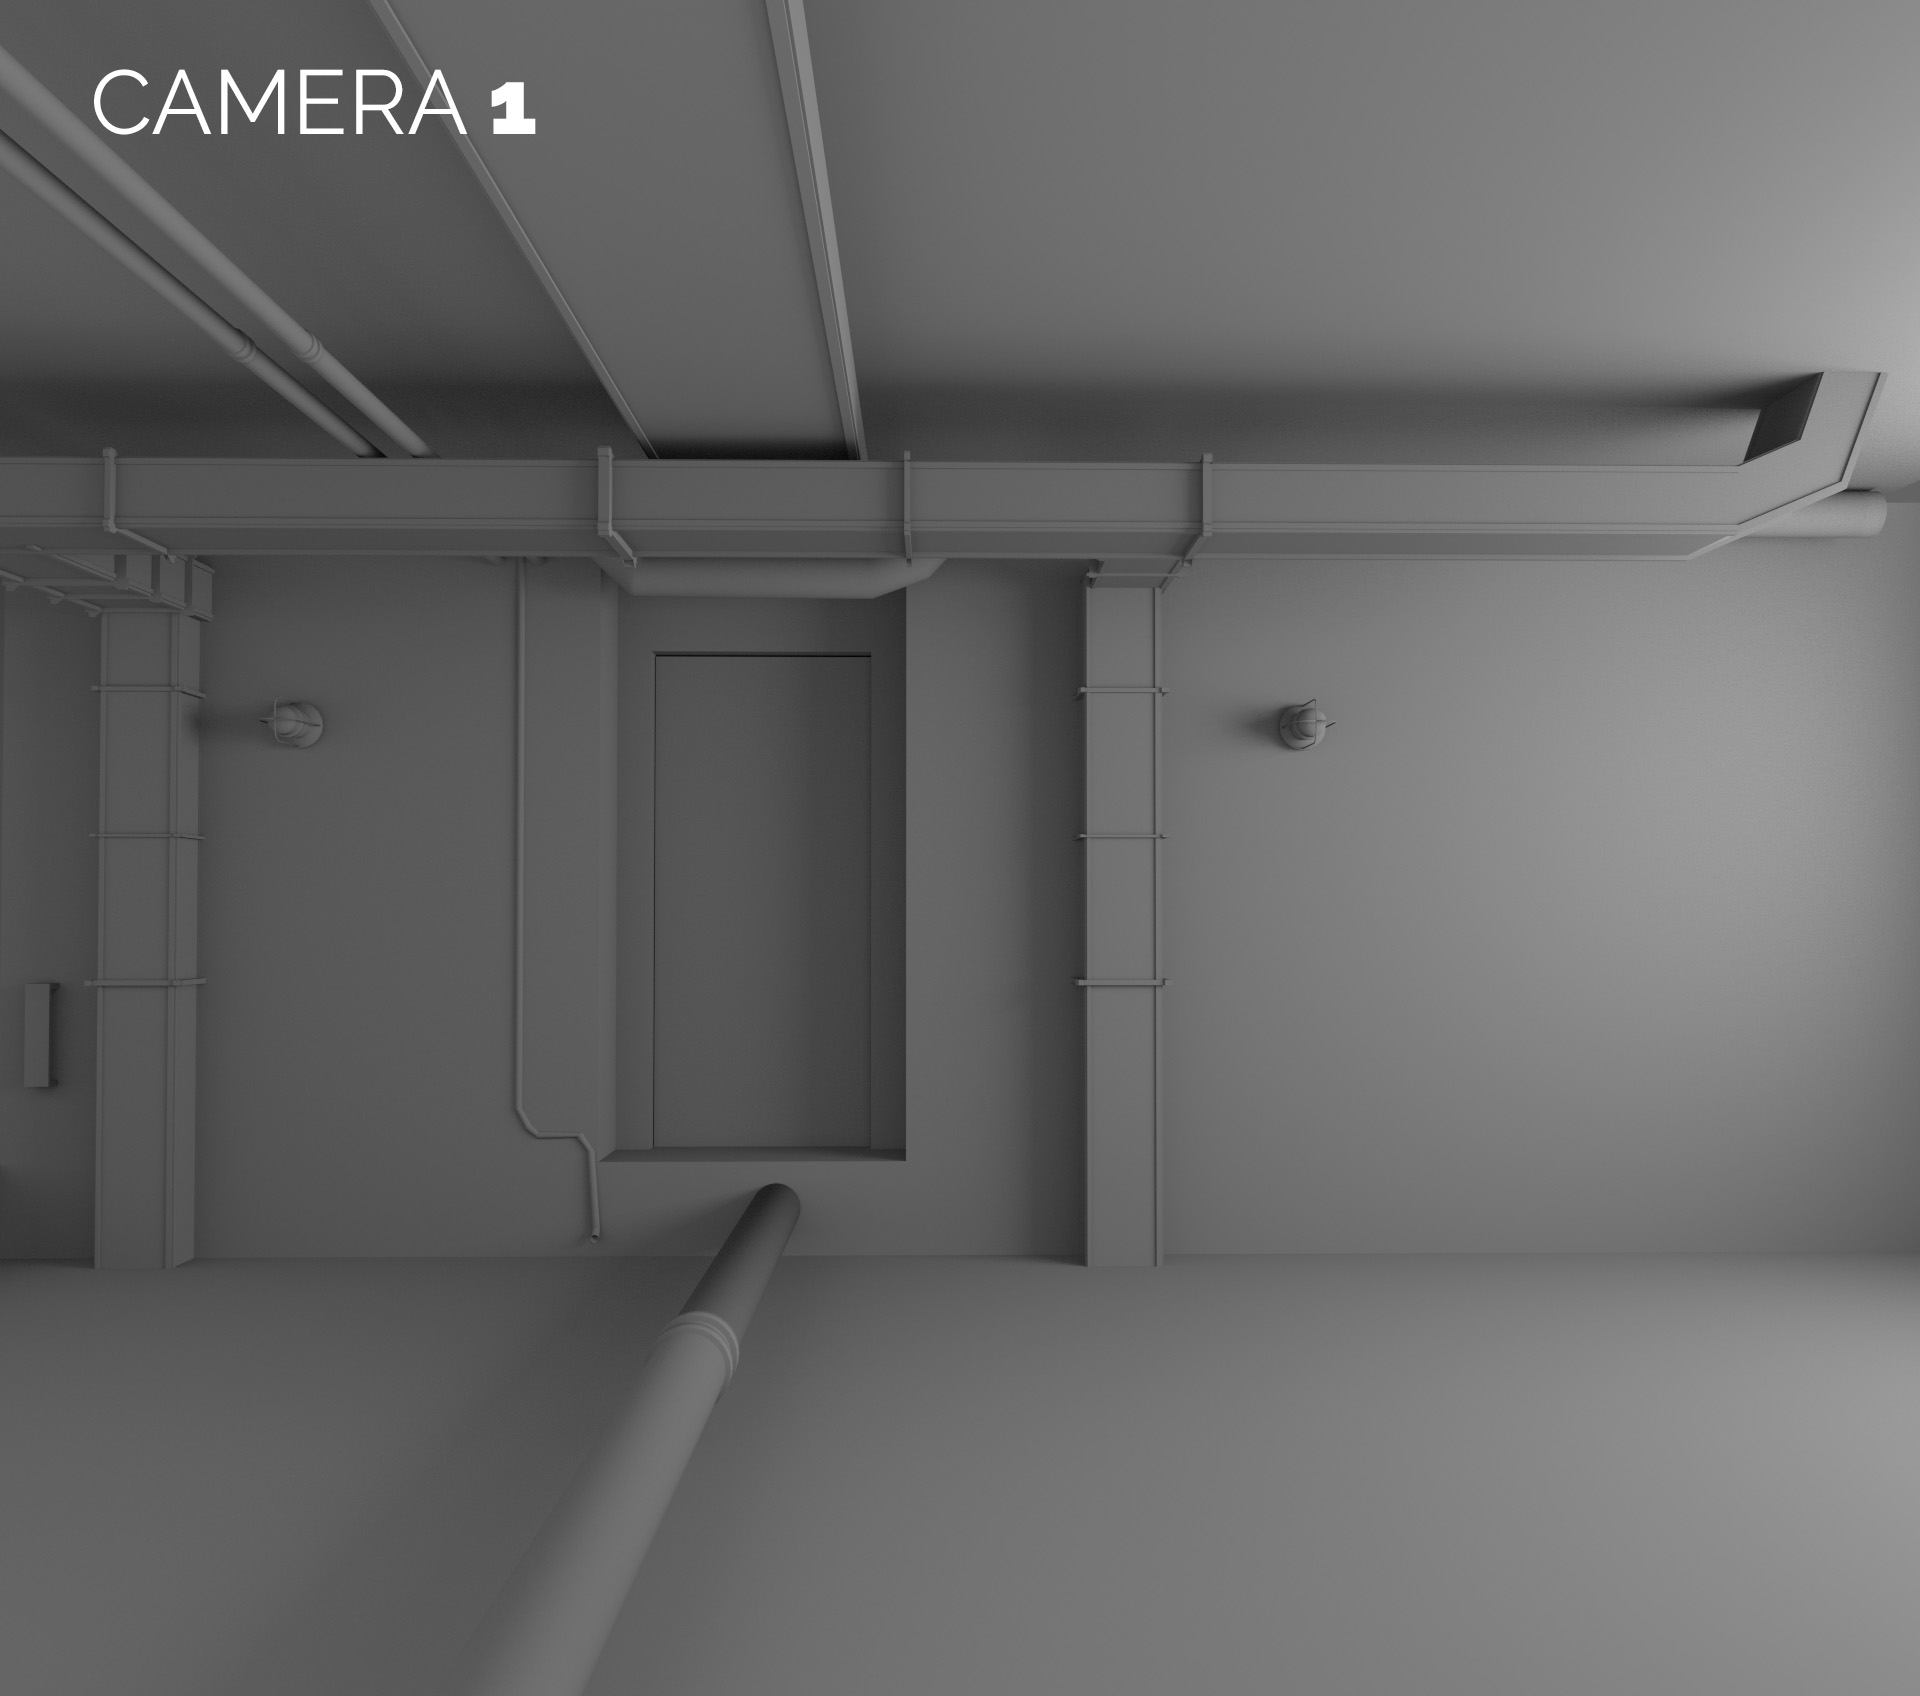
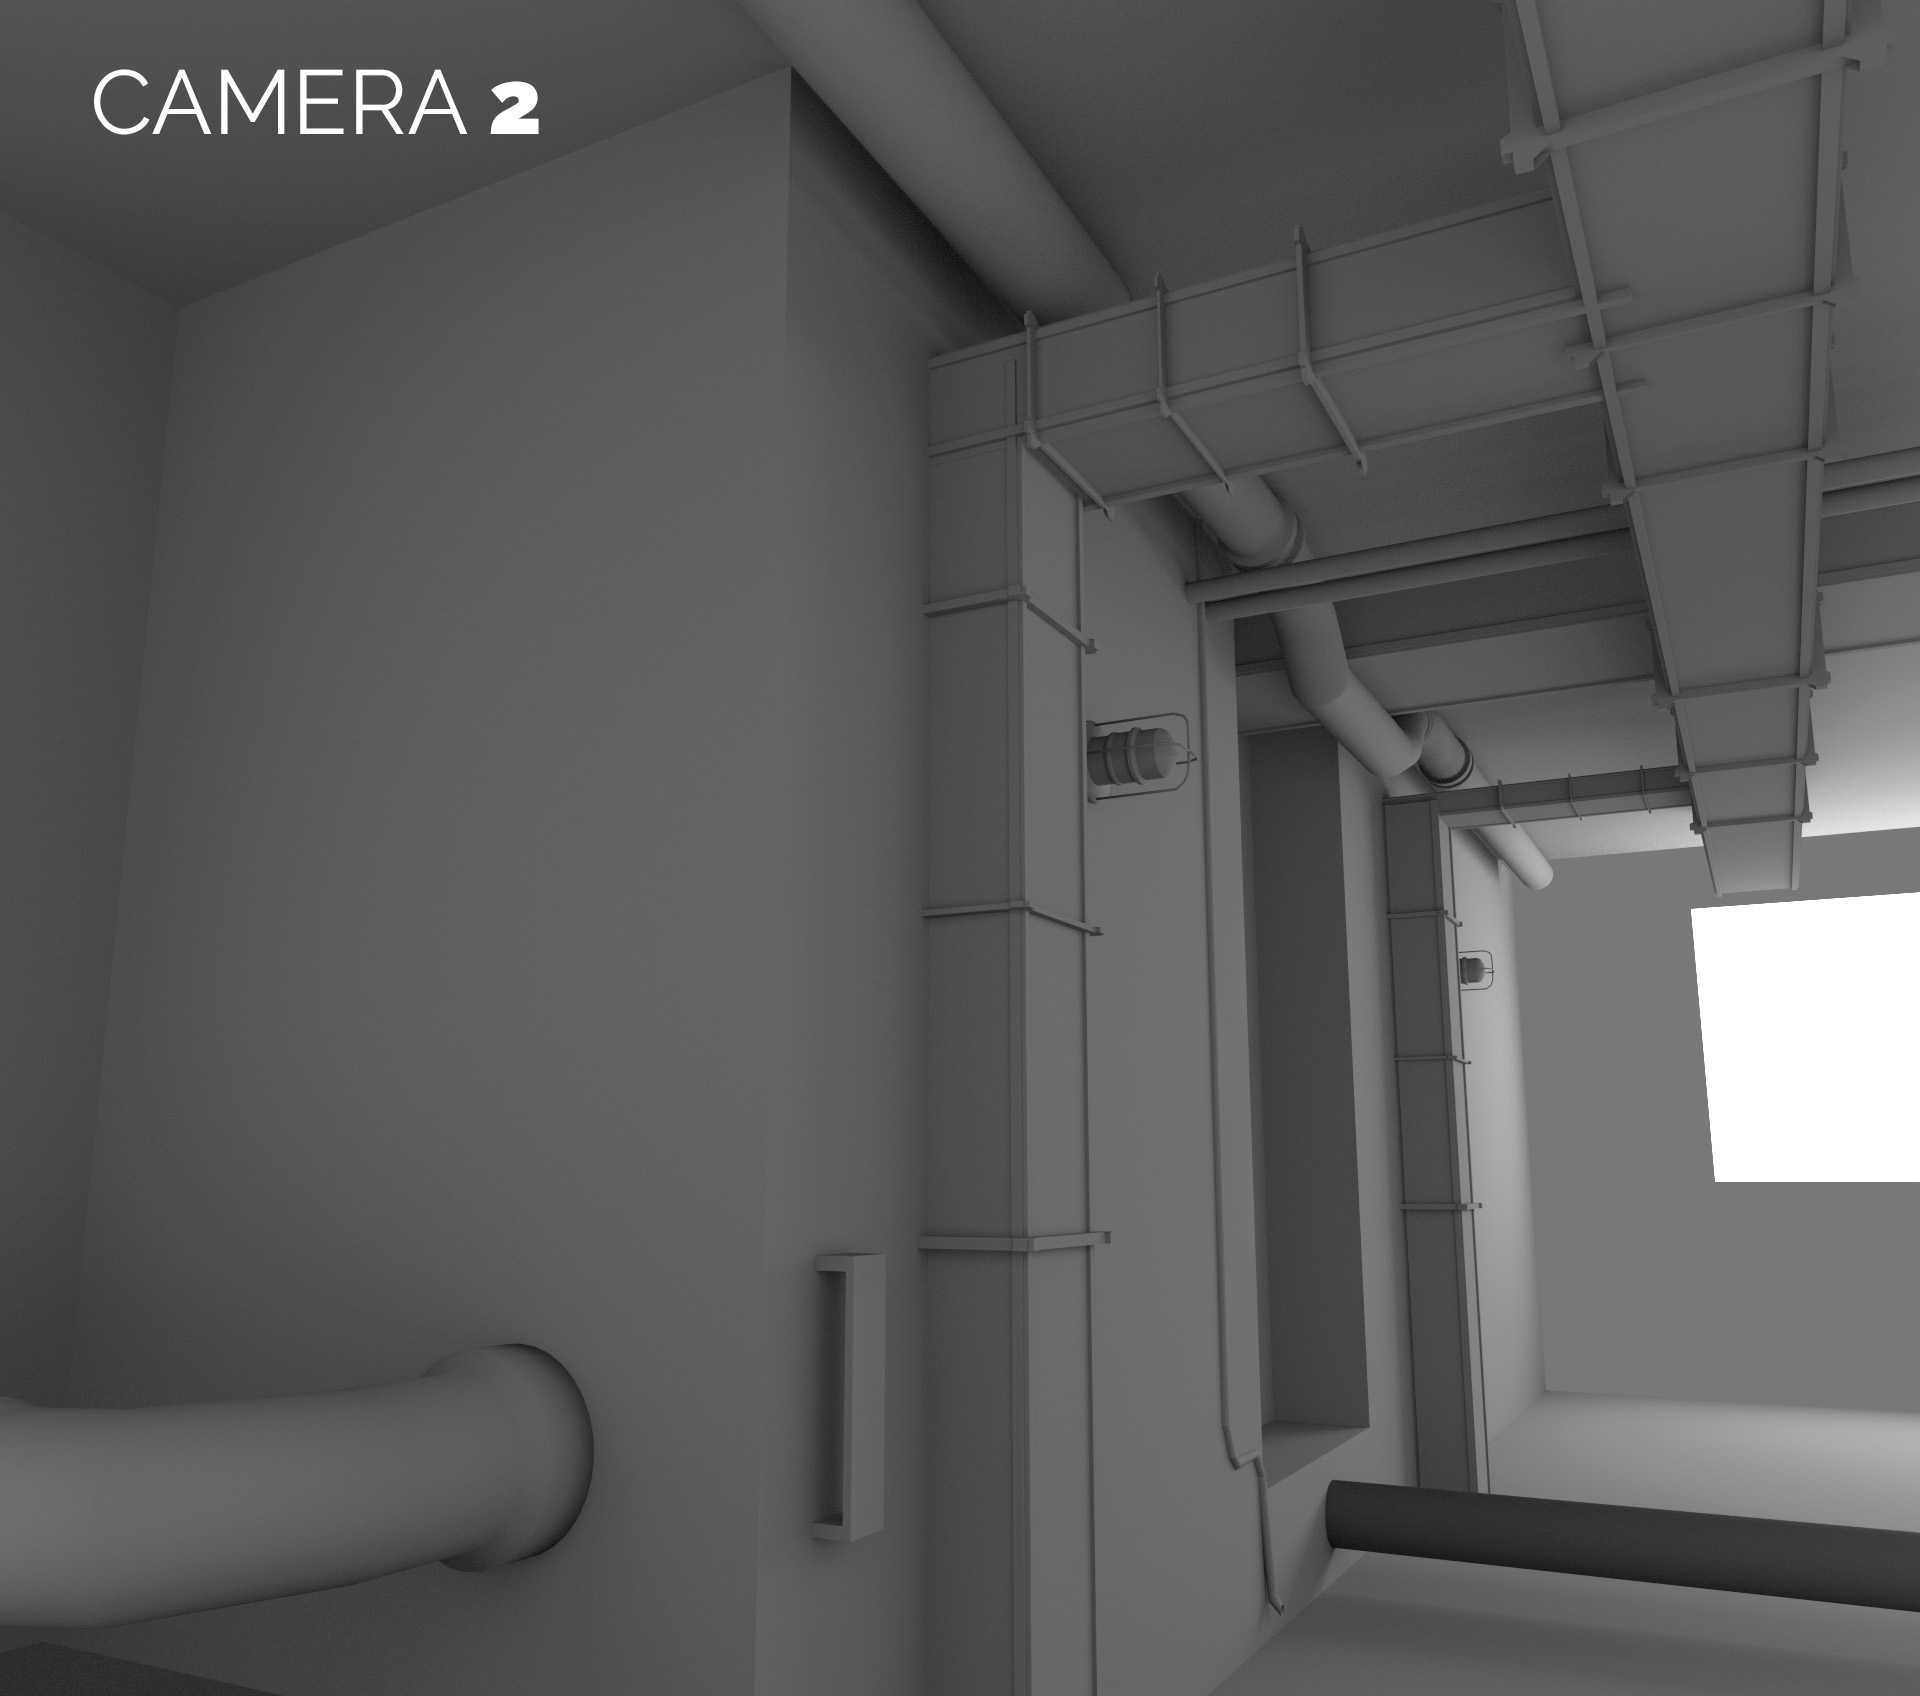
First, let’s pick a camera angles from which we will project the texture. How to pick the best angles?
To have the best projection, we need to be perpendicular to the surface. At sharp angles projection will get stretched and that is not good. So, it’s fine to position camera directly in front of the biggest surface the wall.
Paint the texture in Gimp or Photoshop
The next step is to paint the texture. Go crazy with image editor and make the best matte painting you can. After doing it, drink some coffee.
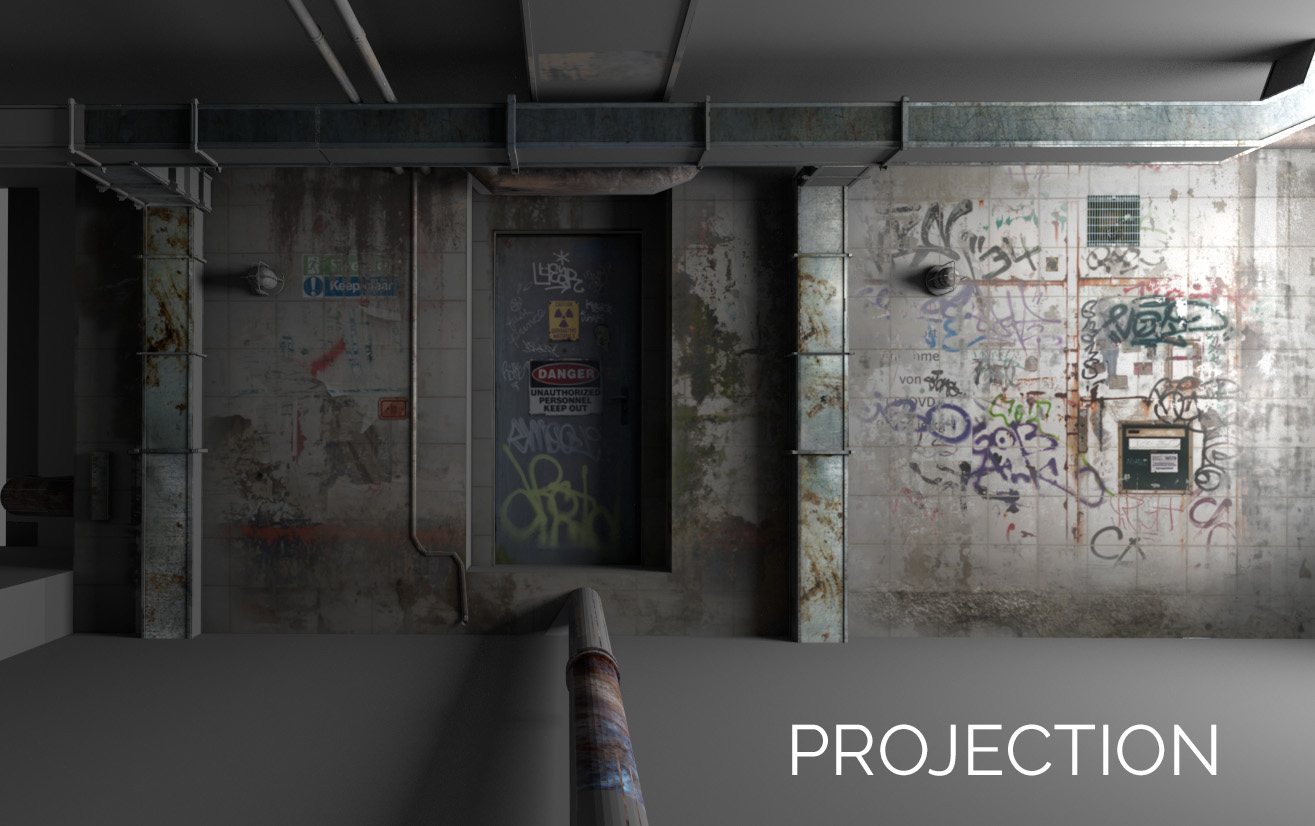
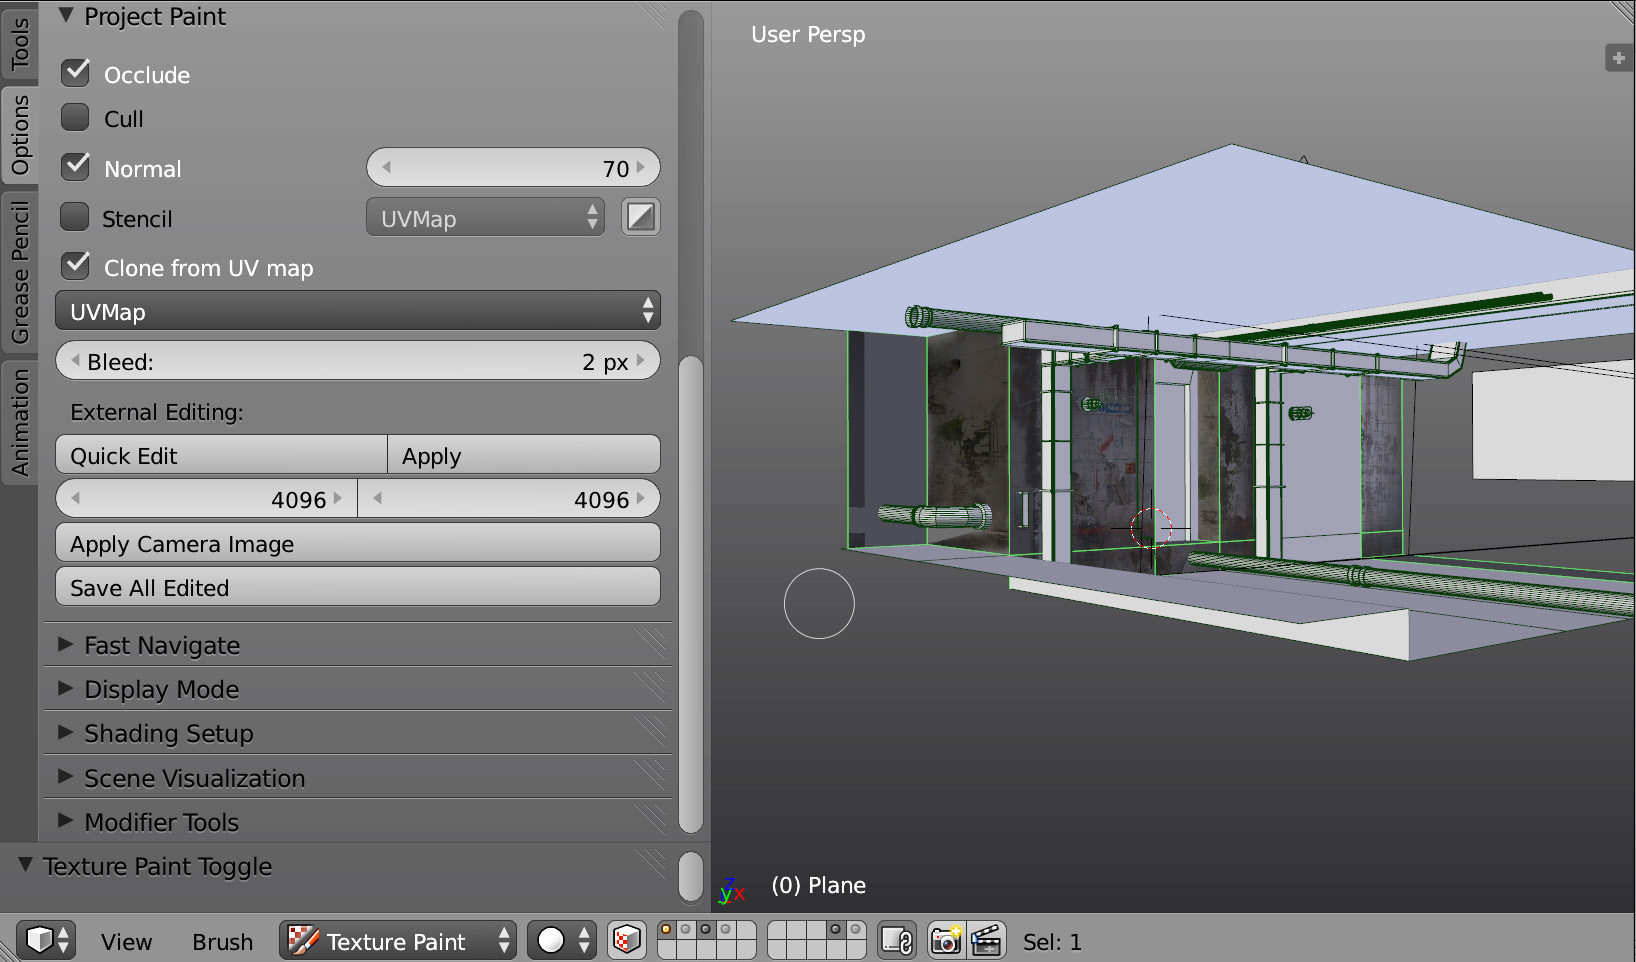
Project the Texture in Blender
And only after coffee, return to Blender, go into Texture Painting mode and hit Apply Camera Image. Pick the texture that you’ve just painted.
Game Level Texturing
In this series of tutorials we talk about:
1. Block out the model & Optimize it
2. Unwrap everything into 1 UV map
3. Paint and project the texture
4. Clone details from 2-nd UV map
5. Bake texture

Sviatoslav Petrov
Hello Gleb!
Thanks! Nice tip! Short & informative.
Sviatoslav Petrov
Keep it up!
Gleb Alexandrov
Sure thing, I’m hoping to make a few more videos on that topic.
Pingback: Game level texturing: refine the texture (PART 4.5/5) | Blender Game
Patrick Depoix
Hi Gleb,
I love your method to paint totally by projection with AO and shadow directly!
A great Thanks for sharing this tip.
Bye bye
Spirou4D
Gleb Alexandrov
Yeah, Patrick, this method of baking everything in one texture works really well in some cases (especially for realtime applications).
Not so well in other cases though, when we need dynamic lighting for example 🙂
Patrick Depoix
but with this method you can mix two texture, one like this tuto and one with the light baking, not?
Dynamic lighting, what do you mean? without shadow on texture, yes? But dynamic lights is heavy and slow in BGE, not?
Gleb Alexandrov
Dynamic light sources, casting shadows are slow practically everywhere, you’re right.
And sure, we can bake light on top of this texture (though, we already have baked some sort of ambient lighting or ambient occlusion).
Patrick Depoix
Gleb, i want you show my project: I work on it since 6 years and it’s a hard job, very special and historic.
Could I send you a private link, please? Not on this forum.
Gleb Alexandrov
Feel free to use a contact form: http://www.blender-game.com/contact
Pingback: Game level texturing: Bake lightmap in Blender and Unity (PART 5/5) | Blender Game
Igor Modst Penaque
Hi Greb,
I did everything that you said, but when I go in Texture Paint > Options and Project Paint, the “Clone from UV map” is hidden or doesn’t exist (Image attached). Can you explain me?
(I tried in Cycles and Blender Render)
Thank you.
Toby
Gleb,
Whilst following this tutorial series I have come across a bit of a problem;
https://uploads.disquscdn.com/images/235995c744b01a61d07e1c31b76cb4c29ab6549270d5f6b07a7ab4c951368dbb.png
^^My ‘Project Paint’ section looks a lot different from yours (There is no External Editing options) and I can’t seem to ask google the right questions to find out how to continue following along. How do I continue the camera projection process in Blender 2.77a?
Gleb Alexandrov
Hi Toby, check the ‘external’ tab. Hope it helps)
https://uploads.disquscdn.com/images/2fefaf0ba974edd91bc443950b9876abc48faa36330f1f5e55312285b097e6be.jpg
Toby
Thank you! 🙂
Dmitry Electroid
Hello, Gleb!
Very nice series of tutorials. But I’m stuck a bit at these part.
I have atlastexture created at the last step and use the UV Map with the atlas texture.
The problem for me is with the rendered image painted on photoshop.
Once I select the image in the uv/image editor it’s automatically used as a texture.
I can then click apply camera image, but that’s go on top of the texture from the image.
I attached images, to see what I’m talking about.
p.s I’m using cycles (same in your video).
Cheers! https://uploads.disquscdn.com/images/b3413d97033e8a8720eb3455374e1de114048882d8824fefa449e2bba94a81f9.jpg https://uploads.disquscdn.com/images/888fe21521ba98441f1734f6947d501c6b7e5c1df50c175e6e1b9e764d1bf411.jpg
Dmitry Electroid
The solution I found is to apply textures from rendered image on top of atlastexture, that’s not perfect because you need to paint all the atlas texture, but that seems to be working solution at least https://uploads.disquscdn.com/images/f769caa18e192e98dc497ead37768df4480adcb656e830e101a870150aa28995.jpg .
Pingback: Capstone: asset making day | Learning Virtual Reality Development