Learn how to use the Render Raw add-on in Blender for streamlined, artistic color grading. In this step-by-step guide, we’ll explore the unified colorist’s panel, inspired by tools like Lightroom and DaVinci Resolve, and show how it can give your renders a cinematic finish. Perfect for Blender artists looking to enhance their visuals with professional-grade color correction. 🦐
Download the Free Mini-course 🦐
—
What is Render Raw?
Render Raw is a commercial Blender add-on by Jonathan Lampel that gives you a unified color grading panel — a bit like what you’d see in Lightroom or DaVinci Resolve, but built directly into Blender.
Grab a limited-time 10% discount on Render Raw with our special coupon code rawshrimp 🦐
Buy Render Raw on Superhive (affiliate link)
—
Color Grading in Render Raw: What you’ll learn?
- How to use Render Raw Cleaner Color Grading for Blender
- Step-by-step Raw-Like Workflow
- Pro color correction tools
- Thinking like a colorist
—
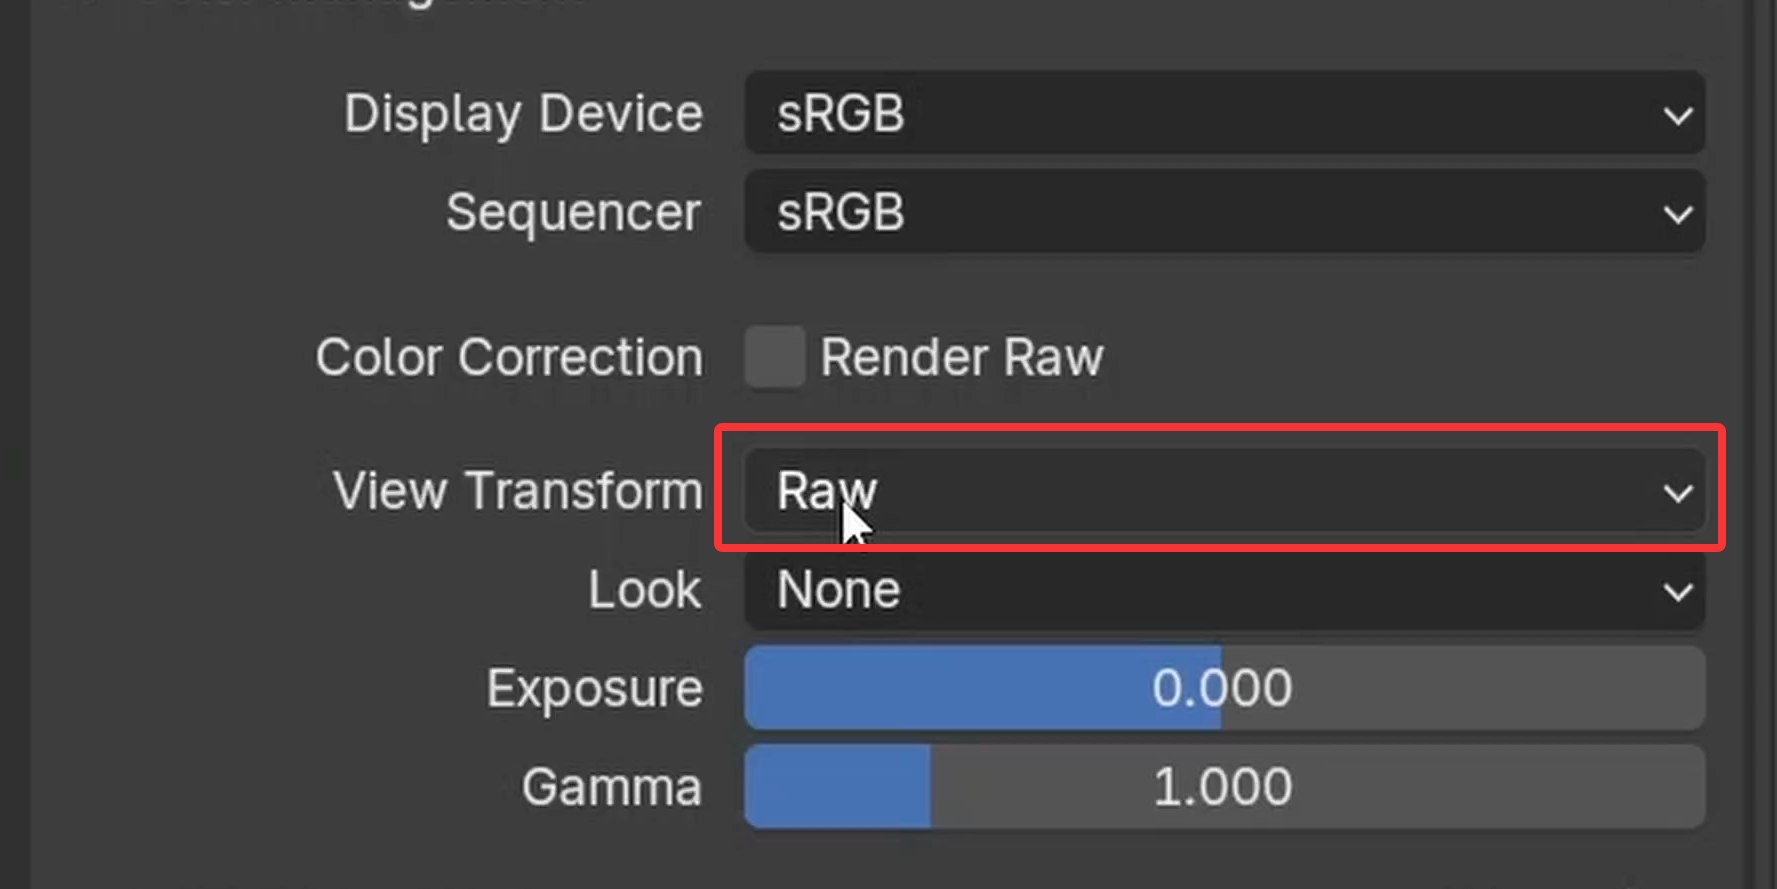
What Does “Raw” Mean?
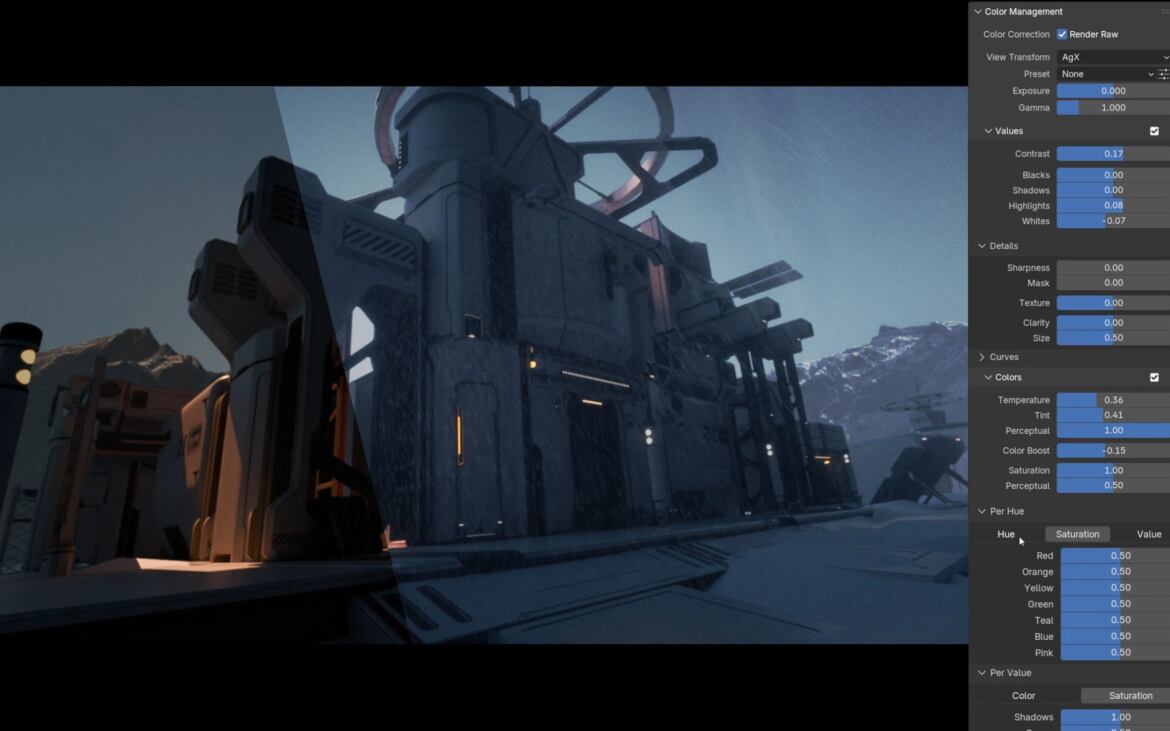
The “Raw” in Render Raw refers to using Blender’s Raw View Transform. This gives the add-on direct access to the raw pixel data from your render, allowing it to build its own powerful color grading system inside the compositor. In essence, Render Raw is a “mega-node” that overrides Blender’s default color management, doing all the complex work behind the scenes as you simply adjust the sliders.
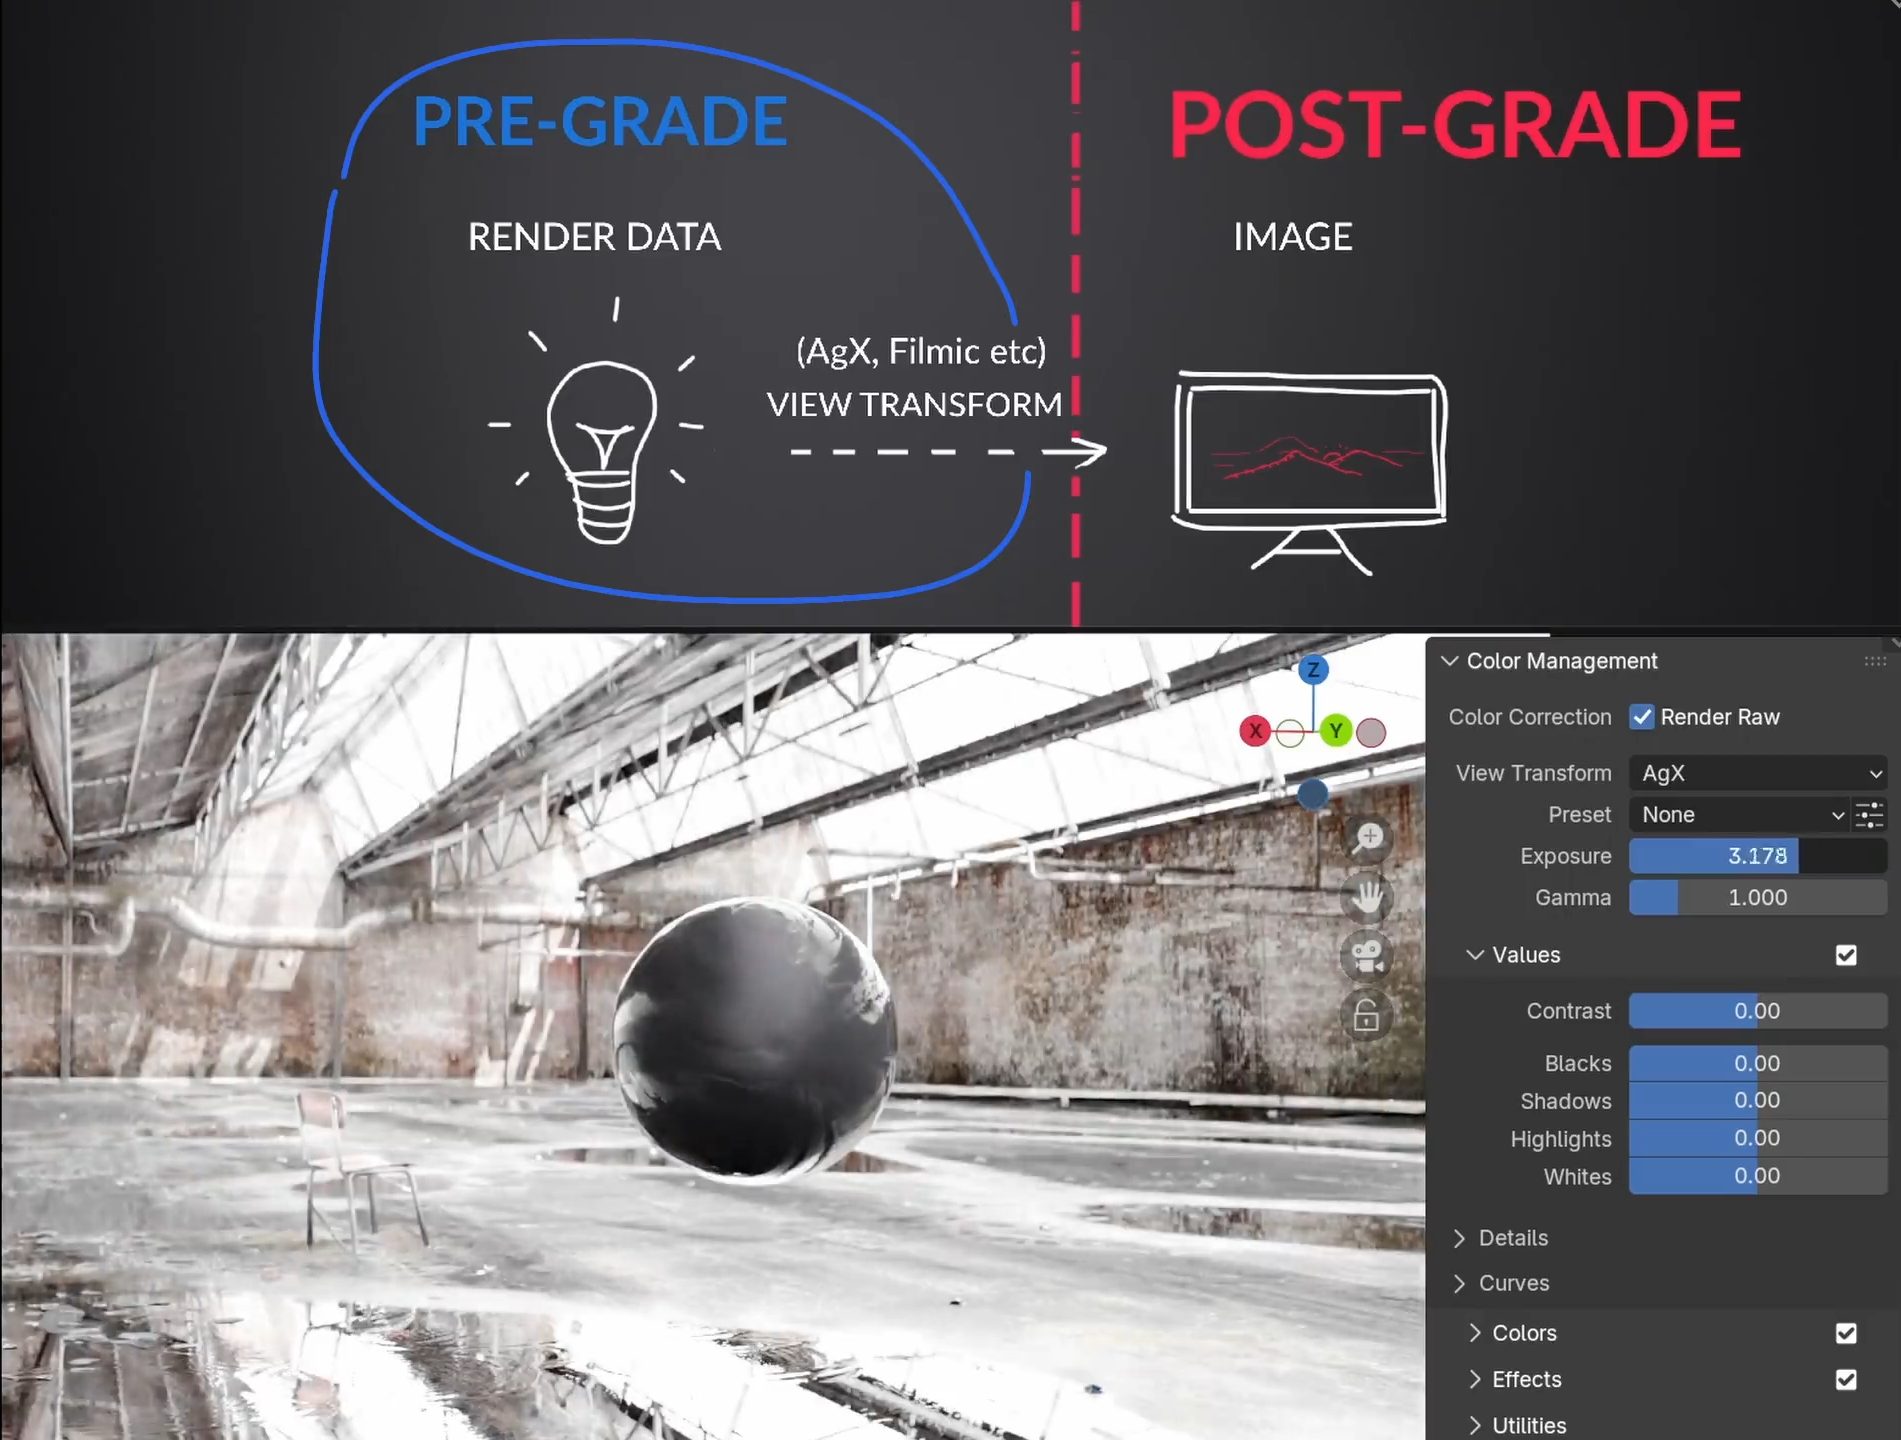
The Core Concept: Pre-Grade vs. Post-Grade
Before touching any sliders, it’s critical to understand probably the most important concept in a professional color workflow: the difference between pre-grade and post-grade adjustments.
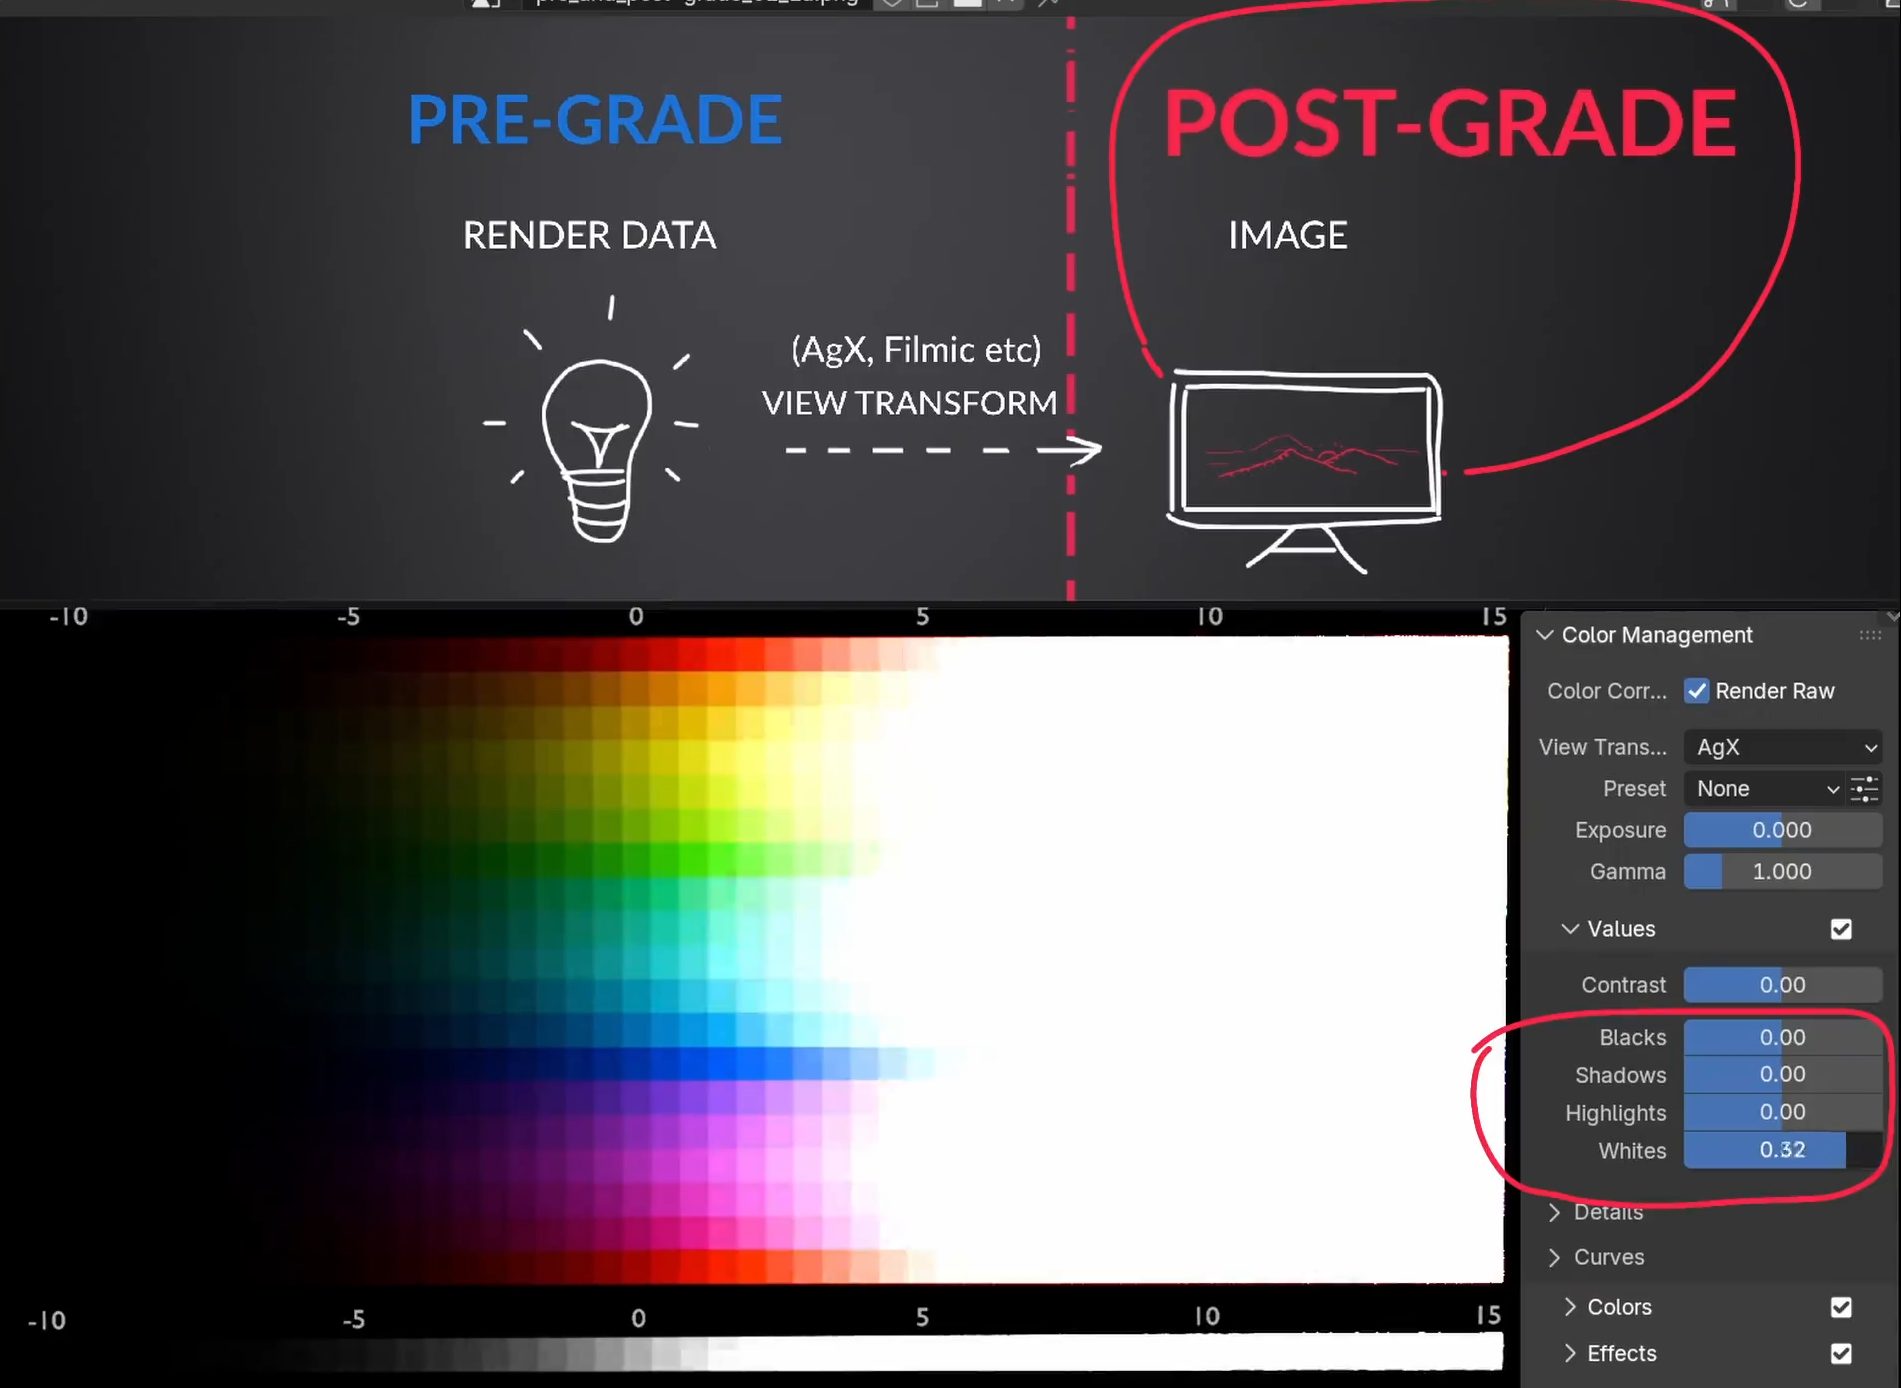
The Protective Power of View Transforms (Pre-Grade)
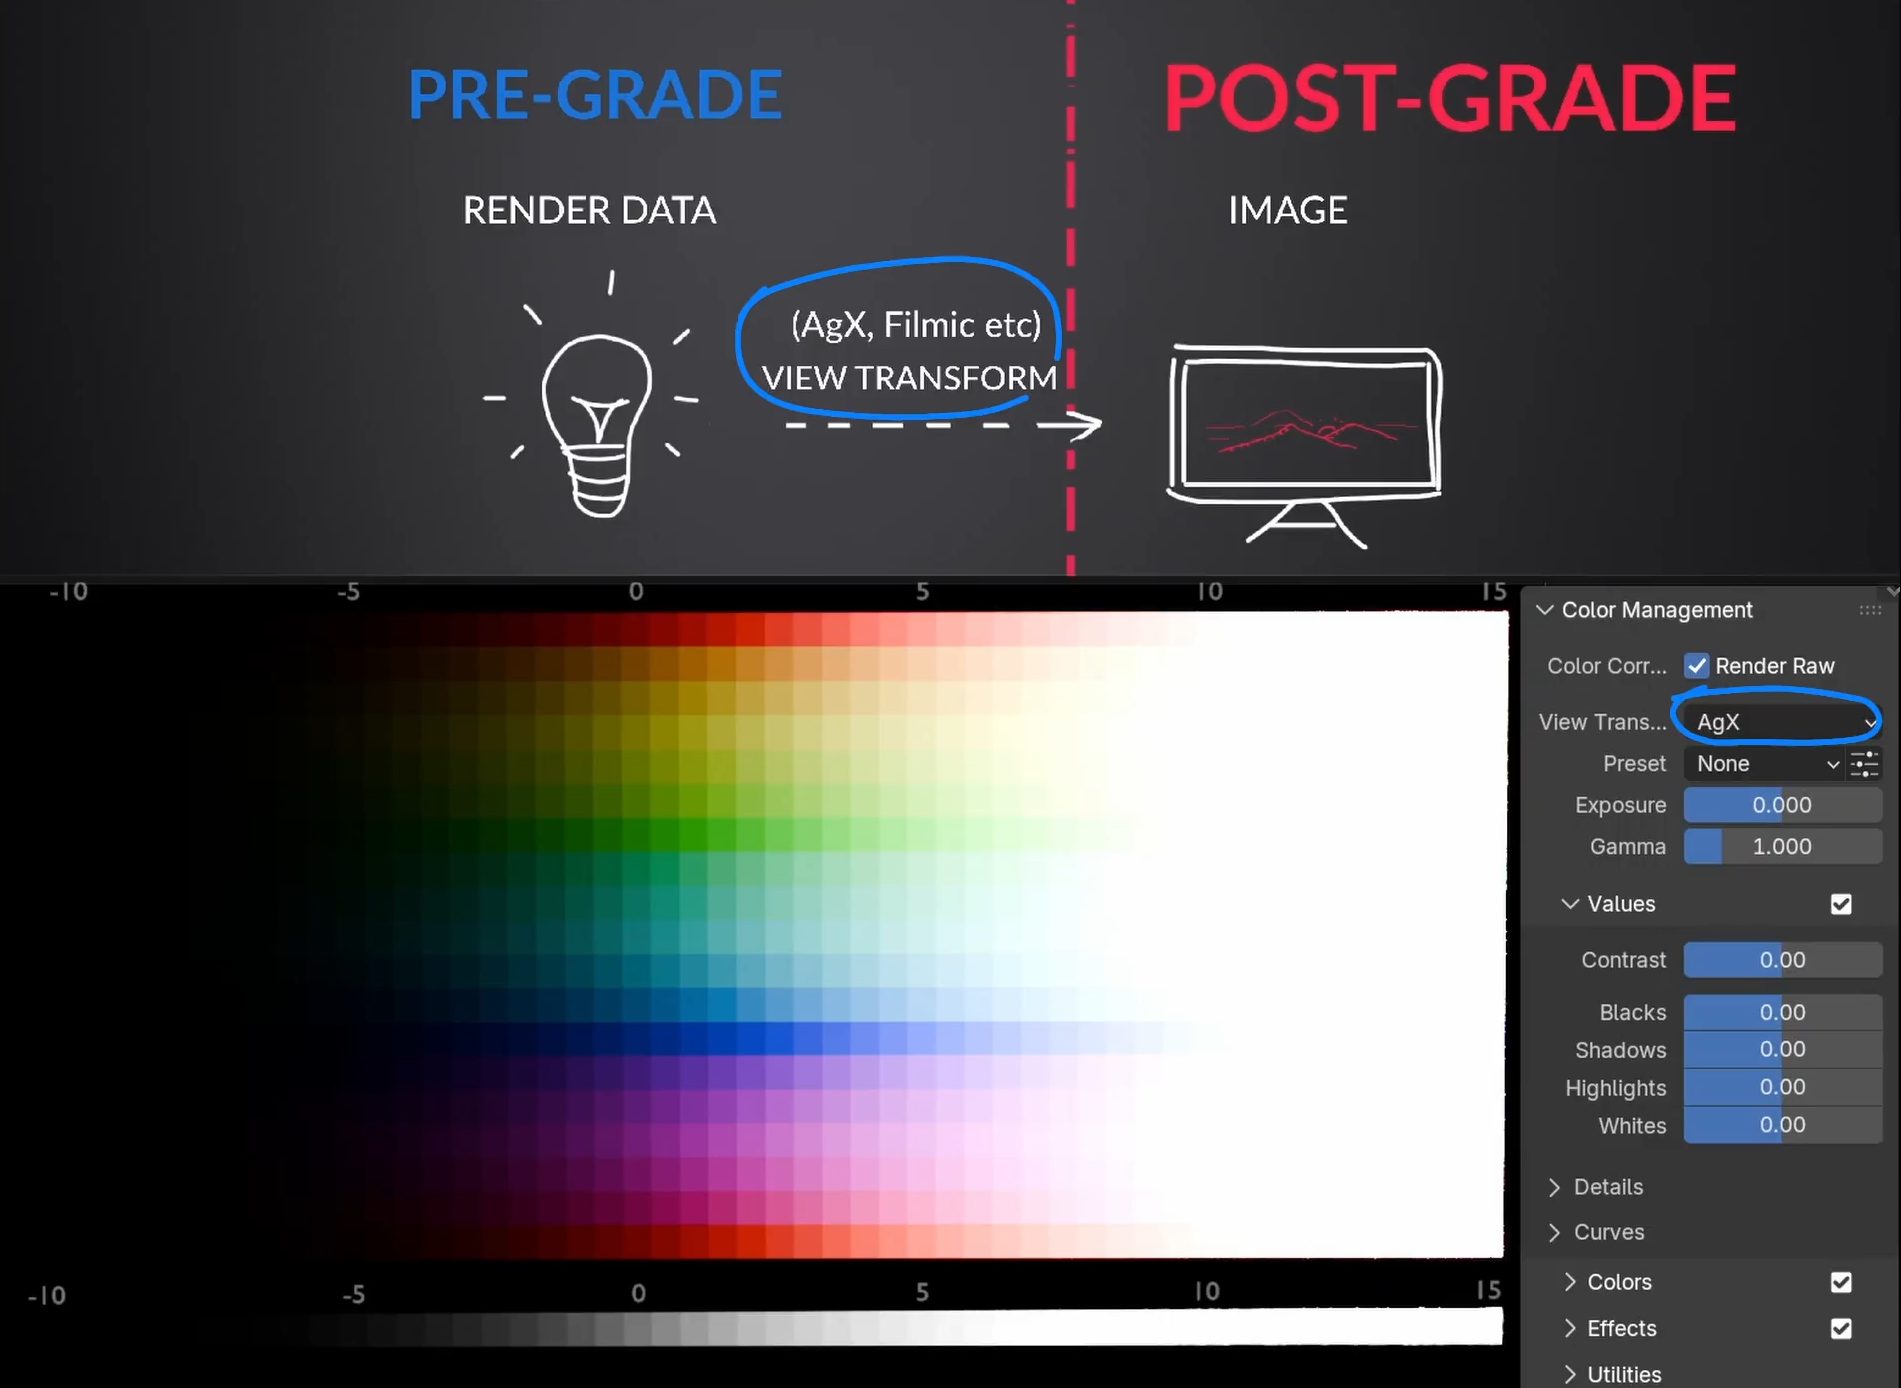
Tools like Blender’s AgX and Filmic are called View Transforms. Their job is to take the raw, high-dynamic-range data from the renderer and map it into a viewable image for your screen. They were designed to mimic how real film emulsion reacts to light. As more light hits the film, it becomes less sensitive and desaturated, which creates a smooth, cinematic highlight roll-off and prevents harsh clipping where bright areas turn into flat, ugly white spots.
For this to work, color adjustments must happen before the view transform is applied. This is the pre-grade stage.
For instance, Exposure and Contrast in Render Raw are pre-grade adjustments. They work directly on the raw render data. Even if you push the exposure very high, the AgX view transform acts as a protective layer, gracefully rolling off the highlights toward white, just like real film.
The Danger of Post-Grade Adjustments
Other controls, like Highlights, Shadows, and RGB Curves, are applied after the view transform. This is the post-grade stage. At this point, the image is no longer raw data; it’s a set of formed pixels for your screen. These adjustments don’t have the protection of the view transform.
Pushing these controls too hard can easily clip your highlights or crush your shadows, destroying detail and creating harsh, ugly transitions. It’s like switching off AgX and using the old Standard transform, which can lead to notorious artifacts like rat piss yellow or nuclear cyan (in Troy Sobotka’s terminology).
Why Have Both? The Raw Workflow Advantage
So if post-grade is dangerous, why use it at all? This is the core reason for RenderRaw’s raw workflow.
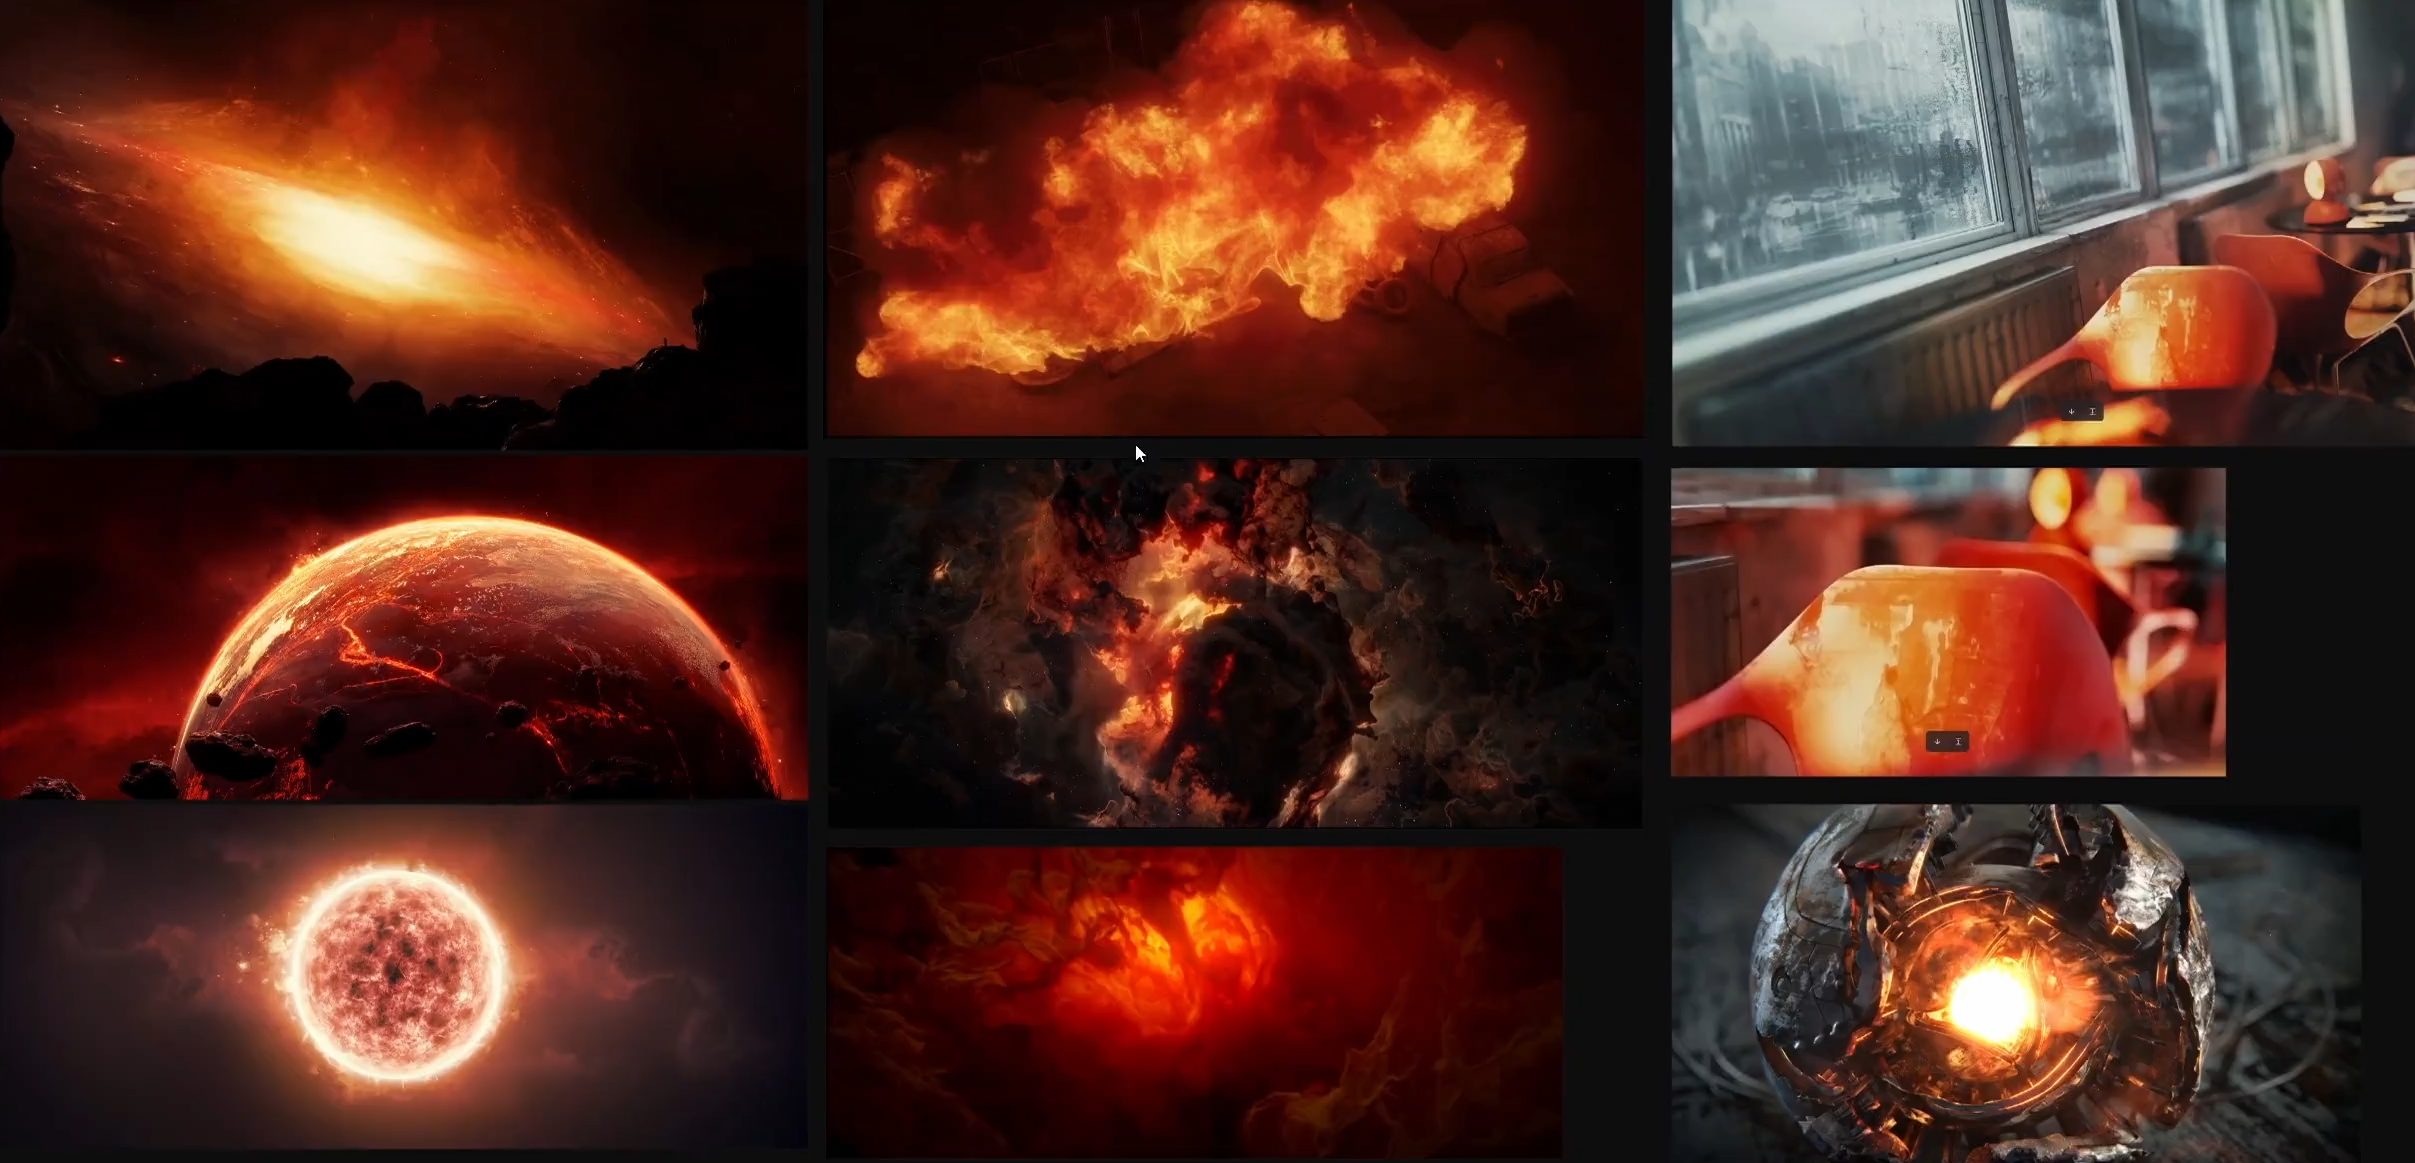
While Blender’s AgX transform is excellent, some artists find that it can make vibrant reds and oranges look a bit muted or salmon-colored. If AgX is applied last in the chain, it’s very difficult to nudge those colors back to a fiery orange because AgX will always have the final say.

And I like fiery orange (as you can surely tell by looking at my #b3d renders). So for me it’s substantial.
How does Render Raw solve this issue?
By setting Blender’s main View Transform to Raw, we bypass view transform altogether. RenderRaw then applies the AgX (or Filmic) transform inside its own node group. This gives us the choice to apply some corrections before the transform (pre-grade) and others after it (post-grade).
This flexibility allows us to carefully nudge the salmon reds toward a more vibrant orange after the image has been formed – something we couldn’t do otherwise. It’s a fairly destructive process, but it gives the ultimate control.
That is the entire point of this workflow: having the choice and flexibility, as long as you understand what you’re doing.

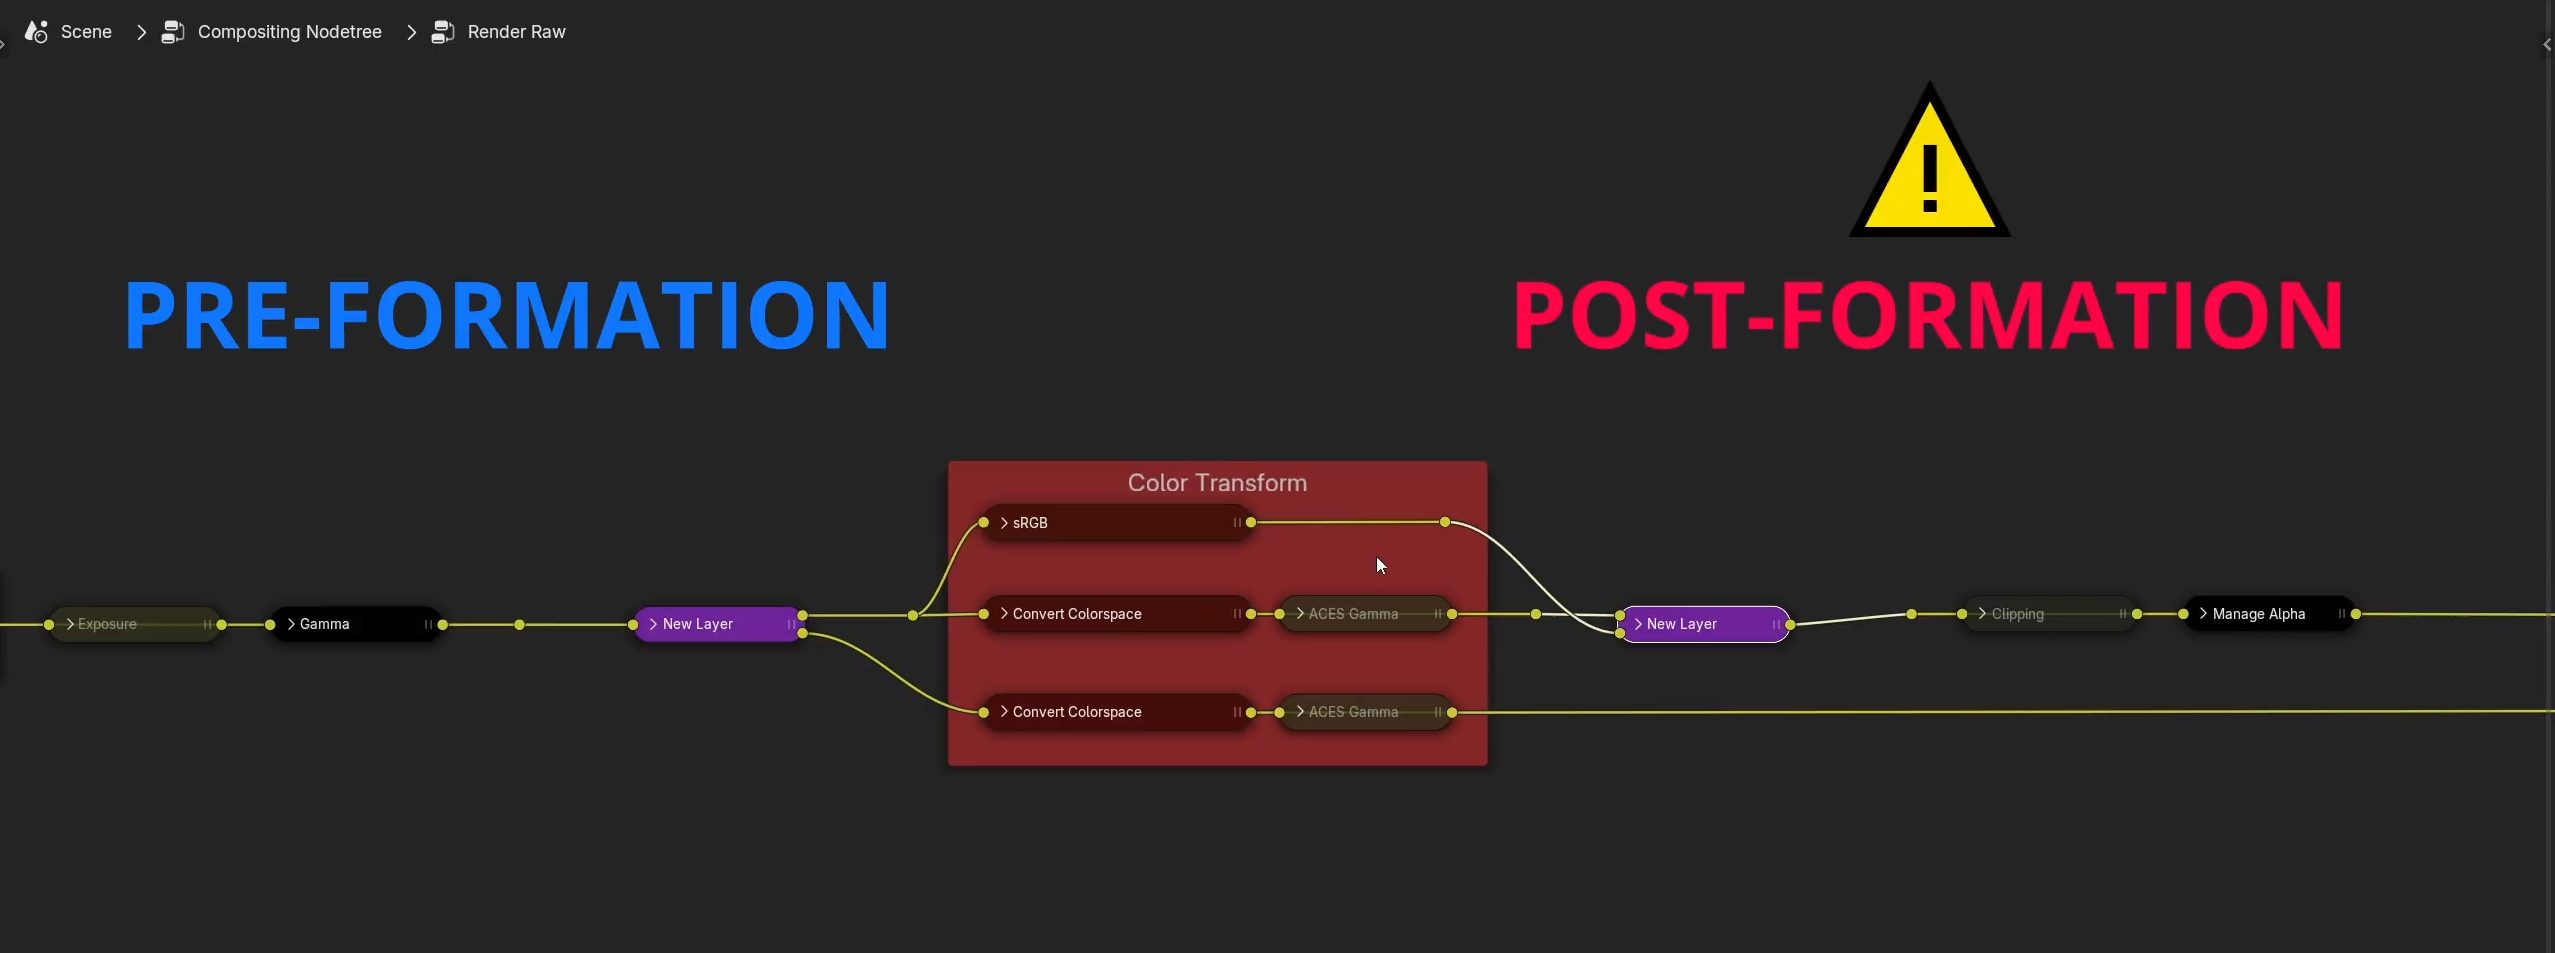
Pre- and Post Formation Controls
Here is a summary of which controls in Render Raw are Pre-Grade (safer) and Post-Grade (use with more caution).
Pre-Grade Controls (Safer):
- Exposure, Gamma (though, Gamma is a technical setting never to be touched)
- Contrast
- Color Balance (Offset/Power/Slope)
- Saturation (Perceptual)
- Temperature & Tint
Post-Grade Controls (More Destructive):
- Highlights, Shadows, White, Black
- RGB Curves (more precisely, its Post variant)
- Detail Controls (Clarity, Texture)
- Per-Hue Adjustments
- Effects (Grain, Vignette, etc.)
—
After nailing the basics of the Render Raw workflow, we can get back to our demon render and apply these concepts. We’ll start with broad, safe adjustments and move to finer, more delicate details.
For a step-by-step guide to grading, watch this tutorial on our YouTube.
And check the full version of the Color Grading in Render Raw Free Mini-course.
—
List 🦐
💌📬 Get more creative tips – subscribe to our newsletter!
—
Our Other Courses and Tutorials You May Also Like
Blender to Resolve Freemium Course

—
Free AgX, Filmic & Creative LUT Pack for DaVinci Resolve
—
Outdoor Lighting in 3D – is There a Magic Formula?