In this quick tutorial we’ll continue to explore the cool texturing techniques to finish the game level. In particular, we’ll make use of Clone From Second UV Map tool in Blender.
Texture Projection – Filling in the Blank Space
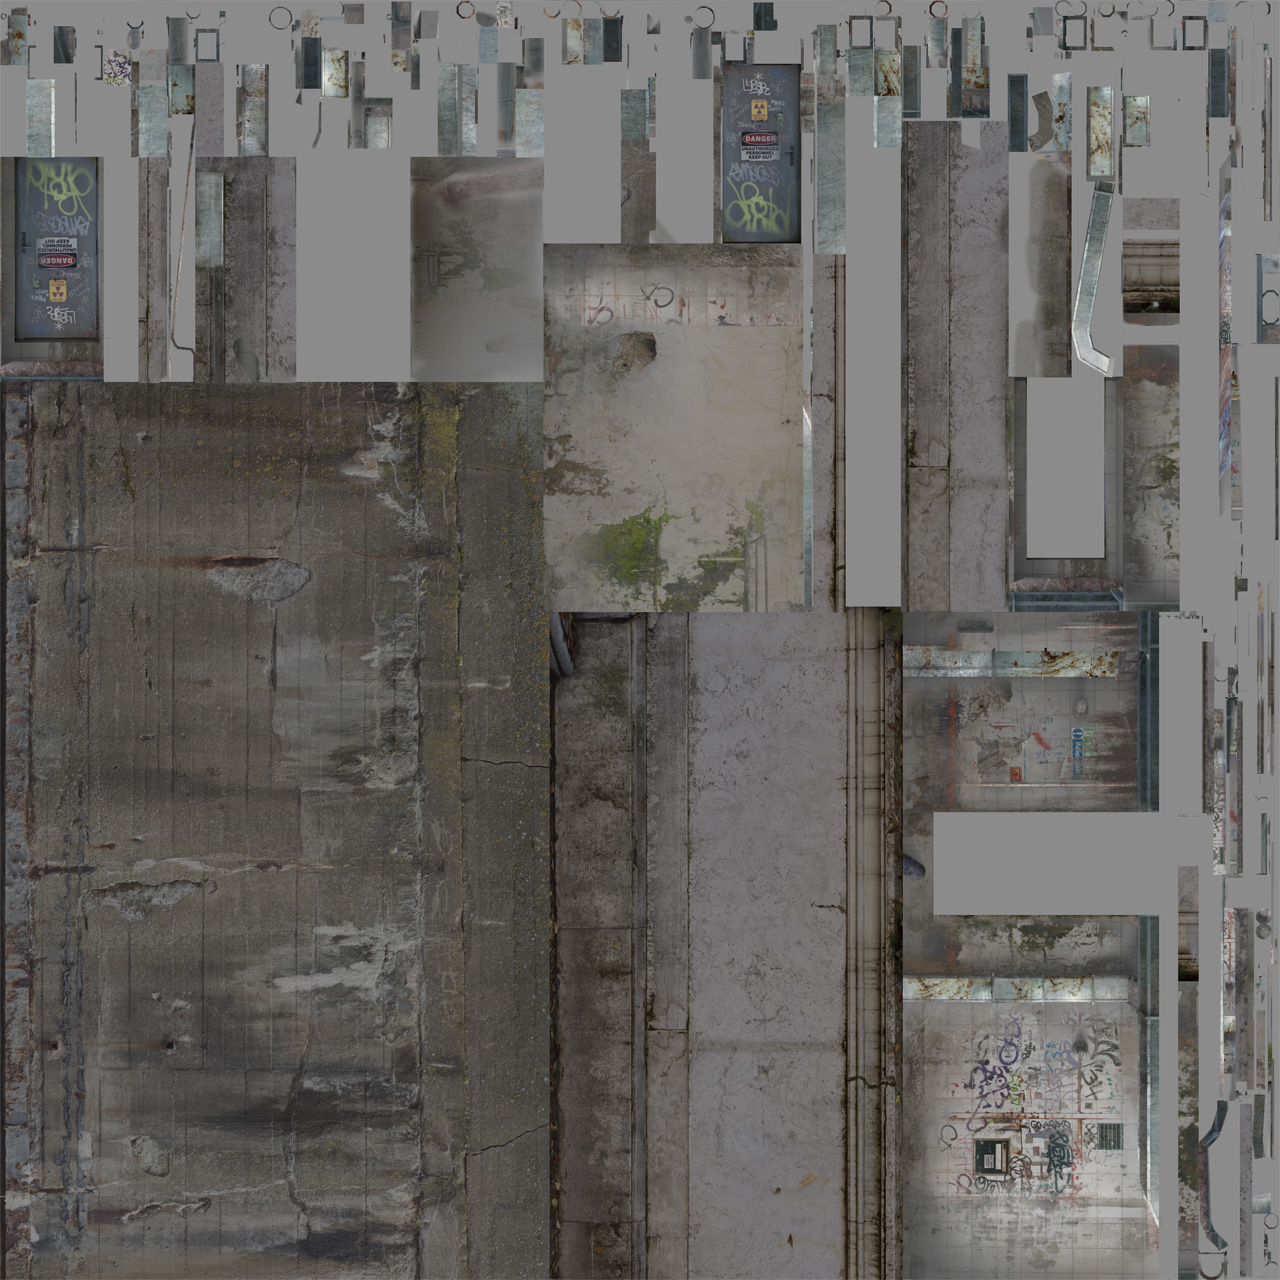
In the previous part, called Paint and project the texture, we projected our hand-painted texture from 2 cameras. And still we see some blank spaces.
Solutions:
1. We may repeat the projection process from 3-rd camera
2. Paint the rest of the texture by hand in Photoshop or Gimp
3. Or we can make a second UV map, quickly unwrap these blank spaces and clone from second UV map back. Sounds weird?
It’s easier than it sounds.
Clone from Second UV map
First, let’s create the 2nd UV set.
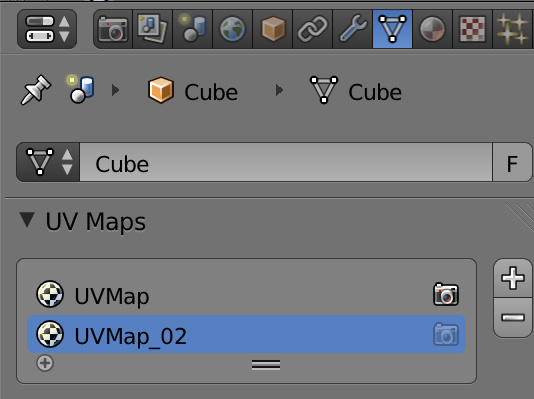
Then, select the polygons that you want to fill in, press U to Unwrap and select Smart UV Project or just Unwrap. After doing it, in the Image Editor move uv island to already textured space.
Lastly, you need to use the Clone from Second UV map tool to clone those freshly textured parts to our main UV set. Get it?
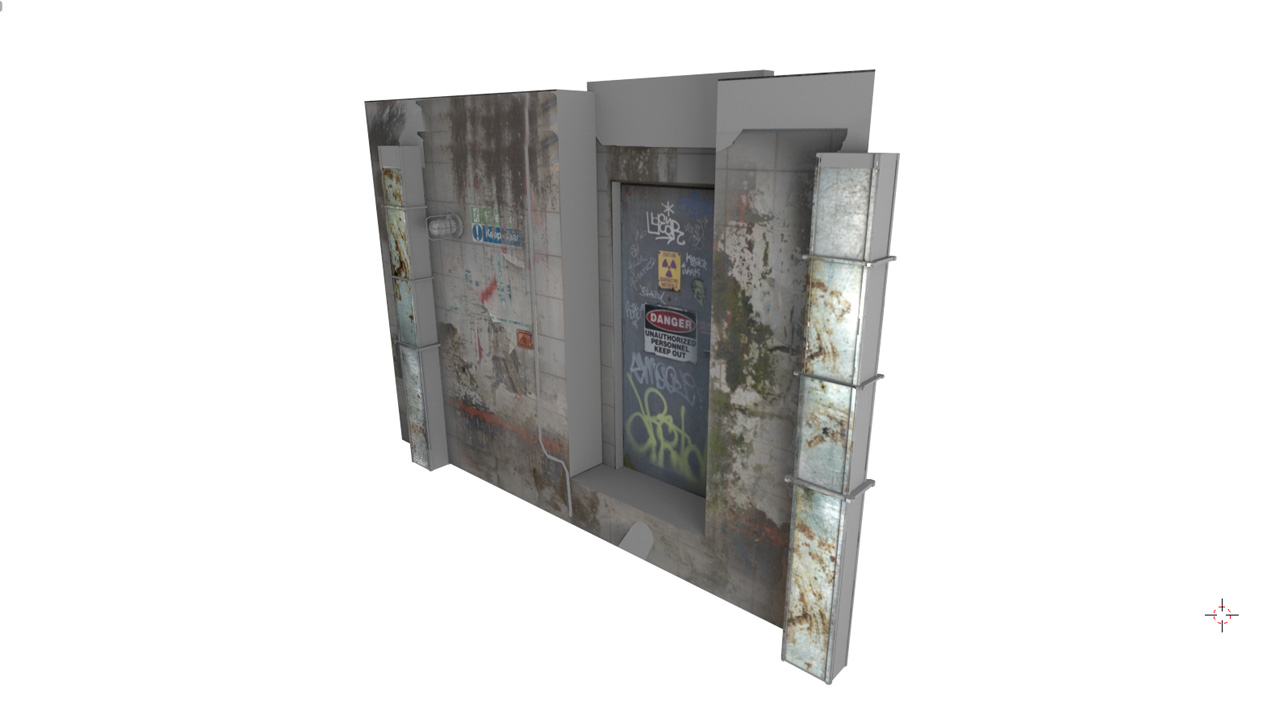
The Texture
Game Level Texturing
In this series of tutorials we talk about:
1. Block out the model & Optimize it
2. Unwrap everything into 1 UV map
3. Paint and project the texture
4. Clone details from 2-nd UV map
5. Bake it
6. Enjoy the result and start making games (this is optional)

Patrick Depoix
Yet Thanks Gleb, I love it! You have the must workspace I saw!
Bye bye!
Patrick Depoix
And for the specularity and bump (or normal or displacement), you use “Crazybump” or something else, may be?
Pingback: Game level texturing: Bake lightmap in Blender and Unity (PART 5/5) | Blender Game
Yulia Kalashnikova
For those who are using newer versions of Blender (e.g. 2.73). The clone brush tool has changed considerably. Here is the link with explnanations: http://blenderartists.org/forum/showthread.php?352509-texture-painting-from-another-uv-map-%28clone%29
Pingback: Blender | Game Level Texuring | Clone from 2nd UV map 4.5 of 5 – Happy Game Pipeline