
Isn’t it strange that muggles refuse to see magical things? Even if the magical things run across the street, swearing and steaming.
Gobbledygook if you ask me.
Hey, but at least they love to draw and create such things.
Here’s a tutorial to assist our muggle friends in creating a fancy looking magical clock in Blender. Keep reading and I hope you’ll enjoy it.
Aparecium tutorial.
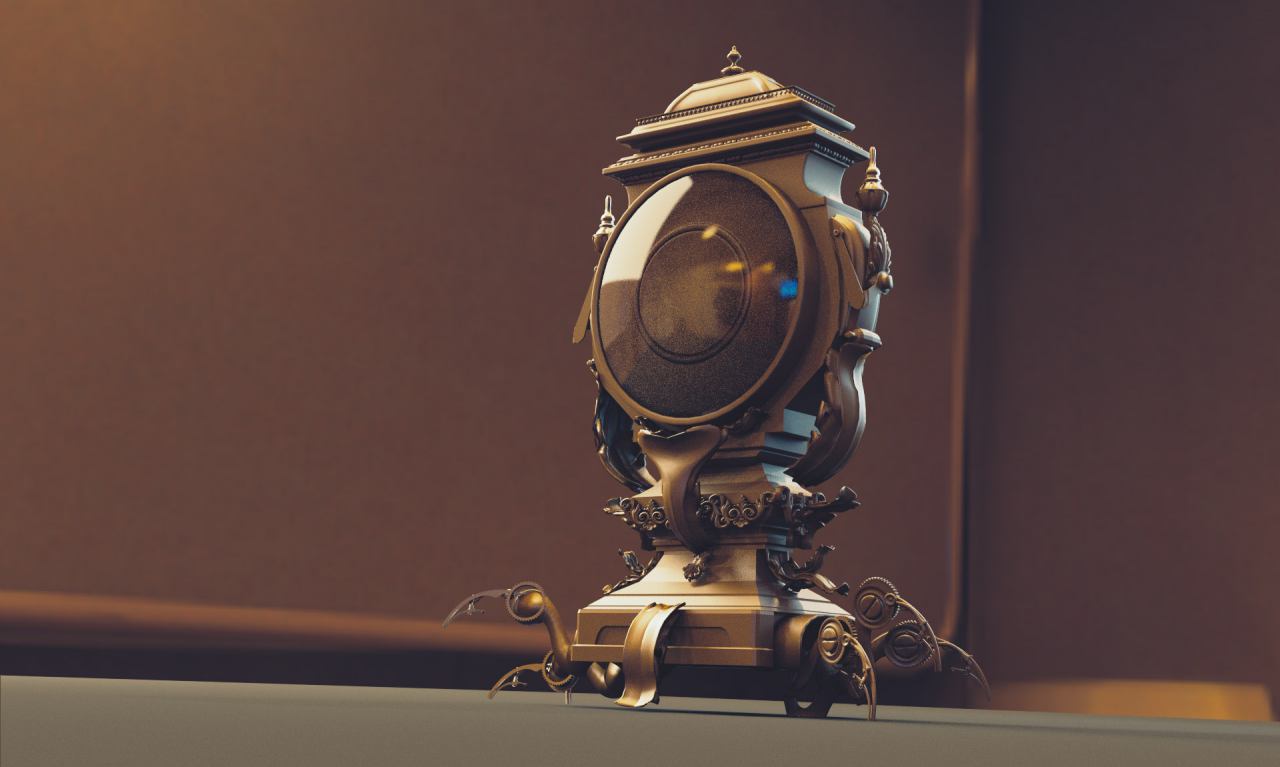
Blender Tutorial: Making of the Clock
Step 0. Burn the Bridges and Tell Everybody
Write your idea down.
Tell everybody about your intention. “I’m in the middle of creating a stylized steampunk clock and I enjoy it so far!”. Something along these lines.
I do the similar trick quite often on Creative Shrimp and I like how it motivates me.
Step 1. Find a Reference
As soon as you find a good reference that sets your imagination of fire, launch Blender and start the ball rolling.
But no earlier. Having a good reference is must have.

Step 2. Create a Model
Block out the simple shapes first.
Just by using cylinders and cubes you can create a rough model. It will allow you to establish the composition.
All in all it’s an effective practice to start with a rough shapes than add the details.
Created a basic model?
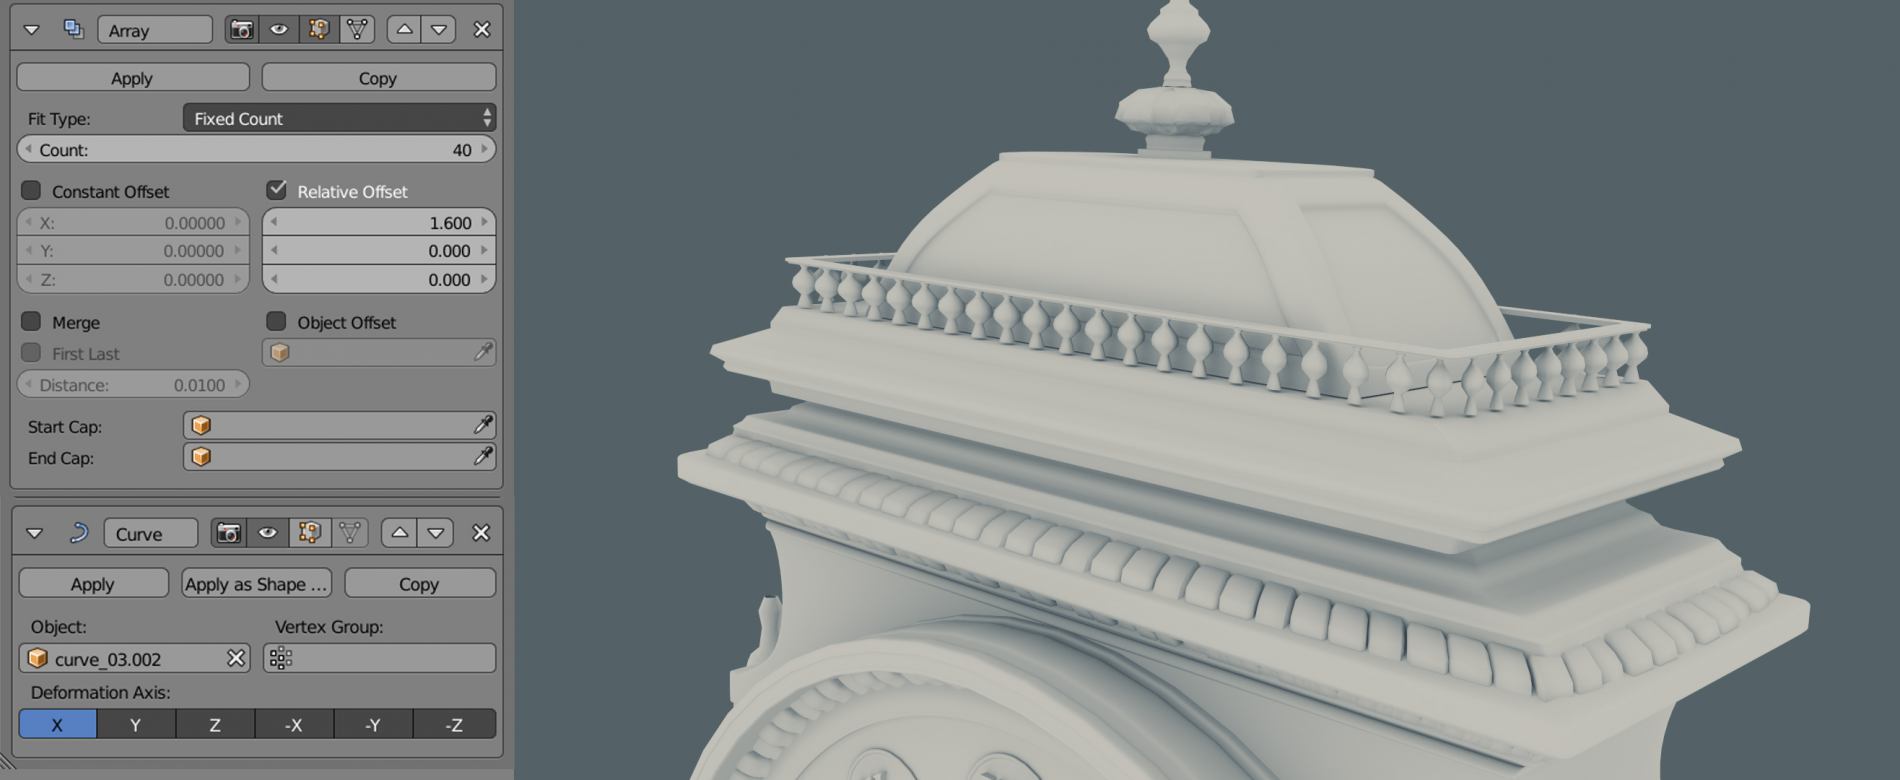
Iterate through the model parts and detail them. Take this cylinder and break it into the smaller shapes. Add bells and whistles.
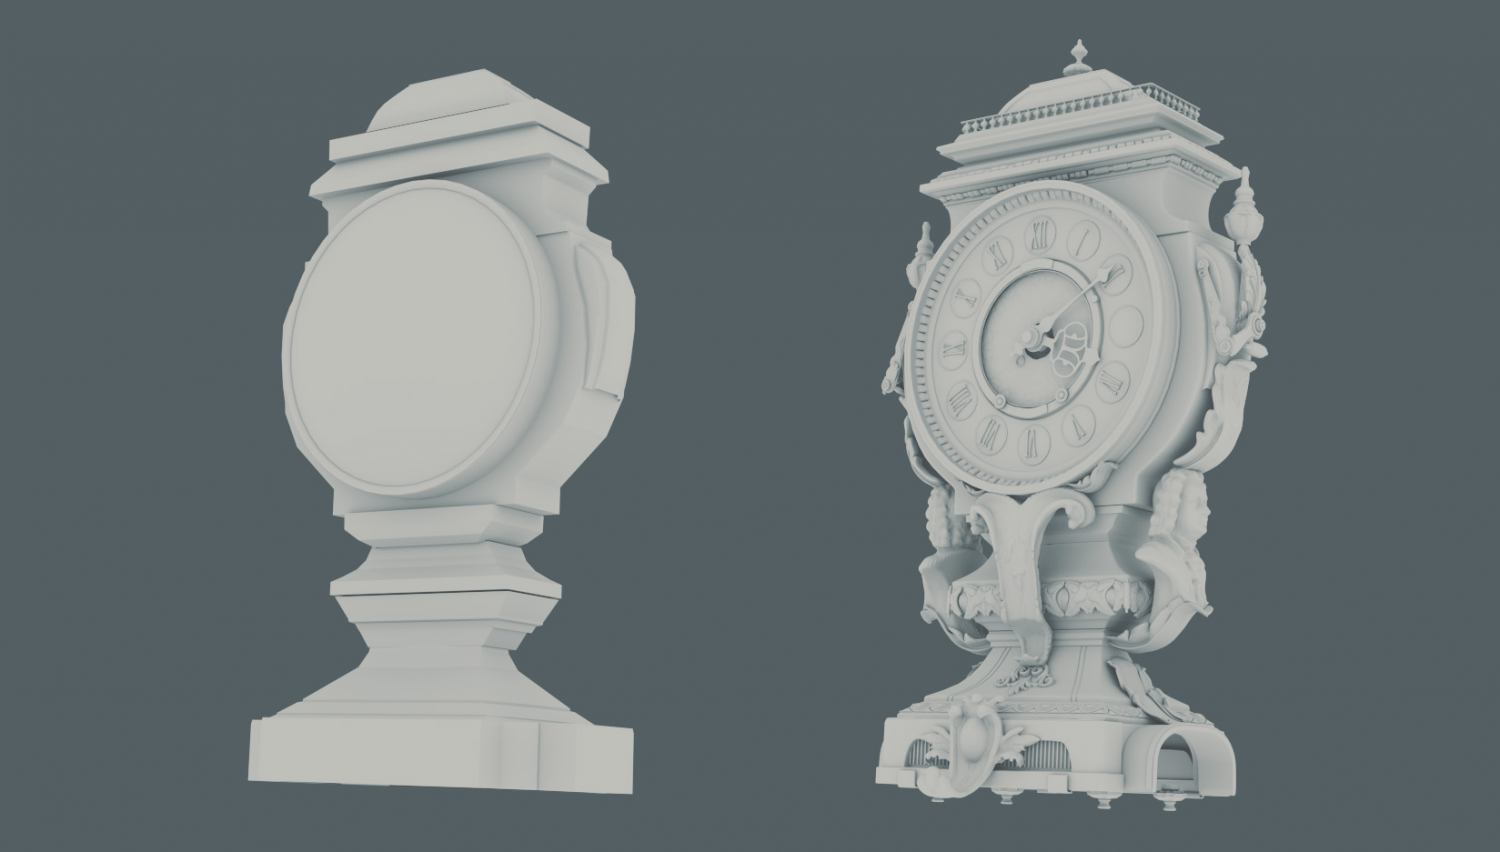
QUICK TIP: Save some time by utilizing generative modifiers (mirror, array, curve, etc). When you can get away with duplicating object a few times, do it.
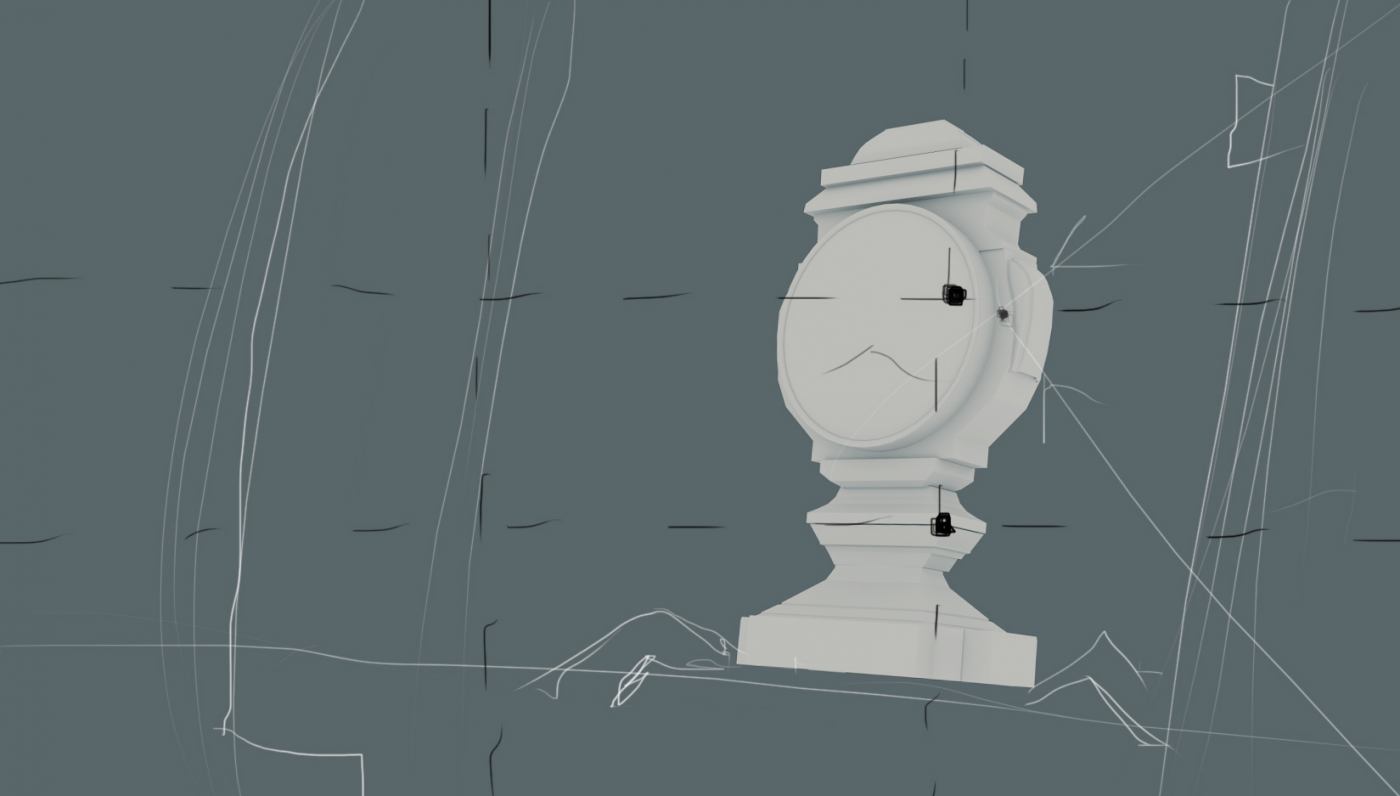
Step 3. Choose a Cool Camera Angle
Choose a camera angle according to your artistic goal.
I wanted this composition to look dynamic, so I tilted the horizon (too much). After that I applied the rule of thirds to position the clock.
What else?
I sketched basic composition ideas in Photoshop.
Step 4. Set Up Lighting
Start with setting up a HDRi lighting.
The HDRi is a good starting point (you can add a bunch of area lights on top of it later on).
The best thing about using the HDRi is that it allows you to get the illusion of the world around your model. For example, the reflective surfaces will catch the highlights from the 360 degree panorama.
Try different environments and see what works for you.
For further learning check out the Lighting Project: a set of unconventional lighting tutorials for creative people.
[video_embed maxwidth=”800″][/video_embed]
Download: Free HDRi (CC BY) is made by Greg Zaal
QUICK TIP: Create a basic shader to get a good approximation of how your model will interact with lighting.
After setting up the HDRi, add a strong directional light (area light), a fill light and an edge light.

Step 5. Create the Basic Materials
Start with creating the seamless textures. Wood, metal, concrete.
Wood:
Create a Mix Shader (Diffuse+Glossy) and plug in the wood seamless texture into the diffuse slot.
Quickly unwrap all wooden parts of the model using these methods:
a. smart UV project
b. unwrap
c. follow active quads
d. project from view

Metal:
Use generated texture coordinates and box mapping to project a seamless metal texture.
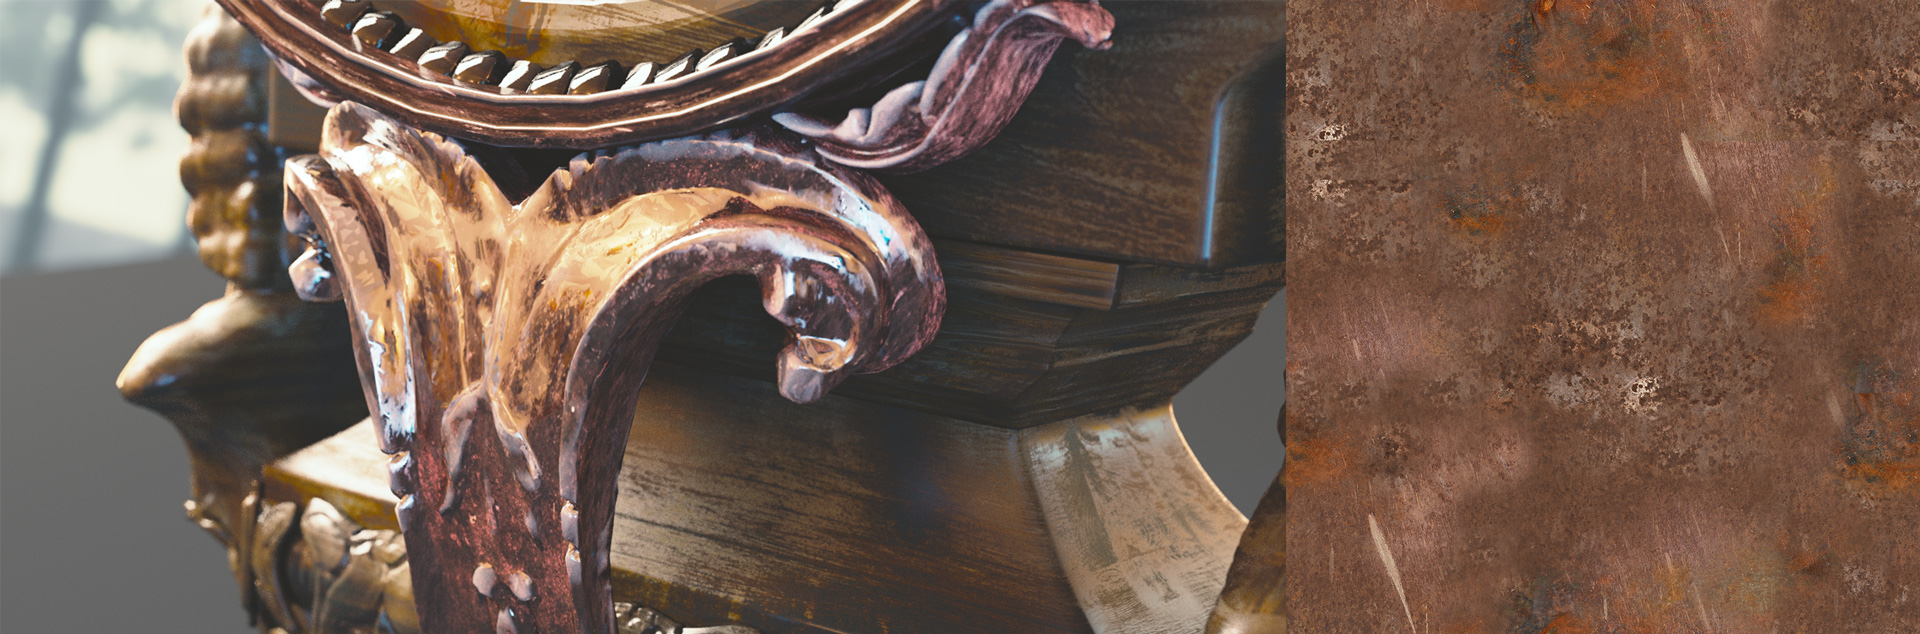
Step 6. Make the Materials Look Pretty
Iterate!
• Add the texture to the roughness input of the glossy shader
• Add the grunge texture to the mix factor input
• Utilize the pointiness attribute to add the edge scratches
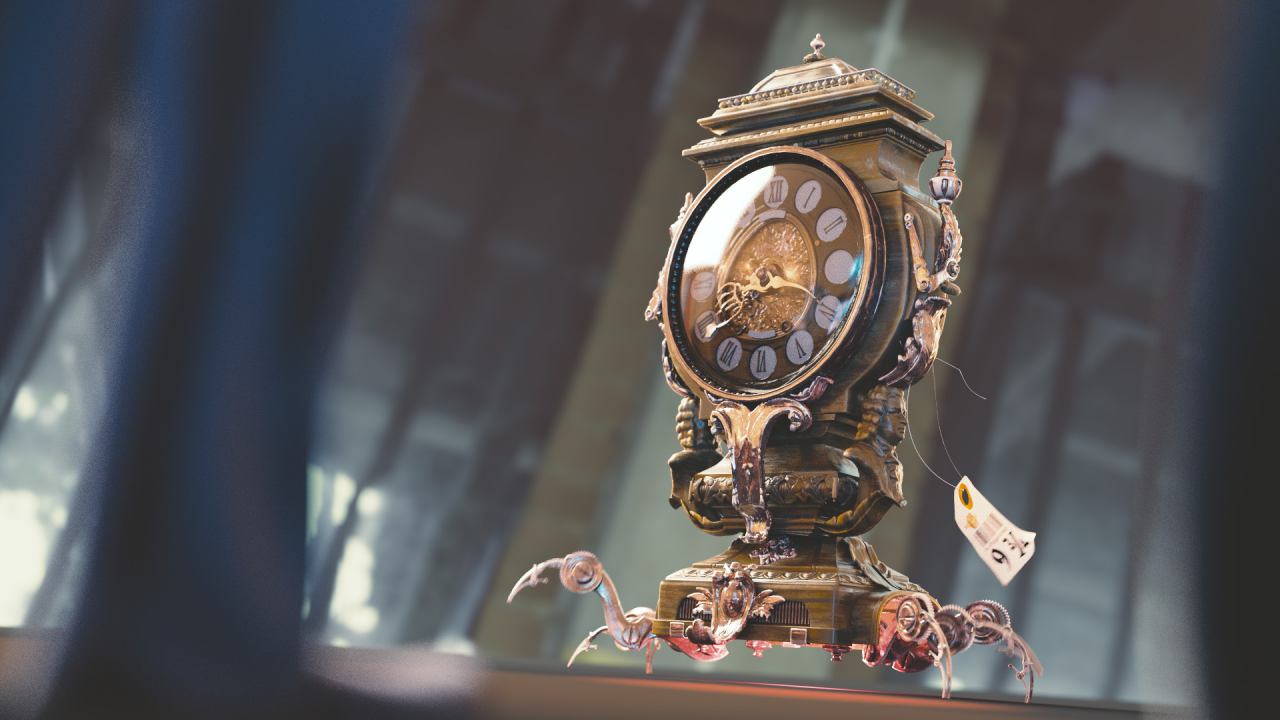
Step 7. Add a Touch of Style
We’re going to make a stylized render. Imagine Pixar movies (ah, I thought it would be cool to mention Pixar in relation to our work).
Apply all modifiers and join the parts of the models.
Bend the model using the Simple Deform modifier.
Bend it once more.
The idea is to create a dynamic pose for the clock. Imagine your clock following the curved line that imply motion.

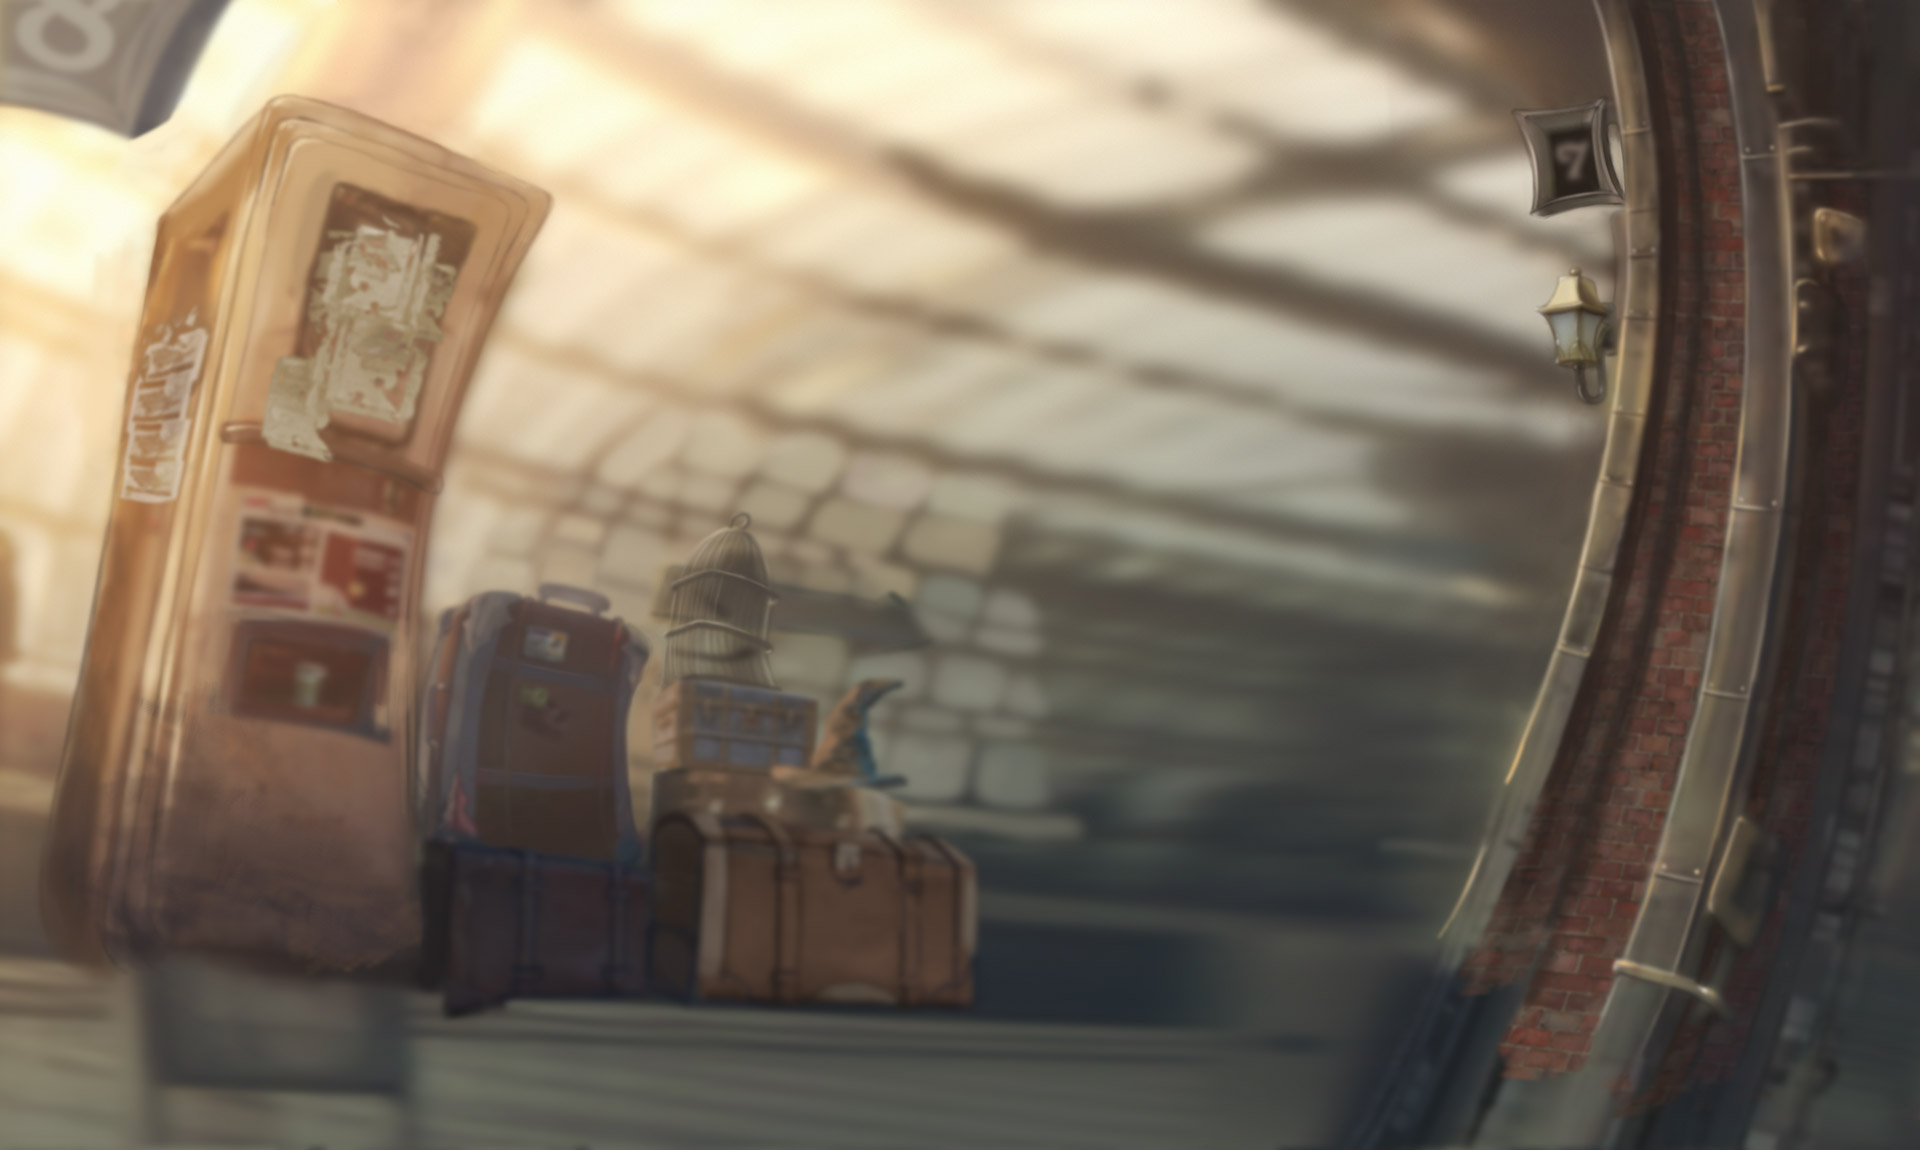
Step 8. Paint the background
Create a matte painting by mixing a bunch of photos and painting over it in Gimp or Photoshop.
QUICK TIP: You can simulate the depth of field in your 2D background by using Lens Blur filter in Photoshop. What you need is a black&white layer that will represent depth.
After painting the background, it’s a good time to rework the lighting to keep your image cohesive.
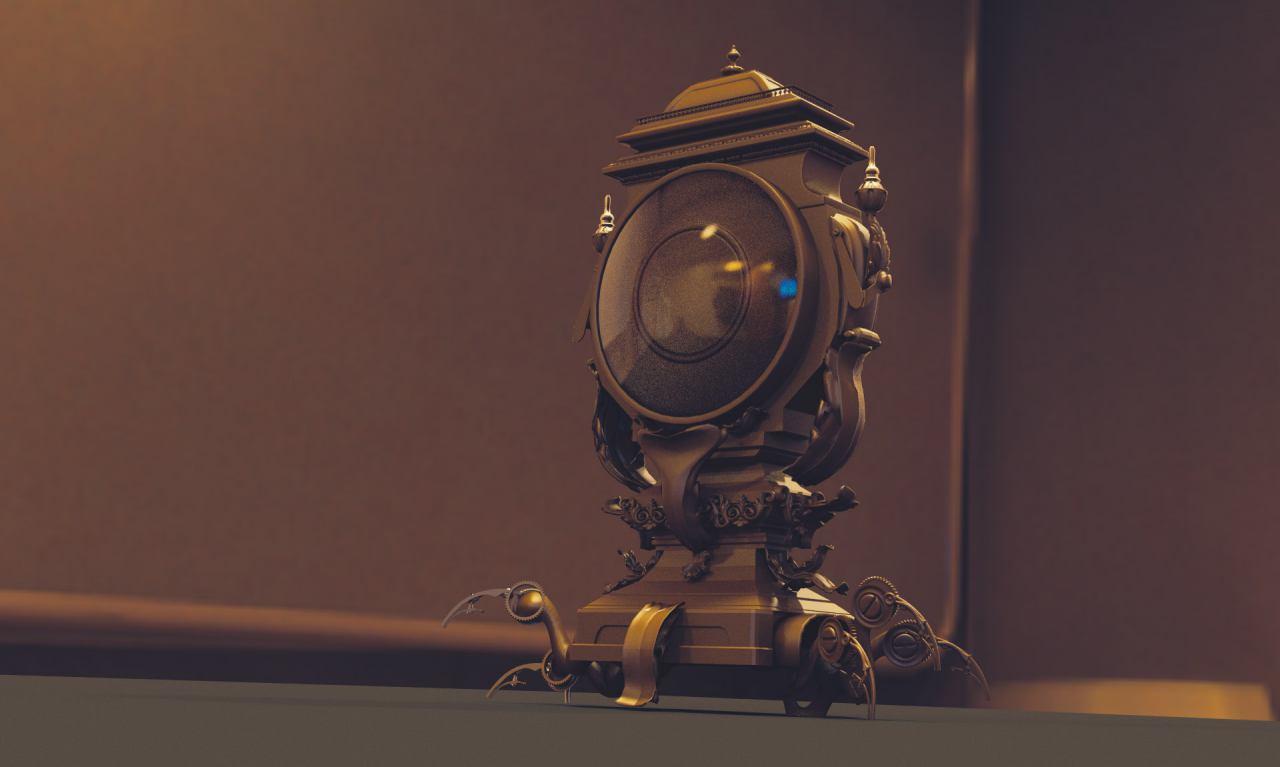
Step 9. Render!
Render it out.

Post-processing
Ready to post-process the image?
Here are some things to consider:
• Aerial perspective
• Light diffusion
• Vignette
• Color grading
• Film grain
• Contrast boost

BONUS TIP: Motion Blur
Animate some objects in your scene and apply motion blur to convey the sense of motion in the static shot.

Step 12. Share it With Others
In today’s world it’s not enough to create artworks.
Share it with the world.
Share it with the fellow muggles who love creating magical (tongue-in-cheek here) things. Just push one of the buttons below the post. Much appreciated!

Micah Denn
Nice. Mixing things up with deform modifiers is a cool touch. Personally I like to go over the whole scene in sculpt mode with the grab brush and just break and bend everything.
Whats your workflow for modeling the more ornate parts? Did you sculpt them?
Gleb Alexandrov
Micah, in case of the ornate parts first I make a low-poly thing using traditional poly modelling tools of Blender + the mirror modifier. Then I add a few subdivisions and sculpt it in Blender or Zbrush.
Semen Wizard
Brilliant!
CynicatPro
can i ask how you made the baroque pieces? i keep trying at baroque and rococo and failing horribly. =3
Stefan H.
Do you keep such models in one piece / one mesh or do you use multiple objects?
Gleb Alexandrov
Stefan, I started with having multiple objects but later on I merged it into 1 object. That said, if I knew the way to keep them separate, I would prefer to avoid merging. But unfortunately, for now we have to join it into one model to be able to deform it using modifiers.
Stefan H.
Ok thx. Would you then, for instance if you had screws on an item, keep the screws in separate objects? (In general, before the task of deforming arises) (this is actually more of a general modelling question…)
Gleb Alexandrov
Yea, even after deforming I still keep a copy of the screws and other objects in separate layer (just in case I’ll need to fix something).
Uncle Snail
Wonderful tutorial. I thought it was a great idea to warp the actual scene. I’ve never thought of that before. I guess I need to think a little more outside the box.
Jean-Marc
Wow, beautiful image. A short CG piece soon?
Gleb Alexandrov
Oh Jean-Marc, I wish it was a shot from the CG piece. That would be flipping awesome. 😉
Decebal Junior
how you modeled the details to the clock if you can make a tutorial .
Decebal Junior
The swirly details on the side .. the small details can you make a tut ?