
Discover the Lomography lighting tricks and start making badass renders (with the old-school film defects like a light leak).
You are reading the chapter 16 of the Lighting Project, the manifesto of a think-different approach to digital lighting. The most mind-boggling project of my life.
Do you want to try a fresh hipster stuff… in digital lighting?
The stuff that will make the viewers groove? Yay!
Hint: it’s an underground stuff from the 20th century. Sexy. A bit bizarre. Revolutionary.
It’s called Lomography.
Shall I explain?
LOMO LC-A was a cheap soviet camera discovered by a group of Viennese students. They were hooked with the badass lighting defects this camera produced.
• Rainbow-colored flashes
• Extreme optical distortion
• Light leaks and film burn
Today lomographers even detach the lens ever-so-slightly from the camera body and call it “lens-whacking”.
Why? It gives lighting a vibrant artistic touch.
But more importantly, Lomography is about a shoot-from-the-hip lifestyle. Lomography is the art of junk, that sets millions of minds on fire.
You can do it too. In computer graphics.

Sounds good?
How can you re-create a similar aesthetic experience in 3D? How can you make your renders look hipster and dazzling?
Let’s explore three steps…
Lomography trick #1: Whack Your (Virtual) Lens to Get a Bizarre Lighting
To add an artistic twist to your lighting, experiment with what lomographers call the “lens whacking”.
Essentially lens whacking means that you deliberately make a weird sh#t like breaking the lens and you expect a surprising outcome.
Imagine.
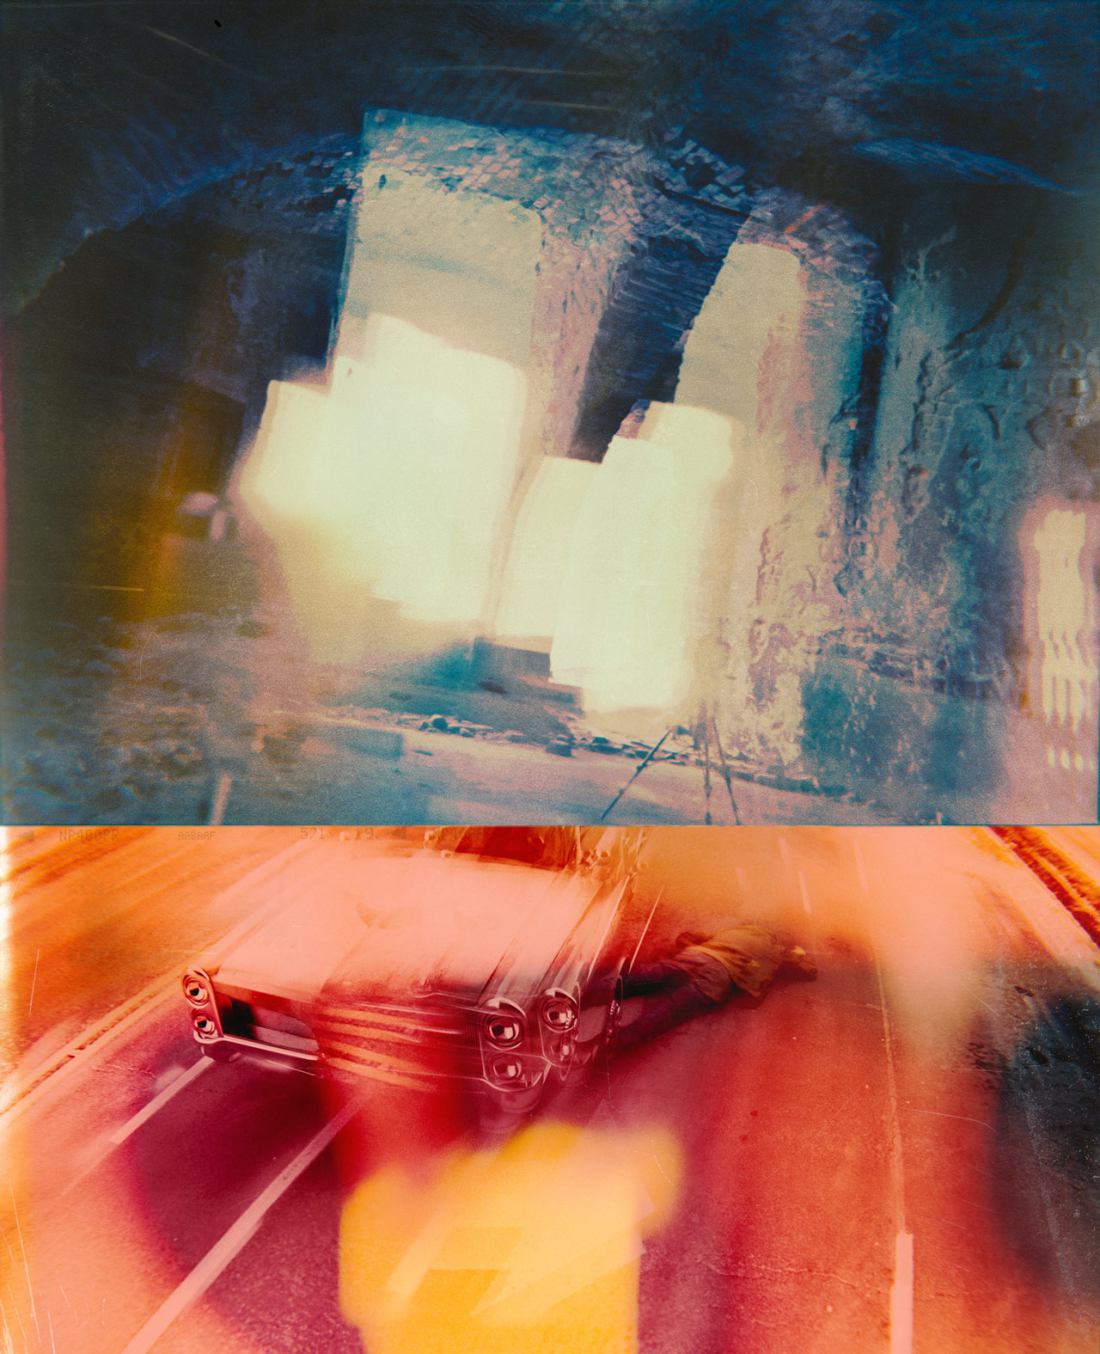
You walk through a crowded Amsterdam street on a late December evening. When you feel bored, you point your LOMO LC-A at a random spot and CLICKKK, the flash goes off. A few days later you process the photos, but you can’t recognize the place. The faces are gone too.
Instead you see the tantalizing light leaks dancing their own rumba.
That’s why people break their cameras. We love surprises.
Ready to break?
• Optical defects
Start by creating a lens and placing it in front of the camera, like in real world. Any refractive elements will work. As long as your software has raytracing, but any potato nowadays has raytracing.
Bend the hell out of the lens. Clone it.
Make it matte and see how the light is smeared across the lens.
Seeing the effect in real time is the best way to do it.
• Film emulation


Lomography fans usually don’t give a damn about composition and studio lighting setups. What they do care about is the hipster looks that are achieved with different kind of analogue films.
Did I hear you say Instagram?
Well, kind of. But a real Lomography has much more oomph to it than just a bunch of post-pro filters.
Imagine that every film respond to light with a different flavor.
Some films clip the whites. Some wash out the blacks. And some have shenanigans going on in the mid range (plus a crazy color tint).
Aim for shenanigans.
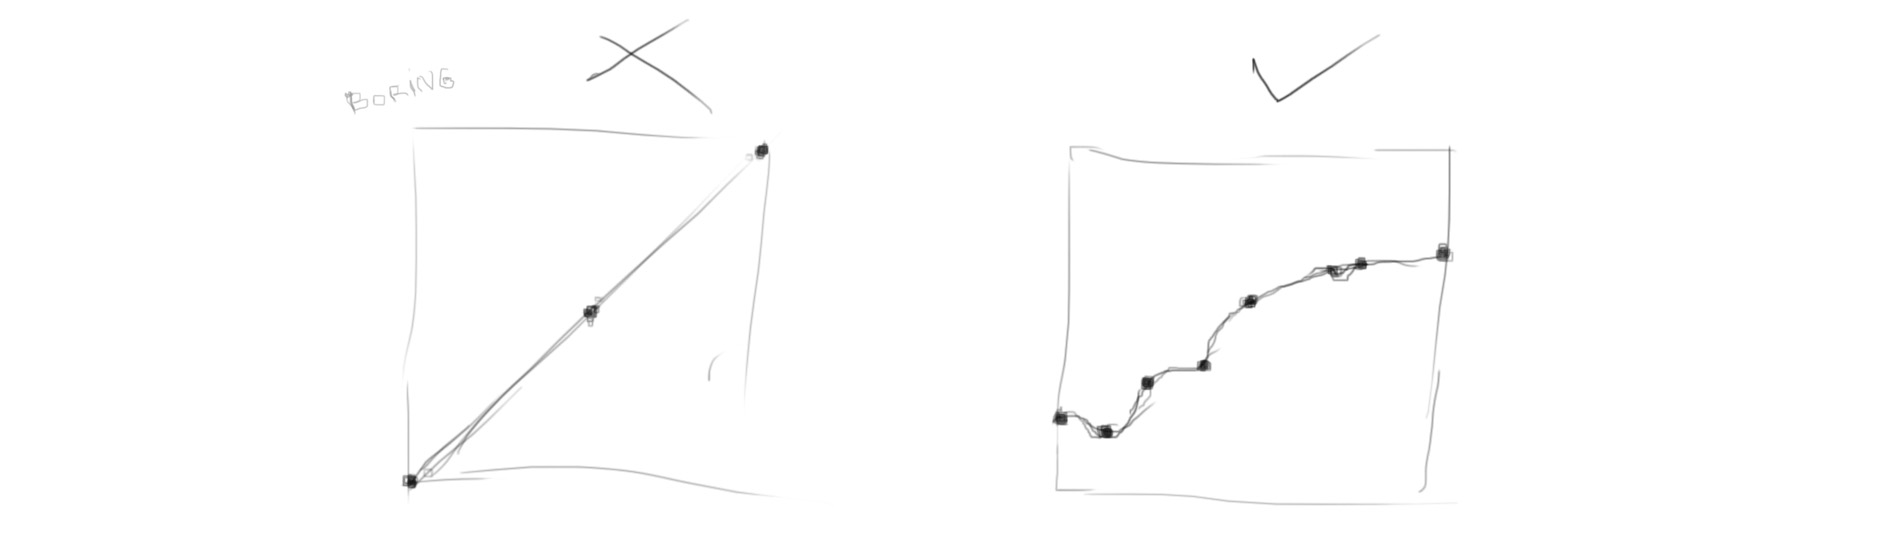
Destroy the RGB curves to create your unique brand of film.
Lomo Shrimp 100 iso? Turquoise Nerd XPro 35mm?
• Light leaks

Light leak is the star of our show.
To simulate the light leaks in 3D, once again stack a few refractive planes in front of a camera. Then you can throw all kind of textures in to control the distortion, the roughness and the color tint of the lens.
Yay, and you don’t have to pay a cent for a photographic equipment. For us CG artists the spare lenses are free.
BONUS TIP: To cook a believable light leak, spice it up with an additive blending.
Lomography trick #2. We Need to Go Deeper (Into the Post Processing)
Your first step was to whack the lens in 3D.
So far so good.
What else do you need to do to squeeze the most juice out of Lomography?
Post process the image with even more sexy defects. More lens damage, more processing defects and more grrrrrrain.
Let’s go.
• Light leaks

Apply these defects to push your lighting further into the old-school analogue film territory:
• Film processing defects (Doubling)

If you scrub through the gallery on Flickr you’ll notice that kind of photos. They look like the ghostly reflections in the shop windows, with double and triple overlays of different images.
When I stumbled across it I had only one thought.
Why the hell don’t we use this trick in CG?
• Chromatic aberration, dust, scratches and grain
Scratches and grain give the subliminal boost to what we call photorealism.
But what is photorealism, anyway? Just a silver halide reacting to light.
Let’s get straight to the most juicy part.
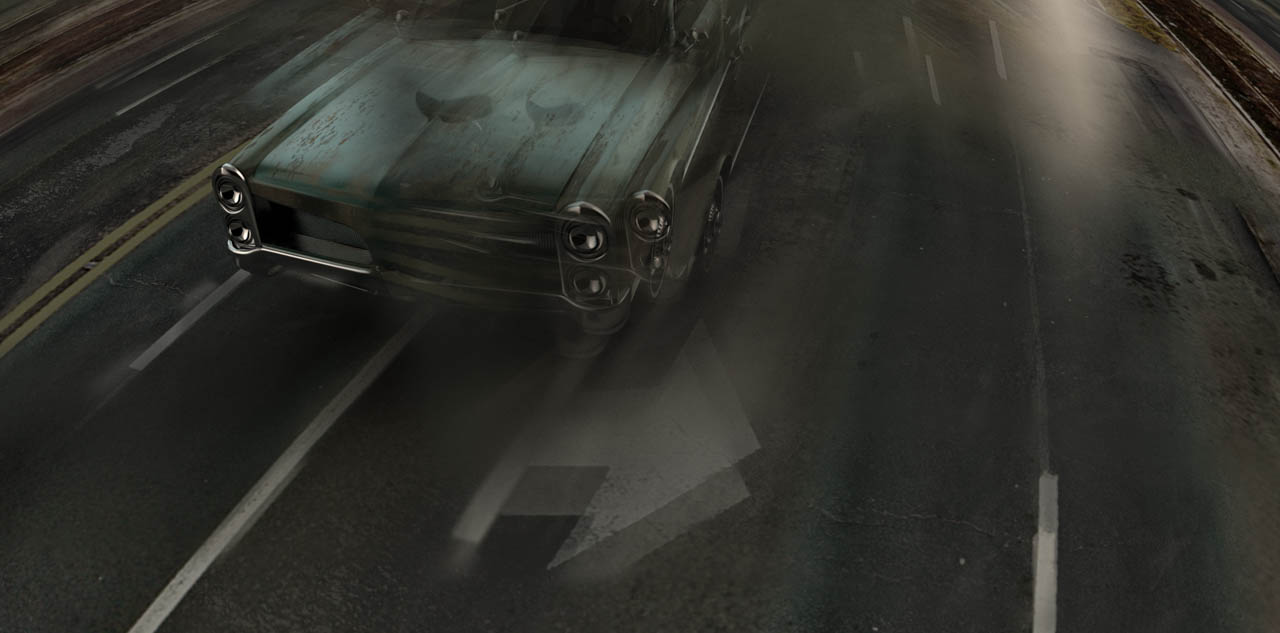
Lomography trick #3: Don’t Think, Just Shoot
Now when you have all Lomography gears rotating, try this.
“I keep a stiff upper lip
And I shoot from the hip” — AC/DC

Don’t plan your 3D render in advance this time. It means no sketch and no concept art.
You probably think, what the heck?
But ahoy, some lomographic cameras didn’t have viewfinders!
Because Lomography is about capturing the environment in here and now.Lomography is about surprise.
Do the same in 3D and you will be stunned by the results.
Waltz into the scene with your camera ready. And hit the render button over and over again while listening to Beatles. Though I‘d prefer Muse or maybe Ghost.
Let the whacked lens (all the rituals you followed through this tutorial) work its magic.
You may find really hot camera angles and unexpected compositions if you apply the motto “Don’t think, just shoot”. Because when you stay tuned to the here and now, you open a new perspective on lighting.
You open a perspective that is an aesthetic experience and surprise.
Over to You
Highest of fives.
If you feel that this Lomography tutorial will be helpful to someone you know, share it by clicking the buttons below this text. It means a world to me, because this way you help me to continue writing the Lighting Project.
The Lighting Project is a manifesto of a think-different approach to digital lighting.
This book will help aspiring artists to revolutionize CG lighting by embracing artistic weirdness and aesthetic perception.
And I’m excited to see your pictures with light leaks and other photo defects. Go ahead and post your wip or finished renders in the comments.

Jay
Looks very different from RAW ,, Grate
Sayan Mondal
This is definitely a great discovery , Gleb. But I’m afraid, it will be a great threat to computation and memory for Cycles. What are your system specs?
-S
Niranjan Raghu
Apologies for butting in here. You and I are on the same boat, bud. =) Laptops aren’t meant for heavy 3D work. But that’s not gonna stop me from trying this out, and it shouldn’t for you, either. Optimise, optimise, and then optimise once more.
Gleb Alexandrov
Yep! Have no fear.
I’ve burnt my laptop a year ago, and I don’t regret it. Laptops are shit for heavy 3D work indeed.
Btw, these shenanigans with lenses are pretty noisy, but we can handle this situation by using the Clamp. To some degree.
Sayan Mondal
How long did it take to render and what’s your specs, man?
BTW didn’t that realistic ice render (one of your previous renders) burn your pc already? 😛
-S
CrazyEngine
If you want to blend properly think about buying a good graphicscard. (Nvidia because of CUDA, AMD cards still aren’t completely suported)
It should have like ~3-4GB GDDR5 RAM. (Like GTX980 or GTX970)
If you’re doing lots of simulations in Blender (e.g. fractures, clothes, and so on) you want to have a good CPU, obviously Intel, something like a Xeon E3. 8Gb of RAM should be fine. Don’t you never ever save some money while buying the power supply unit, pls. It’s the heart of your computer and if goes nuts it could melt all the other neat hardware components into a cute ball of metal and plastics. (BeQuiet! E10 400/500W should be fine.)
All of this based in a good case with a proper airflow and boom, you can render the sh*t out of your scenes. 😀
If you want a detailed list of recommended components feel free to contact me. I’m a hardwarefreak. 😉
And thanks to Gleb, pretty cool tips on how to be hipster. ^^
CrazyEngine
Ah, forgot to mention that the graphicscard should have a good cooling solution. Never ever buy the normal version with the nvidia-coolingsystem. To understand what the best solution is, i would recommend you to look into some benchmarks/tests of your desired gpu. 🙂
Johnson Martin
I’ve been blending on a $200 laptop for 2+ years. It makes things hard, but it’s never stopped me. 🙂
Gleb Alexandrov
Martin, neither it stopped me 🙂 I made quite a few renders on the laptop, arguably the best ones including the zeppelins. But when it started to reboot every 4 minutes when using GPU, I felt the touch of evil.
Agreed. It’s possible to make renders even on a weak machine, but it’s much more satisfying to have a (semi-)powerful rig.
Johnson Martin
A powerful machine lets you focus on creativity in your art, not on how to make your computer run better. 😉 hehe. But it’s great to know that Blender can run on low-end laptops without problems. 😀
Niranjan Raghu
Hasn’t stopped me yet, either. 🙂 If it starts burning out, then I will consider setting myself up with a rig.
Jay
Most of us try s to make pic more parfect and realstic but in this case we need to make rubbish from our best one 😀
Niranjan Raghu
God, EVERY time I see your mail in my inbox, I get so hyped, and you always deliver. Stellar stellar stellar! Can’t wait to experiment with this, it sounds so awesome. T_T
Gleb Alexandrov
Niranjan, let’s hope that one day you’ll see the email from me, open it, and there will be… interstellar content! The moment of #b3d singularity.
Niranjan Raghu
I await that day with all my heart! 🙂
Niranjan Raghu
I just realised on my second read-through that I’ve always unconsciously been doing lens-whacking with my renders, and making glares and leaks where I think light sources should go. Now I can put a word to it (yey I learnt something today) and do more hipster stuff with it. Thank you so much!
Gleb Alexandrov
Way to go! I’m happy that it was helpful to you. Before writing this article, I had been doing ‘lomography’ things here and there without realizing it. And then I found that there is a huge cultural movement called lomography. It abuses lens defects, cheap cameras, light leaks and so on. Bang.
kropaman2
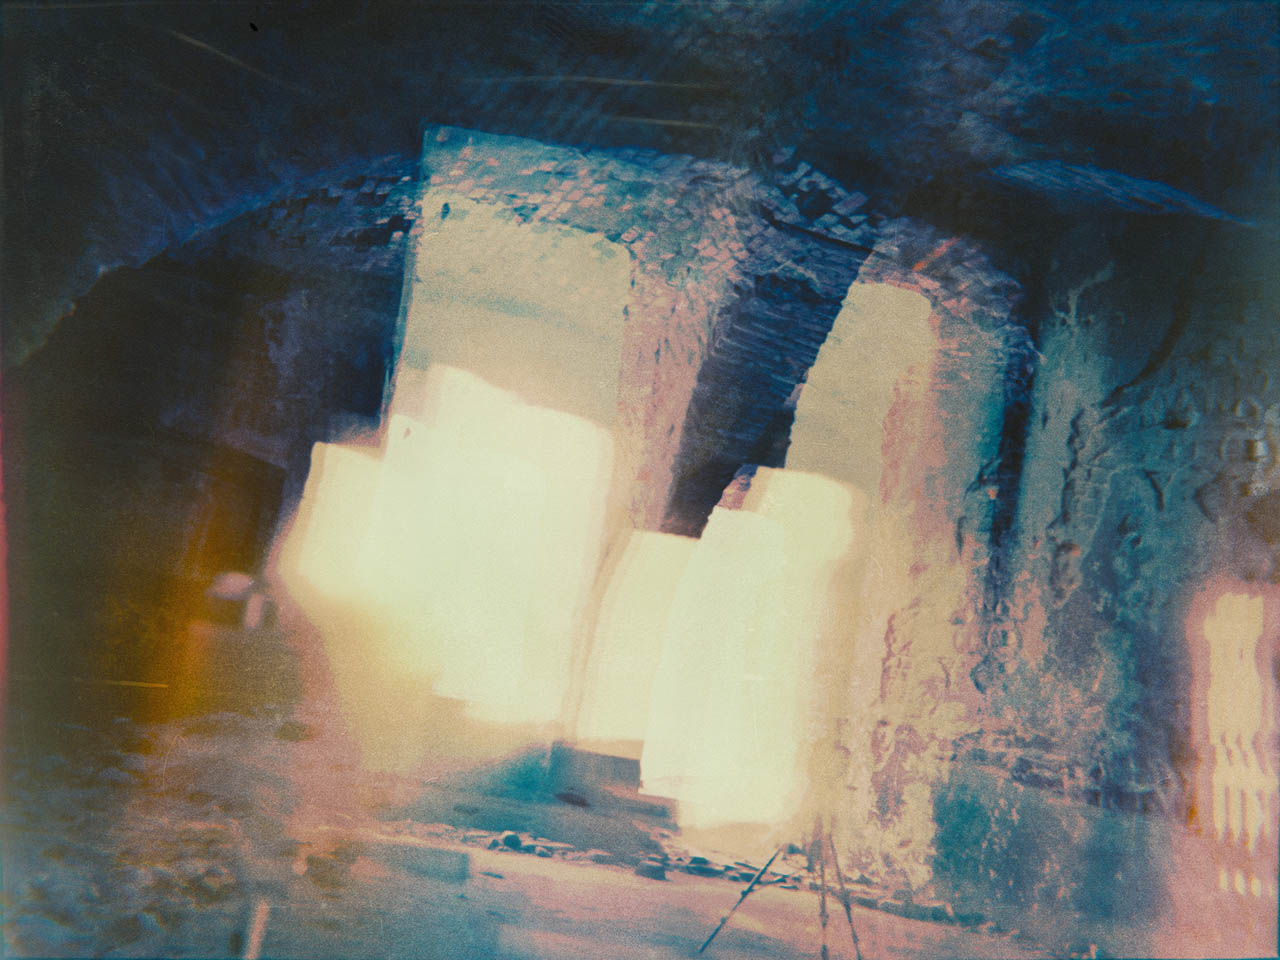
“Church of Light” by Gleb Alexandrov. Thank you!
Conrad Hughes
ZOMBIE QUEEEEEEEN
Niranjan Raghu
Hey again, Gleb. =)
Overstimulation? Lomography? Both? I followed my instinct on this one.
Niranjan Raghu
Also, I tried to find information on it, but couldn’t: is the doubling of image always a thing in lomography?
Tutehn
Lomography was originally done with the crappy plastic cameras that Gleb mentioned. Sometimes the film wouldn’t wind properly and you would have double (or more) exposures. Double exposures are an element sometimes found in this style but the real thing with Lomography is to just embrace all the mistakes and imperfections that the camera adds to your images instead of throwing out the photo as being ‘bad’
Gleb Alexandrov
Well said, Tutehn!
Niranjan Raghu
Thank you so much for explaining!
Gleb Alexandrov
Woah, amazing! At first glance I thought it was a painting or a photo.
Niranjan Raghu
wow, really? Thank you!
eknightGER
Just for the fans… Check on kickstarter, there is a project to rebuild a lomo after the old plans, quite exciting (and no, I am not connected to them ;-). I also like the pushing this photorealism nonsense over the edge, so it becomes art istead of trying hard. Will be interesting how the assumption of realism will change over the next years with hdri and raw filters taking out all lens distortions and abberatios :-))), as always great stuff, Gleb. Thx a million.
Yitzi Litt
Hello!
First of all, thanks for yet another awesome tutorial. I was inspired by it to make something fun in blender, although I turned out not using your lomography technique.
As you may or may not know, it is currently Chanukah, a Jewish holiday. Today, I was experimenting with a dreidel (“top” associated with Chanukah) model, and I came up with this interesting piece (the darker one).
Afterwords, I went back, and made a lighter version of the scene (the other picture).
I would love to know what you think of it, and perhaps which one you prefer.
Thank you!
-Yitzi Litt
Gleb Alexandrov
Hi Yitzi. I prefer a darker one! Here are my suggestions of how we can improve it.
1. aerial perspective
2. focal point (main objects)
3. color (make it brighter and more saturated)
Thanks man!
Yitzi Litt
Wow!
Thank you very much for the tips, I’ll try using them in the future.
Ivcota
Gleb, where do you get your music from? It sounds cool.
Unwary
Had a good whack for the scene going, shifted it absentmindedly, and could never regain it. It turned out okay though. Do you have any tips for the doubling effect? Two scenes, composited together? render it twice, and combine in another program?
Thanks for the tutorials.
Gleb Alexandrov
Unwary, I made the doubling effect in Blender compositor. Yeah, it is two scenes (or rather two angles of the same scene) composited together using ‘add’ mode.
leGordeau
Hi there!
Thanks for such inspiring tips.
Here goes my surreal attempt.
Cheers
leGordeau
Hi there!
Thanks for such inspiring tips.
Here goes my surreal attempt.
leGordeau
Hi there!
Thanks for such inspiring tips.
Here goes my surreal attempt.
Gleb Alexandrov
Haha, very nice surreal thingy! Thanks for sharing 🙂
wph4
I must be missing something. How do you get the double exposures? I’ve added several “lenses” with refraction and distorted them. It distorts the scene just fine, but I’m not getting any multiples or the double exposure effect. I’ve tried with the glass and refraction shaders.
Gleb Alexandrov
I got the doubling effect by mixing 2 renders (from different cameras) in the compositor (in overlay mode, with cranked up RGB curves on the second camera render). Hope it helps.
wph4
Thank you, yes that explains it 🙂 I’m more a photographer than 3D artist, so I really appreciate your lighting tutorials and your synergistic approach..
stefan m
I love the tutorials on this site, Gleb! I used to play around a lot with an old LC-A, a Holga and their plastic fish-eye camera (all lomo) and the results were mostly weirdly beautiful. Could someone explain to the noob that I am how to set up such a custom lens? Like basic shape (as I assume you put a transparent mesh object in front of the camera view) and basic material setup, I can probably figure out the details myself. I a mesh plane with simple glass material in front of the camera and then solidified it and deformed it. But I only got undesired results.. thanks, stefan