The Langoliers.
These scary little creatures devour today, when it becomes yesterday. Now think about the deep fog, covering your scene. Devouring it, like a Langolier.
Actually, that’s a pretty weak analogy. Why? Because the Langoliers just erase everything. On the other hand, fog creates the new world out of ordinary.
And while you’re scratching your head, I will strike with the next pop-cultural reference.
Silent Hill. When you travel from the ‘real’ world to bizarre dimension of Silent Hill, the first thing you see is fog. The fog (a simple change of lighting!) means that now you are in completely different place. Tete-a-tete with demons. Knee deep in the past.
Apparently, fog is not just an effect, or a mood. It’s a massive creative force.
And it’s an aesthetic experience, more than anything else.
You can create the new world just by introducing new lighting conditions. Just by adding fog.
4 STEPS TO UNLEASHING THE CREATIVE FORCE OF FOG
I bet you have experienced in your life, how fog makes everything strange. I feel this estrangement myself every time I happen to be standing in the fog.
But how to translate that feeling to computer graphics?
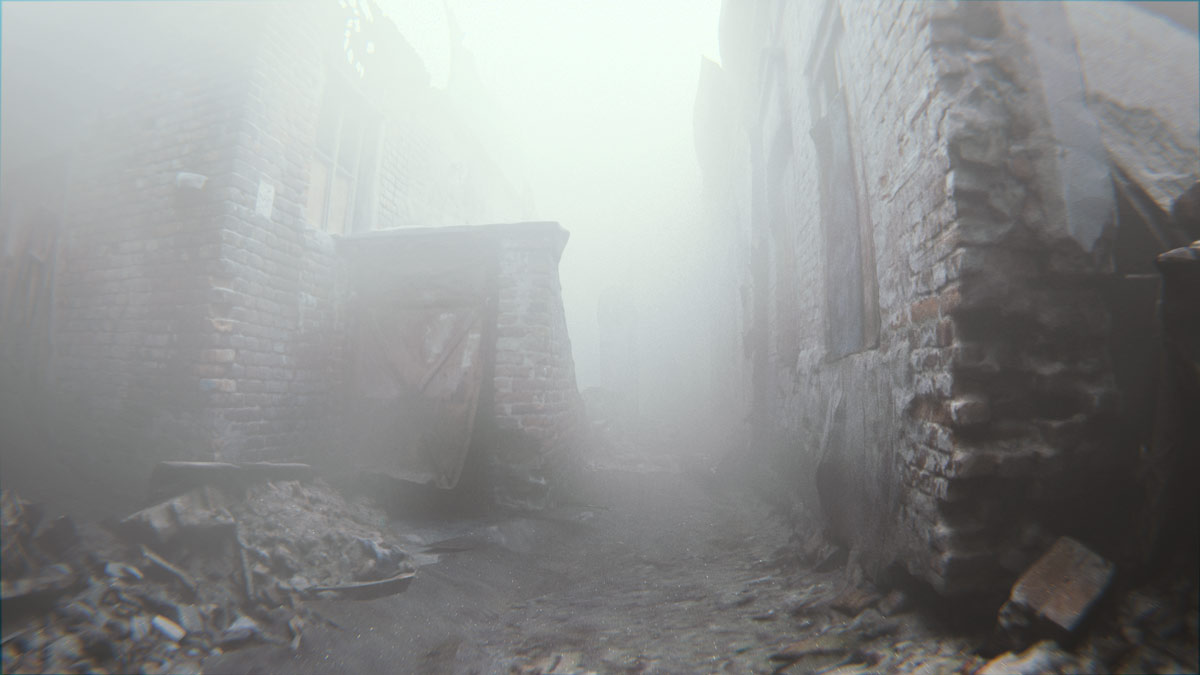
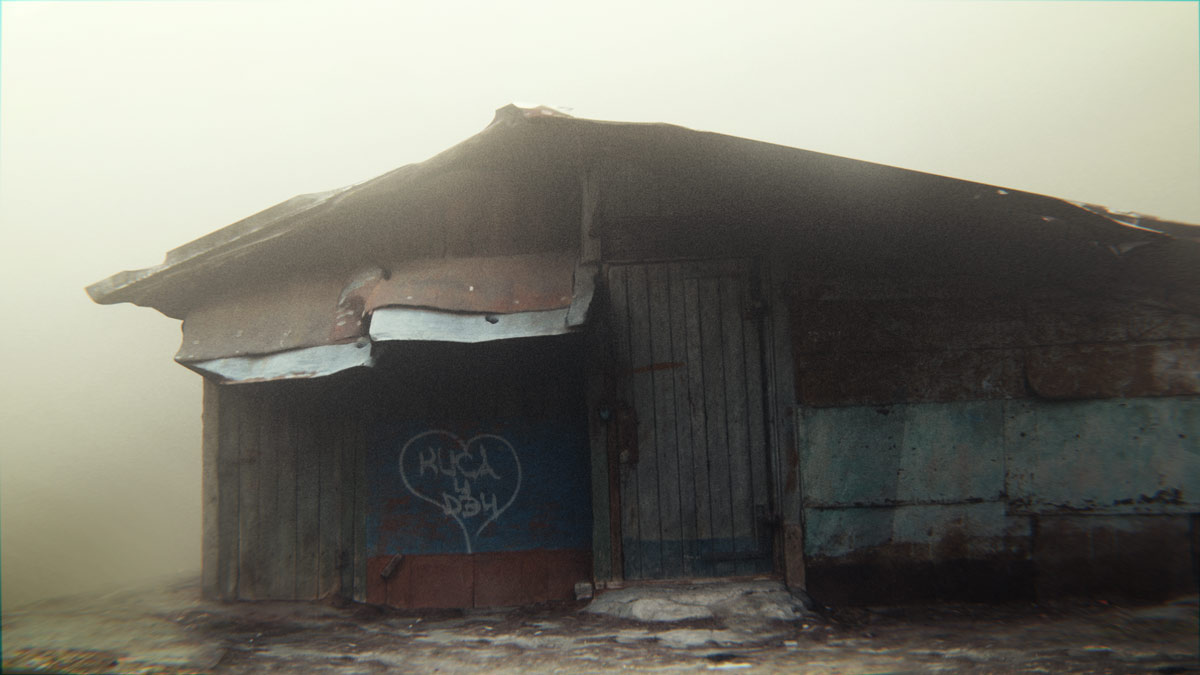
While I was trying to recreate that elusive feeling, I captured a few photo scans of Brest. Abandoned buildings (that doesn’t exist anymore), a creepy part of the city.
I thought that if I convert them to 3d models and then add fog, I will capture that feeling. From the beginning I felt that the lighting is the key.
Here is what I learned.
After following these 4 steps you will turn ordinary into mystical, and mystical into awesome. I’m pretty sure about it.
1. Forget About Form

2. Isolate the Subject

3. Give Substance to Light Using Thick Fog

4. Let Your Lighting Come From Everywhere
STEP 1. FORGET ABOUT FORM AND CLARITY FOR A SECOND
How many times you wanted to move away from the light-reveals-the-form paradigm? Today is the good day to forget everything you’ve learned about making CG.
They say, lighting should reveal the form. They say, best lighting is the side lighting to some extent.
Not so fast.
What if you don’t want to follow these rules? And you want not to reveal, but to hide your world from others. You can absolutely do it by hiding everything in the thick milky fog.
Sure, nobody will appreciate the masterful texturing, modelling or whatever. Fog will devour the outlines, the shapes, the colors. The only thing that will stay is the lighting. The lighting, suspended in the air.
But still, you have the right to do what you want with your worlds.
So use your chance to think different. Forget about form.
See how fog devours everything.
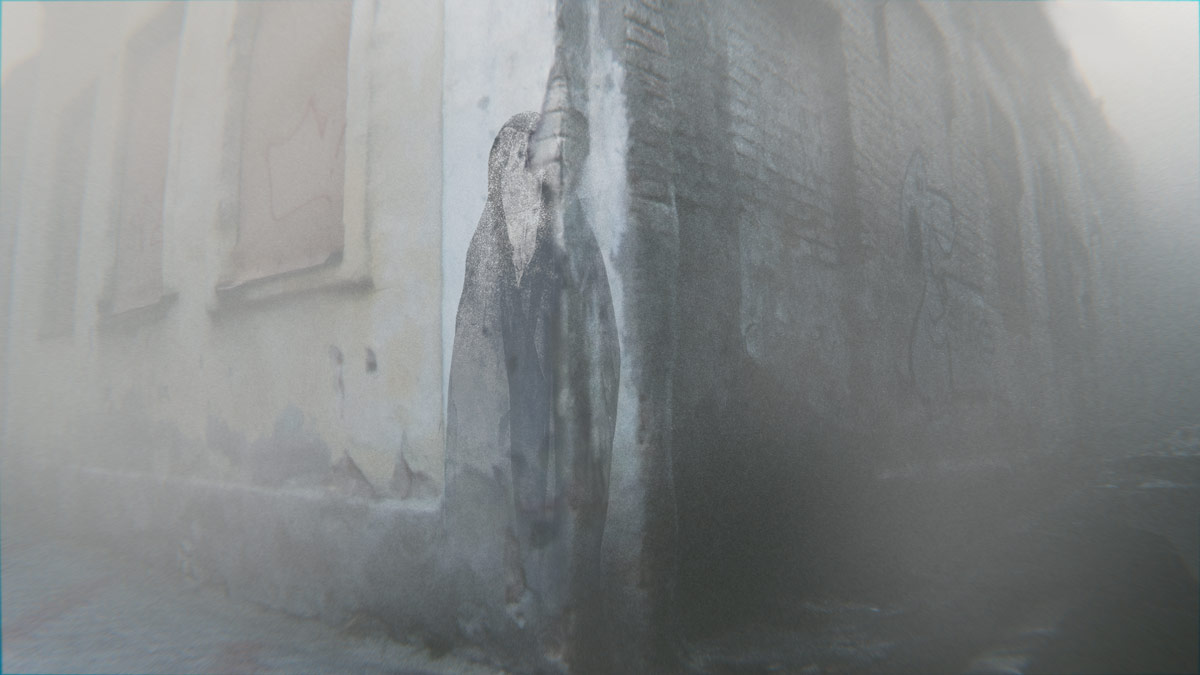
STEP 2. ISOLATE THE SUBJECT FROM THE REST OF THE UNIVERSE
In the 1999, the creators of Silent Hill game decided that the town will be covered with fog. The reason behind it was very prosaic. Unsurprisingly, the game consoles of the time weren’t fast enough to render everything in view.
But I think that the real intention was to take away all the garbage. Do the same and you won’t be disappointed.
Now Silent Hill visuals is considered to be a classic.
Isn’t it because the minimalism is actually a cool thing (not speaking about Pyramid head here)? Minimalism helps you to drag viewers’ eyes to what really matters.
Think of the fog as a screen, that can isolate the subject. Drag viewers eye to subject.
Tip: Minimalism is sexy
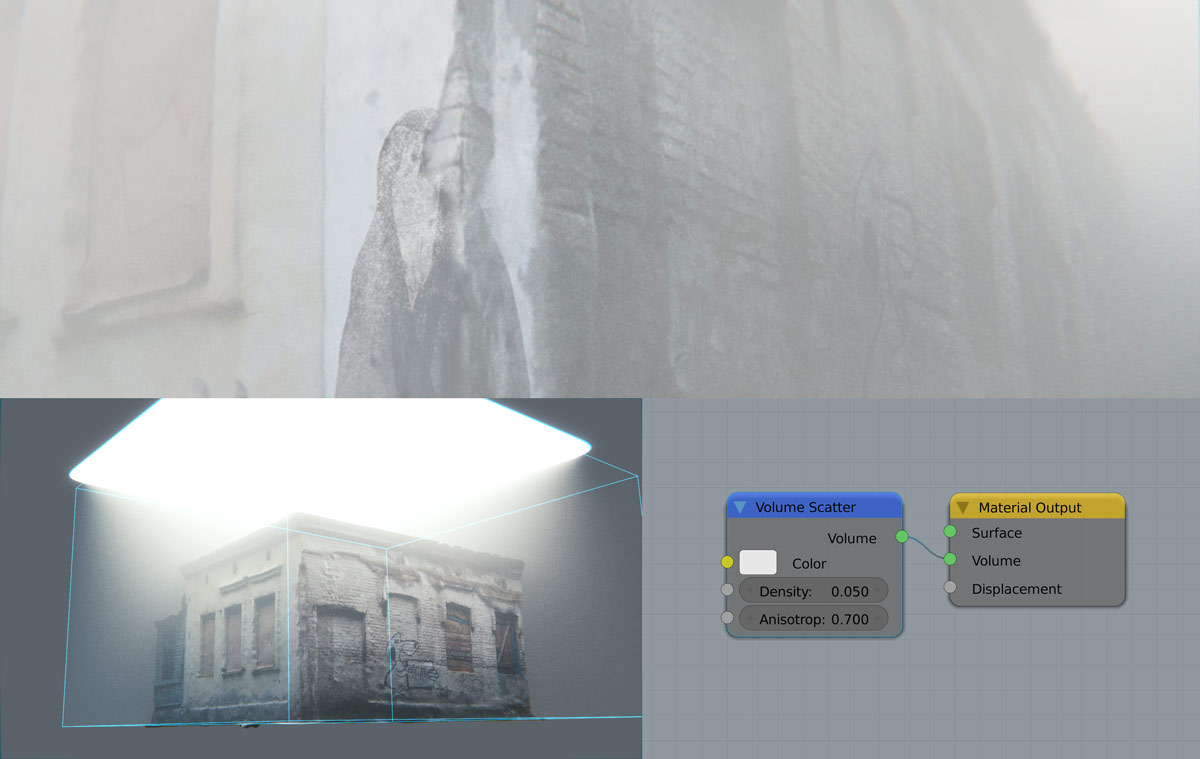
STEP 3. GIVE SUBSTANCE TO LIGHT, USING THICK FOG
Fog kills the sense of direction.
But in exchange it gives a substance to light. A body.
Imagine an invisible person, standing in the rain. The streaming water reveals the outline of a hat, a coat, and a suitcase. That is similar to how fog works.
Now look how fog particles trace the light. If you place a small lamp in the fog, it becomes a large glowing sphere. Or maybe it becomes a cone of light.
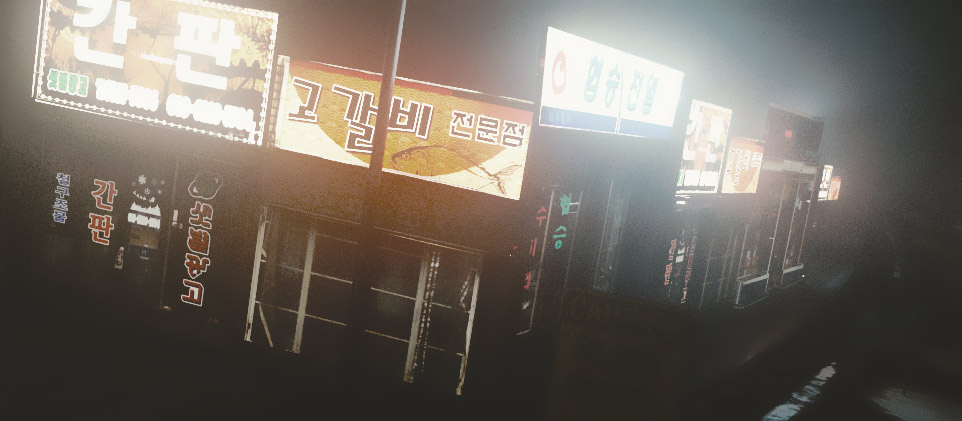
The real fun begins, when you use the bright colored light sources. Dozens of them, like on a night highway.
And you will end up with having a story, told exclusively by light.
Isn’t it freaking awesome?
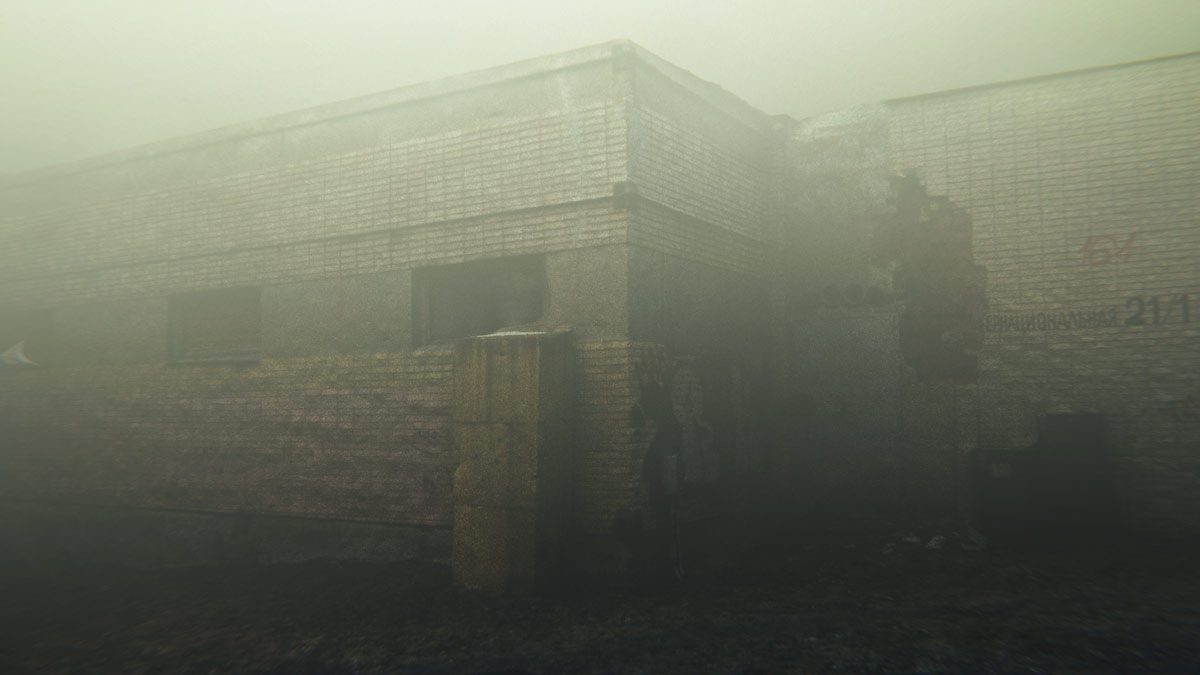
STEP 4. LET YOURSELF FREE. LET YOUR LIGHTING COME FROM EVERYWHERE
Direction, quality, direction.
Lighting should reveal pretty details, they say. Good lighting should have a direction. And you’d better develop a strong sense of directionality.
And huh, don’t you love the side lighting?
Side lighting helps you to showcase microscopic changes in roughness. Tiny bumps. It helps you to sell your texturing skills.
But let me put it this way: let yourself free. Let your lighting come from every direction at once.
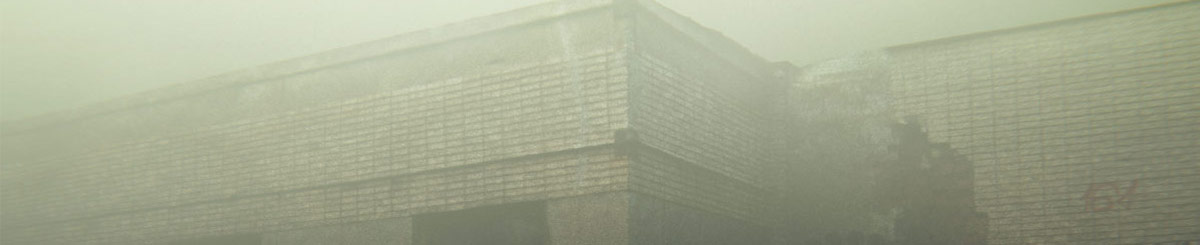
Fill your ghostly town with fog and see how it scatters the light. Imagine that you use a huge soft-box.
“The sun can’t penetrate a deep fog layer, so the light reaching the ground seems to come from all directions.”
James Gurney
All directions sounds awesome.
Try it now and you will be amazed at how cool is the ambiance.
START BRAINSTORMING YOUR NEXT FOGGY IMAGE
Now it’s your turn to go to Silent Hill.
Go ahead and start brainstorming your next foggy image idea. Maybe it will be a boat in the middle of the ethereal river. Who knows.
Just make sure to share it with the world, when it’s done.
THE LIGHTING PROJECT
The Lighting Project is taking shape and personally I’m super excited about it.
I really appreciate your help with promoting this project and I want to say thank you to each one of you. If you want to take this open project even further, feel free to spread the word about it.
- In your social media
- By clicking these fancy social share buttons below and above the post
- By talking to people
We can do it together. Together we will make an incredible book about lighting for digital artists (and nerds!).

Gremllin
awesome!!!!!…. is the models in the first scene low poly game assets
thnx for tut
Gleb Alexandrov
yep, it is mid poly asset, that can be used in game. Obtained by photogrammetry, using Agisoft photoscan.
Piotr Morga
Hi everyone. Last night I thought a lot about IES lighting which in some situation – colud be very helpful. For me IES lighting means individual “light print” which provide most of source light. It could be very valuable topic for all of us to create article about it . Bay the way, I would share with you blender users some simple render test which contain IES lighting usage.
Piotr Morga
Here you are
Gleb Alexandrov
Hi Piotr, how did you make those IES? Is it Blender Internal?
Piotr Morga
Hi Gleb yes you could import IES lighting straight to blender, but you have to have Add-on “IES to cycles”. The big disadvantage is poor control abilities in blender ( only adjust strength and temperature of the light- during importing). Tomorrow I will sent you and another people same custom shapes created by me. You could also find some IES light library straight from light producers.
Piotr Morga
I appreciate your open lighting project. It could be big thing for community. I think we should use some purposeful lighting technique for better control and faster retouches stage.
Piotr Morga
I have some light tip for all of us. In cycles we could control our light by using: strength, tinting, light falloff ( node section) but we could also control by using Ray visibility in certain object section ( glossy, transmission, diffuse light influence on that kind of surfaces).
Piotr Morga
It really helps in some cases. Gleb, I have some question to you? Have you any reason to use such big strengths values in emission shader slot while you’re using some image in color slot to determine its “shape” ? Are you using some HDR images to recreate accurate representation of the image ?
LABAI Grieztas
thanks, as always, in the top!
Alex Kelly
Cool. Why did you use a box volume shader and not world volume? I did a couple of test renders to see if there was any difference. Credit to lucasassone on Blendswap for the scene models.
Fendy
why both fog have different result?
Alex Kelly
Not sure I guess the volume scatter shader acts differently across the world compared to a box? The other thing is I used a slightly different node setup to reduce noise on the world volume it obviates the need for indirect/direct clamping.
Jojo Tkrem
The difference between world and box is, that when using World Volume
you cant use World Lighting and Sun Lighting since they come from
infinetly far away and get absorbed.
Alex Kelly
Yes true but i didn’t use world lighting or sun in those renders both used emitter object plane only.
Domenico D'Alisa
Hi Gleb, how do you set usually heavy fog in scene like this?
Always a cube with volumetric scatter or even using world setting?
I love fog but when i try to raise the density the material of all the other objects in the scene looks like plastic, don’t know why…
Reynante M. Martinez
“Minimalism is Sexy” Awesome as always, Gleb! 🙂
– Reyn
Gleb Alexandrov
Thanks, Reyn. Lately, I try really hard to keep production time at bay ) But minimalism demands a lot of work, hehe.
Alex Kelly
Got that Monday morning foggy feeling again?
Gleb Alexandrov
Feels like a morning, indeed 🙂 Nice!
Yulia Kalashnikova
a new post with illustrations! Gleb, you certainly manage a lot! Could you tell us a couple of words on your “daily routine”, as Andrew Price puts it. Is there a key to such productivity?
Gleb Alexandrov
Yulia, my daily routine is basically just struggling with procrastination, spreading myself too thin across many projects at once. But sometimes I manage to concentrate efforts on doing just ONE most important thing. And that is the most productive mode.
So I would recommend to prioritize things that you should do, and concentrate on doing 1 thing.
Michel Rochette
I live near a river and sometimes the fog is so thick that I can barely drive. Will take a few pictures of the downtown next time and see what I can do with Blender. Thanks for the share Gleb.
Gleb Alexandrov
Sounds fantastic. I’d love to see these pictures too.
Gremllin
awesome tut again love the project X)
rickles13
Trying for a foggy…..eerie look
Gleb Alexandrov
Wow rickles, that looks sinister and cool! 🙂 Very disturbing tint of green (in a good sense).
Bloyd
Hey Gleb, I just tried out this tutorial, but I wonder how many samples I should use for a clear foggy render.
because I tried to make a similar scene witth the picture where you show the setting of volumetric scattering, but even if I got over 2000 samples, my scene is still noisy… am I missing something?
after I see beautiful feedbacks in comments, I wonder why I could not achieve something similar..
please help 🙂
thanks advance.
Hakkı
Niranjan Raghu
I find myself coming back to your articles for refreshing my memory! This is what I’ve got in my head. It’s a shot from Panta rhei. I hope your tutorial + my laptop not crashing can help me achieve this!
Gleb Alexandrov
Unfortunately, laptops can be very unreliable. I literally burned my laptop while doing this kind of stuff 🙂 Hope that yours will be fine. By the way, I like the concept!
Niranjan Raghu
Thanks! Time to cheat with Mist, I think, if I can’t get it to render without noise. 🙂
anonymous
Awesome tutorial. I think AAA games uses photoscaned model for their cool graphics.
Where i can get this tutorial blend file for educational purpose.
Pingback: Lighting Tutorials and the Book by Gleb Alexandrov • Creative Shrimp
Pingback: Lighting Tutorials and the Book by Gleb Alexandrov • Creative Shrimp