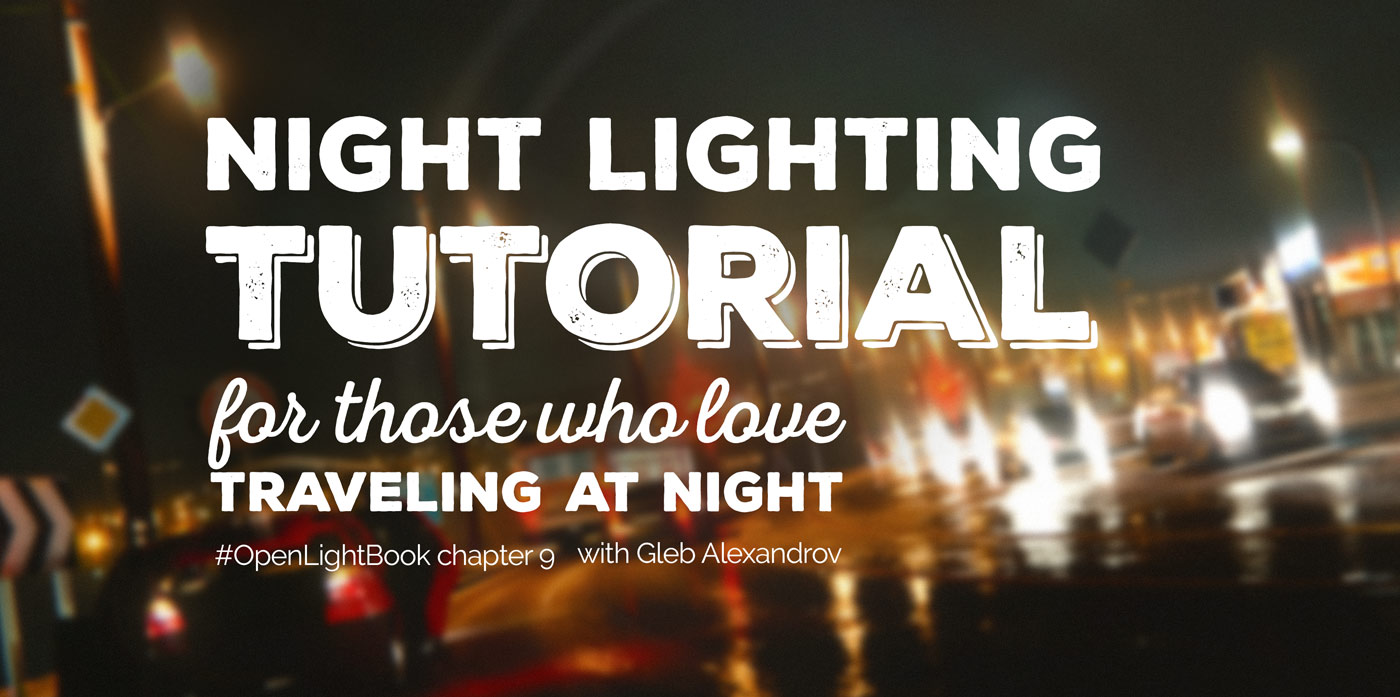
When you go by car from Amsterdam to Vilnius, tired and sleepy, it’s not easy to notice how captivating is a night highway lighting. Really, I am speaking from my experience of night travels. The last thing that comes to mind is that you see an awesome lighting, created by traffic.
But what if you actually start looking? Start looking like you just saw the road for the first time in your life?
You will discover the weird world full of light. You will discover rhythm. Blazing trails. Infinite motion.
Night highway with a flickering motel sign is an inspiration for Steven King. Movie makers, from Alfred Hitchcock to Steven Knight, love depicting road too. Just remember the recent Locke film.
In this tutorial we will talk about the unique lighting scenario of a night highway. For an artist, night highway lighting is a huge discovery. That discovery will help you create your own night and your own highways.

LEARN THE BASICS OF THE NIGHTTIME LIGHTING
Night lighting is a very complex visual experience. Let’s break it up into few smaller experiences. For example, for me the night road lighting is:
- The trembling fireflies of traffic
- Rhythm, created by lamps, cars, shops and billboards
- Blazing trails when you take photo using a long exposure

- Bursts of light, refracted by the raindrops on the windshield
- Dim lights of distant city, forming the glowing chain
Focus on these things one by one, and after reading this article you will have a new set of artistic tools at your disposal.
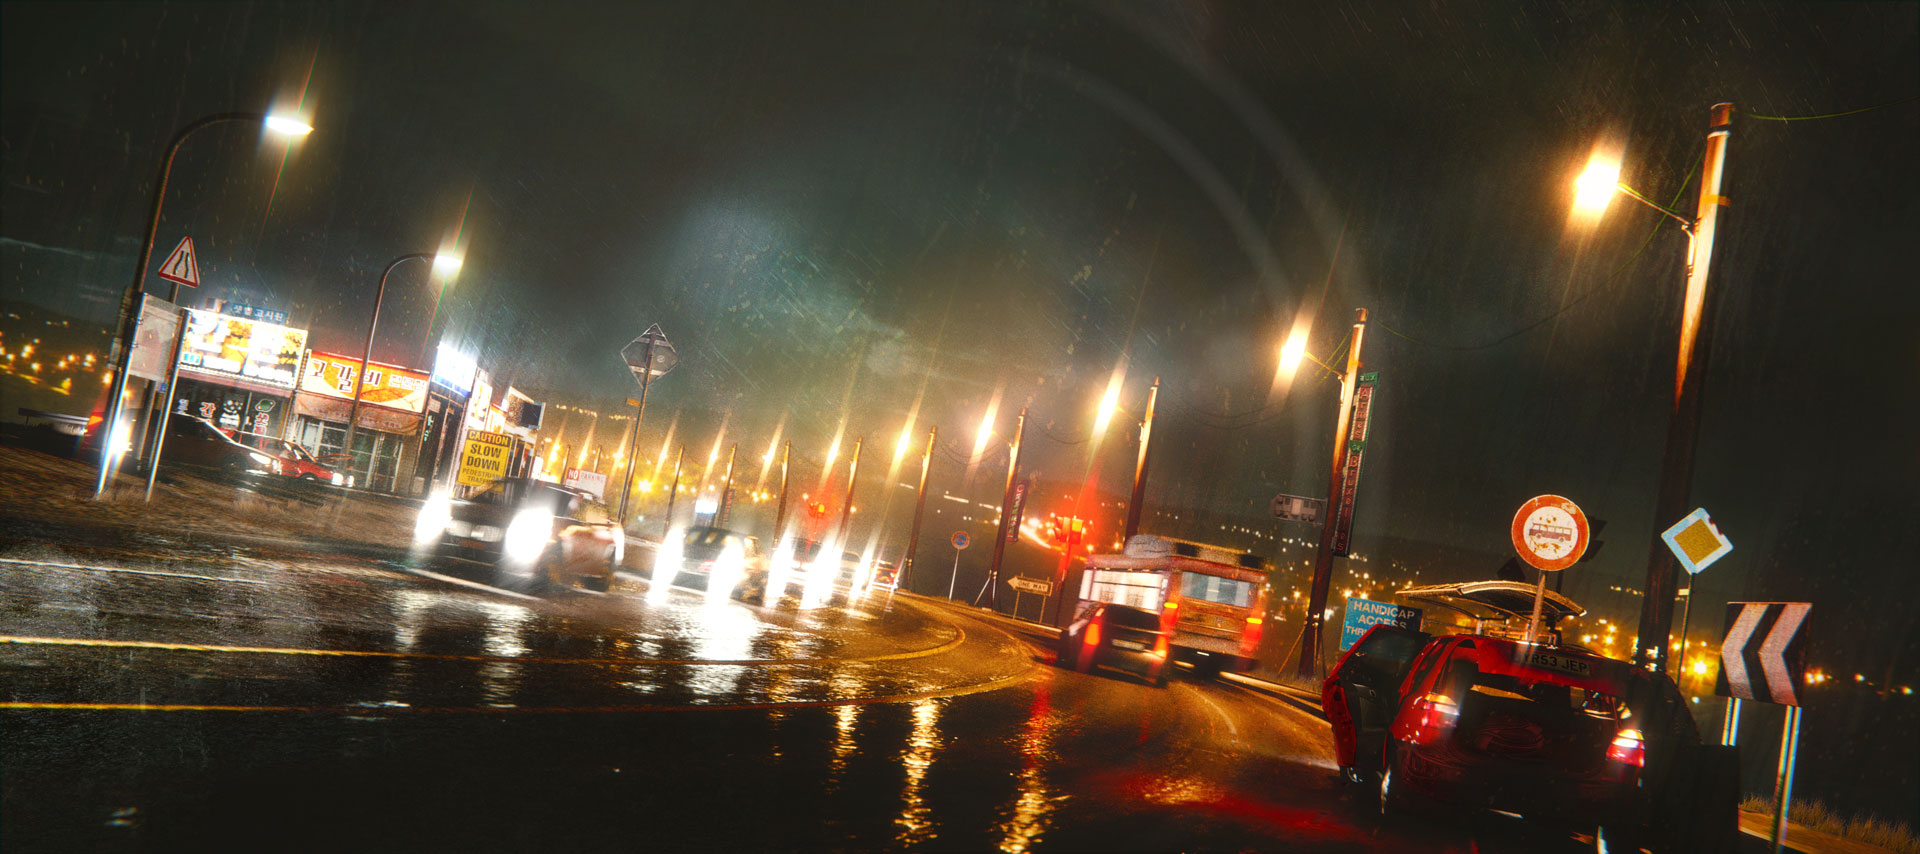
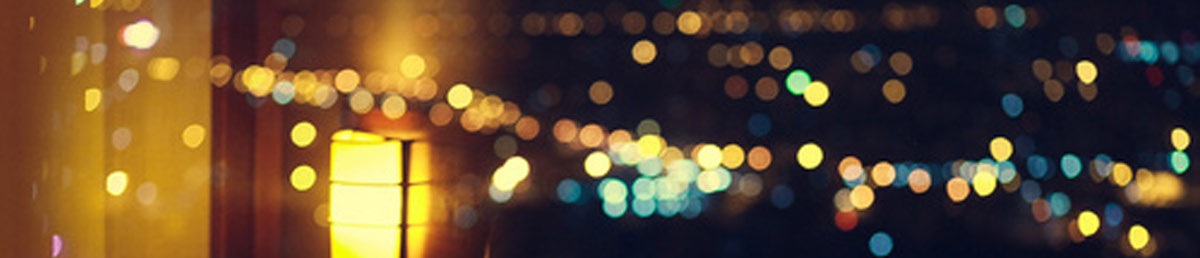
1. CREATE THE FIREFLIES. DOZENS OF THEM
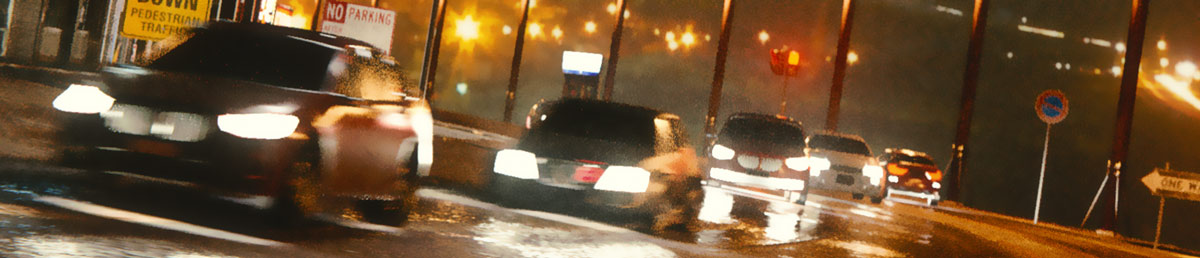
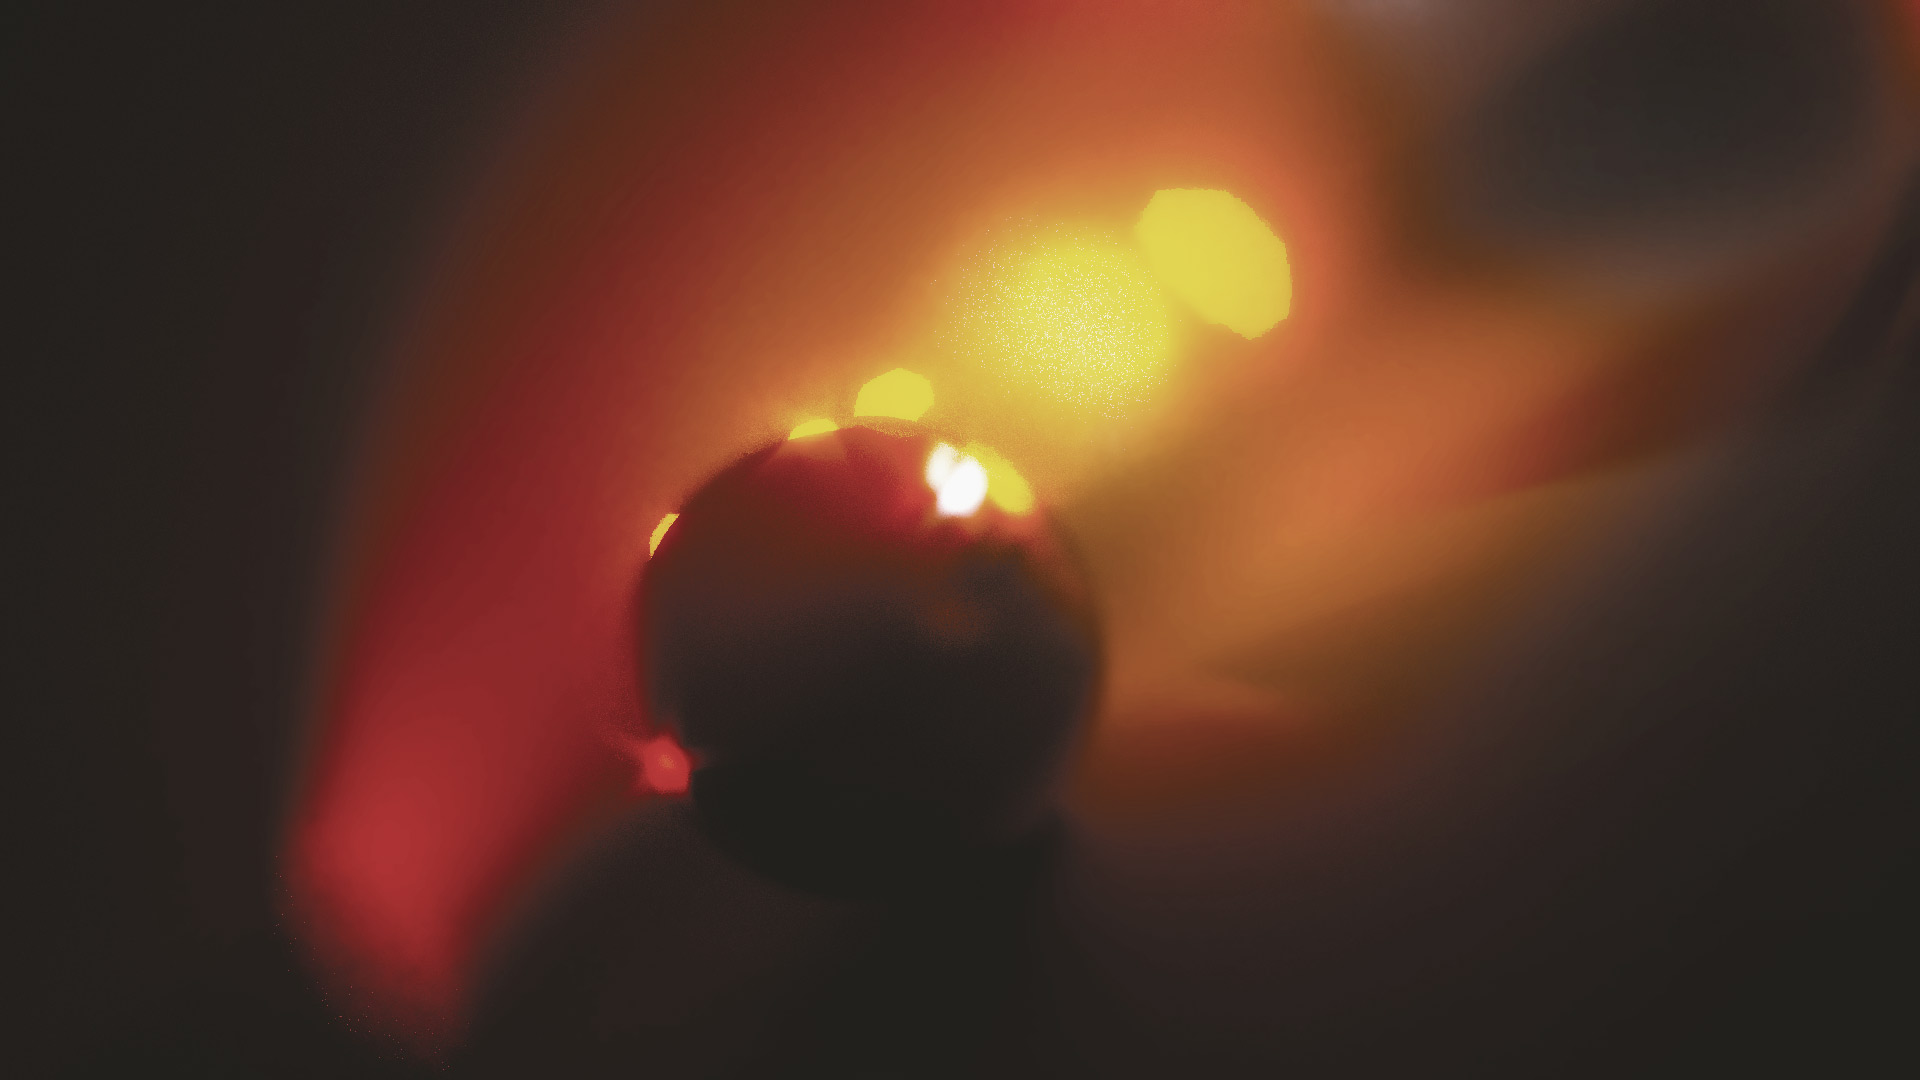
Night highway looks almost as if it’s swarming with fireflies. Dozens of fireflies. At times, these tiny light sources appear to illuminate only a tiny area around them. Often, their light appears not to hit anything at all.
Often, they are prominent only in reflections on the wet asphalt as well as on the car paint. As if it was a hallucination of a tired mind. Drifting splotches of color.
Now compare it to a day lighting. During a daytime, you see only one dominant light source, plus the softbox of the sky. On the contrary, the night throws hundreds of small light sources at us.
If you want to create an awesome night highway lighting setup, be ready to handle 10, 20, 100 light sources. Tiny, sharp, and overly bright for sure.
Look at the picture, it features 52 light sources. Plus 200-300 if we count distant city.
Day: 1 dominant light source and a soft fill
Night: Dozens and dozens of light sources and only a hint of a fill
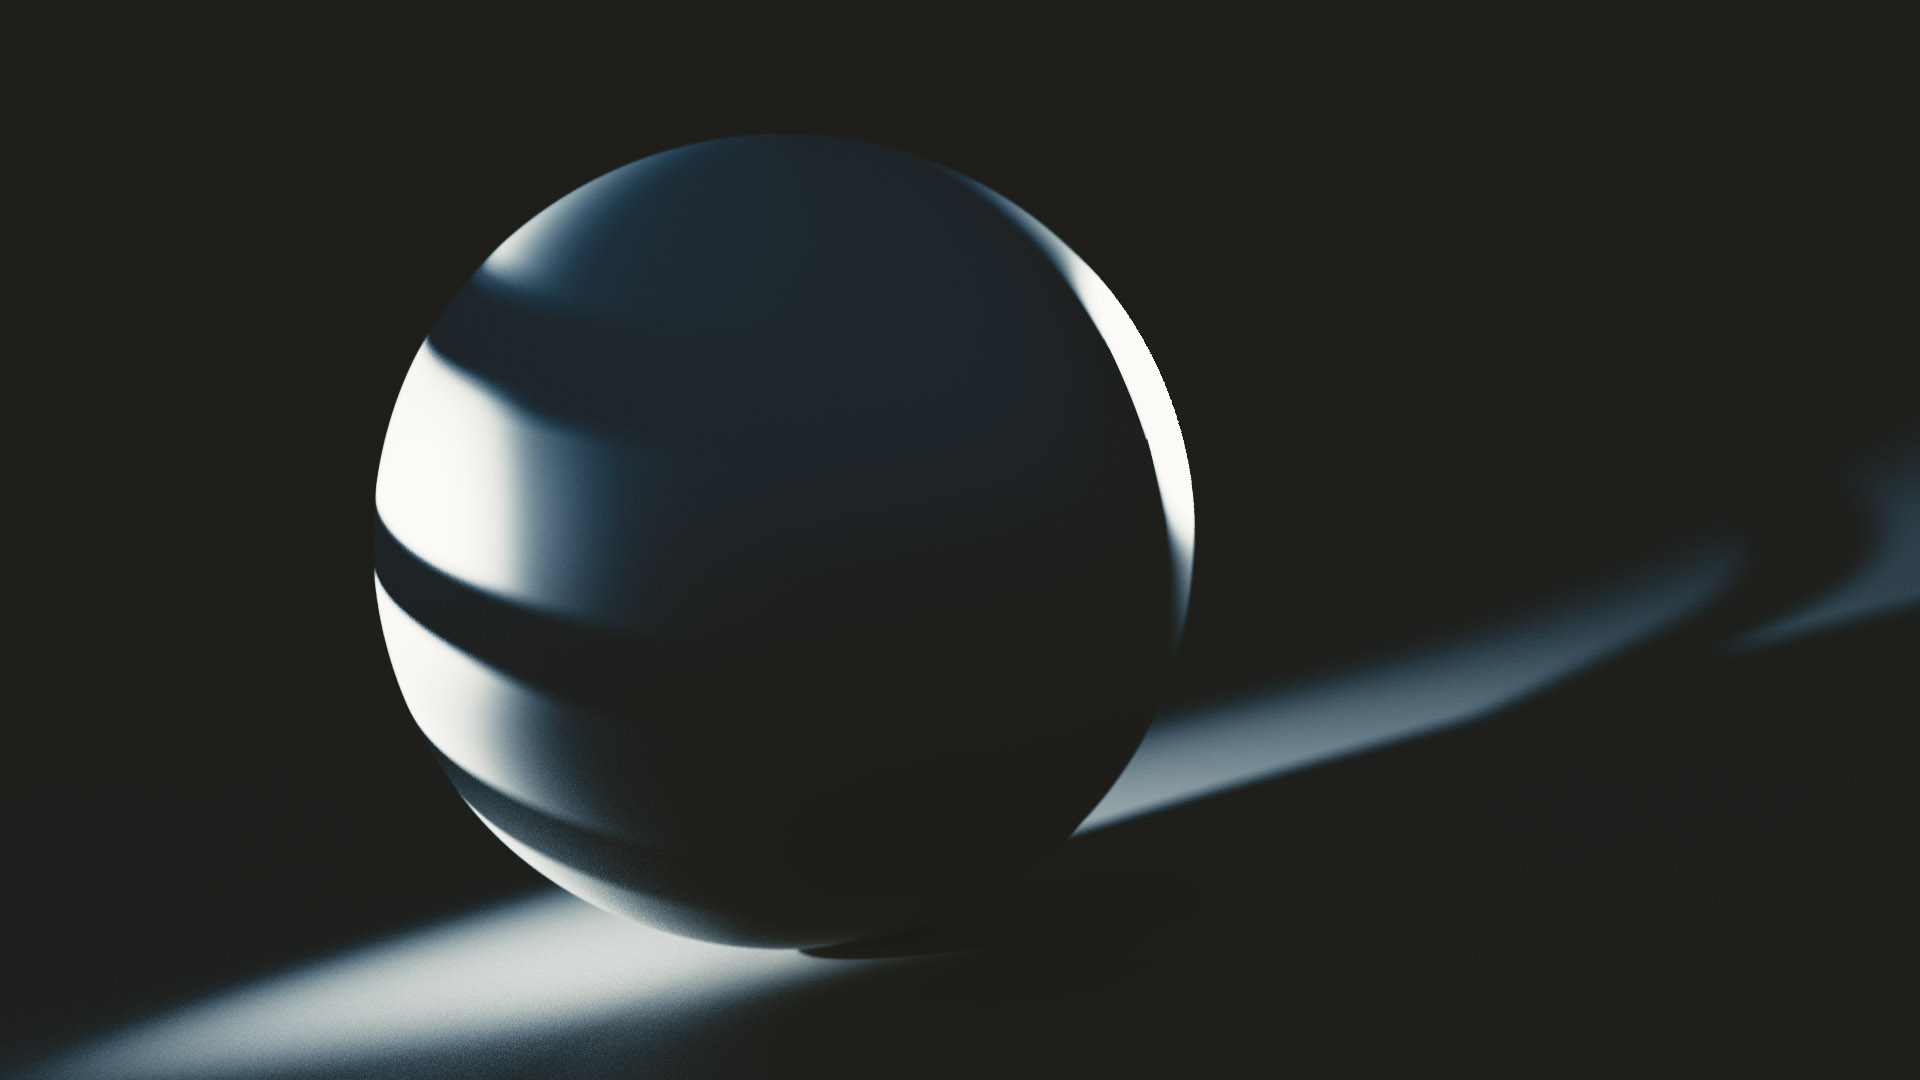
2. THROW AWAY YOUR SOFTBOX, WHEN RENDERING NIGHT
Have you ever noticed that night doesn’t feature soft lights? As the lamps are small, and the city is nothing more than a distant glowing chain, the shadows are very hard.
Why? To wrap around the objects light needs to be emitted from a big surface. Small surface means focused, hard light.
Hard light reminds me of Film Noir (check the tutorial about Low Key Lighting to know what I mean).
If you love photography (and love using softboxes), this kind of lighting probably drives you nuts. It isn’t flattering by any means. Especially when you consider the fact that often it is a lighting from below.
Sure, billboards can be reasonably soft, but who cares.
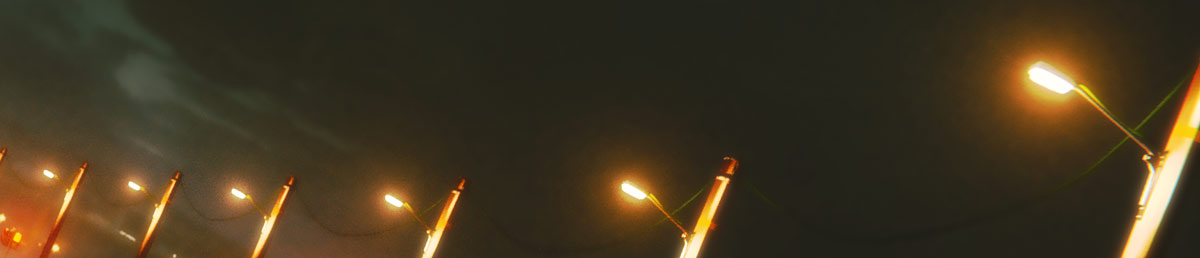
3. USE RHYTHM
For me, rhythm is what makes me feel so excited. It makes me watch the swarms of lights passing by, like you watch the movie.
If you look carefully, you’ll notice that lamps are placed over the fixed intervals. You’ll notice that the cars in a long traffic queue move at the same speed. You’ll notice that the distant city is not totally random.
After that shift, you start to see rhythm in this chaos. And you should know that rhythm is what makes a great composition. Not only artists ranged from Van Gogh to Andy Warhall to everybody else played with rhythm.
CG, motion graphics, visual arts, architecture use rhythm like there is no tomorrow (hey, Beeple!).
So should you. Focus on rhythm, when looking at the night highway. After all, it’s a freaking amazing opportunity to do so!
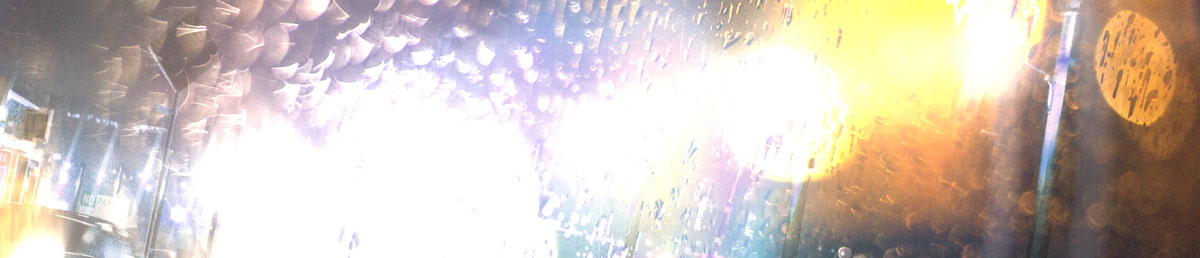
4. SPICE IT UP WITH THE LENS FLARE
As a maker of art you are capable of seeing the defects, such as lens flares, as a part of the experience.
When light is refracted through the dirt windshield and then passes through the lens of your eye, you see an overwhelming lens flare. It often looks like a streaks of light, stretching into different directions. Sometimes, it looks like a quasar: a huge vertical ray.
I understand that when you are going by car from point A to point B, the flare is a huge nuisance. It blinds you and makes your grip the steering wheel. But anyway, embrace the flare. You will see that it’s a big part of a night aesthetics.
And if you want to simulate lens flare in Blender, be sure to take a look at GLFlares on Blendswap. After Effects peeps should already know about famous Optical Flares plugin by Video Copilot, so I won’t put a link here.
Stupid Tip #1: Use lens flare defect as an artistic tool
5. ADD THE AIR. MAKE YOUR 52 LIGHT SOURCES GLOW
If you want to recreate the night highway in 3D (or in your imagination at least), don’t forget about the atmosphere.
In the real world the air is thick. The light rays are scattered by a billions of water particles, gases, small bits of debris and other stuff.
Add volumetric scattering, and you will get the pools of light. You will get the multicolored fog in your scene. Should I say that with fog, everything looks better?
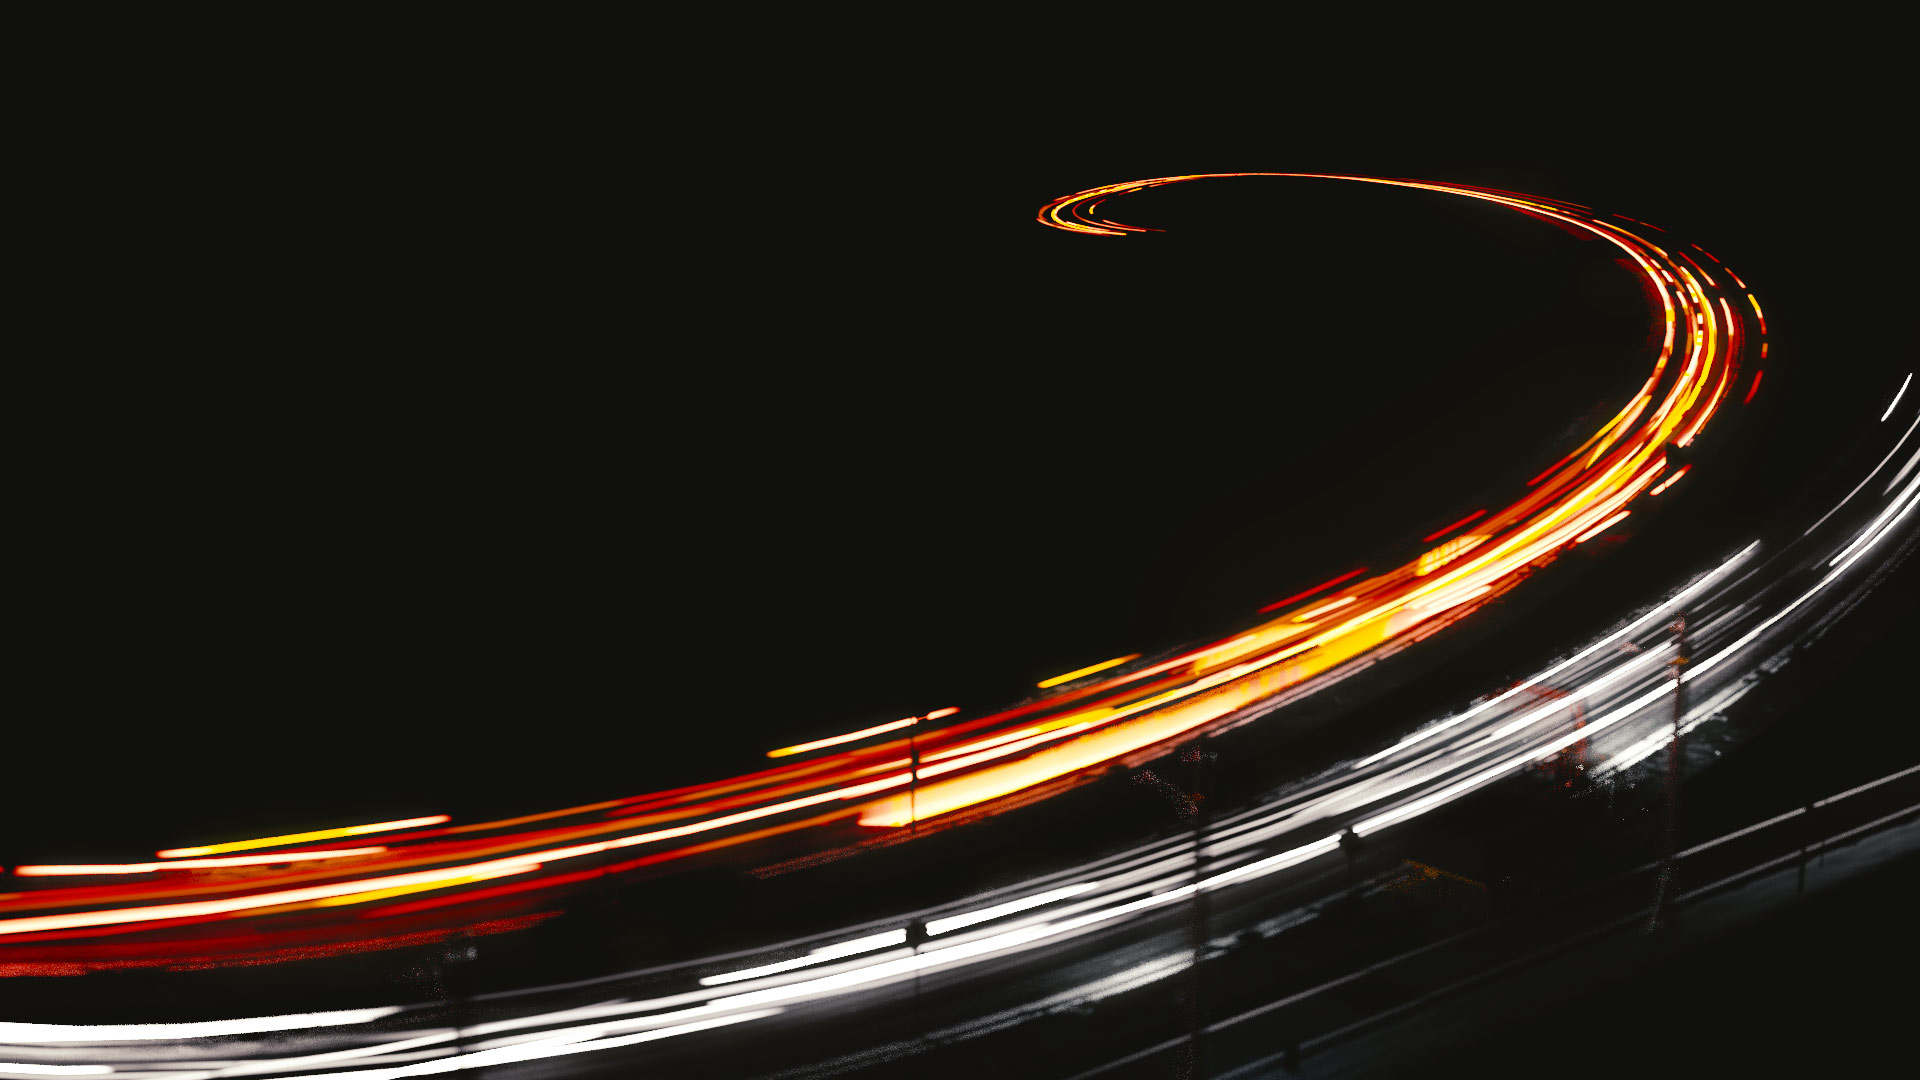
6. CREATE THE TRAILS OF LIGHT (FAKE SLOW SHUTTER EFFECT)
As the light sources are moving fast, they are leaving trails of light behind them. Perhaps that’s just a visual inertia, but what I see in these trails is the time.
The time, full of motion. Even if you capture it in photo, or create a render, the time is still there.
So when you approach some setting, that involves roads and lights, add motion blur and move some parts. Create the trails of light. Like your scene existed long before the frame was rendered.
Stupid Tip #2: Fake light trails using splines with emissive material
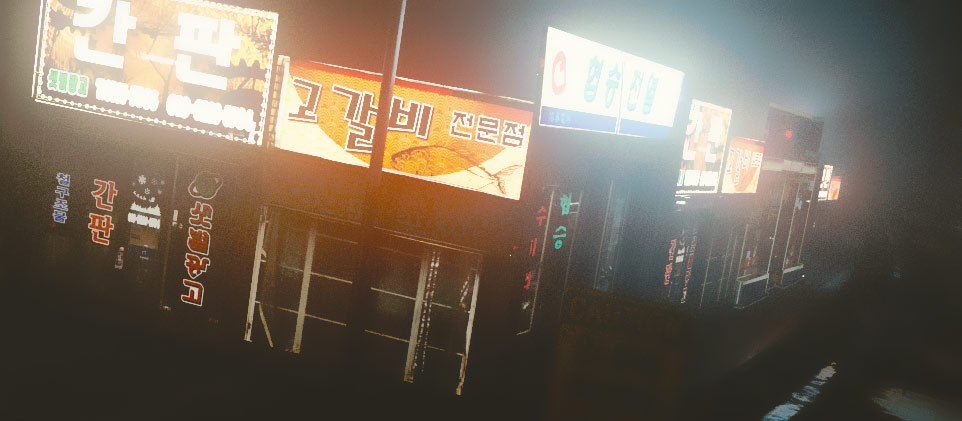
7. GIVE YOUR LIGHTS A COLOR: FROM WHITE HALOGEN LAMPS TO GREEN LED PANELS
Seen on a black backdrop, night highway is full of color.
Color comes in burst and splotches. Ranging from bright white halogen lamps to dull green LED panels. To illustrate this point, I want to show you short movie, created by my friend. It’s featuring a bus, shot in Vilnius at night.
Notice how vibrant are colors: red, cyan, orange point lights all around you.
YOU HAVE THE PIECES OF THE NIGHT LIGHTING PUZZLE, NOW SOLVE IT!
Also, while you are watching it, recall everything you know about night lighting. Imagine each aspect of the night lighting to be a piece of the puzzle.
Fireflies and rhythm, hard shadows and theatrical lighting. Atmosphere, trails of time and bursts of color.
If you are on the same page with me, you should be able to solve this puzzle.
Now go ahead and create your own night and your own highway! You can use any 3D package, as long as it is Blender. Or just take a camera, then ask your friend to be a driver, and … you know what to do.
Share with me you photos/renders/paintings that depict a night time scene.
Let’s talk about it 🙂 You can as well use a hashtag #AskGleb on Twitter to ask me any questions.
FURTHER WATCHING FOR NIGHT LIGHTING
To get the feel of the night lighting even more, watch Locke film, starring Tom Hardy. You won’t regret it, I promise. This movie is about life that are moving past you at the speed of 180 miles per hour.
Locke inspired me to write this article.
And while you are downloading Locke from torrent, I want to say thank you for reading and commenting. I appreciate you so much.
LIGHTING OPEN PROJECT: Share Your Thoughts
This project is my way of writing a book, with your interest and support.
Every week I publish the tutorial, touching some aspect of digital lighting. Work in progress and other exciting stuff goes straight to social media. So be sure to like (on Facebook) and follow (on Twitter).
Bokeh Tutorial For CG Artists +A Few Inspiring Examples


Syde
Always fun to read you article sir. Mostly I would avoid doing night scene because my hardware is not capable of rendering dark scene and i don’t have the patience and luxury of waiting with higher sample and all lol. But by reading this, you gave the idea of using the light it self as a subject, kinda open my mind about doing night scene, and can be done minimalistically too which what I prefer most at the time being, thanks for inspiring Gleb :3
Gleb Alexandrov
Syde, I agree with you that night scenes can be VERY frustrating to render in Cycles. To eliminate the noise with such amount of tiny light sources, we need crazy amount of samples (and even branched path tracing doesn’t help). Or some kind of cheating to keep sample count at bay (like lens flares, large emissive surfaces, etc).
Also, I like your conclusion: light itself as a subject. That’s exactly what I’m talking about. 🙂
Java
Indoor lighting tutorial please.
Dave Walls
Hey Gleb – Enjoyed the tutorial. I just completred my first night scene, only using two main light sources to create a contrasting emotion of cold and warmth. (A winter scene). I’m now recognizing that an important characteristic of light at night is that it can have a more dynamic aspect than daytime lighting which is more static. Looking at my scene again, it looks a bit static and boring. I’m going to try a new night scene… Cheers.
Gleb Alexandrov
Dave, if you want you can share the scene so we can take a look 🙂 And yeah, night lighting is in many cases an interplay between many lights, so it becomes quite dynamic. And if we talk about the setting, similar to road, there is motion blur, and flares, and other things, that create a visual movement and interest.
Stepan Komisov
Выглядит очень атмосферно! Очень люблю ночь и тёплое “ламповое” освещение ночью. Даже почувствовалась ночная прохлада после просмотра это картинки! Единственное мб я бы суть уменьшил размытие по вертикали, но там смотреть надо на результат. Очень крутая работа!
Looks very atmospheric! Very fond of the night and warm lights at night. Even feel the coolness of the night after seeing this picture! The only thing I would mb are reduced vertical blur, but it is necessary to look at the result. Very cool work!
Classy Dog
This is an excellent breakdown of night time lighting! You’ve taken a very complex subject and made it easy to understand. Your final image is outstanding as well, one of my favorites I have seen from you. I am blown away. I can see your work appearing in one of the Ballistic EXPOSÉ books one day.
Gleb Alexandrov
Haha, you are too kind :)) But yeah, I wouldn’t mind to see it in EXPOSÉ (as well as in any other magazine). Maybe after publishing it in my book – that’s the main goal for now 🙂
Fliper Lahtin
а где можно найти перевод этой статьи?
Stepan Komisov
Никто не переводит, может позже кто-то займется (хотя я думаю вряд-ли). Если только Глеб не сделает на сайте 2 языка, но на это будет уходить в 2 раза больше времени и я не думаю, что такое большое ру комьюнити у блендера. Хотя его уроки подходят не только для Блендера 🙂 Глеб уже писал почему делает все уроки на англ.
Yulia Kalashnikova
да, мало кто пишет на русском. и я даже не уверена, что первичнее – маленькая русскоязычная аудитория блендера или отсутствие для него своевременно обновляющихся уроков на русском. скорее всего это reinforcing loop: никто не пишет -> никто не пользуется -> никто не пишет и т.д.
David Mcsween
I love the new OpenGL flare system for immediacy but if you want to replicate real world flares try the OSL shader on the BlendSwap site. http://www.blendswap.com/blends/view/68257 It is amazingly flexible and sourced from the original Disney studio flare setup. And it’s Cycles friendly too.
Gleb Alexandrov
Thanks, David. Haven’t seen that OSL setup. I guess I should try it now.
Lcq92
Gleb your articles are getting better and better each time ! By the way, are you planning on releasing your book as a physical copy ? I would love to use it as a mouse pad :]
Yulia Kalashnikova
I was wondring…. I encountered this problem when I was making my own night scene. Night scenes are overwhelming: you have a gazzilion lights and your eye has nothing to rest upon.. It’s all bright and shiny and ultimately overloaded. May be it’s just me, and a real artist would leave a dark patch for a viewer to relax. But what if I want my character to be a focal point? What I had eventually was the night lights devouring my scene and competing with a character to be the center of attention.
Radi Bear
I am far from professional, but I would probably use a building silhouette or just the top of the sky as a black source. Then, blur everything a bit except for the subject
Yulia Kalashnikova
uuu… I love this idea 🙂
Anthony Calderone
How do you maintain your black levels without getting that funky dodge/burn banding thing?
EgisBa
Отлично! Thanks for your tutorial. And great shortfilm! (filmed in my hometown, yay)
Reda Lamine
Gleb it’s amaizing to read your articles you go deep sometimes I read every sentence twice as I feel that I need to read it well in order to understand I’m happy cuz I see details that you’re talking about but never thought of them that deatiled! Keep it up and you’re actually changing the world of computer graphics 😉 Don’t forget to drink more coffee
Pingback: 25.000 Subscribers... Blender Conference... And the Idea for the Store • Creative Shrimp