Using Render passes can save us hours of work.
How many times you’ve rendered the animation over and over again just to get the motion blur right? Or set up the Depth of Field and turn on the render samples to some crazy 10000 to get rid of the noise?
Learn how to utilize some of Render passes to your advantage (especially like number 5 – because it’s sort of hidden).
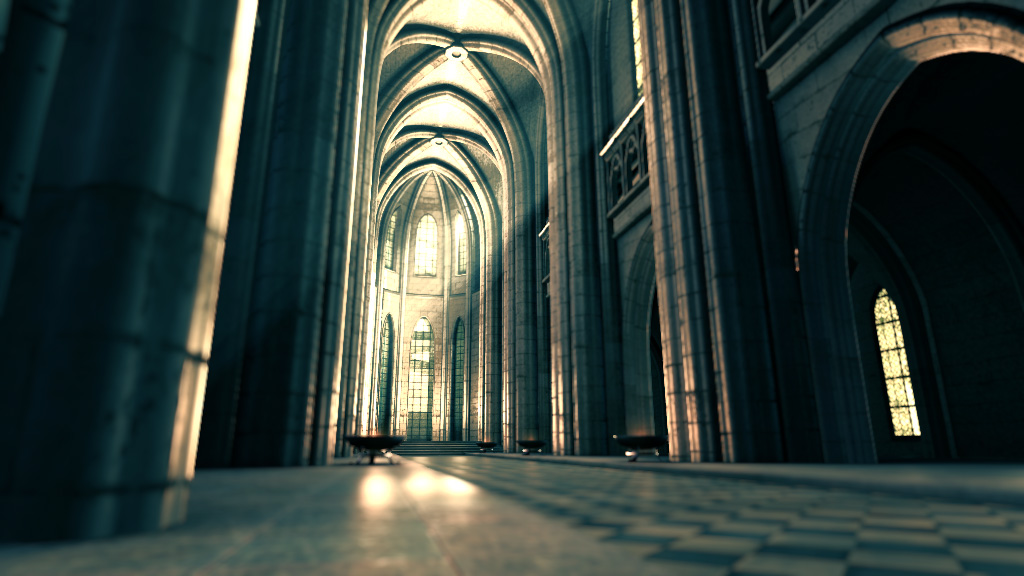
1. Speed Vector Pass and Motion Blur

Sometimes it’s called the Velocity pass. This pass represents the speed of moving objects and their direction. And you guessed it – here we have a motion blur solution for post-production.
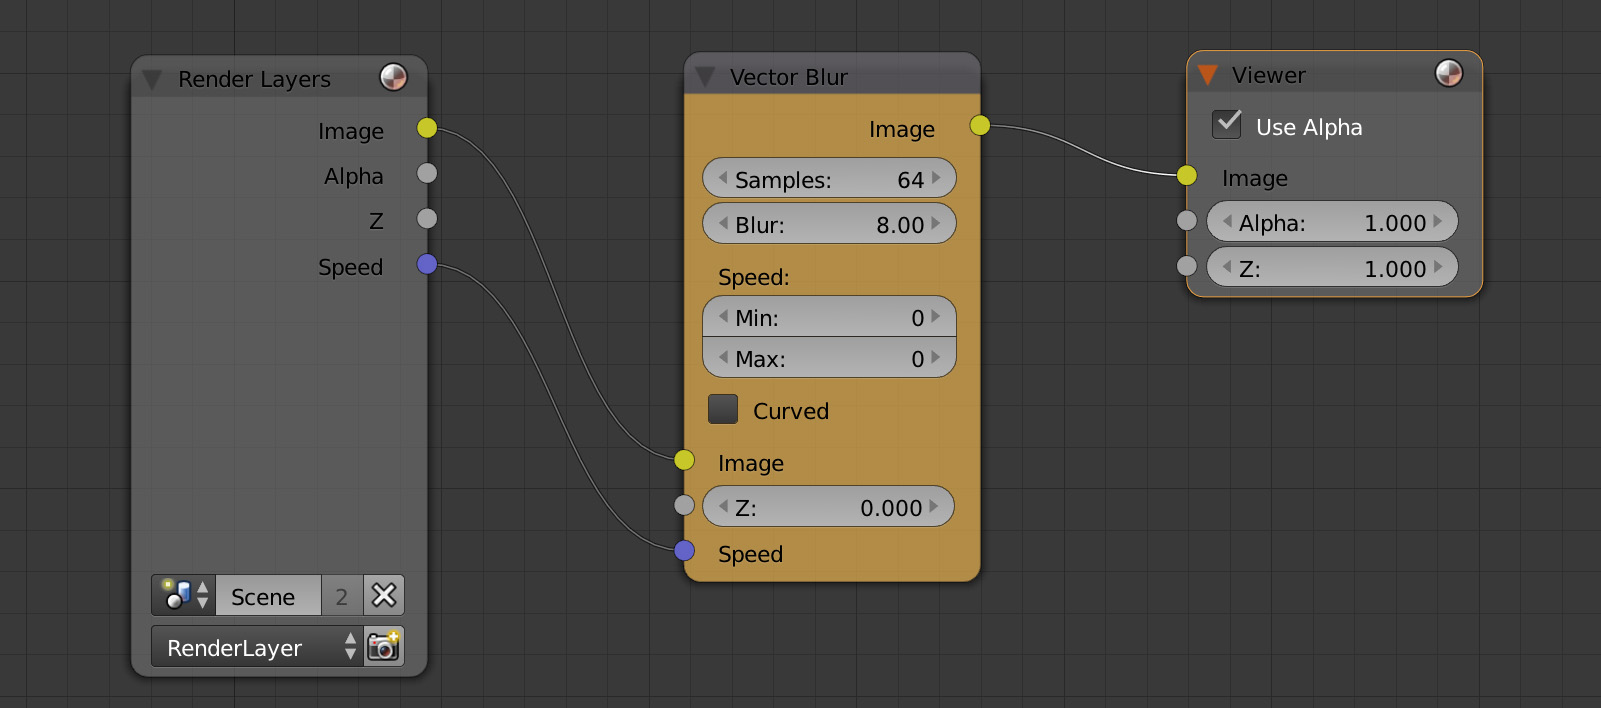
[icon icon=”info-circle” size=”2x”] In Blender compositor there is the Vector Blur node. And it does exactly what we expect.
2. Z Depth and Depth of Field
Cathedral model by Zuendholz on Blendswap (Used under CC BY)
Faking Depth of Field in post production is a very common technique. Realtime feedback and the ability to tweak the Depth of Field effect after rendering is just too tempting, you know.
As Z Depth pass contains the info about the scene depth – or a 3rd dimension – we can use this info to define the focus point for DOF effect. In Photoshop, Blender compositor, After Effects, Gimp and the other soft.
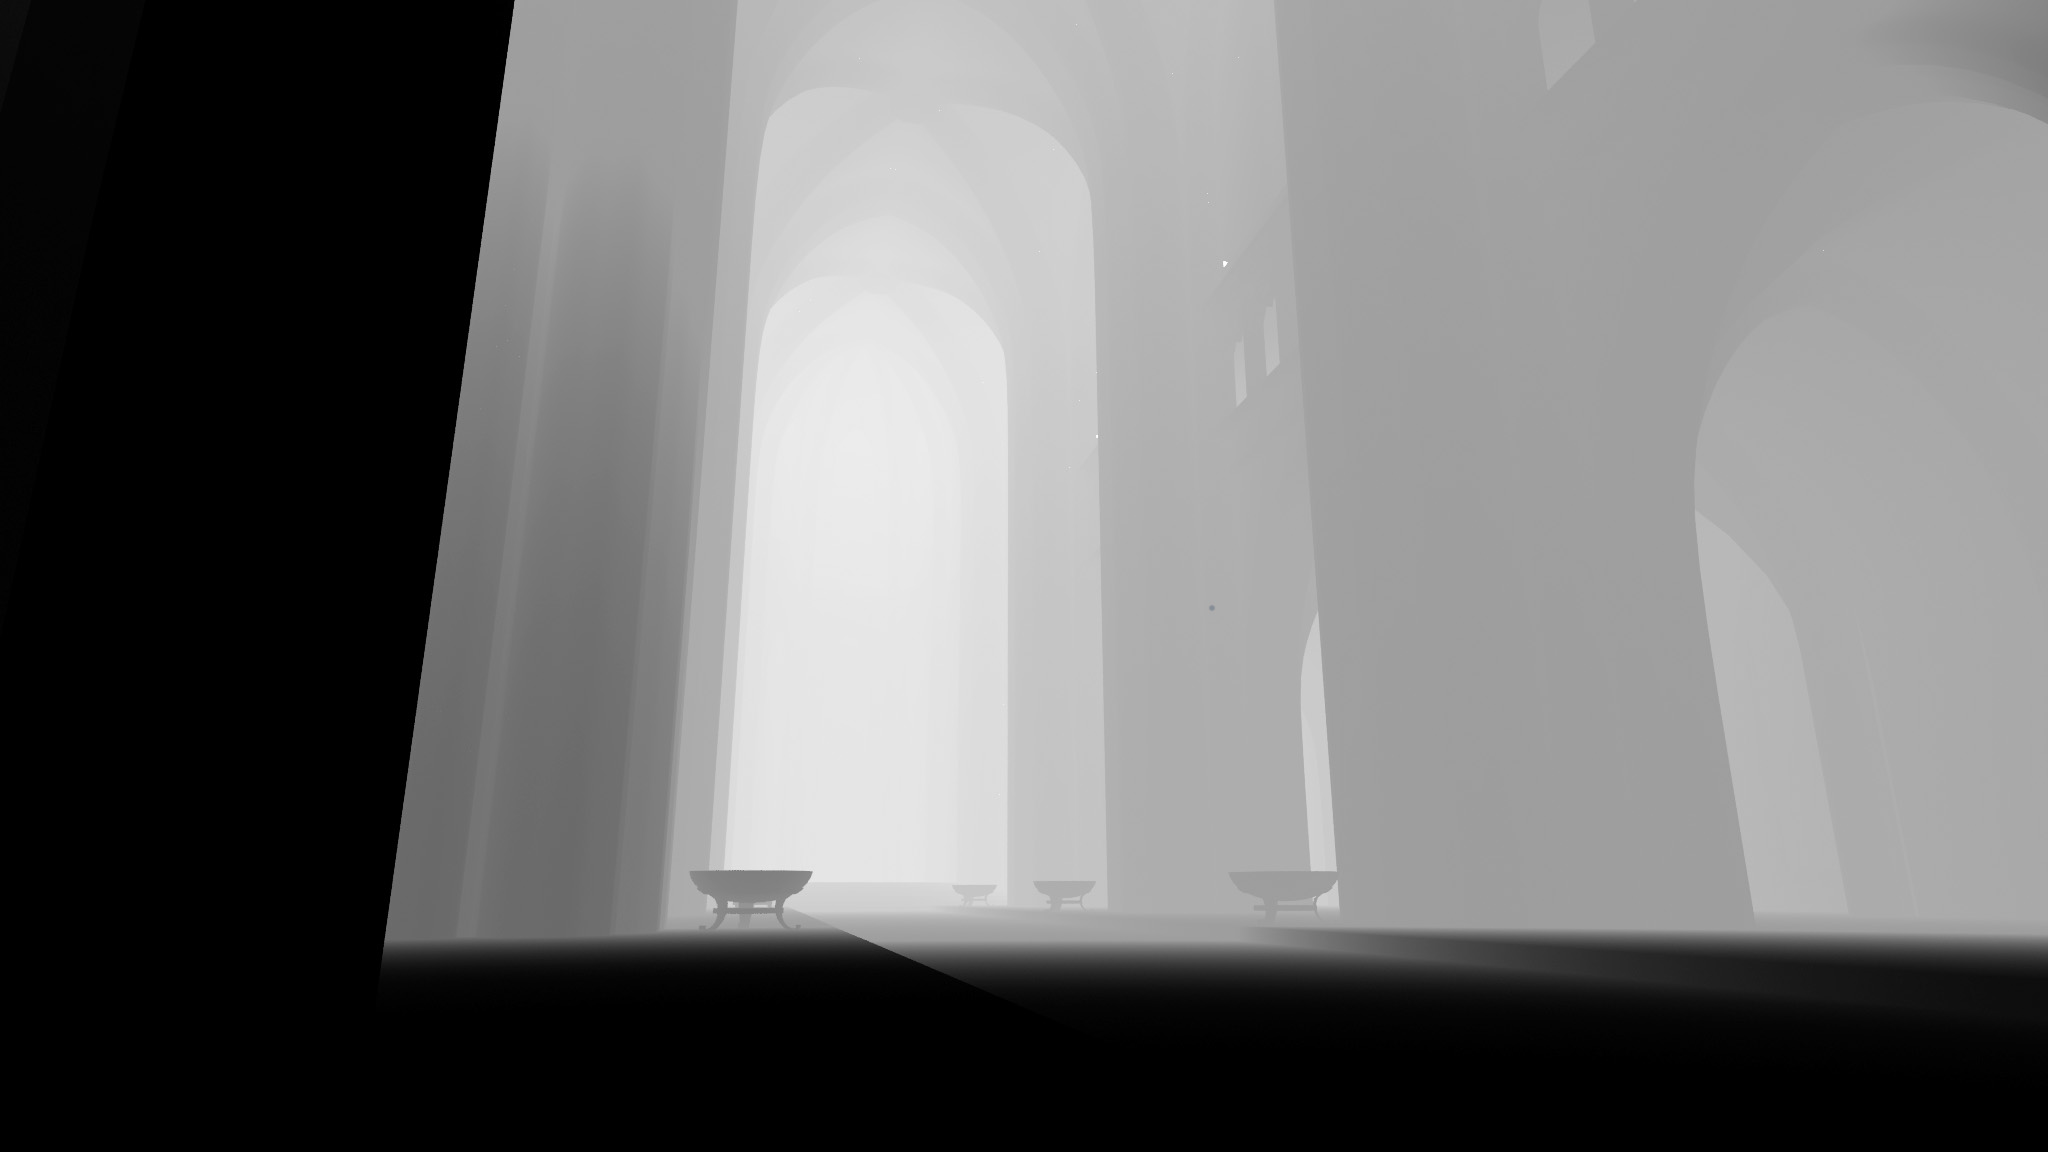
[icon icon=”info-circle” size=”2x”] In Blender, we also have the Mist pass. Essentially, it’s the same thing as Z Depth, just anti-aliased.
[icon icon=”chevron-circle-right” size=”2x”] Also, we can animate the effect.
3. Z Depth and Fog
It seems pretty natural that for simulating fog we can somehow utilize the depth information. Indeed, Z Depth (or Mist) pass can serve as a mask for this effect.
[icon icon=”info-circle” size=”2x”] We can control the falloff of the fog using levels or curves adjustment. Or the color ramp node in Blender.
4. Ambient Occlusion
In CG world there is a good tradition to overlay ambient occlusion pass on top of everything. No surprizes, it’s just better with AO.
Global illumination sometimes doesn’t capture so called contact shadows, leading to ‘floating’ objects. AO compensates for this effect.
Check the different ways of creating Ambient Occlusion.
5. UV Pass for Texture Overlay

Before writing this article I had no clue about what is this misterious UV pass. But actually, Texture UV pass allows us to texture stuff in compositor!
What about overlaying the checkers? Awesome.
Know some other hidden render pass? Let me know.

Pingback: 5 Ways to Use Render Passes | BlenderNation
Julian Perez
I would add the normal pass, that’s the one you use to “relight” your scene in postproduction.
https://www.youtube.com/watch?v=bMGntSDvZUE
Gleb Alexandrov
Yeah, relighting with the normal pass is another interesting way to use render passes! I especially like Normality plugin for After Effects.
bdiscus
I already knew about the UV pass, but thanks alot gleb, your tuts are awesome as always.
Gleb Alexandrov
Cheers!
James Sky
As someone who is just starting to worry about rendering, this tutorial was fantastic (definitely earned a place in my ‘Favorite Tuts’ folder 😉 )! Thanks so much for all of your time and energy!
Gleb Alexandrov
And thanks for your interest.
Brian Wagner
Thanks for the tips. Where can I learn about #5, UV texturing in the compositor??
Gleb Alexandrov
Brian, try watching this tutorial: http://www.screenr.com/lT9s
I think the best way to get into it is just to try ‘Map UV’ node in compositor. It has 2 inputs: Image and UV.
1. Activate UV pass in the Passes section
2. Render the scene
3. In the compositor, plug the UV pass in the UV input of the ‘Map UV’ node
4. And plug some texture in the ‘Image’ input.
5. Note that object should be unwrapped
Hope it helps.
Brian Wagner
Got it, thanks!
Marcin HRN
https://www.youtube.com/watch?v=Gq5YWSpvME8 nice tutorial by Bartek Skorupa. Great tip how to use UV pass and change texture in ready animation -> fast way without complex re-rendering!
Gleb Alexandrov
Marcin, I agree, it’s a brilliant stuff – when you want to combine UV passes and use a bilateral blur along the way. Watched it when was searching for noise-reduction techniques in Cycles.
simenesky
This is a stupid question for you but what parameters did you use to make background for speed vector pass and motion blur ?
TNX in advance
Gleb Alexandrov
A simple one, actually. Just 2 area lights. Would you need a .blend file?
simenesky
YEEEESSSS please !!!! Thank you very much
simenesky
Looking to your tutorials, you are composing scenes so good and in tutorial “9 Ways to destroy things”, one of the best backgrounds for presenting tutorials. If you can send me the blend file that will be great and again TNX in advance !!!
Gleb Alexandrov
Shared the file. Cheers!
https://www.dropbox.com/s/usa4xgb1gt2co79/scene_01_1.blend?dl=0
simenesky
I received the file thank you sow much. The big part of scene is node editor witch I now so little but this will get me started. Thank you once again a looooot !!!!!
Gleb Alexandrov
Yet another test comment. oh..
Marco Mazzo
Hi Gleb, I can’t understand how you get the Dof effect, I’m trying with the defocus node in the compositor, but it work only with a specified obj or distance… so i can’t change the focal point in the compositor how are you showing here… can you explain how you did it? I’ve googled but all tell about setting a point in camera settings and then use the defocus to adjust the focus on that object.
Thanks for all your beatifull stuff
Marco
Gregory
Hi Marco,
I too struggled with this same problem but I have found a solution after much trial and error. And you don’t need a target empty in your scene etc or to set any information in the camera. I’m using Blender v2.73.
1. When you render your image Blender will need to save 2 output files , one for your Image pass and one for the Z pass, using the node editor in compositor mode. (please see my screen shot below with the Z pass result in the background to replicate the setup). If you are simply rendering a single frame make sure you still use CTRL F12 and just set start and end frame to same number. Remember to set a proper file path in each File output node, one for IMAGE, and one for Zpass. Well that’s what I called them, you could make up your own naming if you want to. Blender will create a folder for each output type and then drop the actual image file (by the same name) into it’s respective folder.
2. Once rendering is complete start a fresh node editing screen, perhaps in a new Blend file, and set it up as in my second screen shot below.
The tricky bit was using the Z pass image, as an “IMAGE” data source, and not as Z (see my colored circles etc in the screen shots).
You can play around with the Defocus node settings but use what I have to get you started.
3. Now the cool part. To vary the focus between the foreground and the background just change the color in the Invert node from white to black, or vice verse. I’m assuming you could even animate that color change in the Invert node to achieve a nice result as well with focus shifting smoothly from aft to fore. I haven’t experimented with that yet.
I hope this makes sense and I hope it helps. I’m still learning so the above explanation may not be the best or most efficient way to achieve your desired result, but it worked for me 🙂
Cheers,
Greg
Marco Mazzo
Many many thanks!!! I’ll try for sure 🙂
Pingback: Useful Blender Tutorials | Jorge Bouza
Jonas Thelemann
Hey Gleb,
thanks once more for these stunning tutorials!
But I also don’t get thatUV Pass for Texture Overlay thing. Maybe you will explain it more detailed in an upcoming tutorial?
🙂
Gleb Alexandrov
Maybe! 🙂 Jonas, watch the new post-pro tutorial, it contains some useful bits: http://www.creativeshrimp.com/post-processing-tutorial-in-12-simple-steps.html
Valentina Irurita Cordoba
Hi!! I was wondering if anyone knows how to composite the cycles render passes in After Effects..I cant seem to get my blending modes right and its killing me