Time to get our procedural texturing groove on! Let’s get into Eevee and create ourselves an open road of texturing possibilities with some clean asphalt!
In this Blender tutorial we’ll…
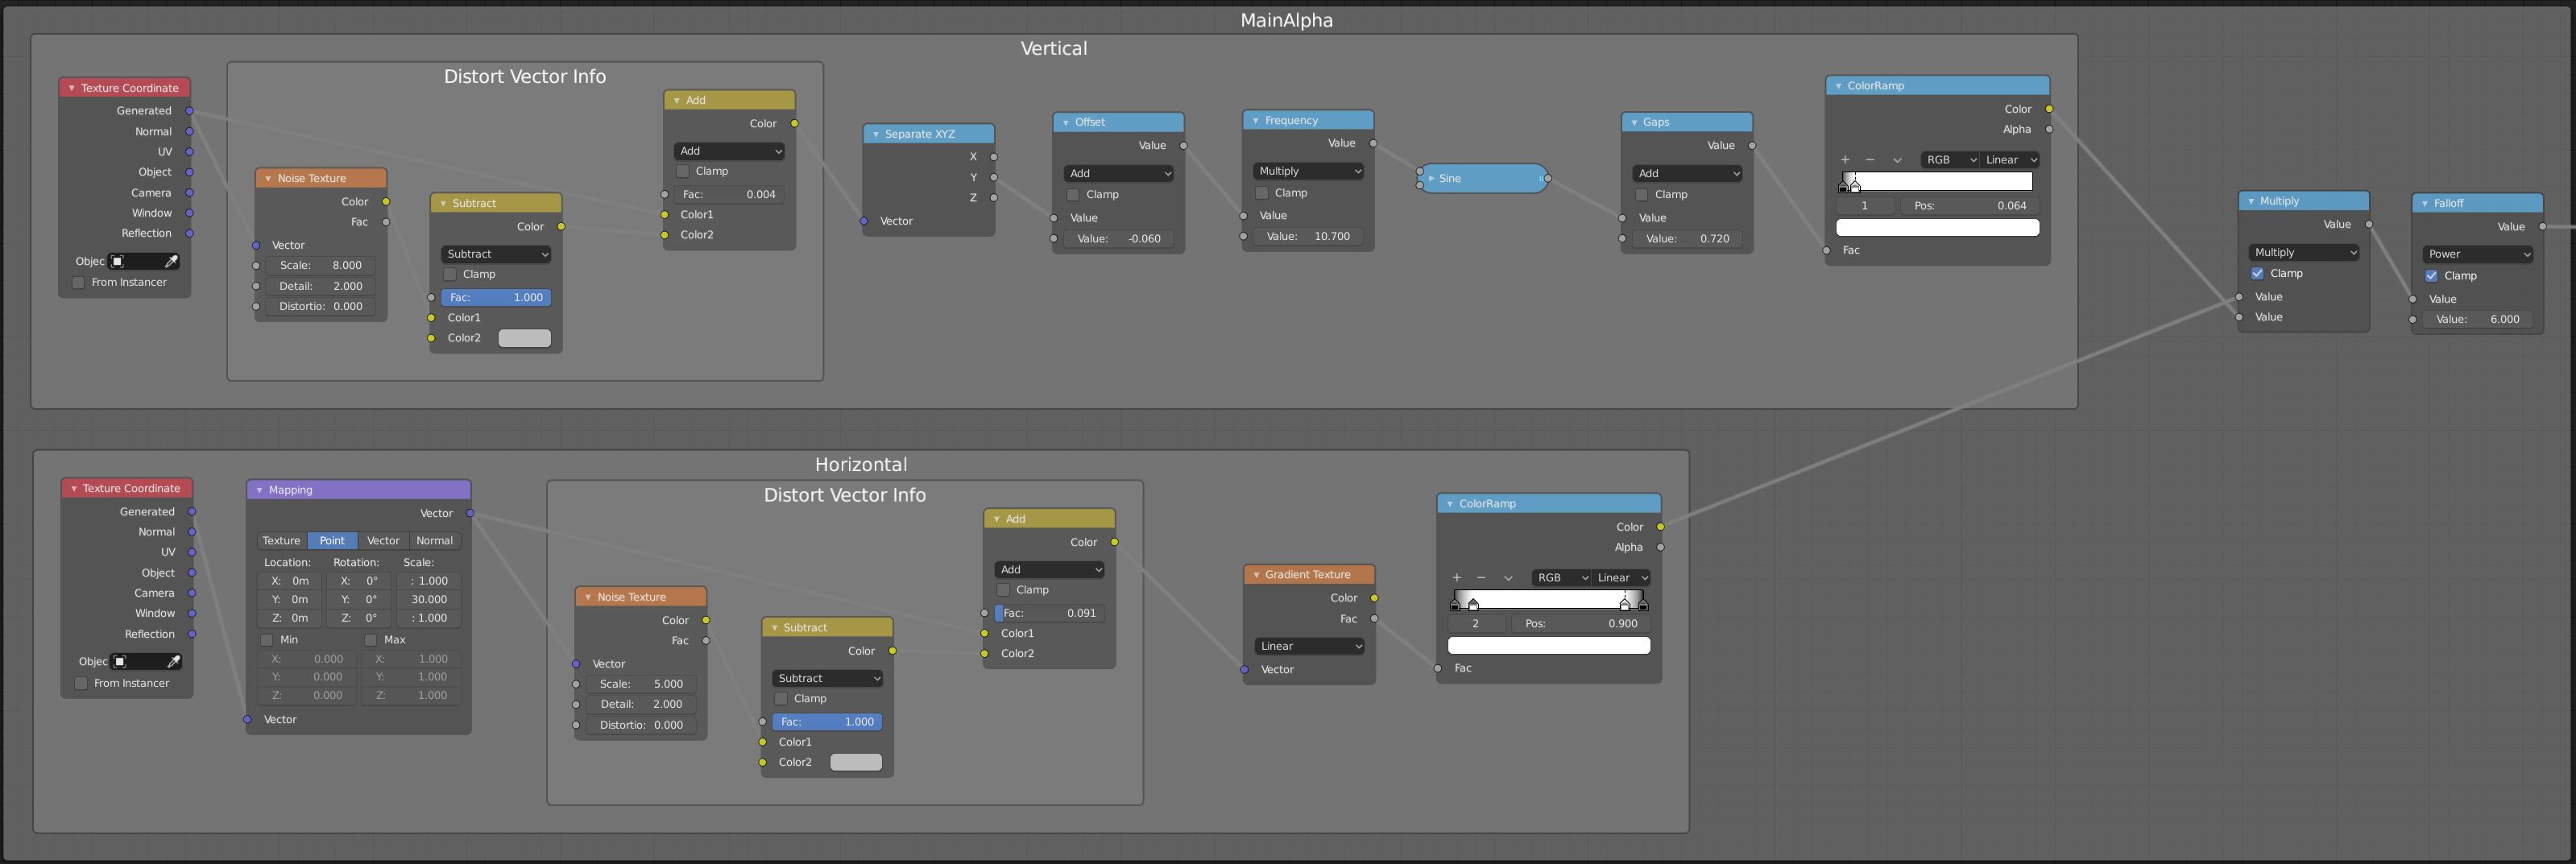
- Set up for a versatile bump & displacement map
- Combine different features of height maps together
- Overcome the limitations of Eevee with layers
- Overcome the limitations of layers with global texture groups
- Procedurally create paint stripes with vertical spacing controls.
What Kind of Asphalt?
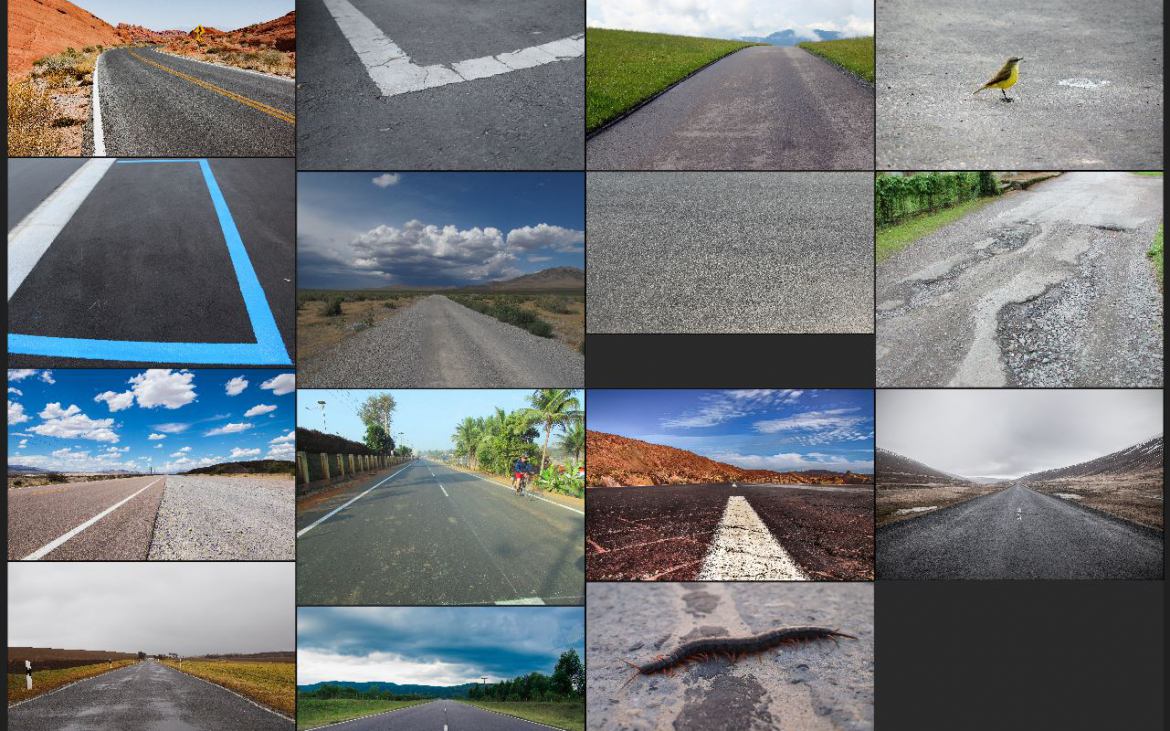
First things first – What kind of road? There are many types of roads, so always collect reference. Then you can mix and match different details that you like from different types of asphalt, in theory the result should be the best personally suited asphalt in the world!
Blender 2.8’s new LookDev mode is very handy, at a quick button press and simple slider control we’ve many lighting setups to quickly test through. Different lighting can reveal quite different details/contrasts within the material.
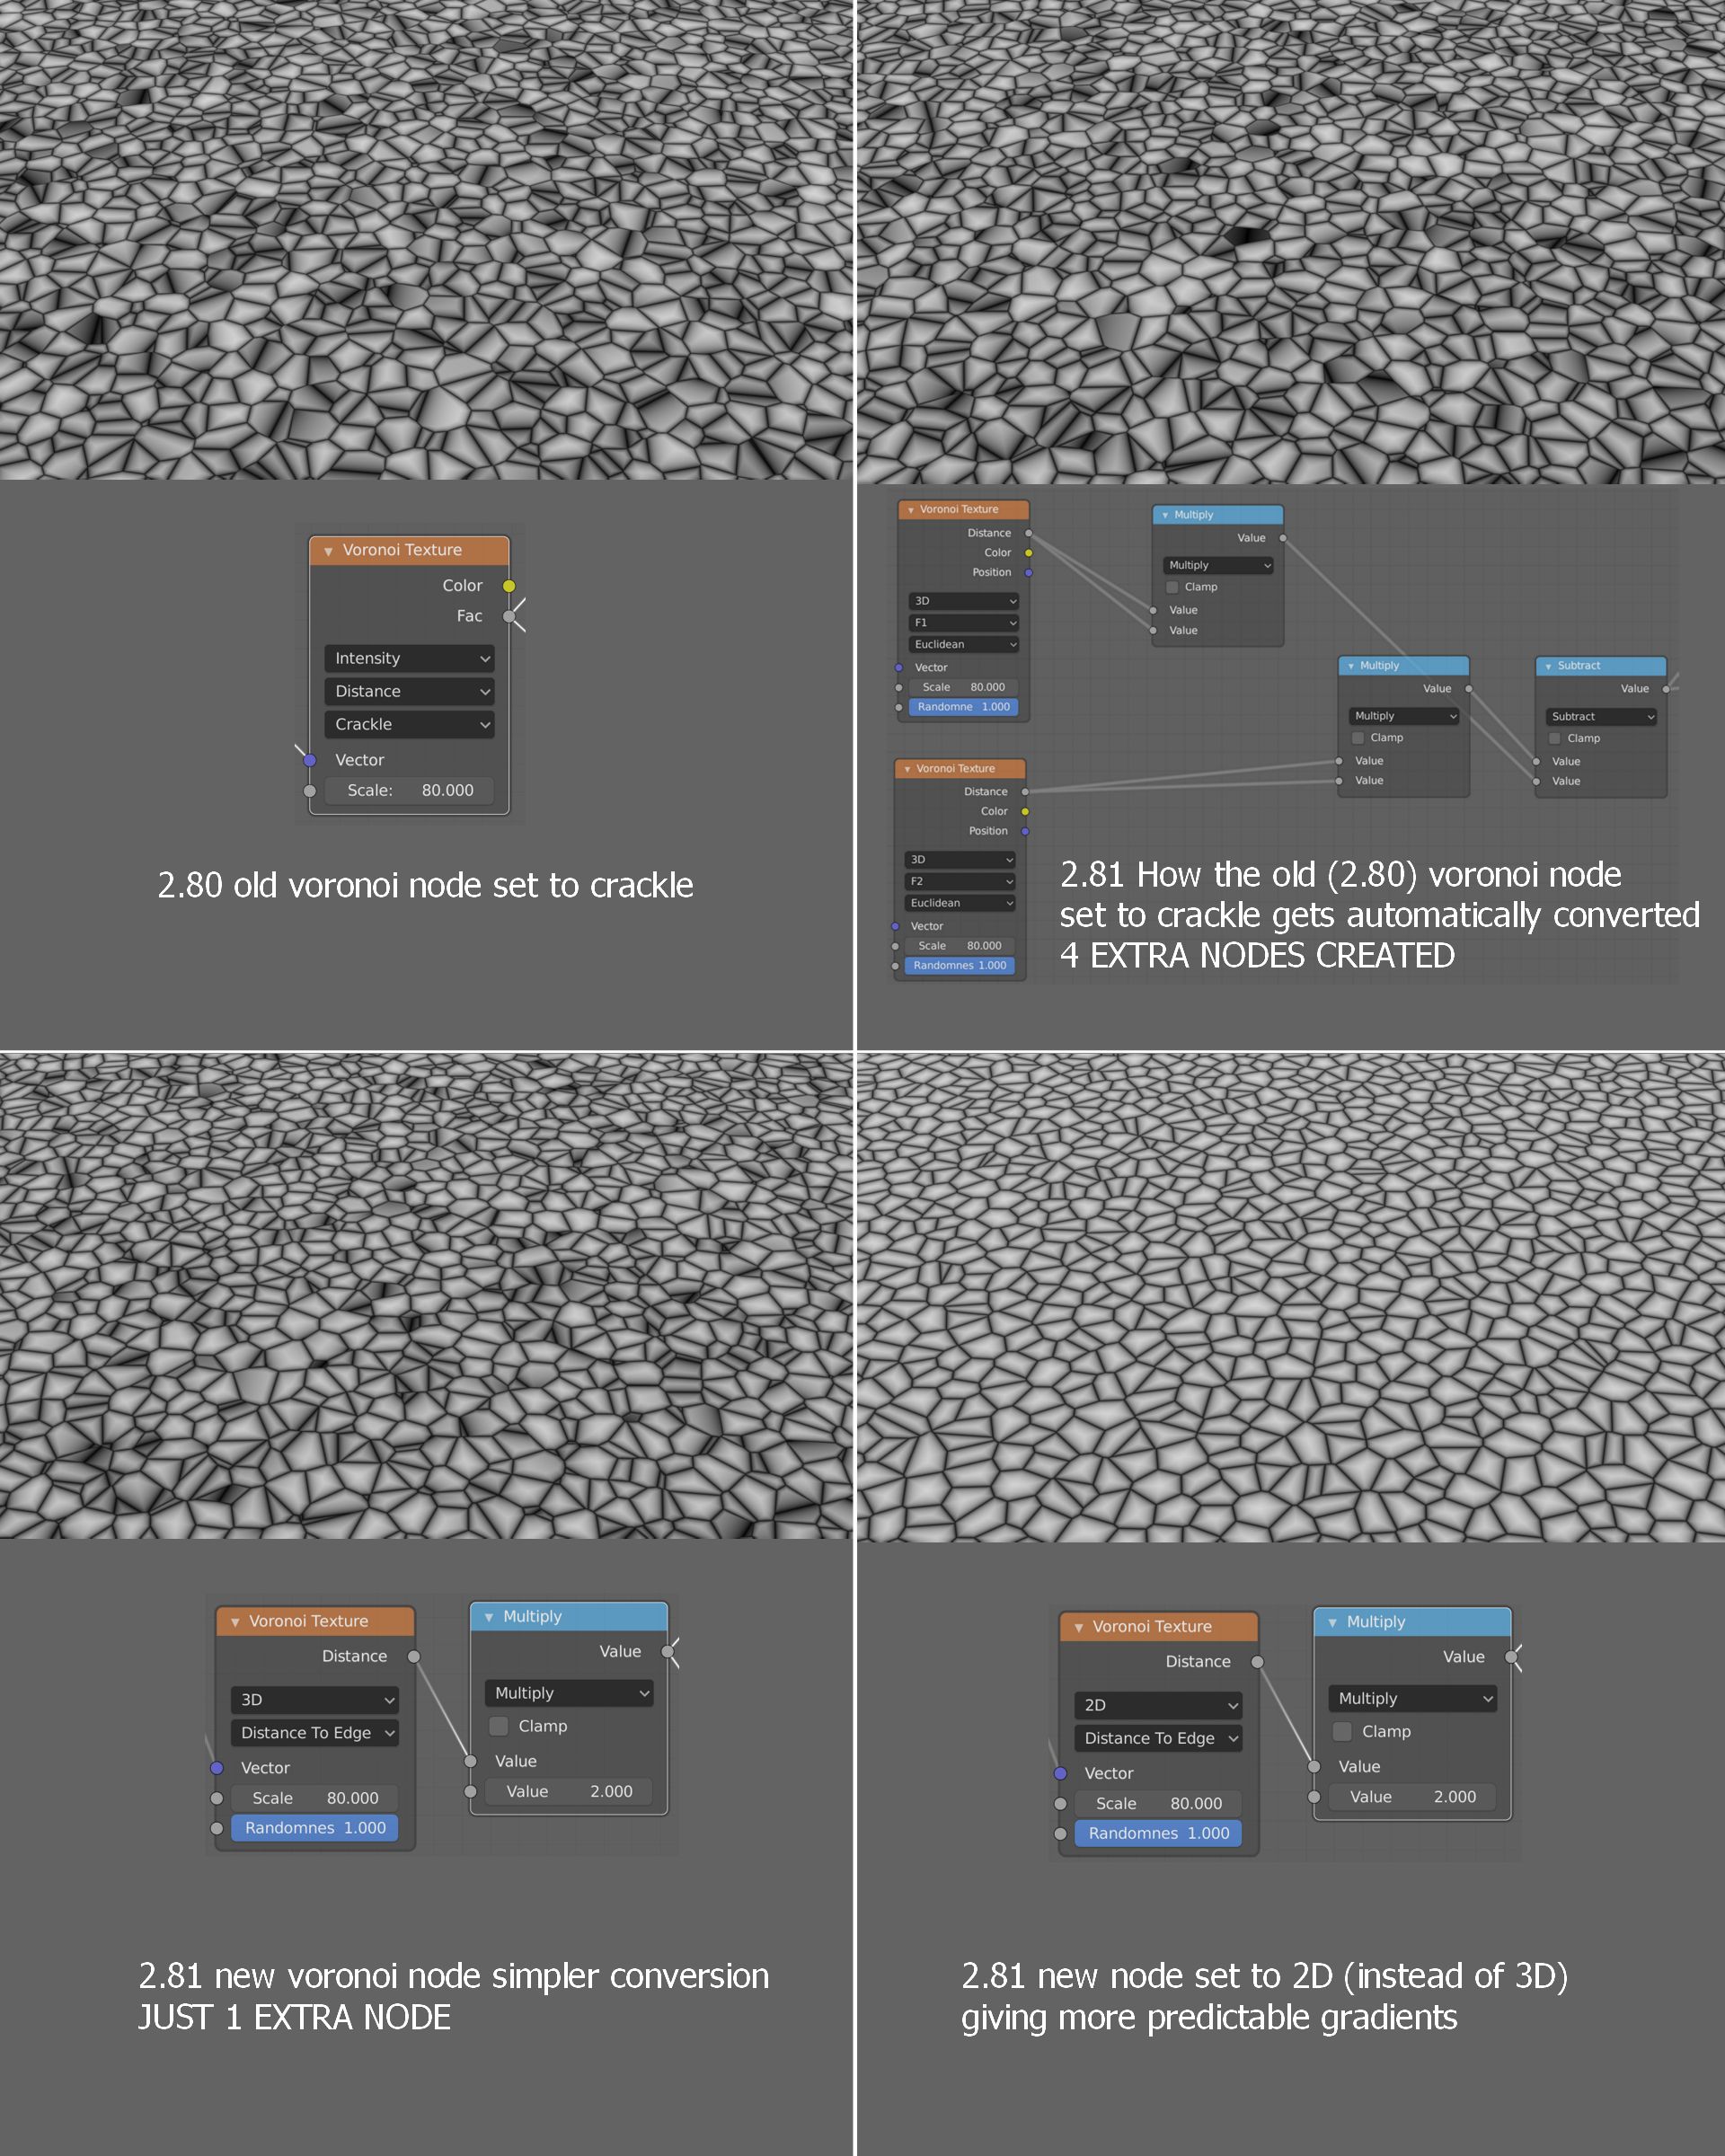
Important 2.81+ Node Change
Taking it Further
- The roughness settings are pretty simple in the final blend, try pushing it further by using some noise perhaps already being used for the bump into a color ramp just for the roughness input of the shader.
- Noisy noise! As you can probably tell the majority of procedural texturing comes from how we manipulate noise patterns. The basic noises we get in Blender are quite simple, hopefully that will change, just look at the amount of noises/grunge generators available in Substance Designer (probably the foremost procedural texturing tool today). Until we get more like that in Blender get out there and collect that noise/grunge! Simon Thommes has a great procedural collection here.
- Use texture images! – This is a procedural texturing tutorial so we kept it pretty pure here to not waste time and stay faithful to the topic. BUT! Don’t hold back on combining this approach with texture images, textures of roads, details like grids and grates as decals and of course especially noise!
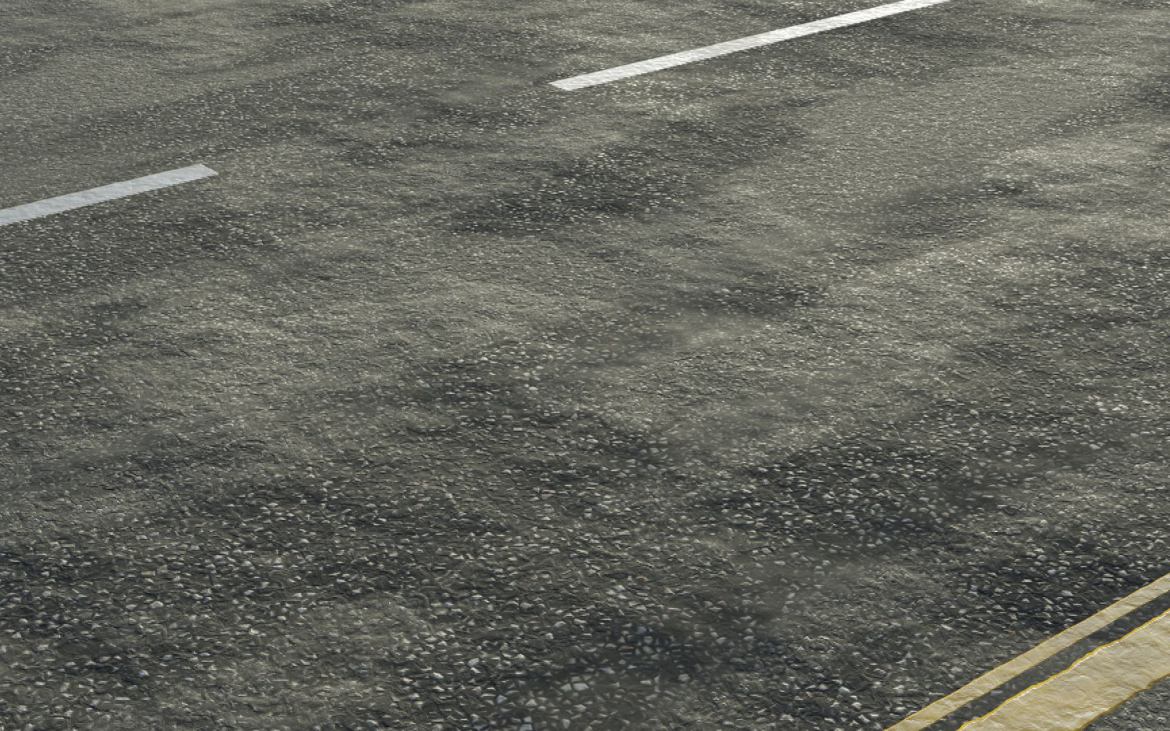
Completed Tutorial Updated Blend File, while still pretty simple overall in this updated version I’ve lightened and slightly colorized the stonechips while giving the tar inbetween a bit more detail.
Links & Project Files
Completed Tutorial Blend File
Completed Tutorial Updated Blend File
More Voronoi Texturing tricks e.g. colorizing the stones
Procedural Clean Asphalt Texture with Array Blend File
Baking procedural nodes down to texture maps
Simon Thommes Procedural Blender Noises
Blender Today UI Lockdown video
We’re often asked what our PC Spec’s are, here’s what I’m using for this tutorial….
AMD Ryzen 7 1700 3 GHz 8 Core Processor
EVGA – GeForce GTX 1080 8 GB FTW2 Gaming iCX Video Card
Thermaltake – Water 3.0 Ultimate 99 CFM Liquid CPU Cooler
ASRock – X370 Taichi ATX AM4 Motherboard
Corsair – Vengeance LPX 32 GB (4 x 8 GB) DDR4-3200 Memory
SanDisk – X400 512 GB M.2-2280 Solid State Drive
be quiet! – Dark Base 900 (Black) ATX Full Tower Case
EVGA – SuperNOVA G2 650 W 80+ Gold Certified Fully-Modular ATX Power Supply
Microsoft – Windows 10 Home OEM 64-bit

Pingback: Easy Stones & Cracks in Eevee | Blender 2.8 • Creative Shrimp
Pingback: Using Blender Like Substance Designer • Creative Shrimp
Pingback: Advanced Normal Map Creation Tips • Creative Shrimp
Pingback: プロシージャルマテリアル [Blender] – Site-Builder.wiki