Want to learn texturing, but too lazy to start? I’ll back you up. In this tutorial you’ll learn the top 14 ways to mix textures and shaders in Blender.
All of this under 20 minutes, so it’s like a Happy Meal (but doesn’t make you fat).
Why bother?
Creating realistic materials is all about blending and mixing. That’s because every real surface consists of dozens of layers. So after you finish this Blender tutorial you’ll get a massive level up in realism.
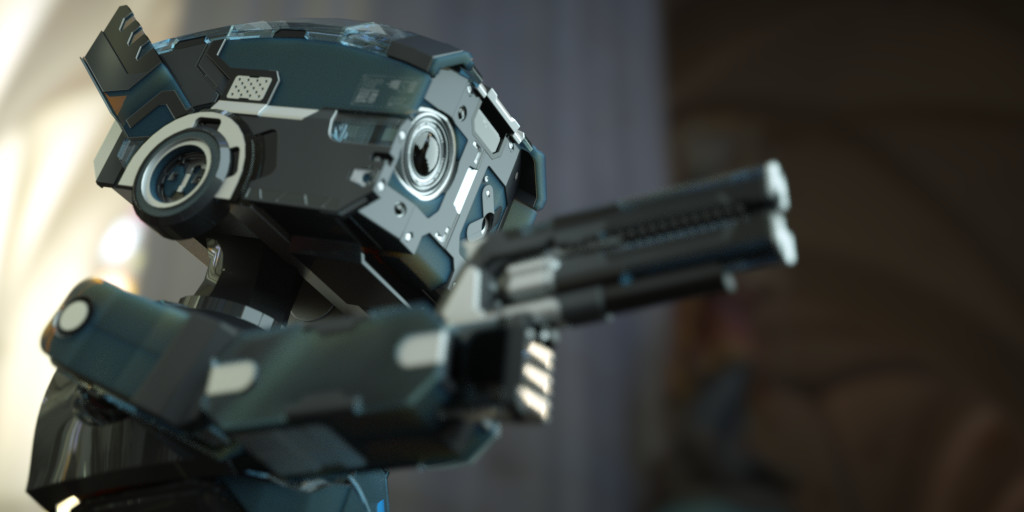
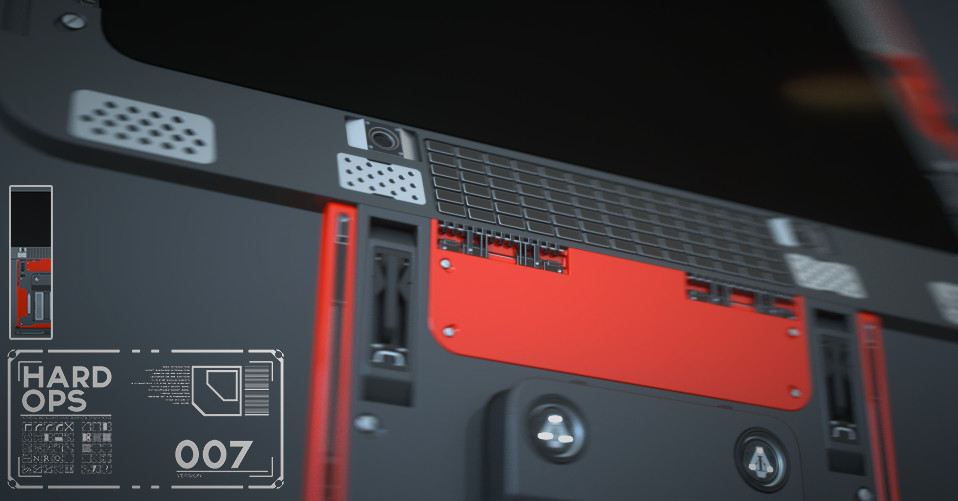
Robot model: Deux by Jerry Perkins (MasterXeon). Originally it was made for the HardOps addon for Blender – I really recommend you take a look at this hard surface modeling tool.
[space size=”25″]
Highlights of the Tutorial: 14 Ways to Mix Textures
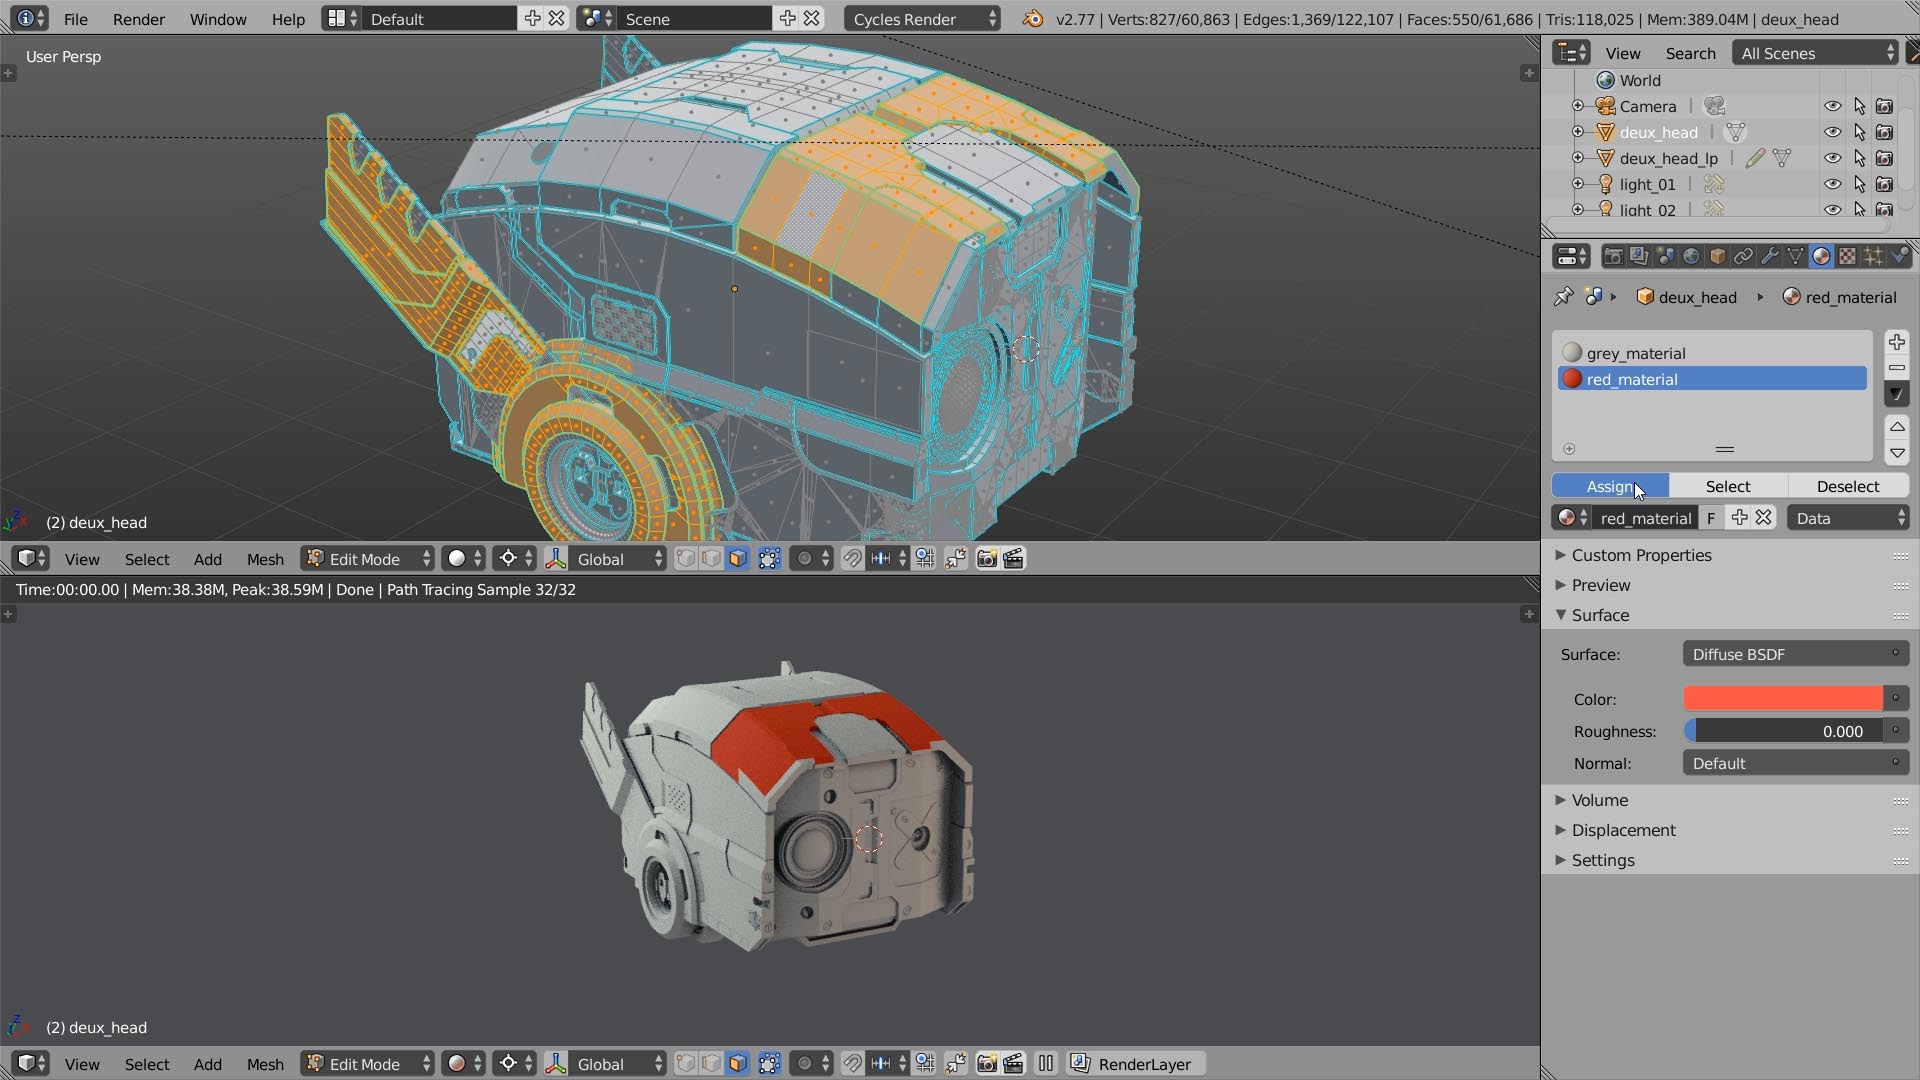
1. By Poligons
Select some poligons and assign a different materials to them. Easy peasy.
An unfortunate truth is that you will have to tweak two materials instead of one.
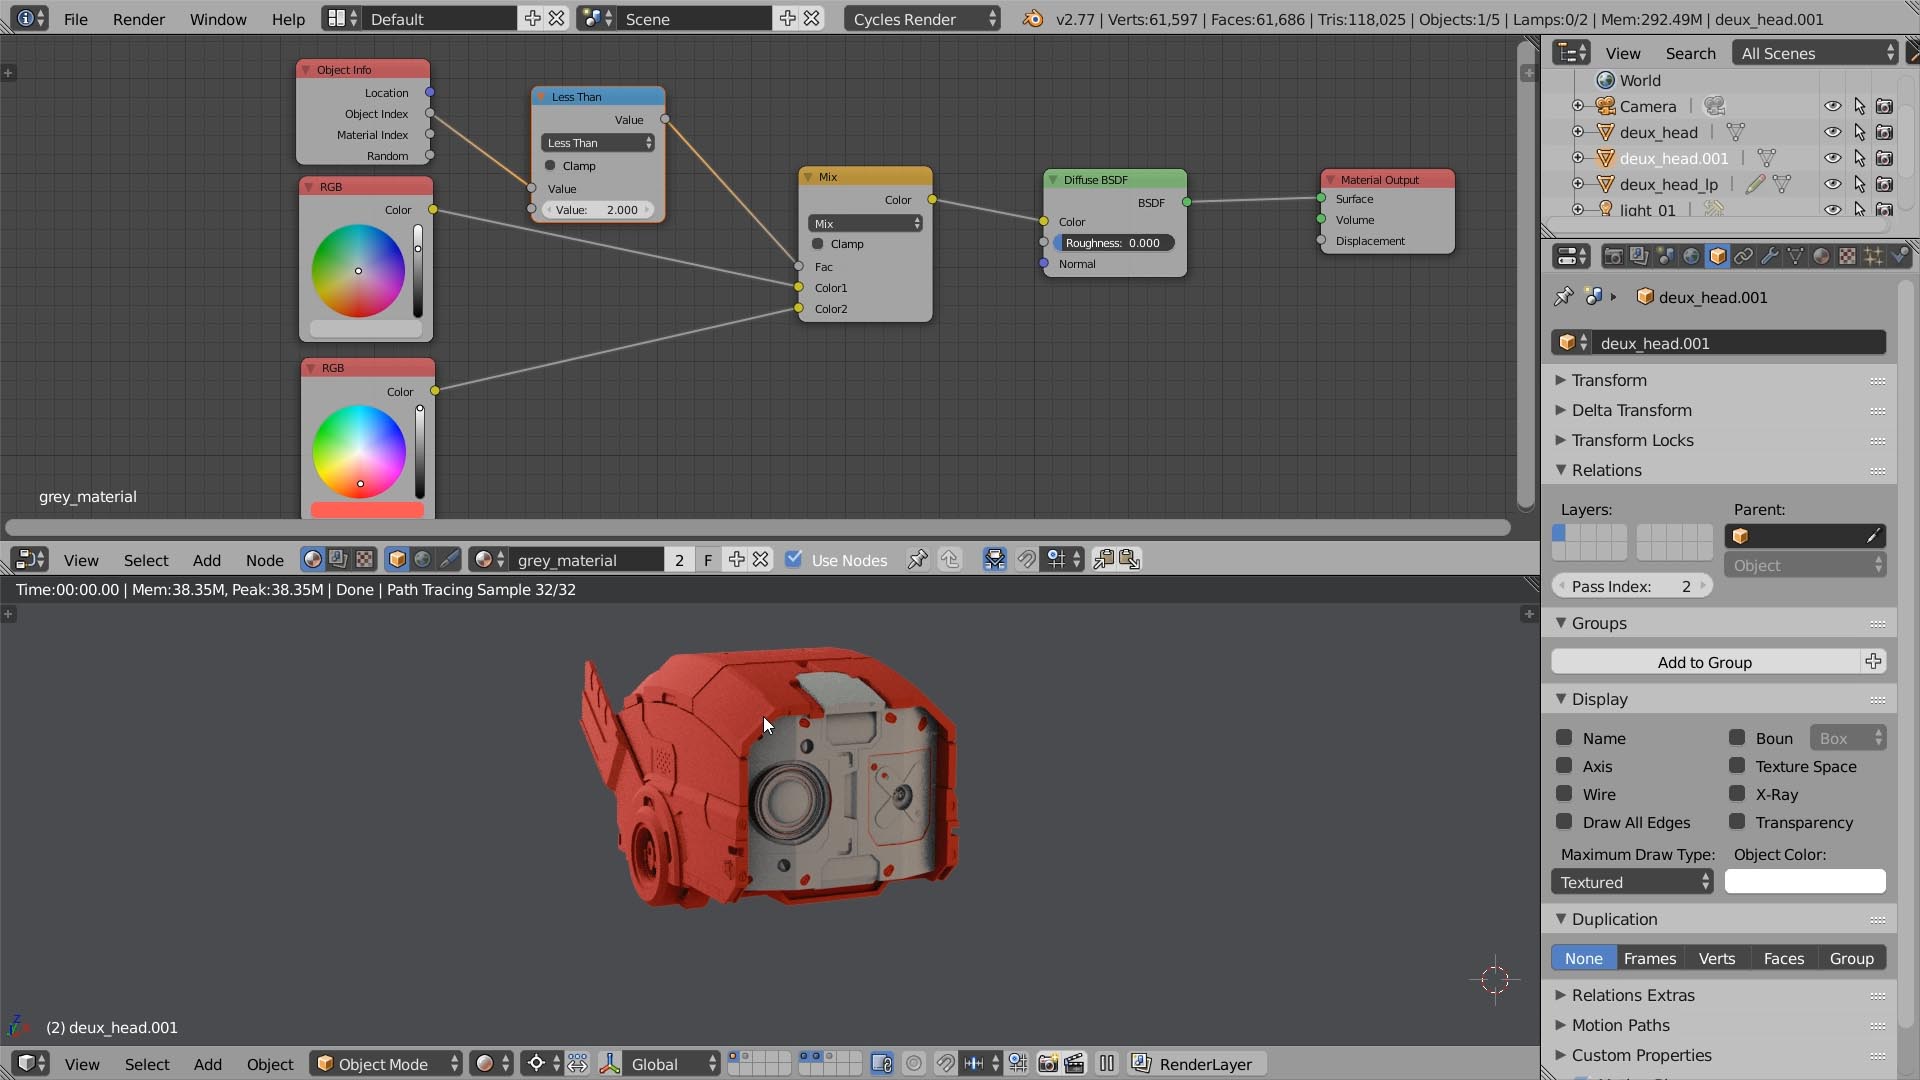
2. By Object ID
Each object in Blender can have a different ID. You can change it in the Object properties panel.
After doing it, you can use the Object Info node in the material editor to mix between different materials, based on this ID. For example, if the ID is less than 2, blend this material in.
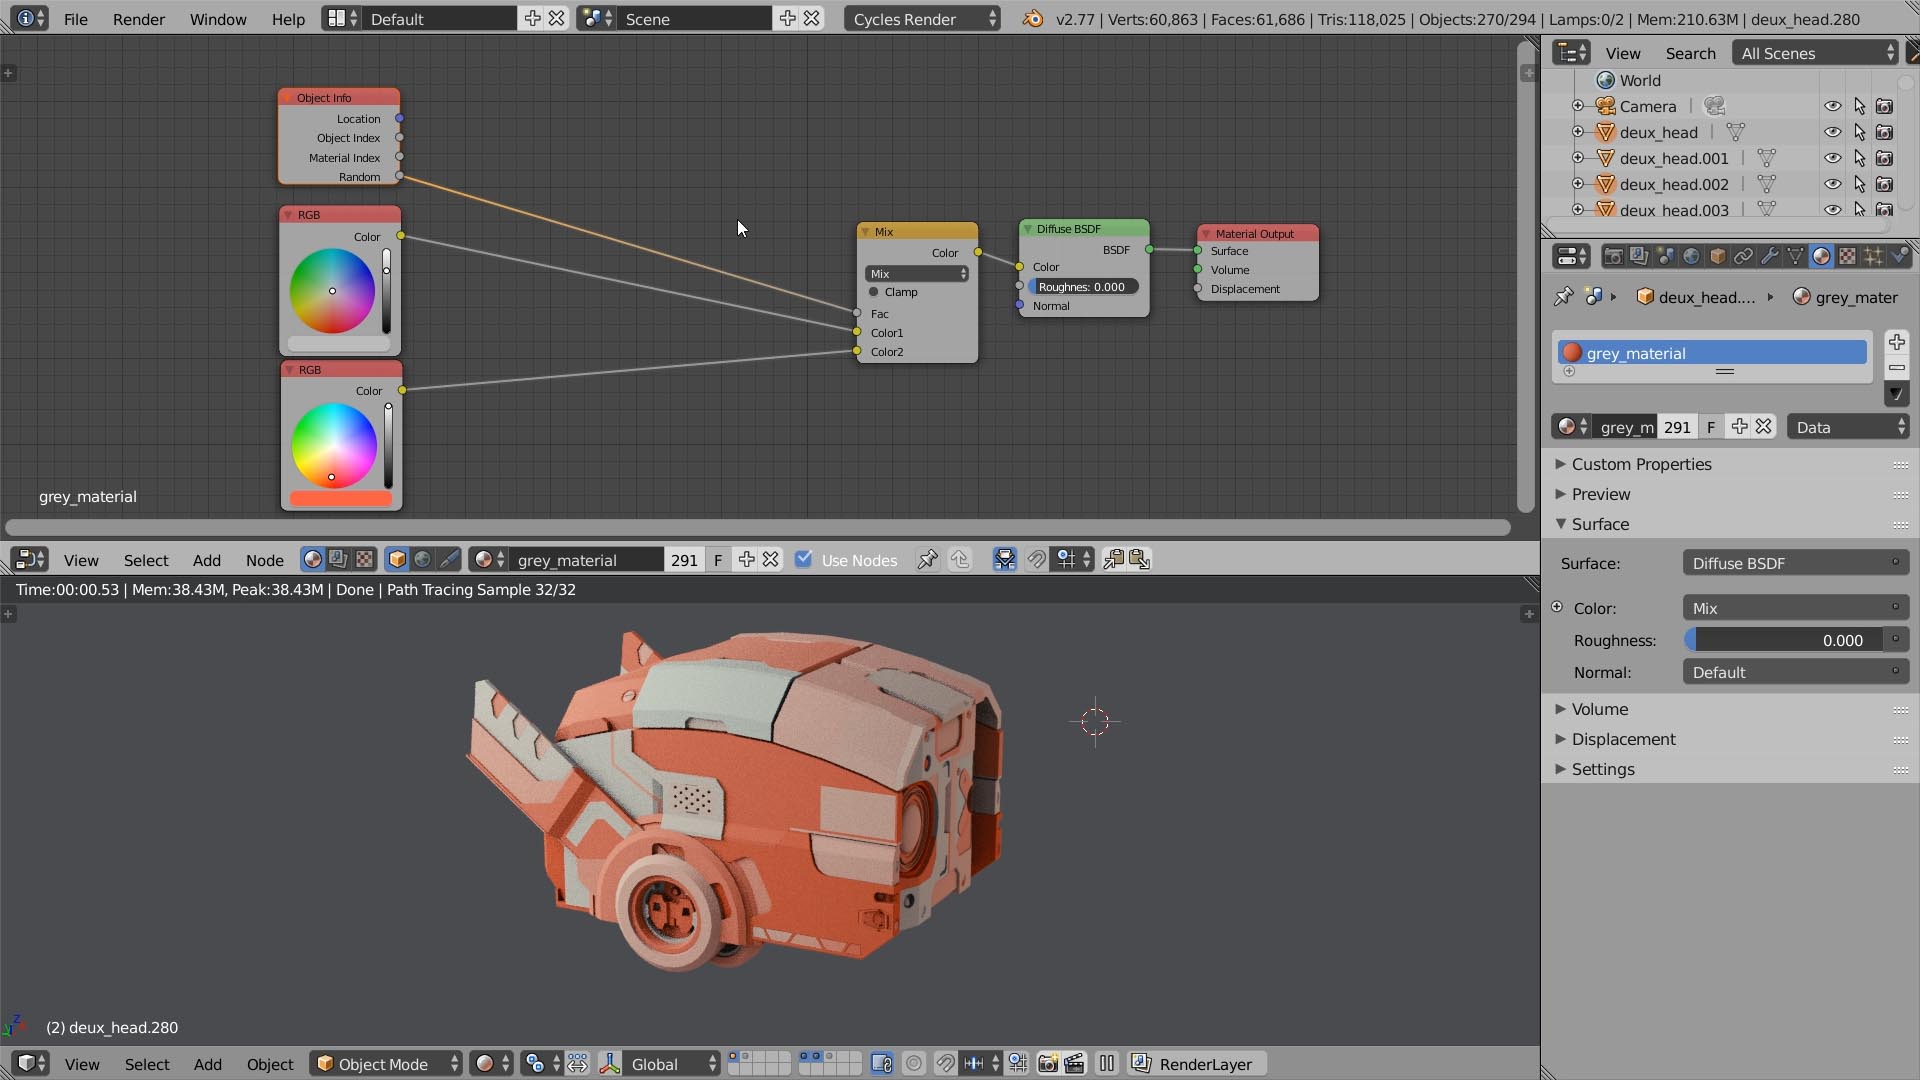
3. By Random
You can assign a random shade of grey to each object, using the Random output of the Object Info node.
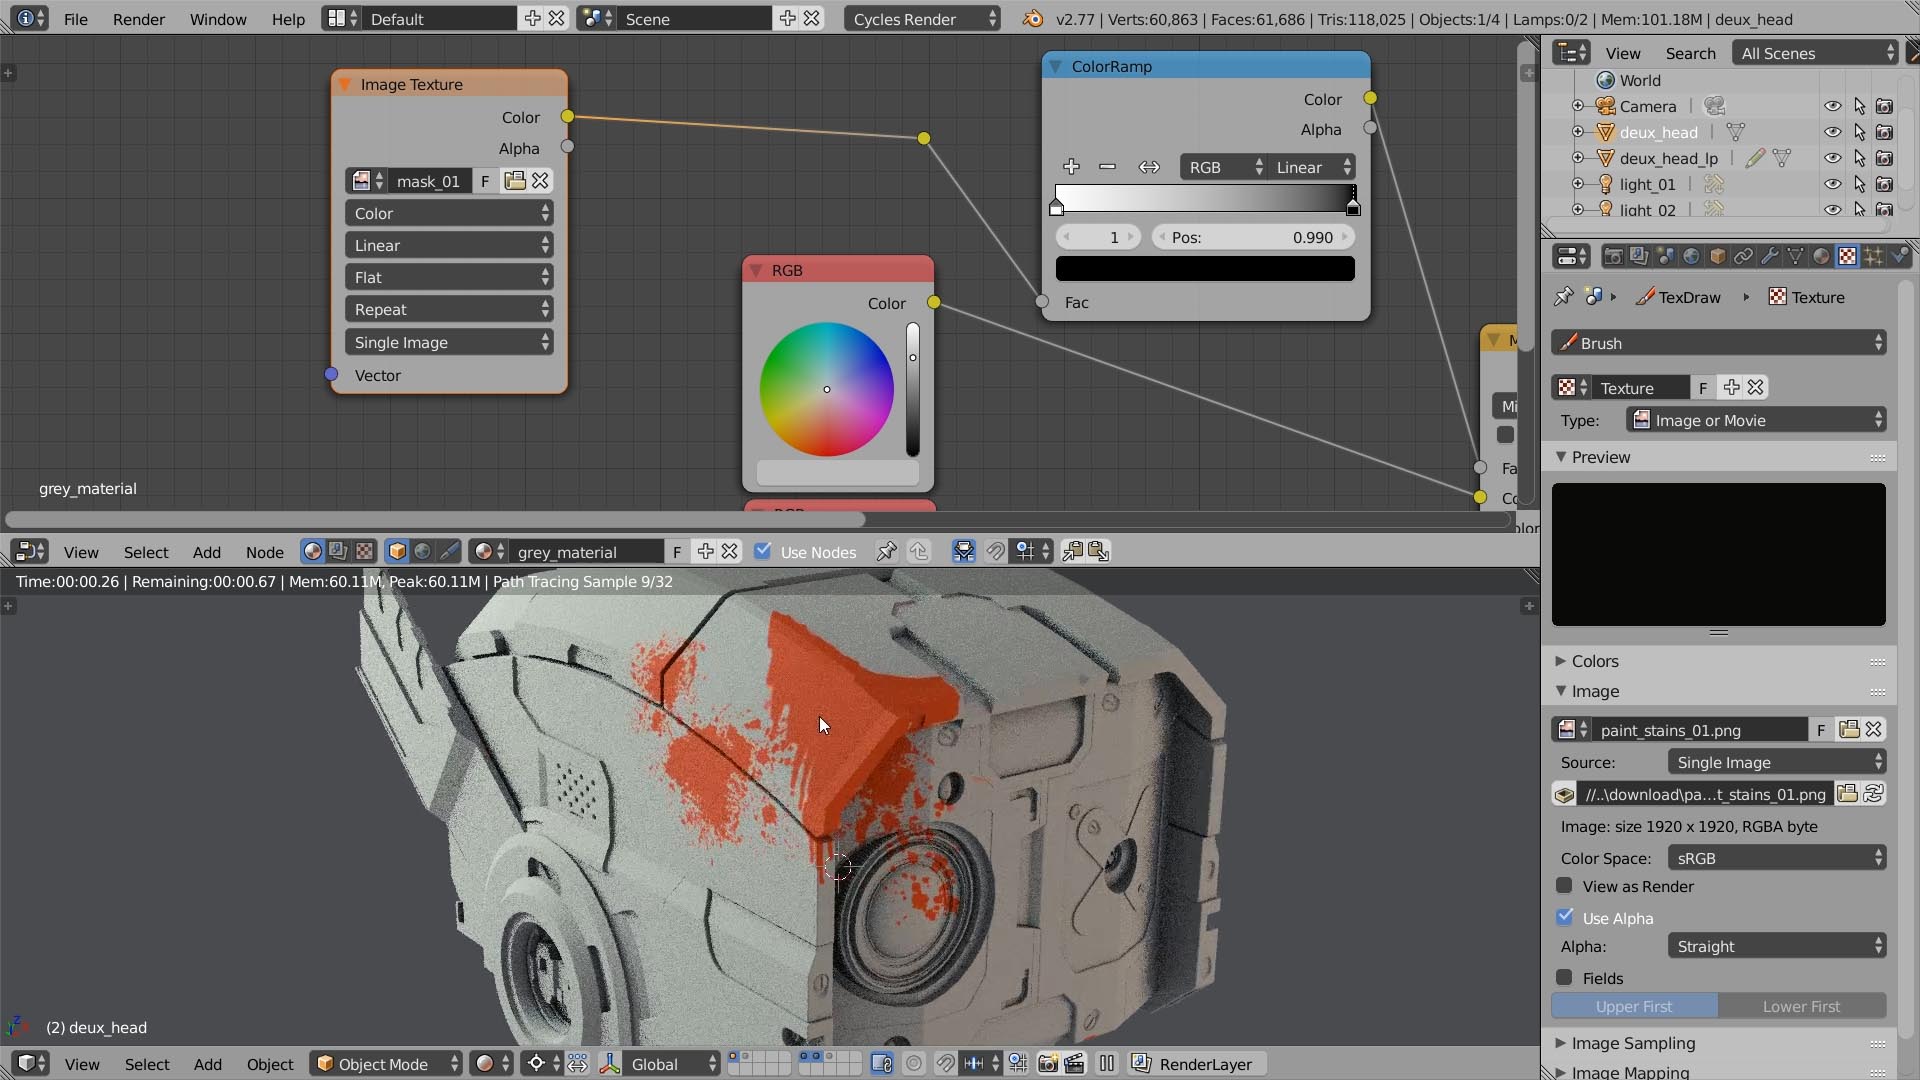
4. Paint the Mask in 3D
Probably this is the common place of texturing in 3D. Paint the mask by hand.
Unwrap the object using the Smart UV Project. Then go to the Texture Paint mode, add a diffuse texture into a paint slot. Have fun with painting.
5. Project the Mask
Press T to open the tools shelf, then go to the External tab and hit the Quick Edit button. It will launch Krita, Gimp or Photoshop (depending on what you set up in the preferences).
Then paint whatever you want on a separate layer. Hit Save, go to Blender and hit Apply.
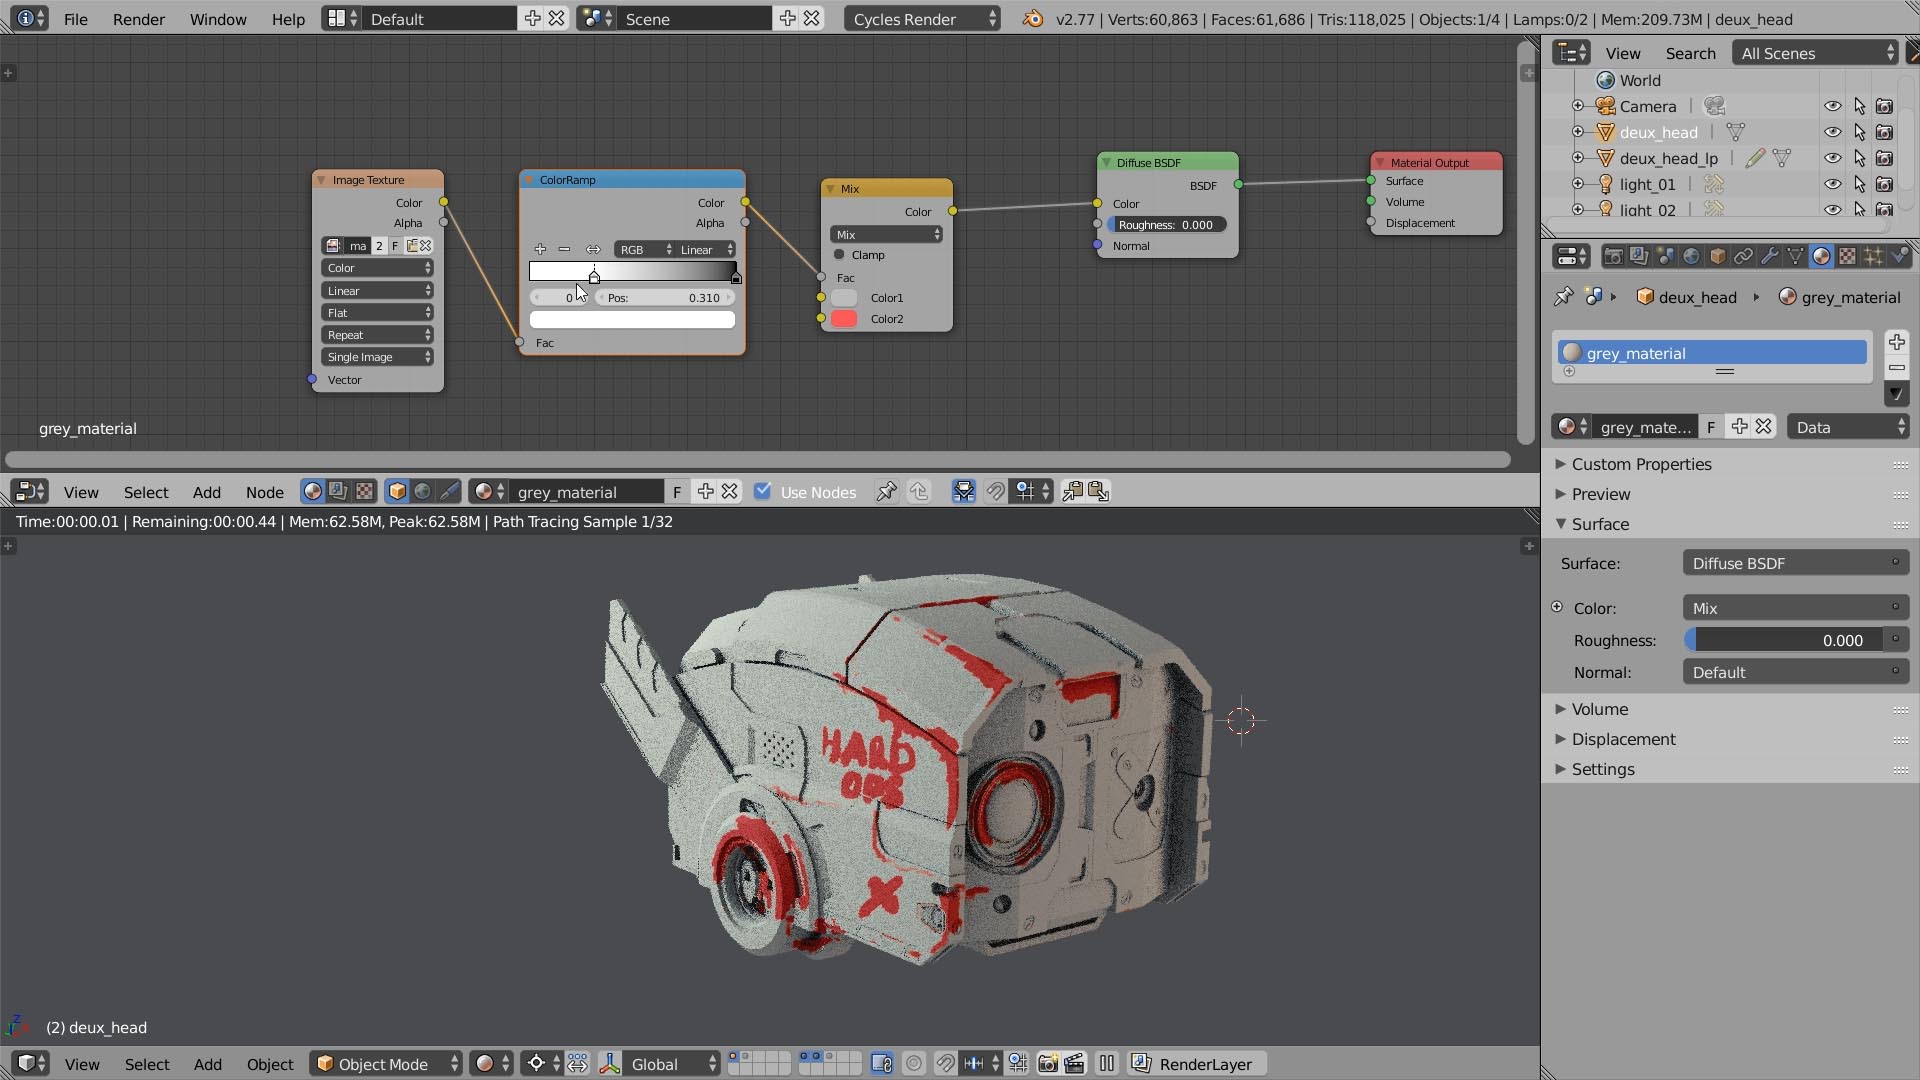
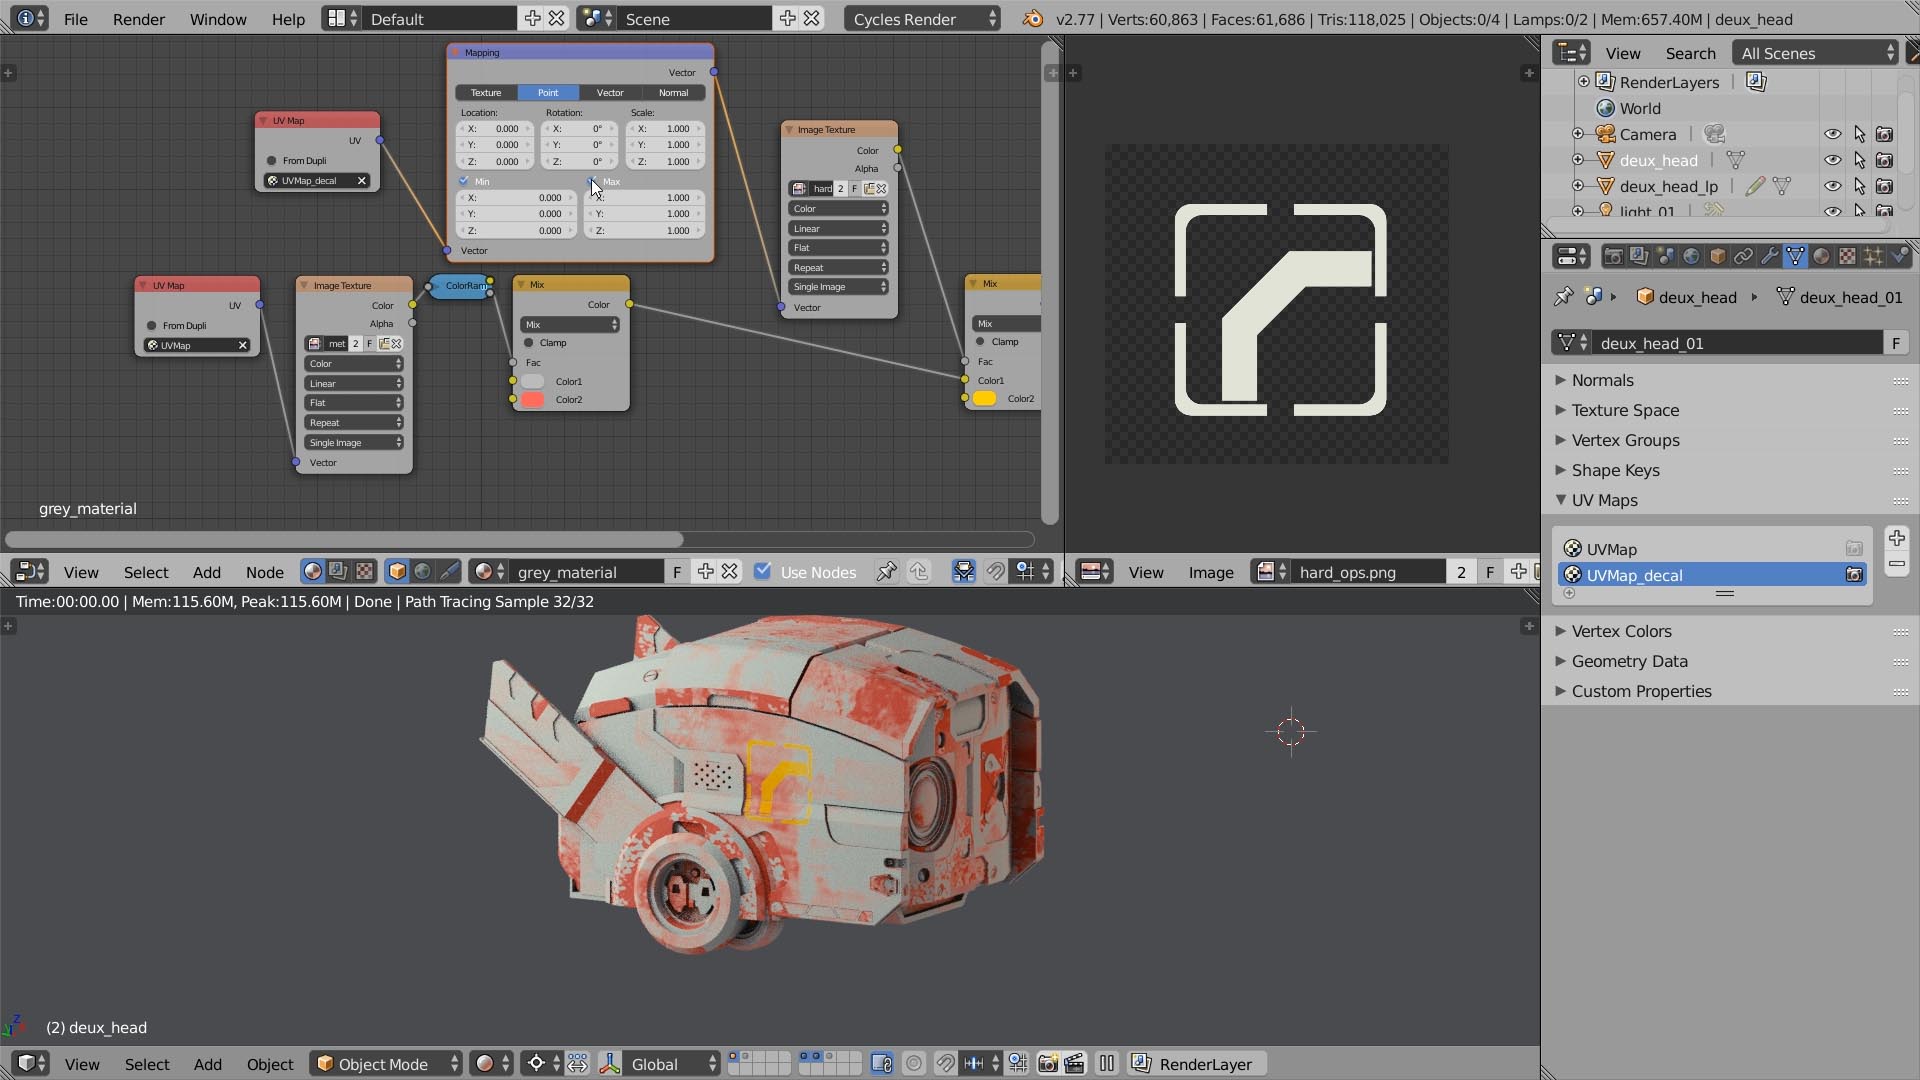
6. Use the 2nd UV Map
One of the easiest ways to add a decal is to use the second UV map. Select the second UV channel, then select some polygons and unwrap them using the Project from View method.
In the material editor, don’t forget to apply this second UV map to your decal texture.
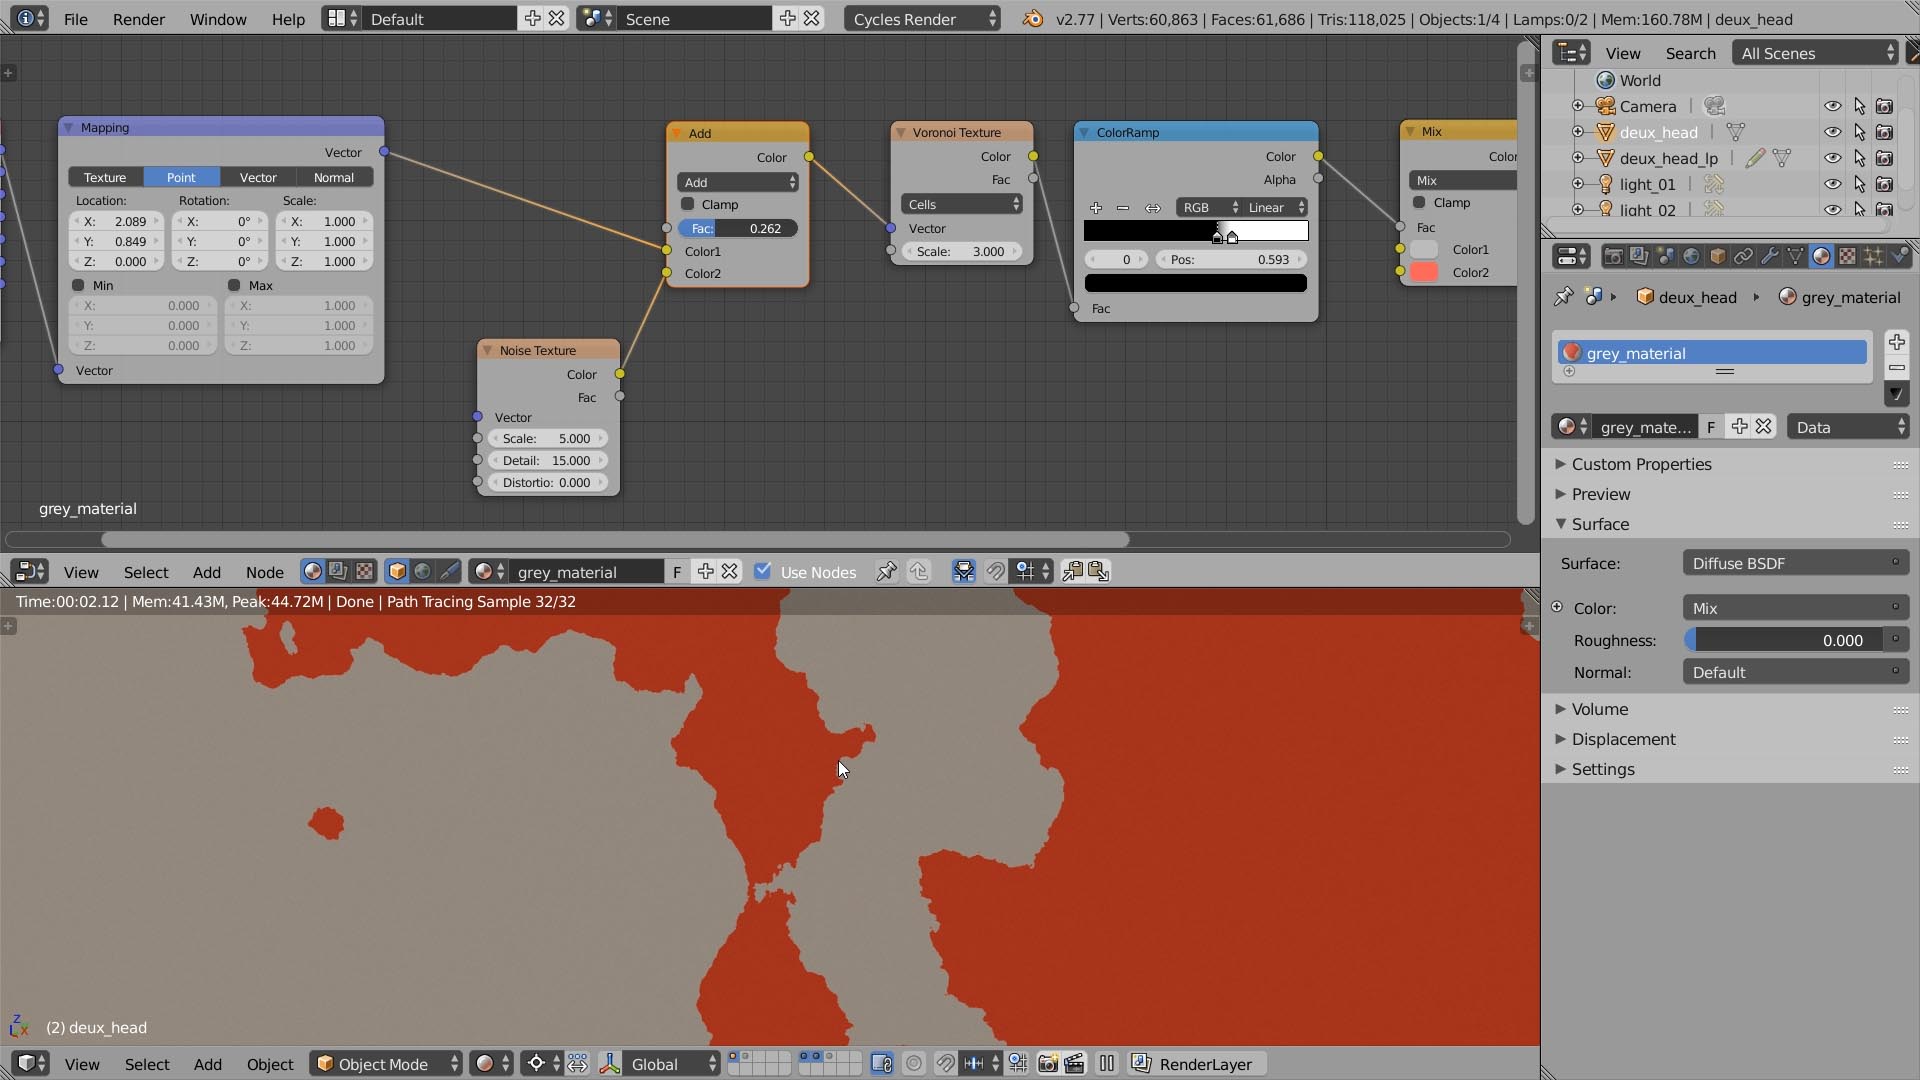
7. Procedural Textures
One huge advantage of the procedural textures is that they have an infinite resolution. Say, you can zoom in and still see a crispy clear outline.
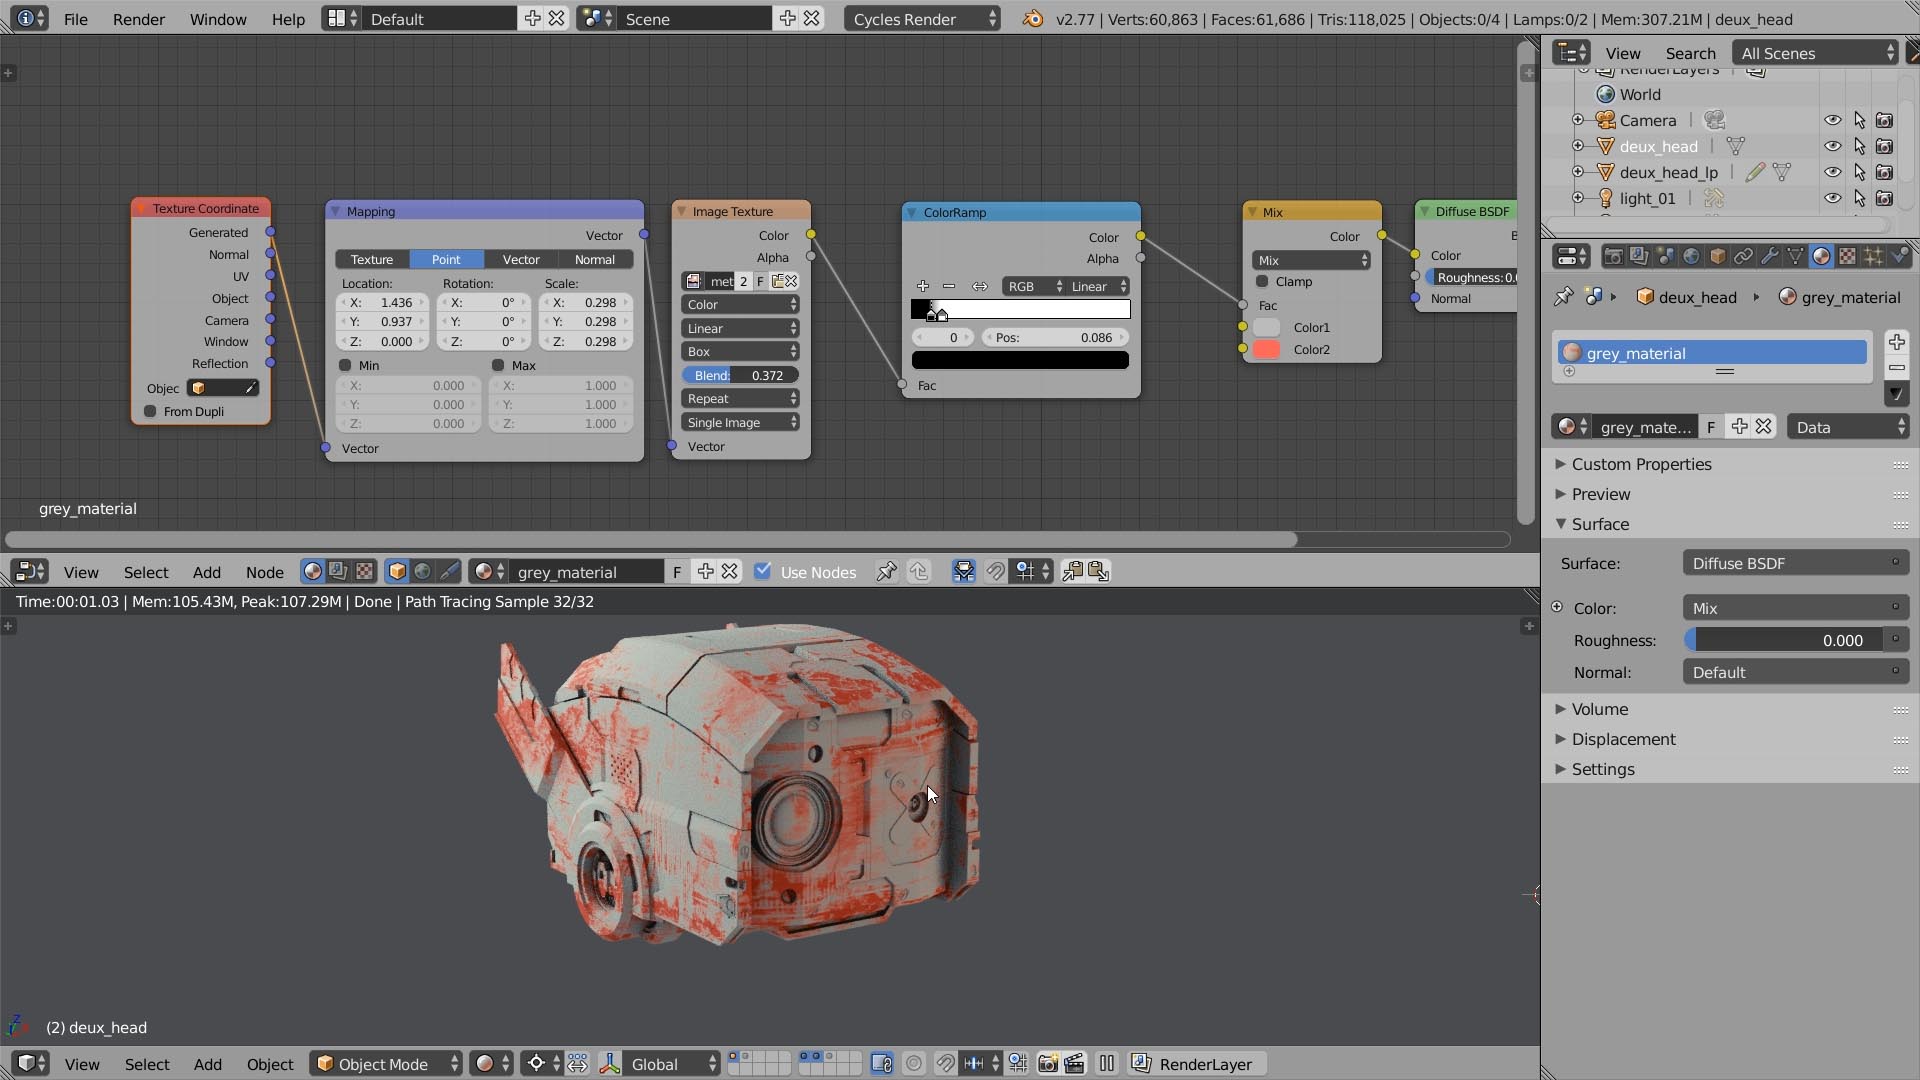
8. Tiled Textures & Box Mapping
If you hate creating UV maps for your models, you’ll love this way of mixing textures. You just need to apply the Generated coordinates with the Box mapping, to project the seamless mask texture from 6 directions (the sides of the box).
9. Normals
You can mix shaders and materials, based on the surface normals. Great for the direction-based effects: dust, snow and so on.
10. Height
For me it was a pretty counter intuitive way to draw the height gradient for the model. Clearly, I suck at math.
You can separate the Z component of the Generated coordinate. Then use it as a height mix factor.
Thank you folks at Blender Stack Exchange.

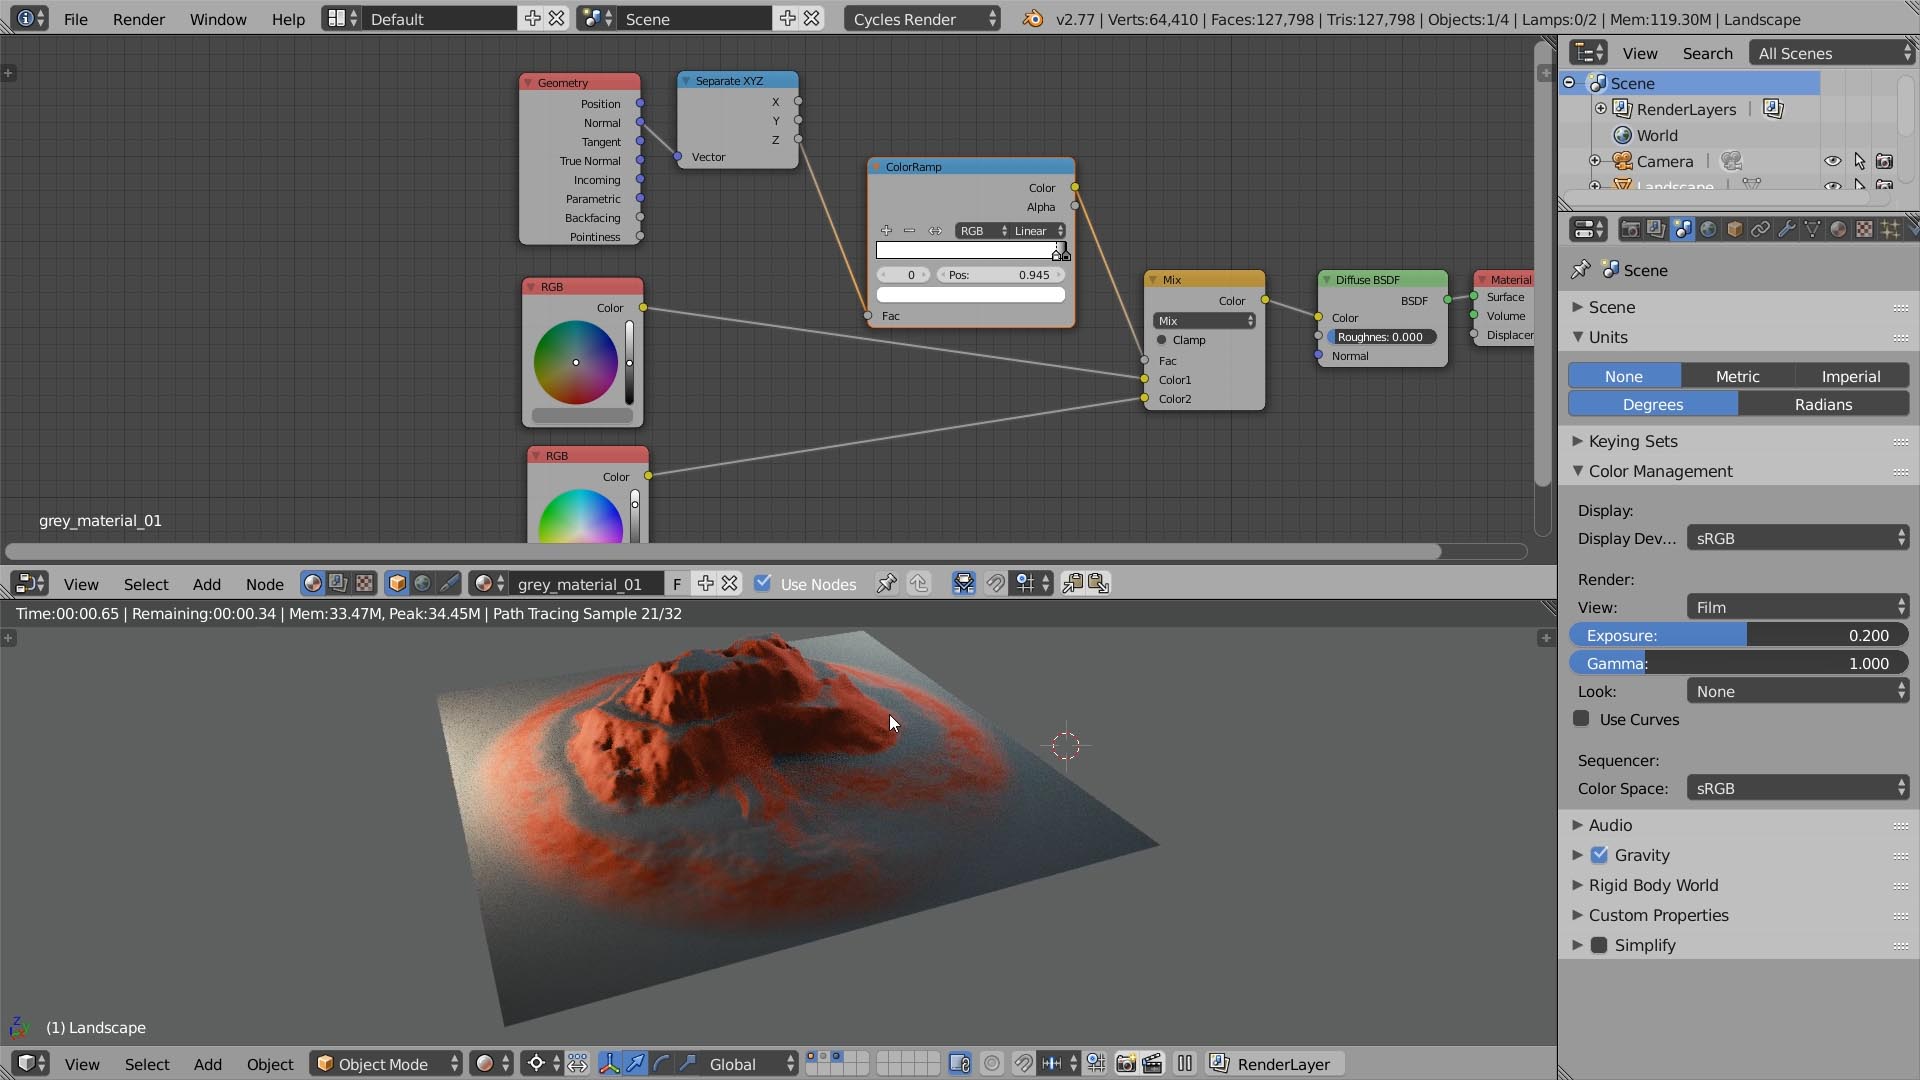
11. Slope
You can calculate the slope by separating the Z value from the Normal vector.
What else? Run it through the ColorRamp to fine tune it.
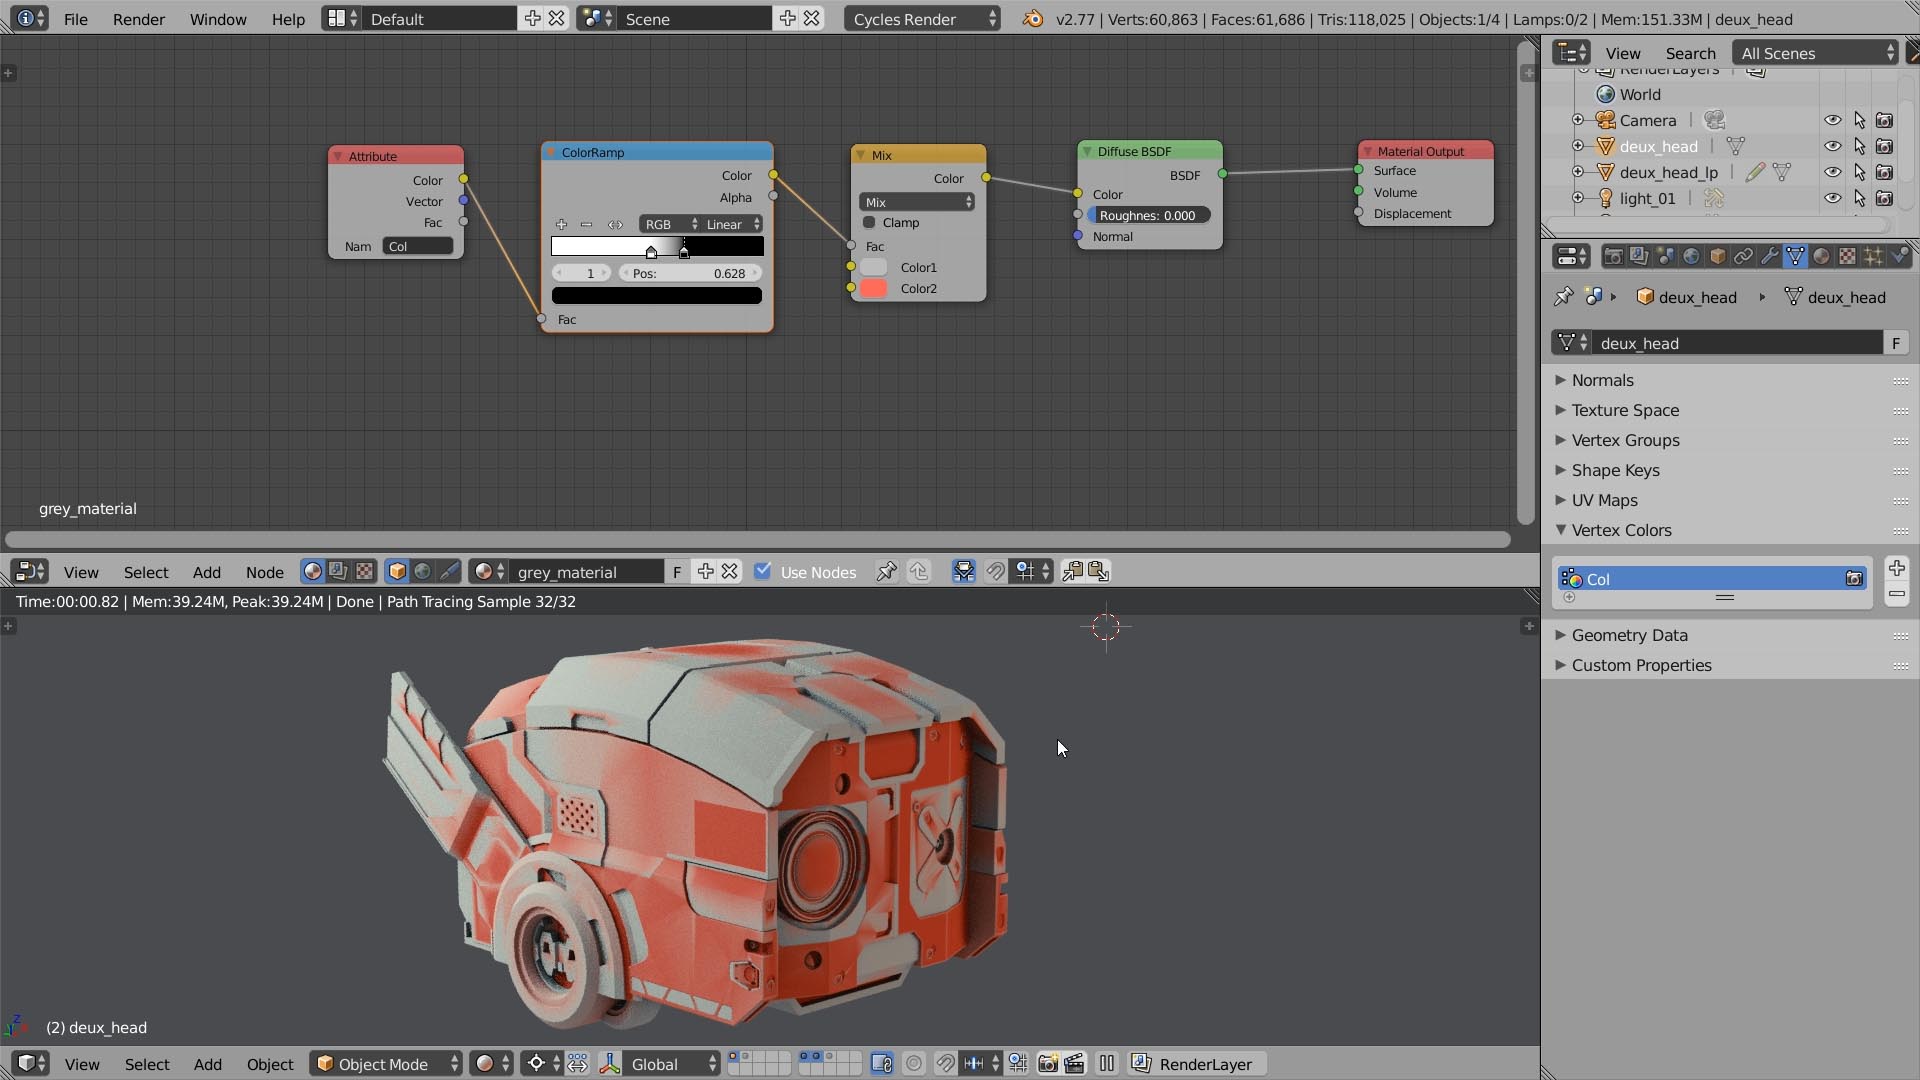
12. Vertex Color
Yet another way to mix textures is to use Vertex Color. This way is a bit sucky because this works well only on the high-poly models.
If you wanna try it, press V to enter the Vertex Paint mode, then paint the mask.
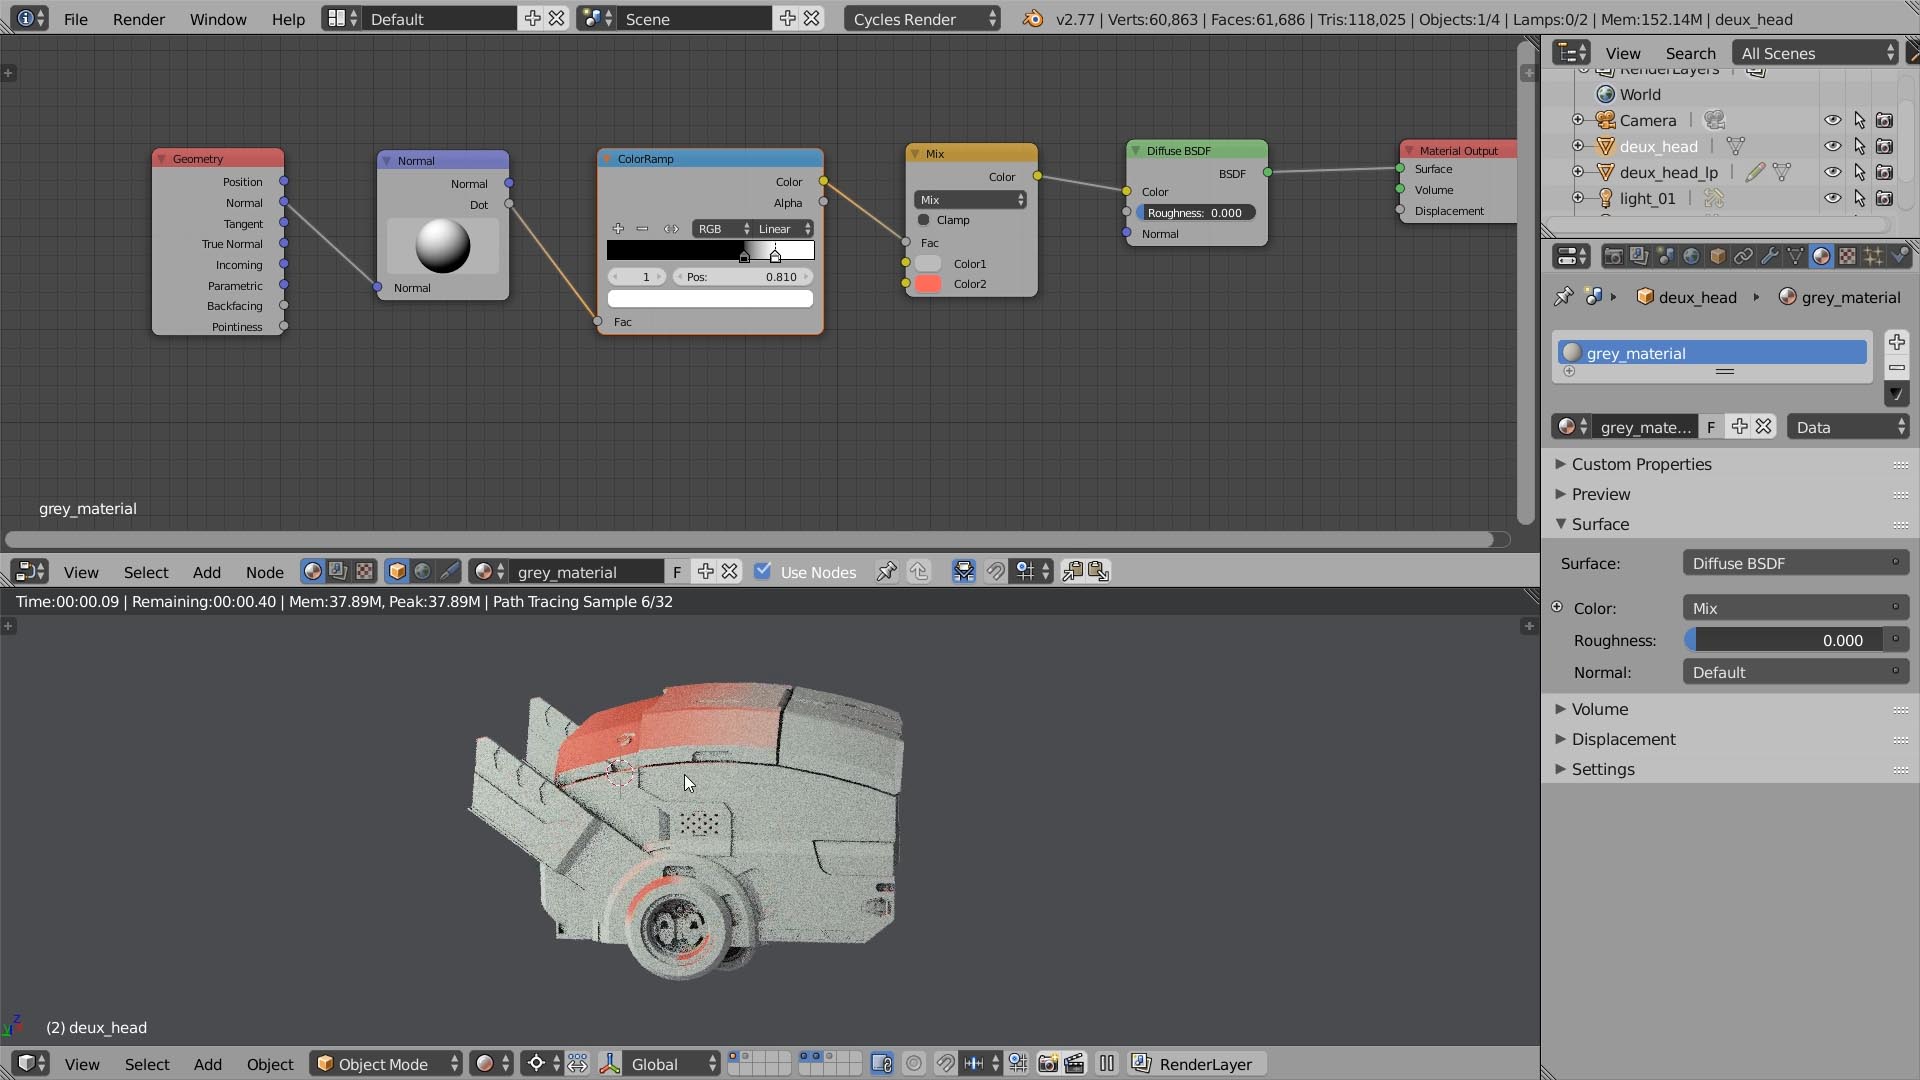
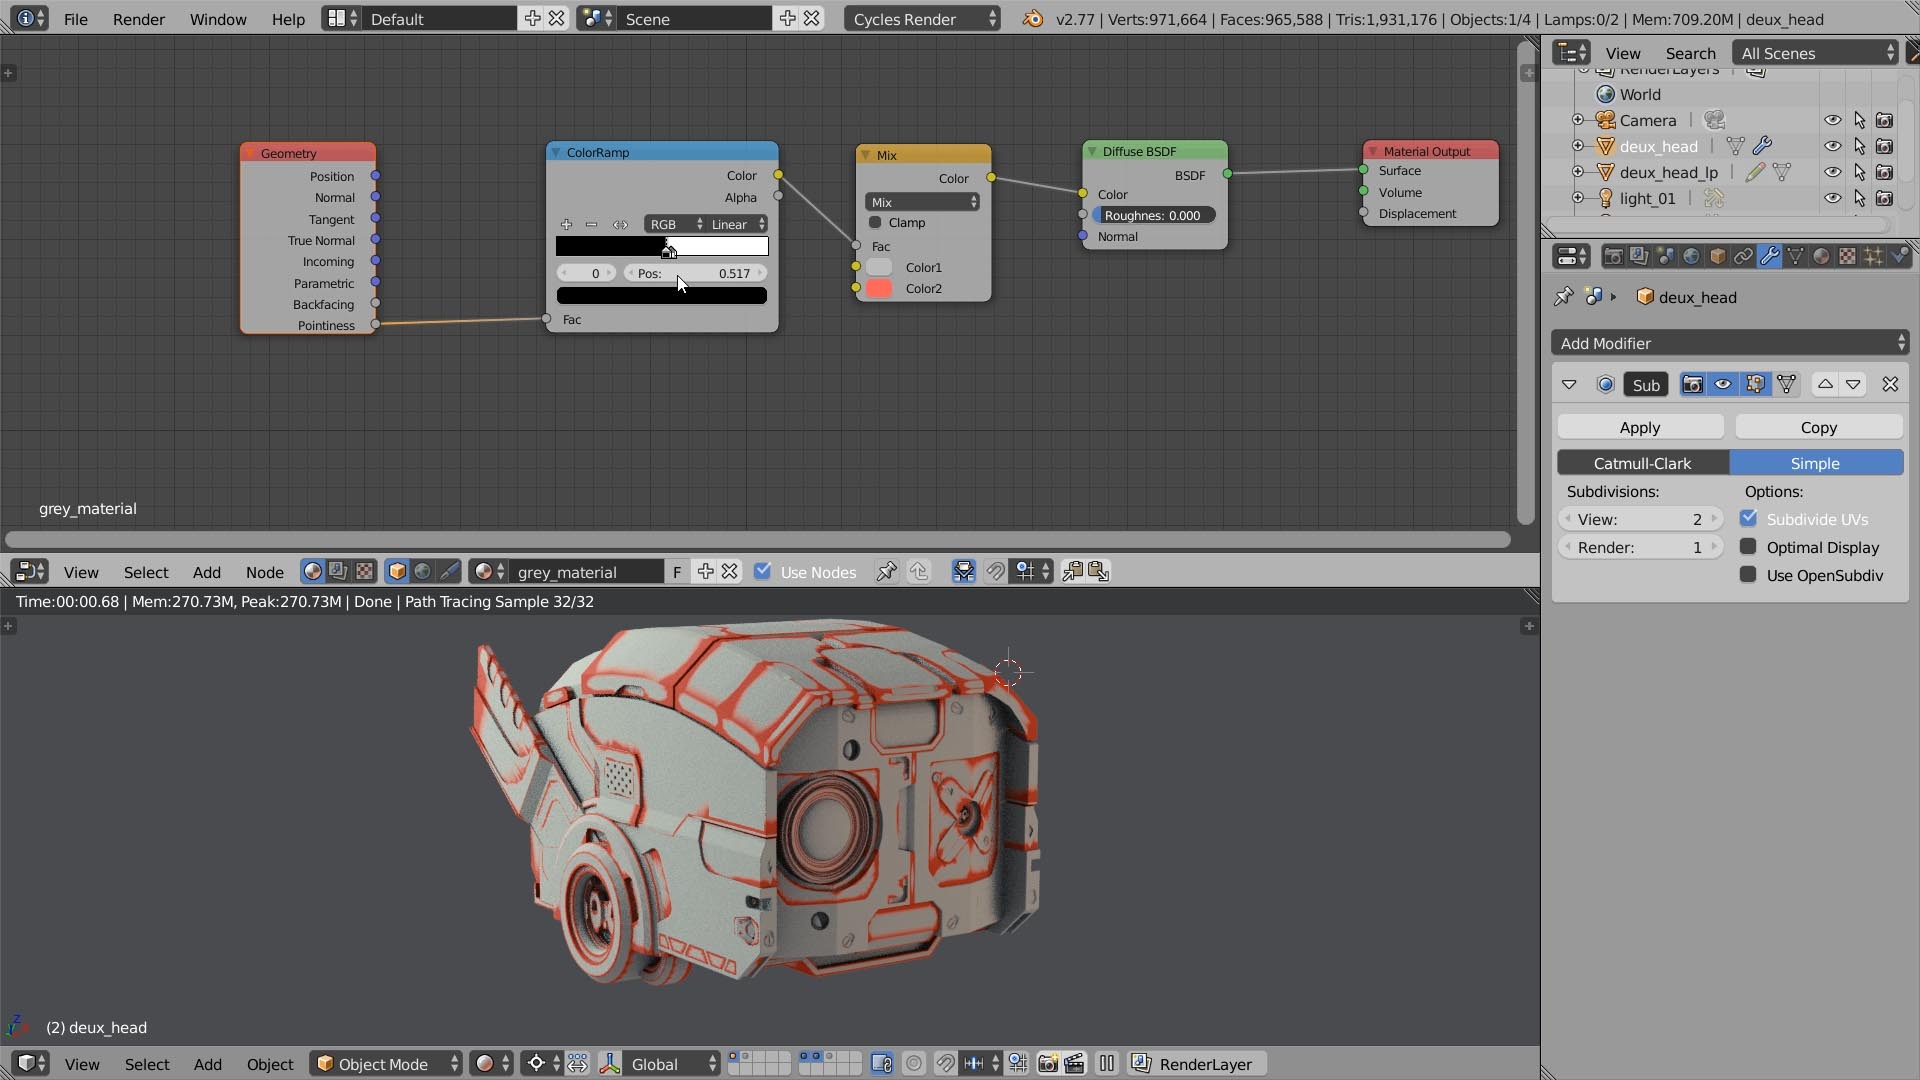
13. Pointiness
Pointiness can be used to mix between textures based on the object curvature. This is the easiest way to create an edge mask.
Though, it depends on the polygon density too.
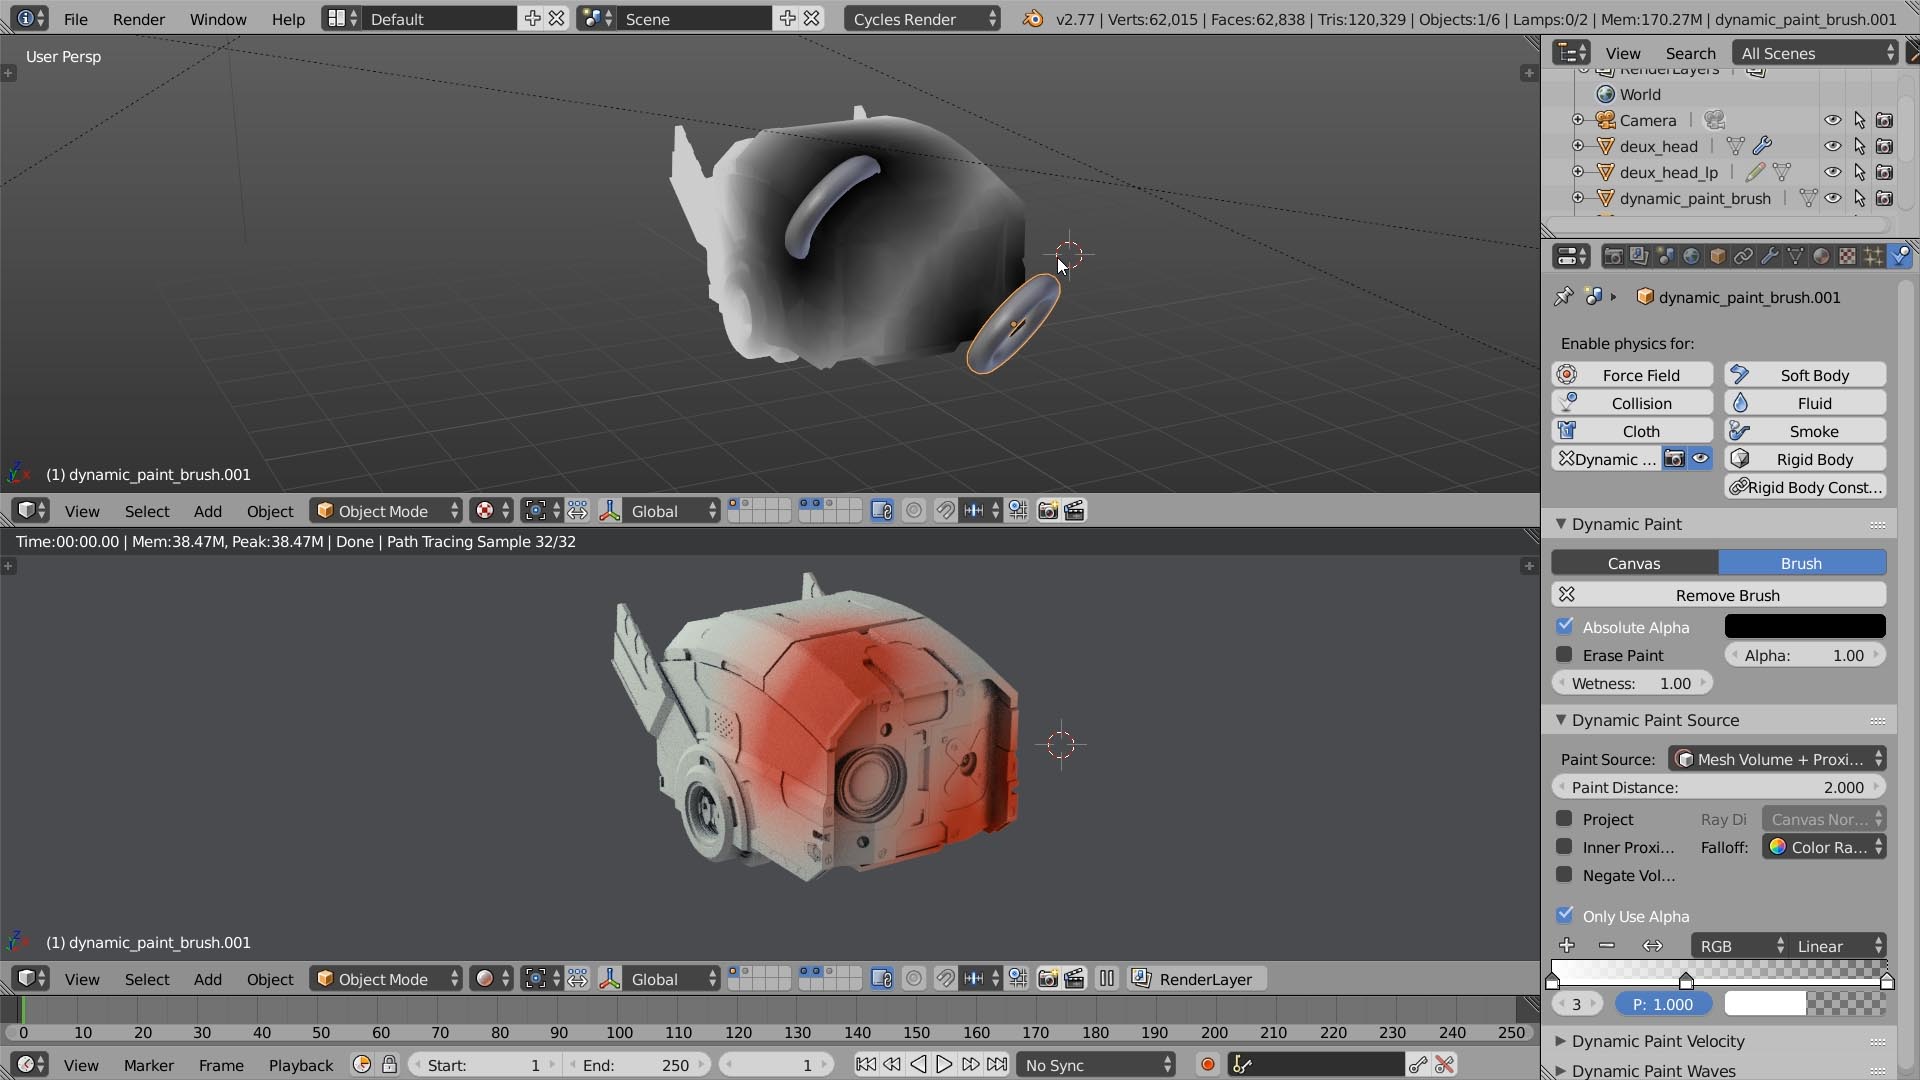
14. Distance (Dynamic Paint)
Finding the distance between two objects and passing it to a shader is possible. Cumbersome, but possible.
You need to enable the Dynamic Paint first. Then assign a canvas object and a brush object. The black and white Wet Map will be your distance gradient.
Your Turn
If you enjoyed this cute shrimpy tutorial, would you mind sharing it? Imagine it. We can unleash the avalanche of shares and make CreativeShrimp super popular.
At least, that’s in my wet dreams.
But you can make it happen, so please share like there is no tomorrow. There are buttons below the article.
Thanks!
Deux Robot by Jerry Perkins (aka MasterXeon)
Kudos to MasterXeon for sharing his amazing Deux with us. Personally, I think that it’s much more pleasant to texture a good model.
By the way, have you seen HardOps addon for Blender? If no, do yourself a favor and check it out (especially if you aim at creating the hard surface models). Personally, I’ve never seen such an elegant and a well-thought modeling tool.
To me it feels like Zbrush had an affair with Blender, and they got a child HardOps.
For those who have already tested this plugin, join the discussion and tell what you think about it in the comments. Thanks!

Adam Król
Thanks Gleb for great compilation of ways of texturing. But what about one more example, by project painting using texture and painting it over diffuse slot, saving it and then connecting via nodes?
Gleb Alexandrov
Adam, I think that’s very similar to projecting the mask. With that said, it’s a cool way to approach layering too. Can you reupload the picture plz?
Adam Król
Picture uploaded again. It’s similar but here you have many options to paint texture by brush mapping, in Photoshop you cant’ do that.
Gleb Alexandrov
Ah, I think I understood you. I covered this briefly in the tutorial, in chapter 4. But you’re right, we can also use the tiled brush mapping instead of stencils.
Adam Król
Oh yes, you wrote that, now I see it ;-). Sorry, I missed that chapter. It’s actually the same as you mentioned in chapter 4.
Gleb Alexandrov
Anyway, I appreciate your comment! I think we can imagine many more ways to approach texture layering, for the future tutorials. 🙂
Sayan Mondal
Really clever tricks. Thanks for sharing!
-Sayan
Gleb Alexandrov
You’re welcome, Sayan!
CVETKO
Awesome as allways 😀
can i know your cpu, gpu and ram?
Gleb Alexandrov
Sure 🙂 I answered it in this podcast: http://www.creativeshrimp.com/askgleb-episode-9.html
CVETKO
Thank you a lot, now i can think about my congfiguration… Just one more question, when you use gpu for render, do blender use cpu or gpu for viewport render view? I hope you undrestan what i mean
CrazyEngine
It uses GPU. I would recommend you to buy a GTX970. It’s pretty fast for Cycles, the prices are so goddamn low atm and the 3.5GB issue shouldn’t be a problem for rendering with it. ^^
CVETKO
Thank you that sounds great, but 1070 will in few monts be less than 100$ more than 970 and about 3x faster so i will wait for it…
CrazyEngine
Well, that’s okay, I guess. 😀
Michael Yoseph
Thank you Mr. Alexadrov! I used tip #9 to add a little snow to my tree 8)
Gleb Alexandrov
Michael, that looks awesome and very organic! Well done!
Pedro Velez
Awesome job Gleb, as usual. I have learned a lot!
I am trying to compare Blender texture painting capabilities with
dedicated software such as Substance Painter/Designer or Quixel. Do you think it is worth use these tools to complement Blender?
Gleb Alexandrov
Pedro, why not? Try it and see if it makes any difference. Either Substance painter or Quixel soft is a pretty awesome tool for texturing. I drool when I see the stuff people do with it.
Dee van Hoven
Thx for this tutorial 🙂 awesome ! we made this in less than 2 minutes, a simple plane and paintng via a texture….duplicating the diffuse map and set this to non color data and give them a “bump”… 🙂 ok not the correct way, but we made only a test 🙂 awesome ! thx Gleb, greets from our team in Auckland
Gleb Alexandrov
Dee, this looks pretty nice 🙂 By the way, in the upcoming release of Blender we will have a micro-polygon displacement (as far as I know). I tested this thing and I can tell you that it’s so cool for the stuff like the bricks. https://www.youtube.com/watch?v=wZc6vz5klsQ
bolaji adelodun
I never knew that was possible with dynamic paint…Great! nd what’s the name of the UI theme?
Matias Nougues
I need to know it too
Bolaji Dele-Adelodun
It’s one of the default ones…check user preferences
Matias Nougues
Yes, I found it yesterday. Thank you 🙂
Astro1derboy
Gleb, this is outstanding! I’m embarrassed to say that, although I’ve been using B3D for several years, I have never known of tips 4 and 5. These will be added to my workflow from here forward. I love your tutorials and all you do for the Blender community (and the general art community). Thanks for sharing!!
Gleb Alexandrov
Funny thing, initially I was going to pack just a few texture mixing tips. Like 3 or 4. But it has started to unfold very quickly. We ended up with 14, and I guess there are many more useful tricks to explore.
Astro1derboy
Well . . . if you find ’em, please share ’em. There’s a lot of ol’-timers still learning in here. 😉
Roland Taylor
No matter how long you’ve been using Blender, there always seems to be much to learn.
Thanks!
Russ
my favorite trick is to mix 2 or more seamless image textures with a procedural to prevent repeating patterns; for example mix 2 or 3 asphalt textures using a noise texture to get a large parking lot without repeating patterns. also good for bark, metal or ground covers, anywhere you need a large area with detailed textures, and you don’t have a big enough image.
masterxeon1001
#deux
Gleb Alexandrov
Yay!
Martin Hooper
Gleb any chance of being able to download the blends for all these techniques?
More for all the node layouts than anything else…
Igor Jabłoński
Hi Gleb! First let me say that You are doing tremendous work and help us, those who are just getting started with Blender. I’d like to ask your opinion about my new project (it’s not completly done xD). I am a beginner but I try to learn from the best! Greetings from Poland!
Gleb Alexandrov
Igor, I like these spheres concept! Good job. Let me give a few suggestions:
1. I’d try to avoid too centered placement of the main sphere. I’d drag it to the side instead, to abide the rule of thirds 🙂
2. Details, especially in the focal point
3. Lighting. To add life and variation, we can add a key light of a warmer color (left), and a rim light of a cooler color (right).
Hope it helps.
Igor Jabłoński
Thank you very much for your response! Your advices (and movies) helped me a lot! I try to make my project similar to the original. What do you think about this now? ( I’m still working on it)
Gleb Alexandrov
Oh f##k, now you nailed it! It’s 10 times better (especially love the out-of-focus particles).
p.s. can I share it on my facebook? or maybe you’ll send me the final version, and then I share?
Igor Jabłoński
Yes of course! Give me a little more time to improve the details. When I finish it I will send you final renders. It will be an honor for me!
Gleb Alexandrov
Perfect, let’s do it this way.
Igor Jabłoński
Thank you for the kind words, you gave me the motivation to further projects were even better!
AF
Really great thanks Gleb….
Jean-Marc
Creative Shrimp…my go-to place when I am in need of inspiration, thanks again!
Have you bought the 1080? Will you write an article about it with Blender?
Adam Líška
Thanks for the tips! Because I’m too lazy to paint textures, I really love #12 and #13 🙂
http://deargruadher.deviantart.com/art/My-EDC-626468972
Gleb Alexandrov
Adam, thanks for sharing! All in all, laziness is the key to productivity.
Jesus Correa
Hi Gleb i learn so much with this tutorial, but i want to know something, can i append a complex material and mix it with others materials in a procedural way? (my english its not the best sorry about that)
Gleb Alexandrov
Yes, absolutely. You can append the material from other scene, then group it if you wish, then it’s just the matter of masking it out using whatever you like.
King Pineda
Your tutorials are awesome !!
Bob Nolin
This would be very helpful if it were more than just a high level list.This stuff may seem obvious to you and need no further explanation, but I need more information to actually move forward. Texture painting, in particular, is really poorly represented in tutorial-land, for some reason. What I’d like to do is start with a projected image texture, and then add layers of detail on top of it. Lots of tutes on how to paint a naked model, but nothing on how to do this, that I can find. I’m probably just going to learn Substance Painter, as it’s a very powerful texturing tool, probably years ahead of Blender in that area.
David Peterson Harvey
Bob, this should help you.
https://www.youtube.com/watch?v=XVA8CYC9z2o
Bob Nolin
Thanks, David, I’ll check it out. His tutorials are usually first-rate.
Louis Spencer
awesome!