True Depth, a Blender add-on for turning 2D images into 3D models using monocular depth estimation, has got a massive update. Version 3 includes, in addition to the Flat Relief mode, the Perspective and the 360° modes and some pretty cool new features as well. So it’s time to update our True Depth tutorial.
Video Tutorial (Full Guide)
—
New 2D to 3D Modes in True Depth V3
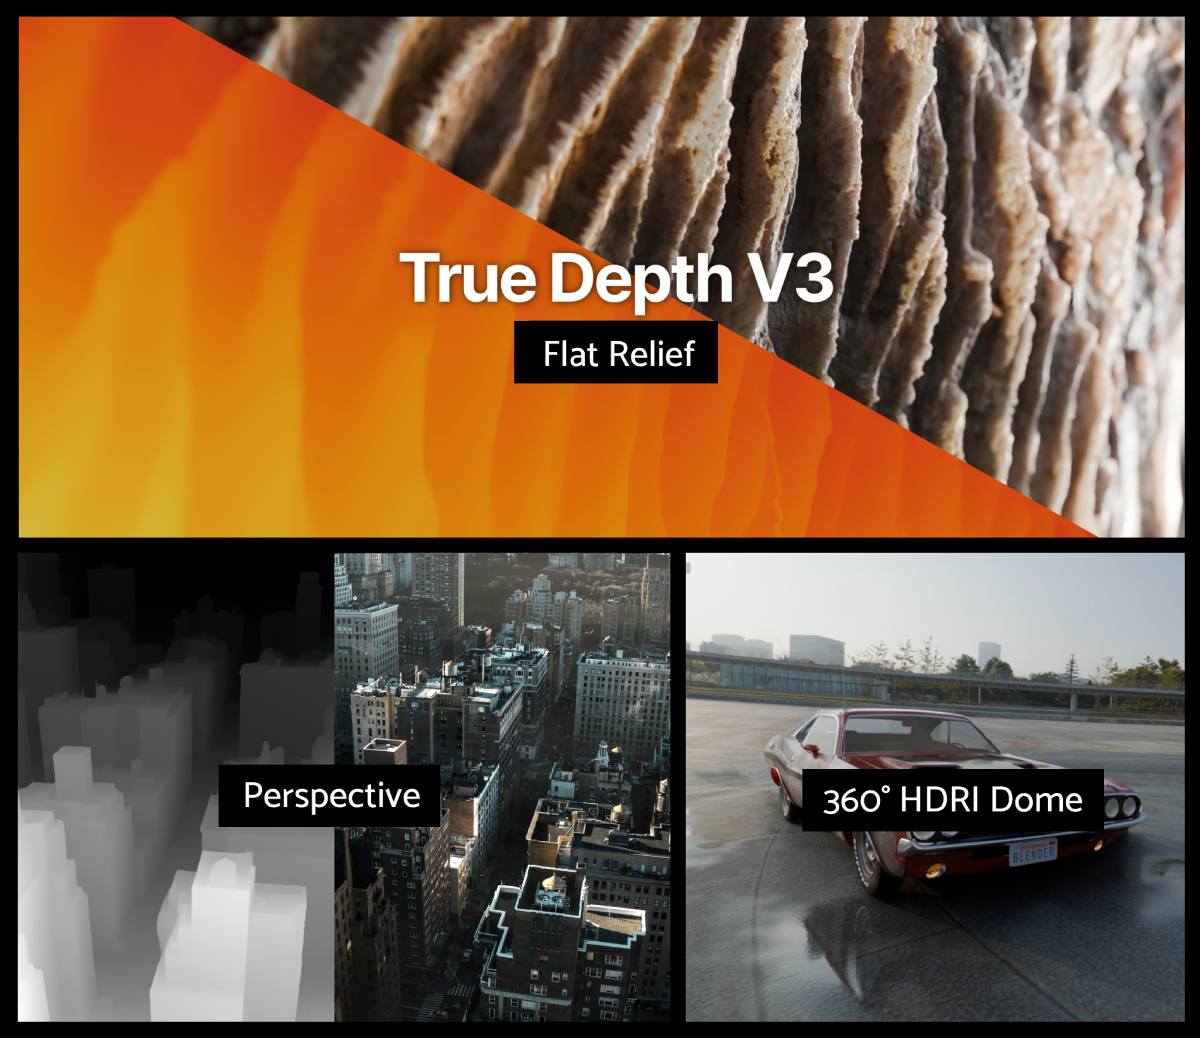
In addition to the Flat Relief mode, there are two new modes in True Depth version 3: Perspective and 360° HDRI Dome.
- Flat Relief generates, despite its name, a 3D displacement based on a depth map generated from a source 2D image.
- Perspective creates a camera-projection-style 3D scene, stretching into the depth and is useful for environments and cinematic shots
- The 360° HDRI mode creates a dome projection setup for a selected HDRI environment (in one click)
Jump to sections:
Perspective Mode NEW
3D Printing NEW
Depth-Anything-V2 – Installation (Local, 16-bit patch) NEW
—
Flat Relief Mode: True Depth’s Main Blender Workflow
The main mode of using True Depth is still flat relief – or actually a 3D relief generated from a single image. Think Polyhaven textures and PBR workflow. Or capturing heightmaps and other surface properties using photogrammetry. 2D-to-3D gives you a pretty high-quality, close-to-ground-truth heightmap.
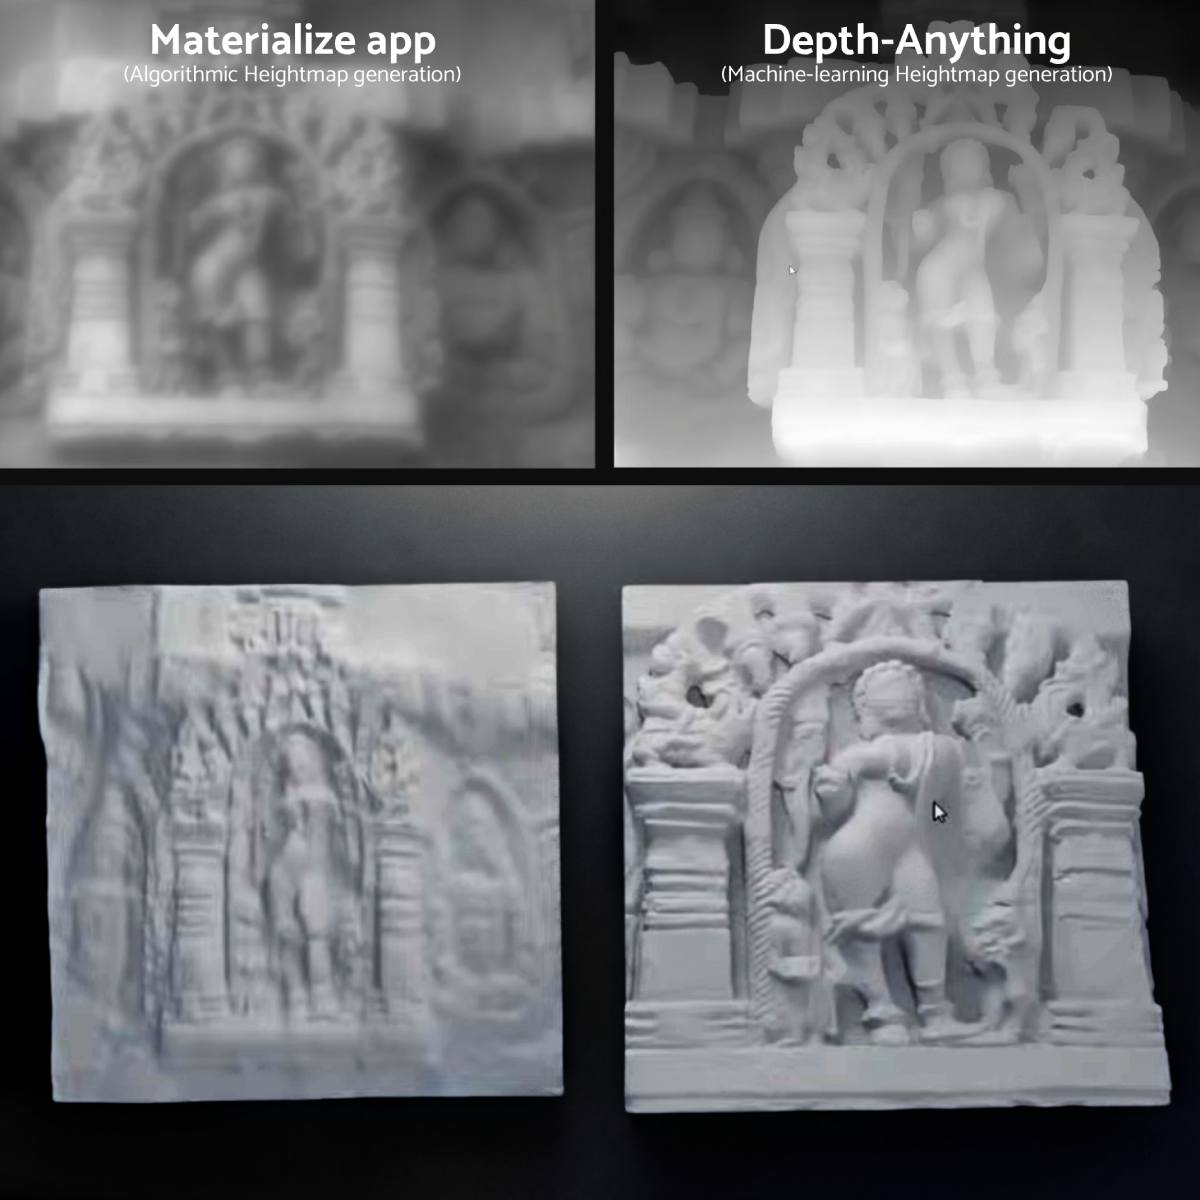
How close to ground truth is it?
I saw this question on X/Twitter. Depth maps generated by Depth-Anything-V2 are miles ahead of *any* algorithmic solution. For instance, Materialize app: its displacement output isn’t anywhere near.
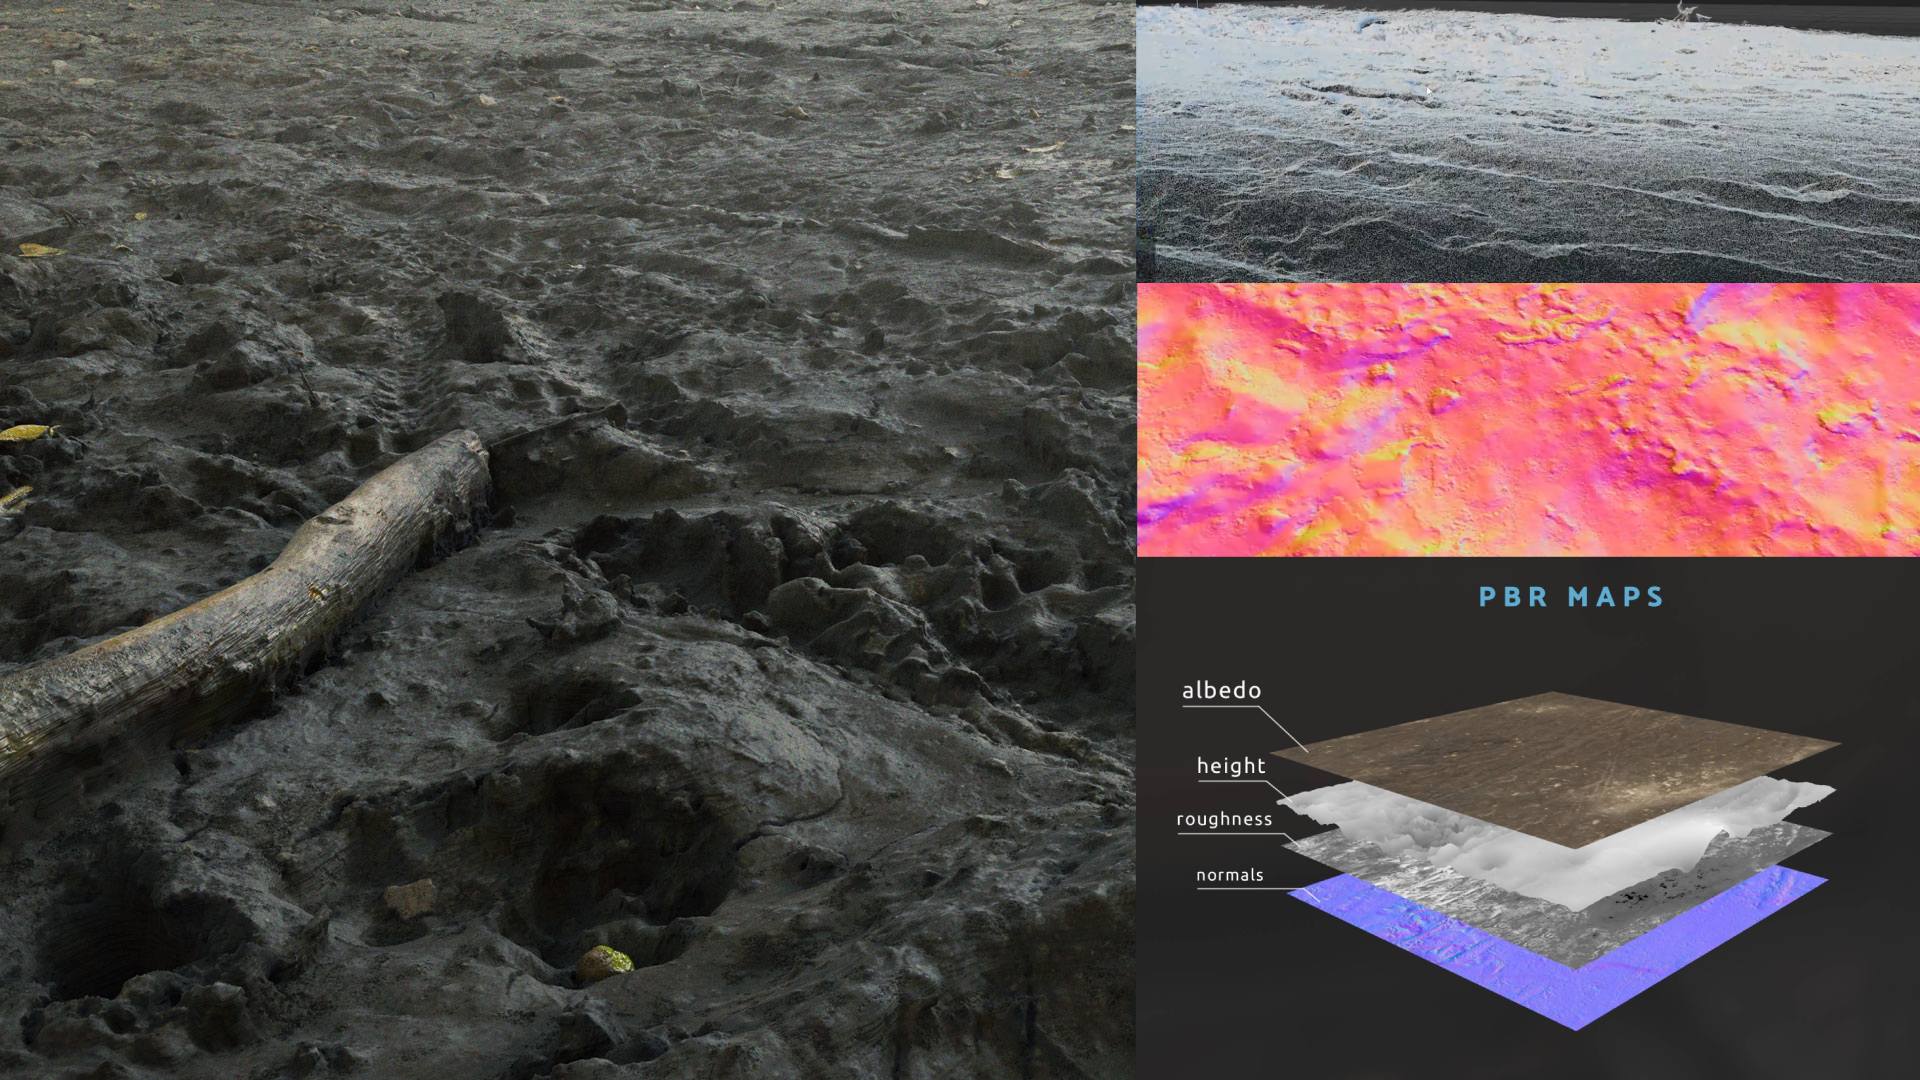
Machine-learning-based depth estimation can only be topped by real heightmaps captured via photogrammetry. With the obvious caveat: to photoscan it, it has to exist. You need to have access to it and so on.
Check our photogrammetry course for more info on capturing real PBR maps.
Flat Relief Mode
Click Open Image, store the depth map beside the original image, and hit Generate Depth Map right away. The further away the pixel is, the darker it appears.
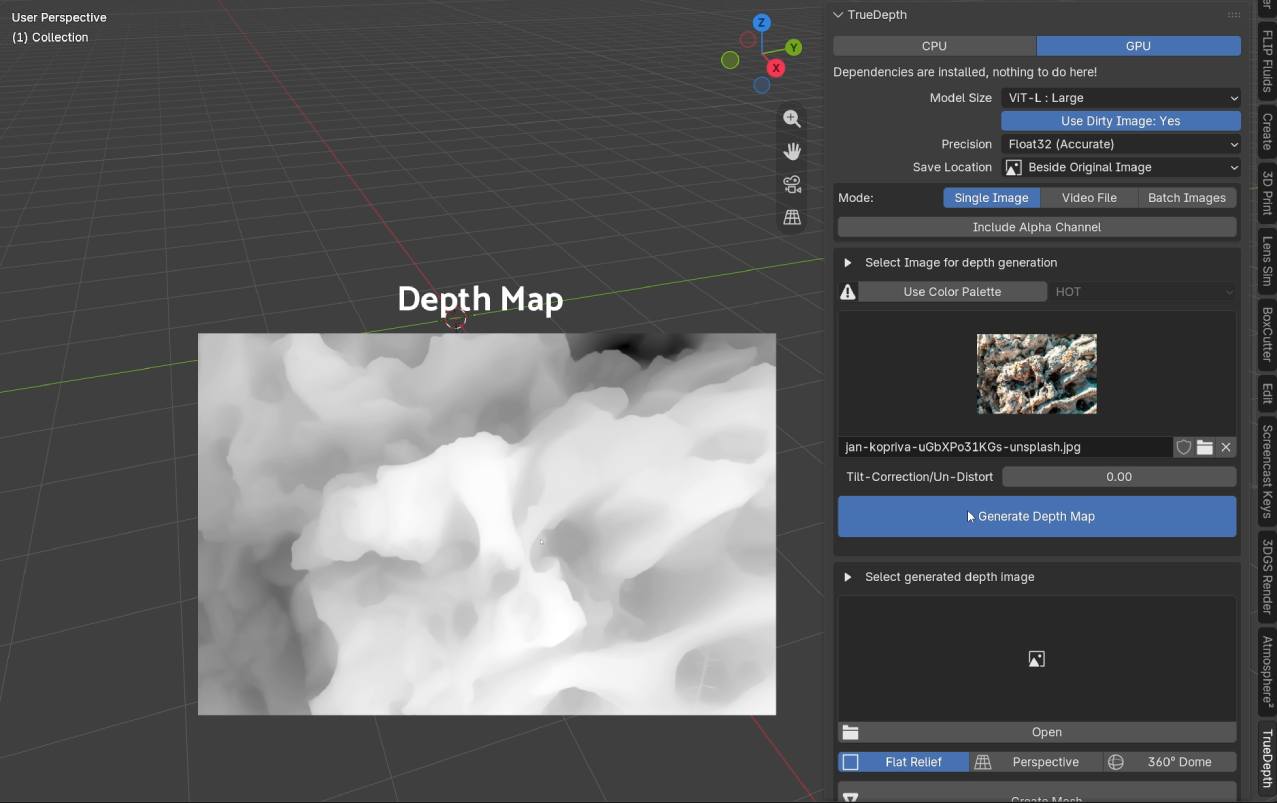
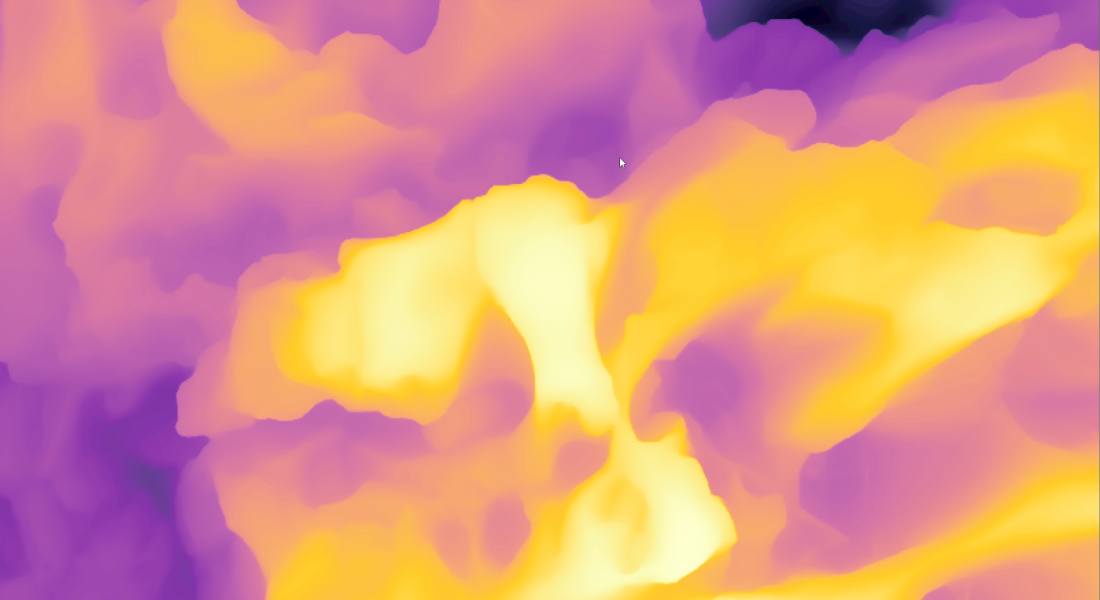
Instead of grayscale, you can use fancy color palettes for aesthetic reasons, but they perform a bit worse than grayscale palettes and are not recommended for actual production.
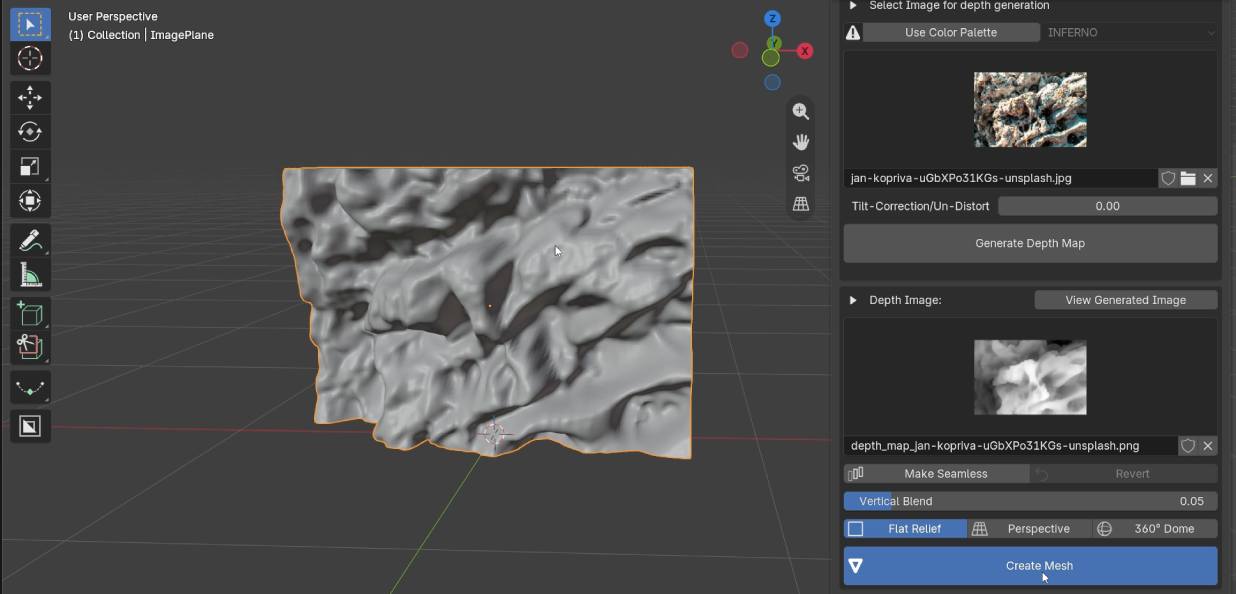
Depth maps are stored in the same folder beside the source files. Once in flat relief mode, simply click Create Mesh and the mesh will appear.
—
Lighting for Relief
If you use EEVEE for rendering, enable Raytracing.
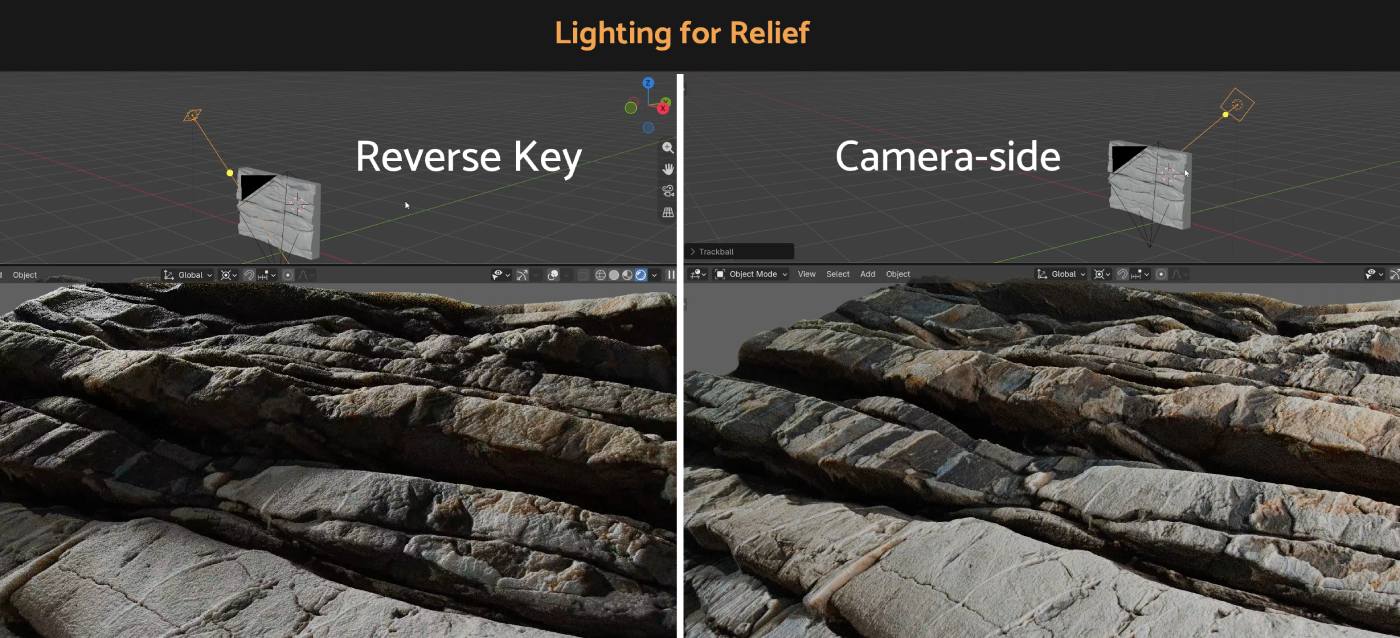
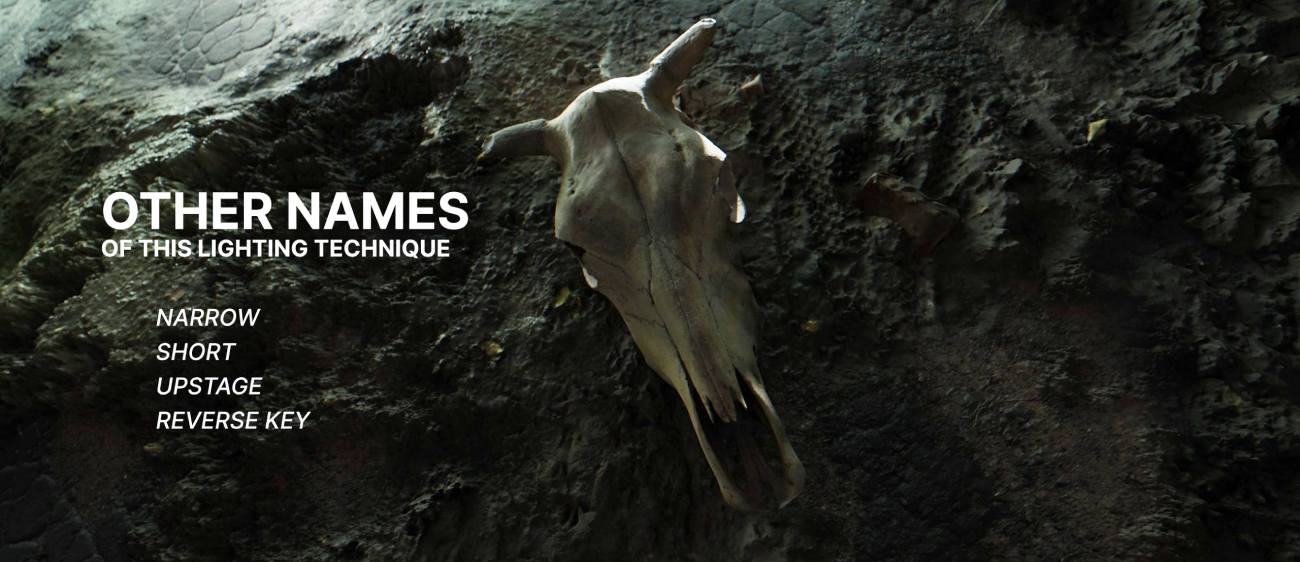
Add a stronger key light (sun or area light) to emphasize the shape and relief. One of the best ways to position it is on the opposite side relative to the camera – known as reverse key lighting – which is an axiom of cinematic lighting if you want a more three-dimensional relief.
—
True Depth Modifier Properties
Resolution & Subdivisions: Increase the number of subdivisions to make displacement much more detailed, keeping track of the poly count. You can even override this field and input higher values like 7 for extreme detail. If your computer can handle it, pushing subdivisions to 6+ can get you into the millions of polygons.
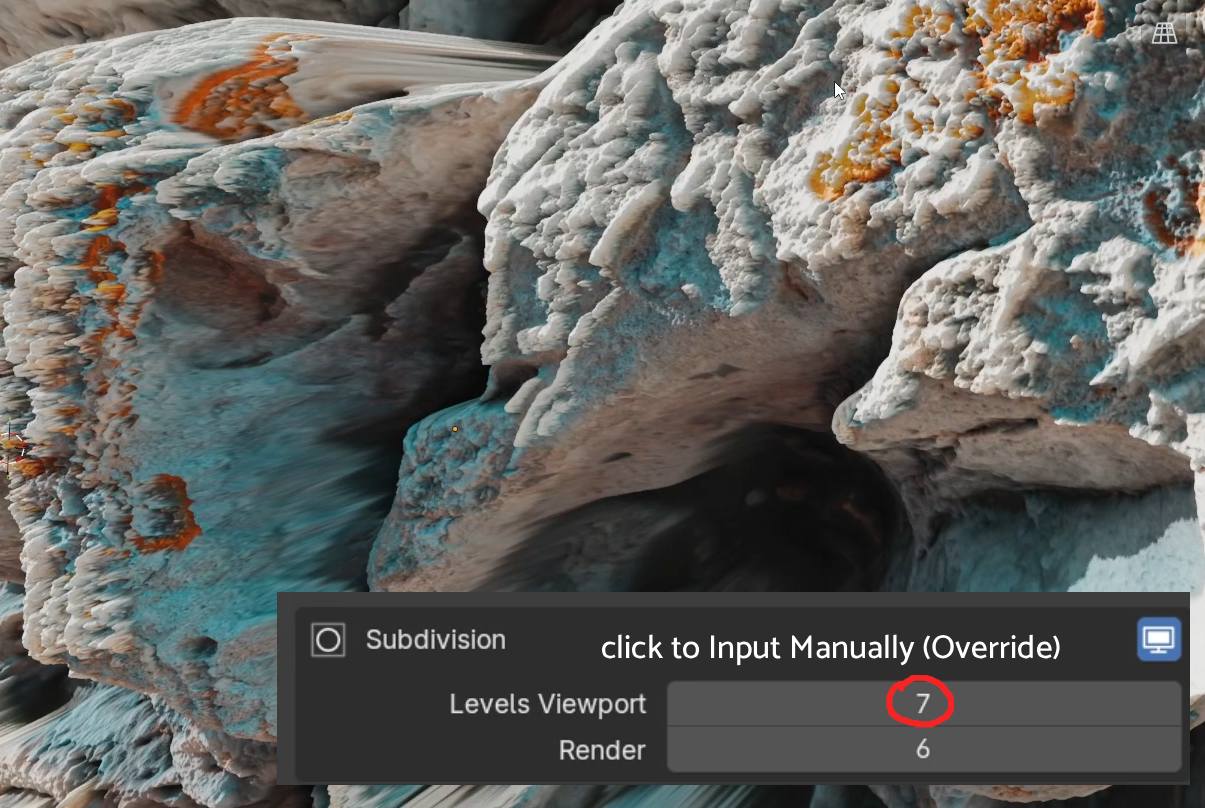
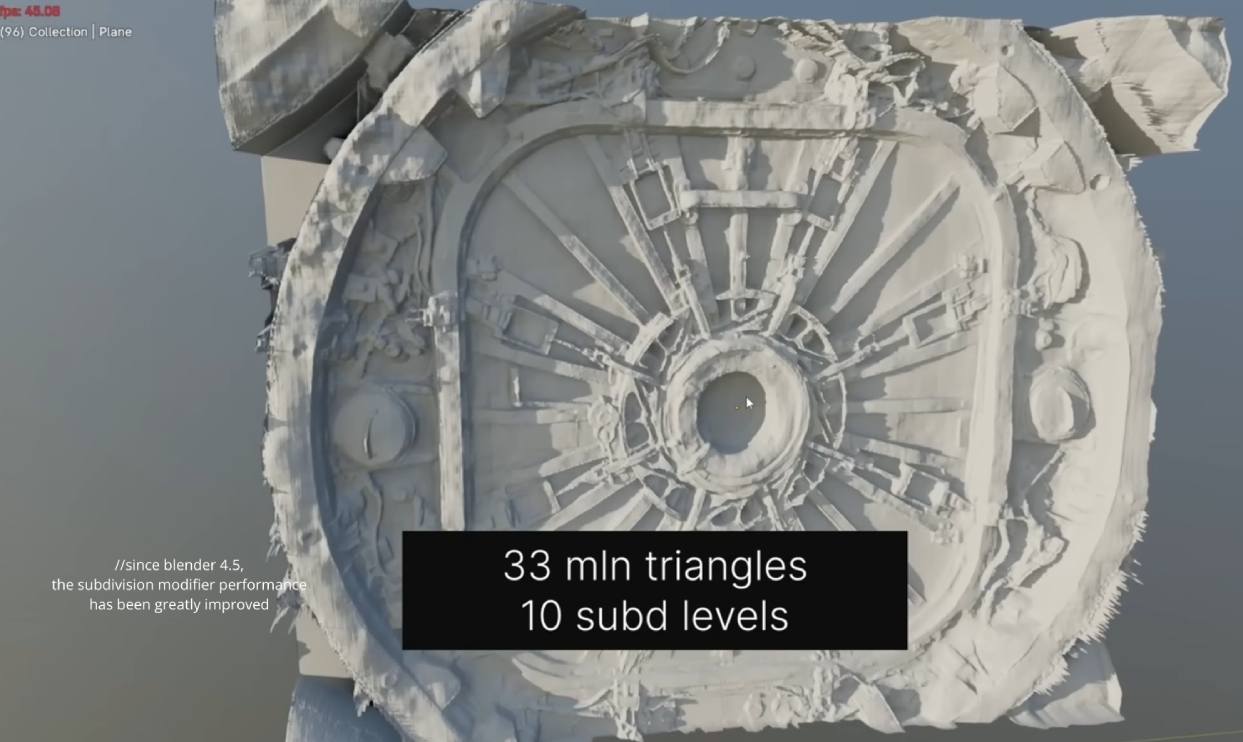
Thankfully, recent Blender performance improvements have made working at that density much more manageable.
Displacement Frequencies
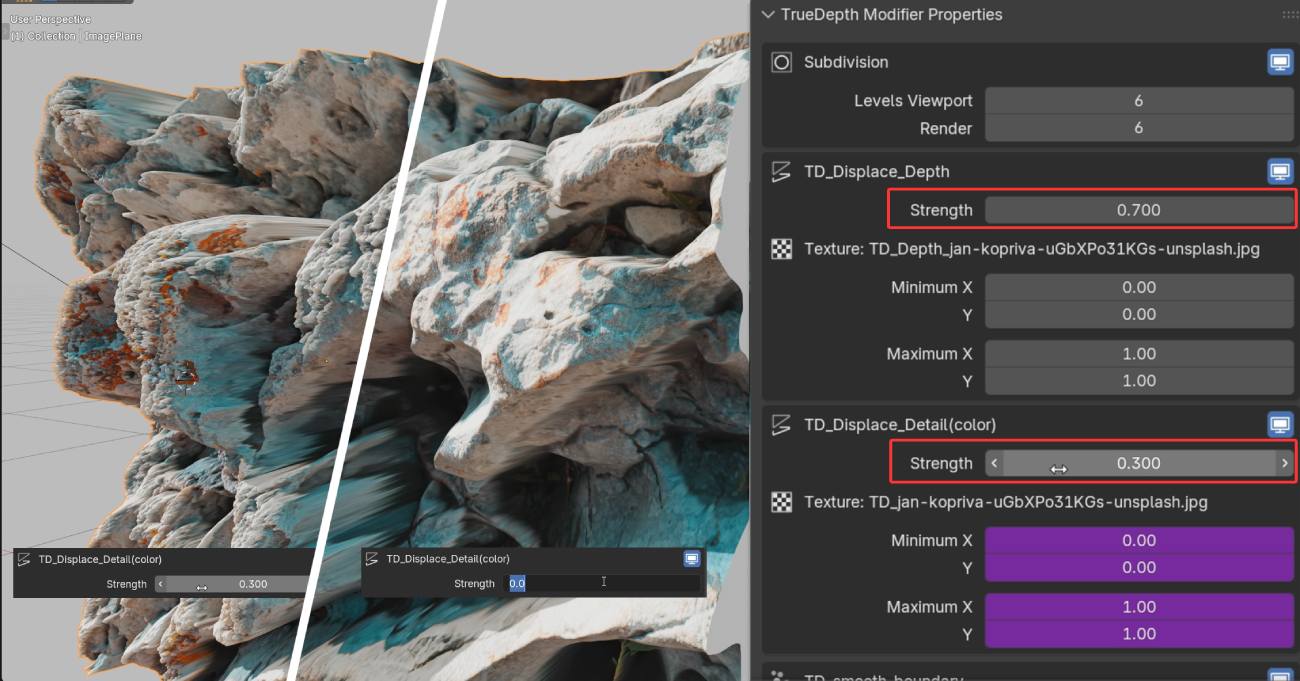
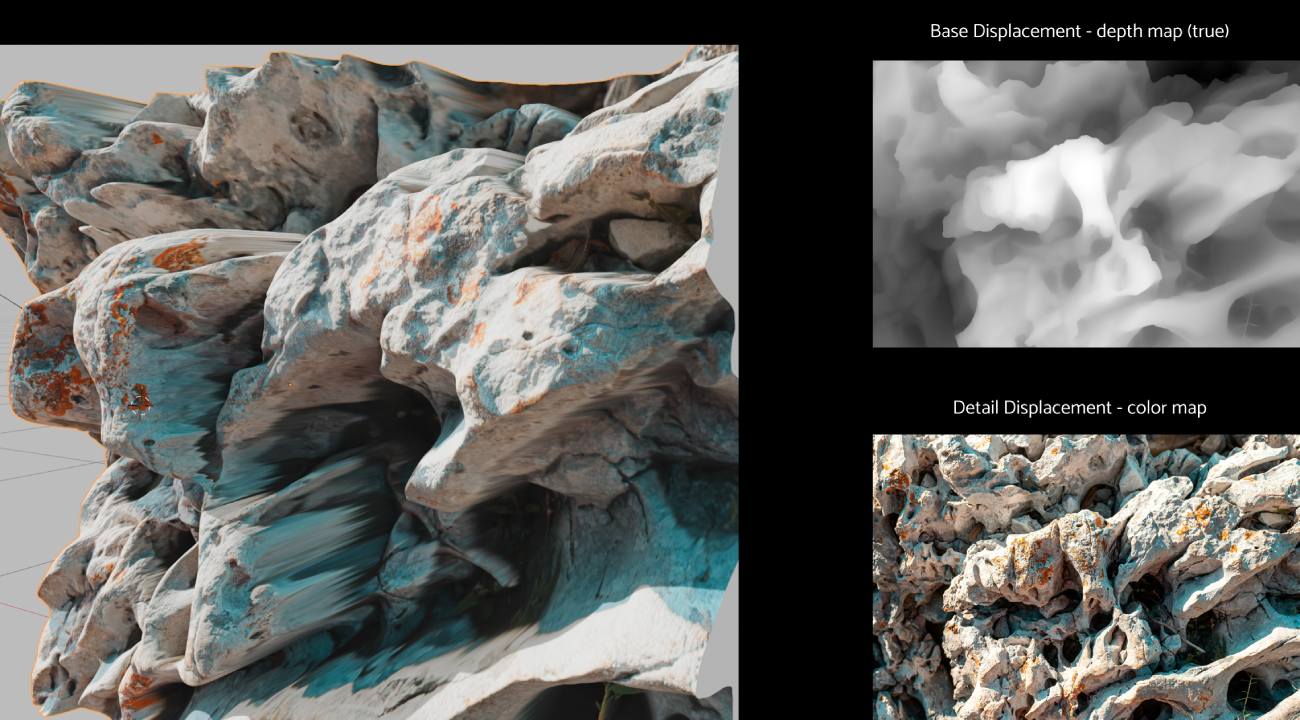
True Depth splits displacement into base displacement (low frequency) and displacement detail (higher frequency spiky undulations).
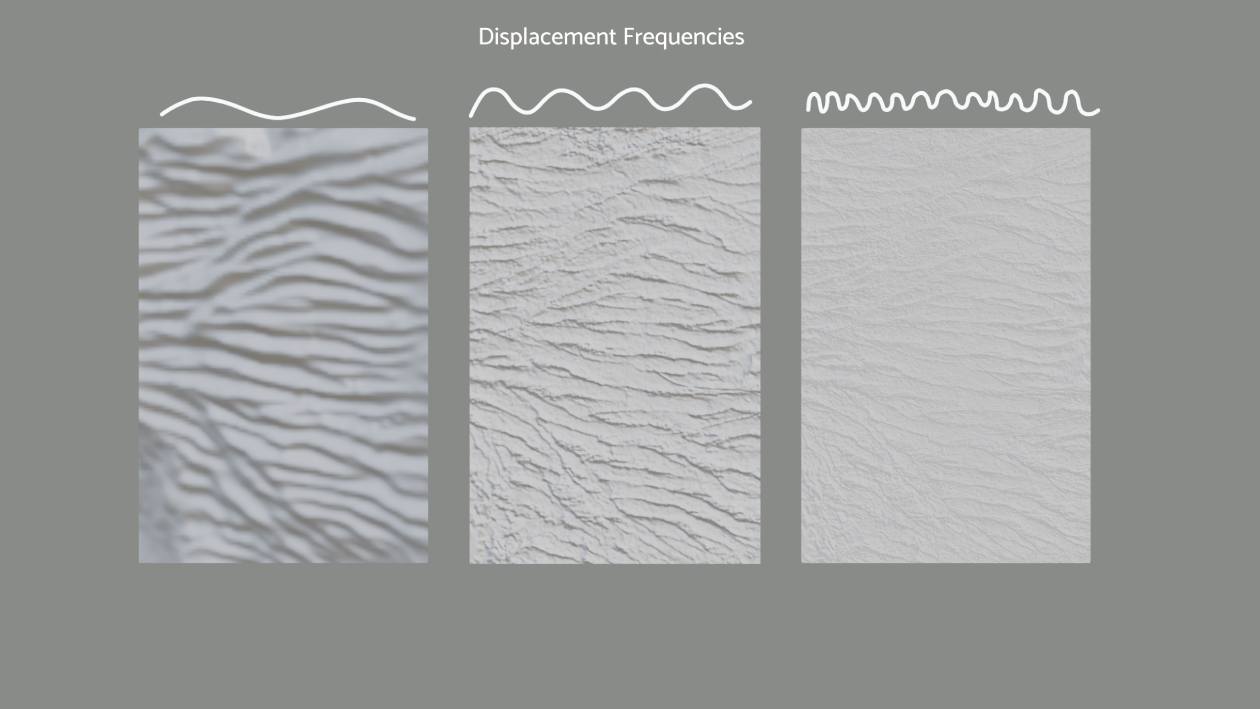
Keep both sliders at bay, especially the detailed one, to avoid heavy stretching or spikiness.
Note that base displacement is driven by the depth map, while detail displacement is driven by the color map.
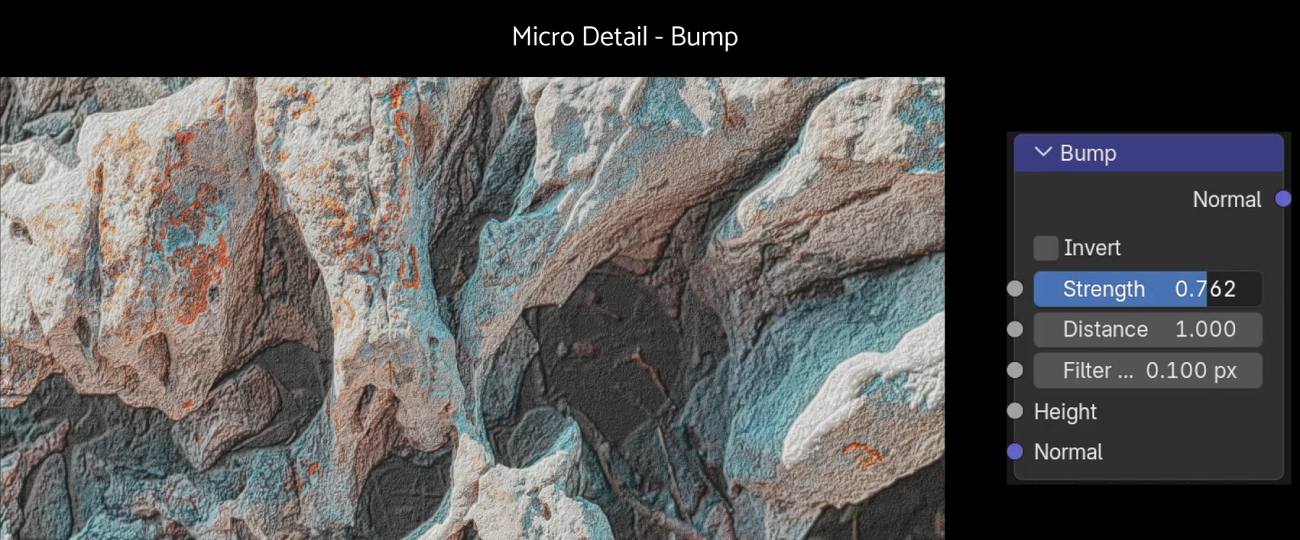
An extra high-frequency bump map is applied in the shader for fine grain (which should also be approached with moderation).
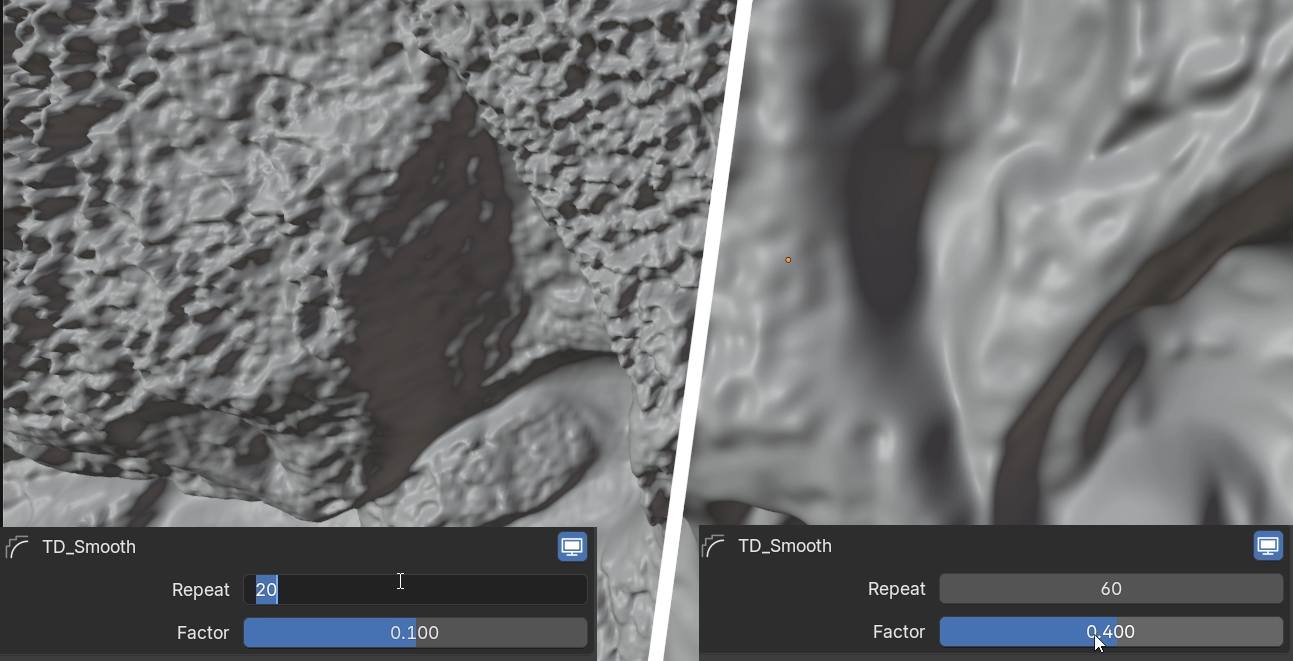
A smooth slider is available to soften the geometry.
Tilt & Distortion Correction
Use the undistortion slider (e.g., set to 1) to correct tilted or horizontally skewed geometry.
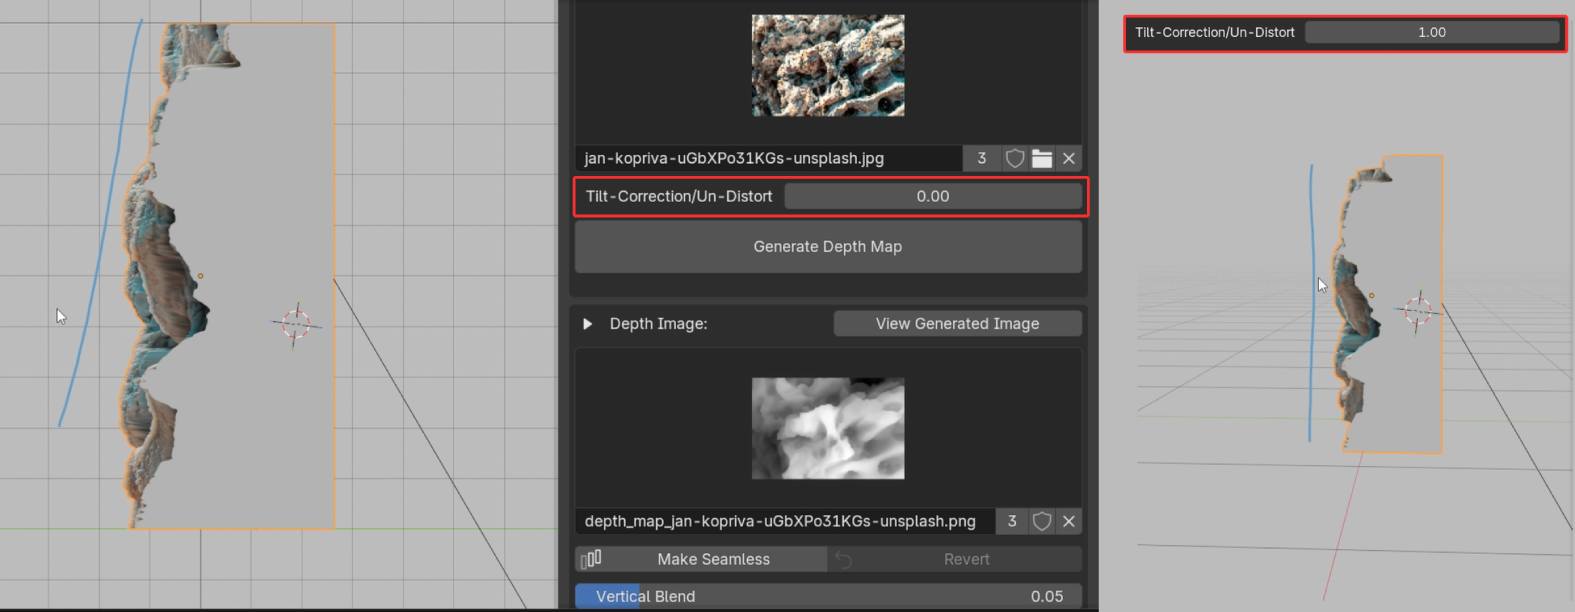
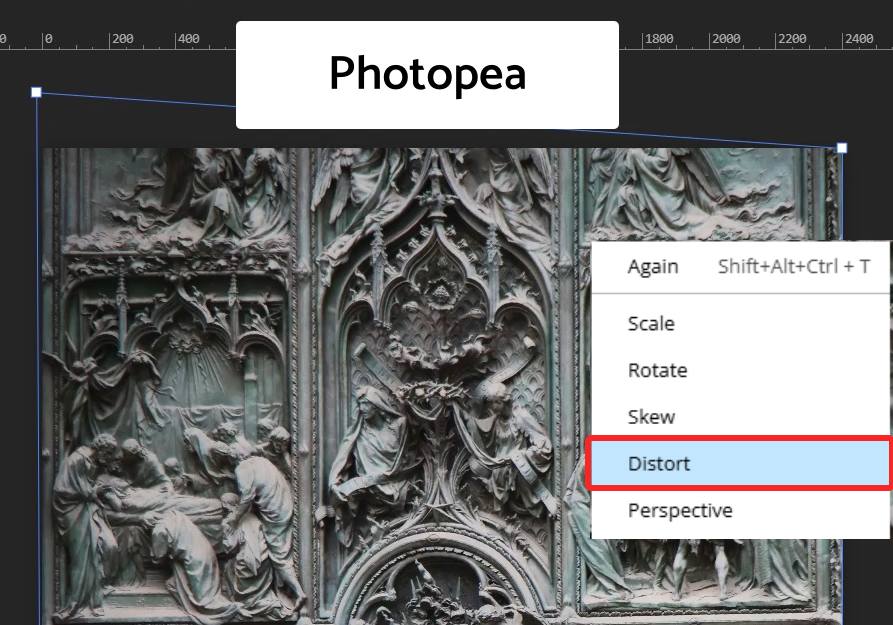
Some images have distortion the slider can’t fully fix on its own – for those, pre-correcting the tilt in Photopea or another image editor before generating the depth map will usually give you a better result.
Modifier Stack and Converting to Mesh
All interface settings are hooked up to modifiers. You can disable them individually to see what each one does: subdivision surface, base displacement, then detail displacement etc. The last one, TD Base, is what makes the mesh manifold – or watertight – which matters later for 3D printing.
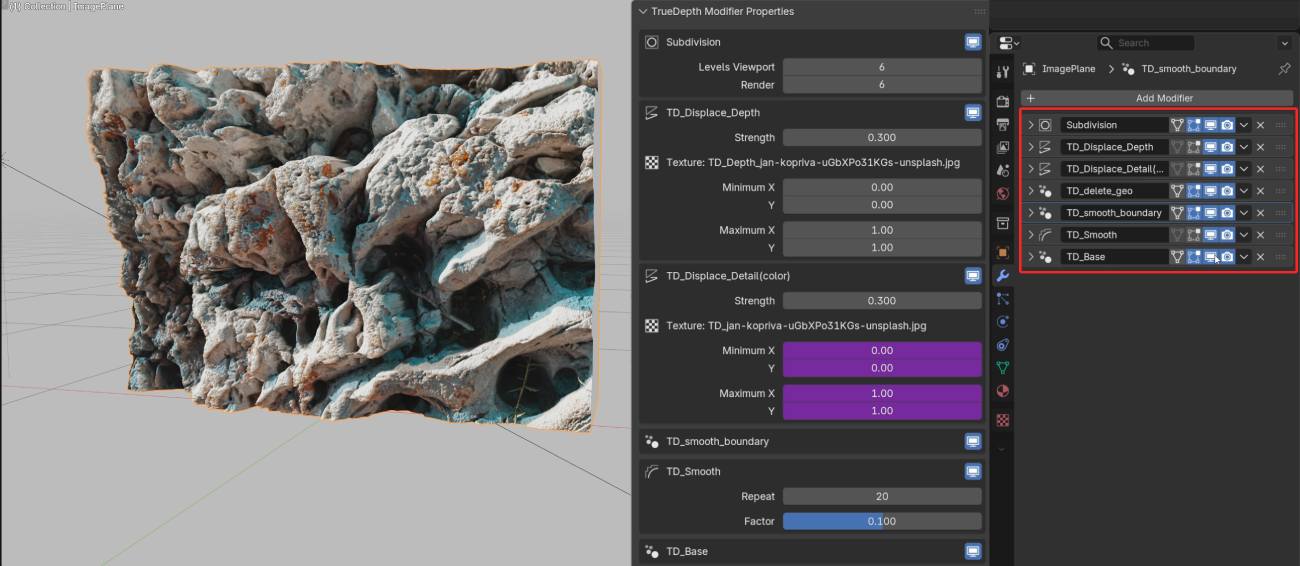
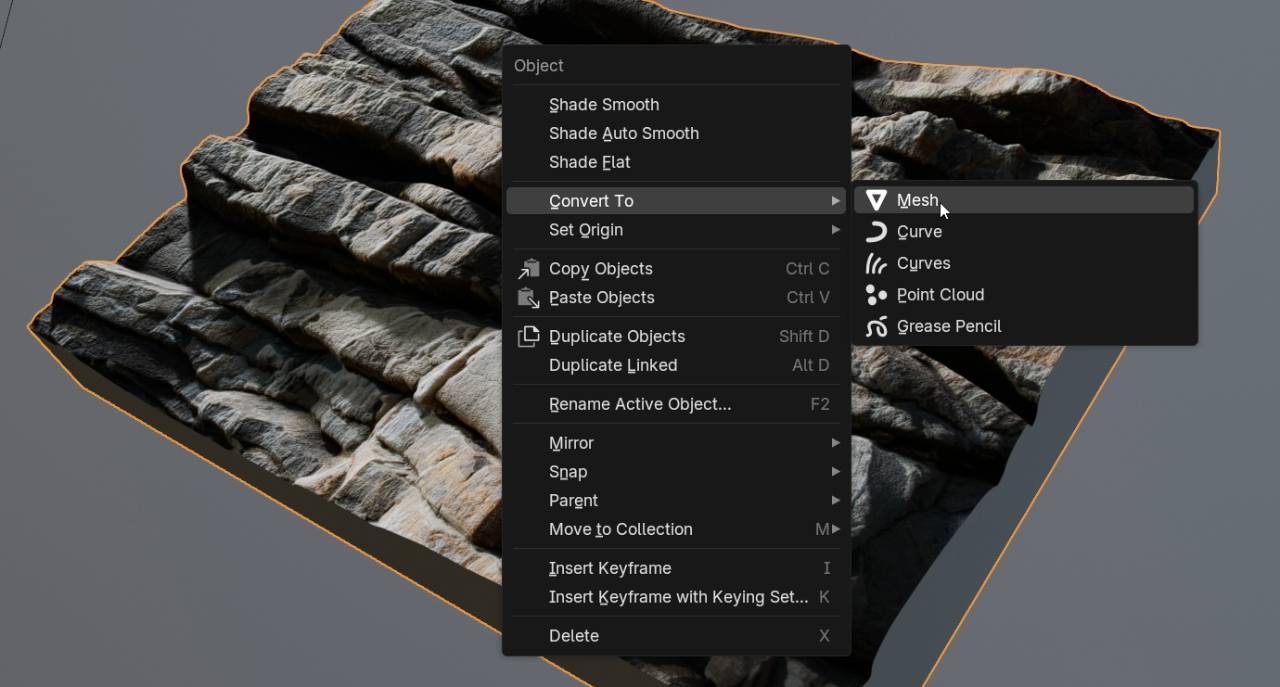
If you’re happy with the result, right-click and select Convert to Mesh to collapse the stack into a regular 3D object.
—
Seamless PBR Workflow with True Depth
Start with seamless source textures.
How to make any texture seamless?
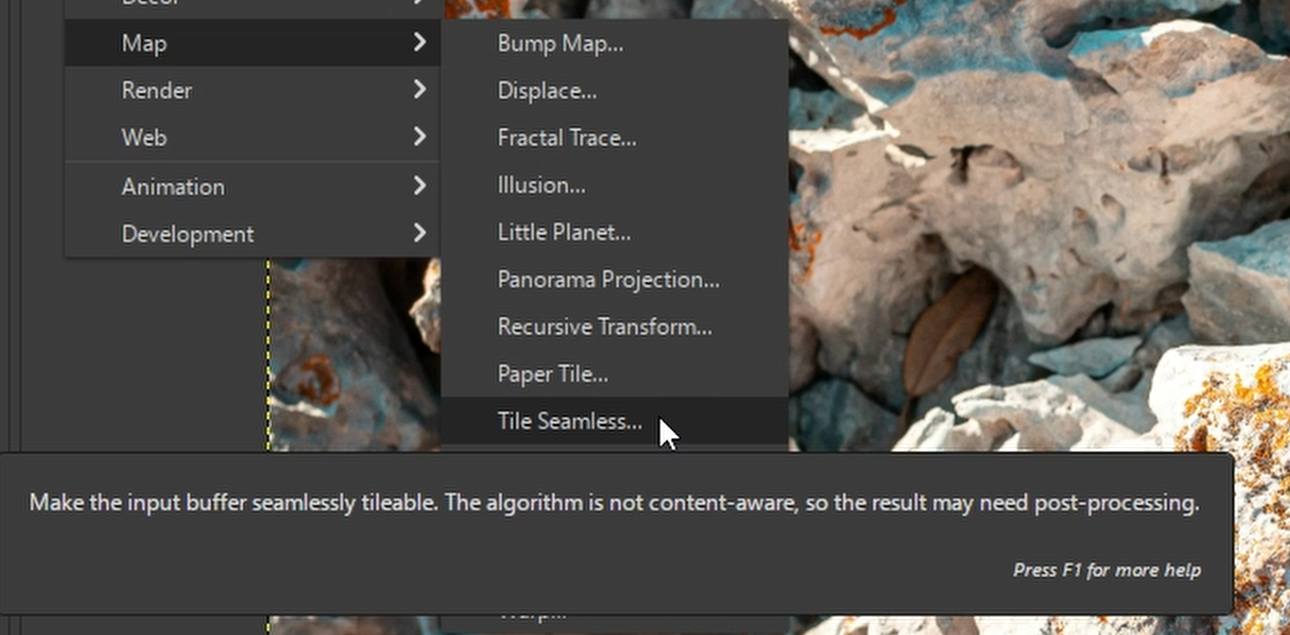
Gimp: Filters -> Map -> Tile Seamless. Simplistic, but it works.
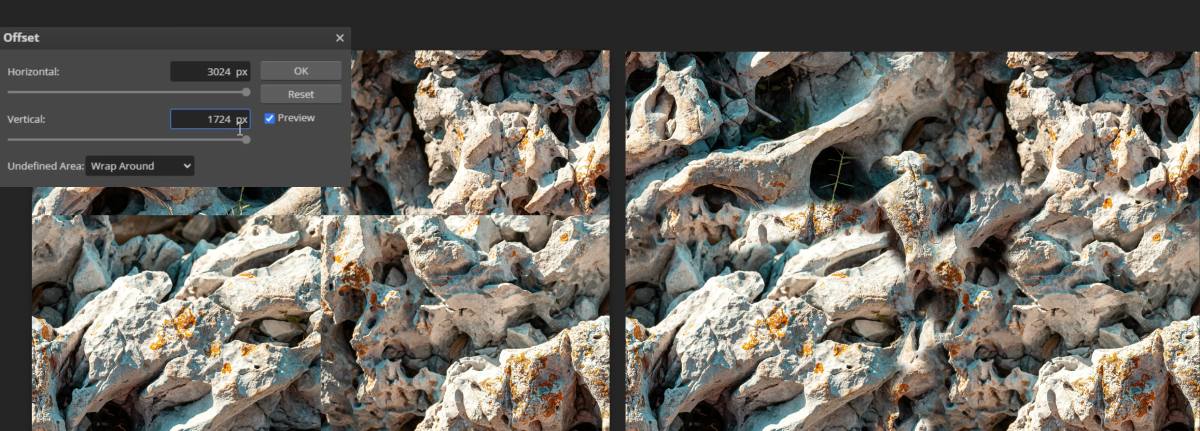
Photopea: offset a copy of the image and paint over the seam with a soft brush to erase it.
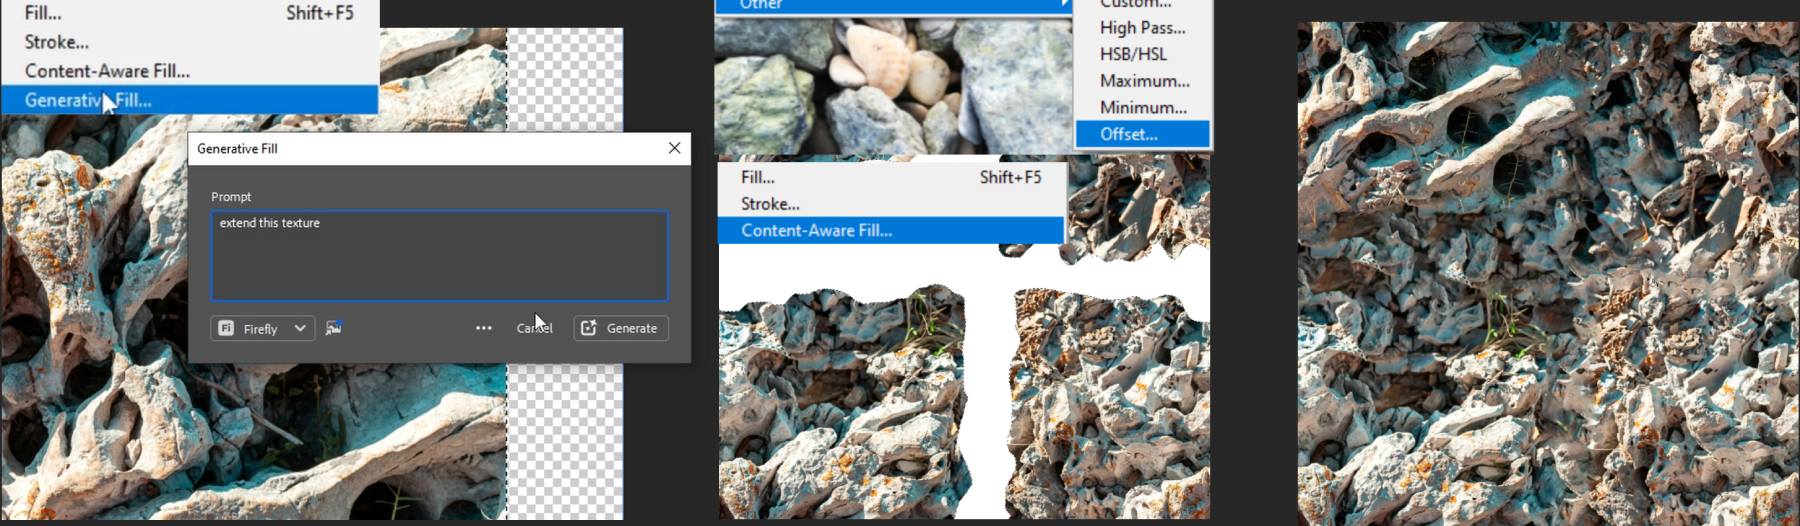
Photoshop: generative fill to extend the texture (Firefly has not been scraping the internet for this, as far as I know? Though that’s a separate discussion), then content-aware fill to paint over the resulting seam.
How to make a height map seamless?
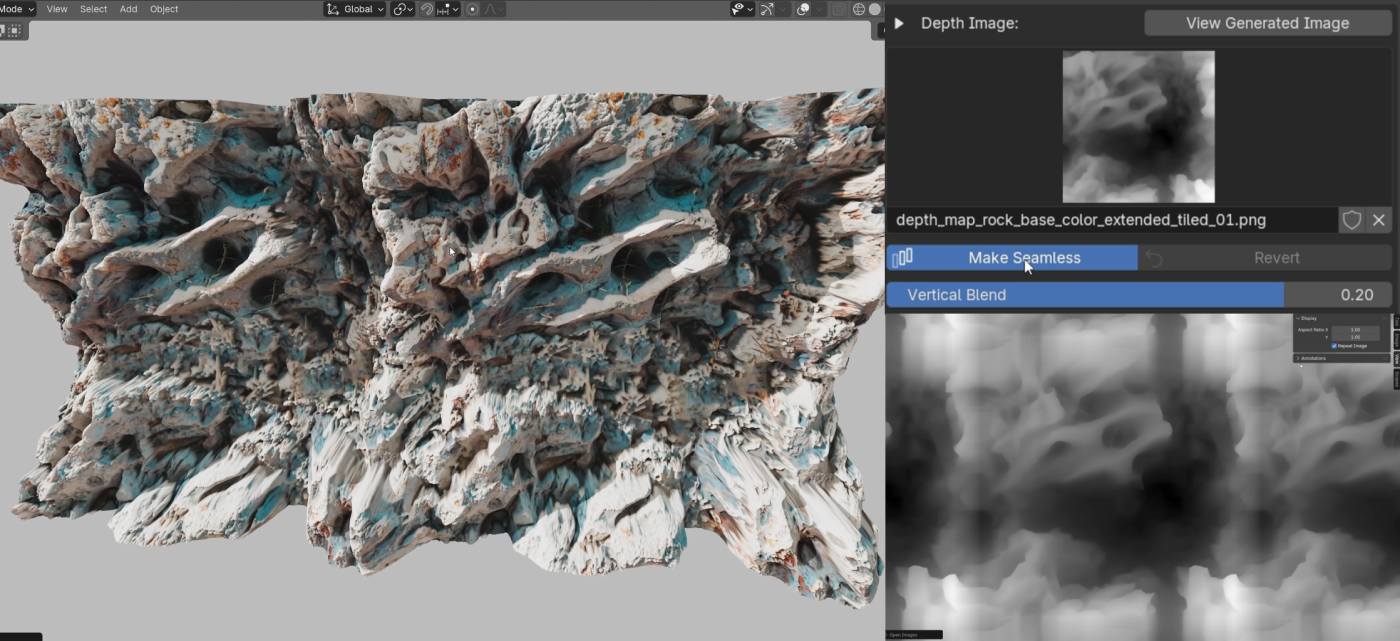
Even when created from a seamless source (color) texture, depth maps usually aren’t inherently seamless.
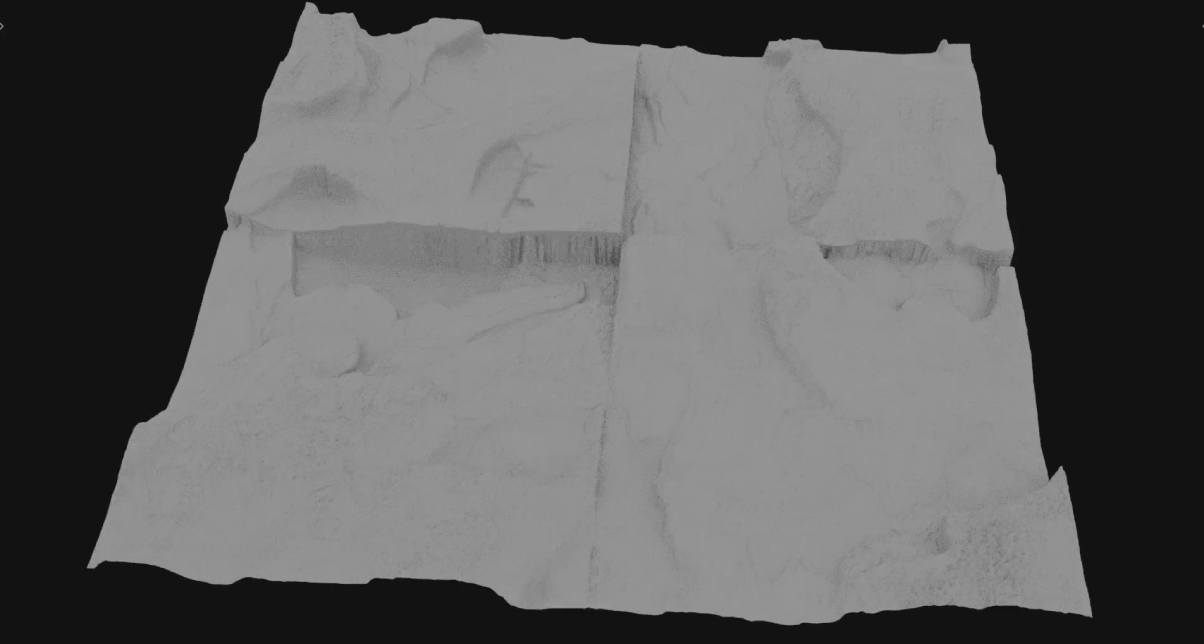
Use True Depth’s Make Seamless feature to remove the annoying seams that ruin any attempt to tile the displacement.
You can prove it worked by duplicating the mesh with Shift+D and placing two meshes nearby.
—
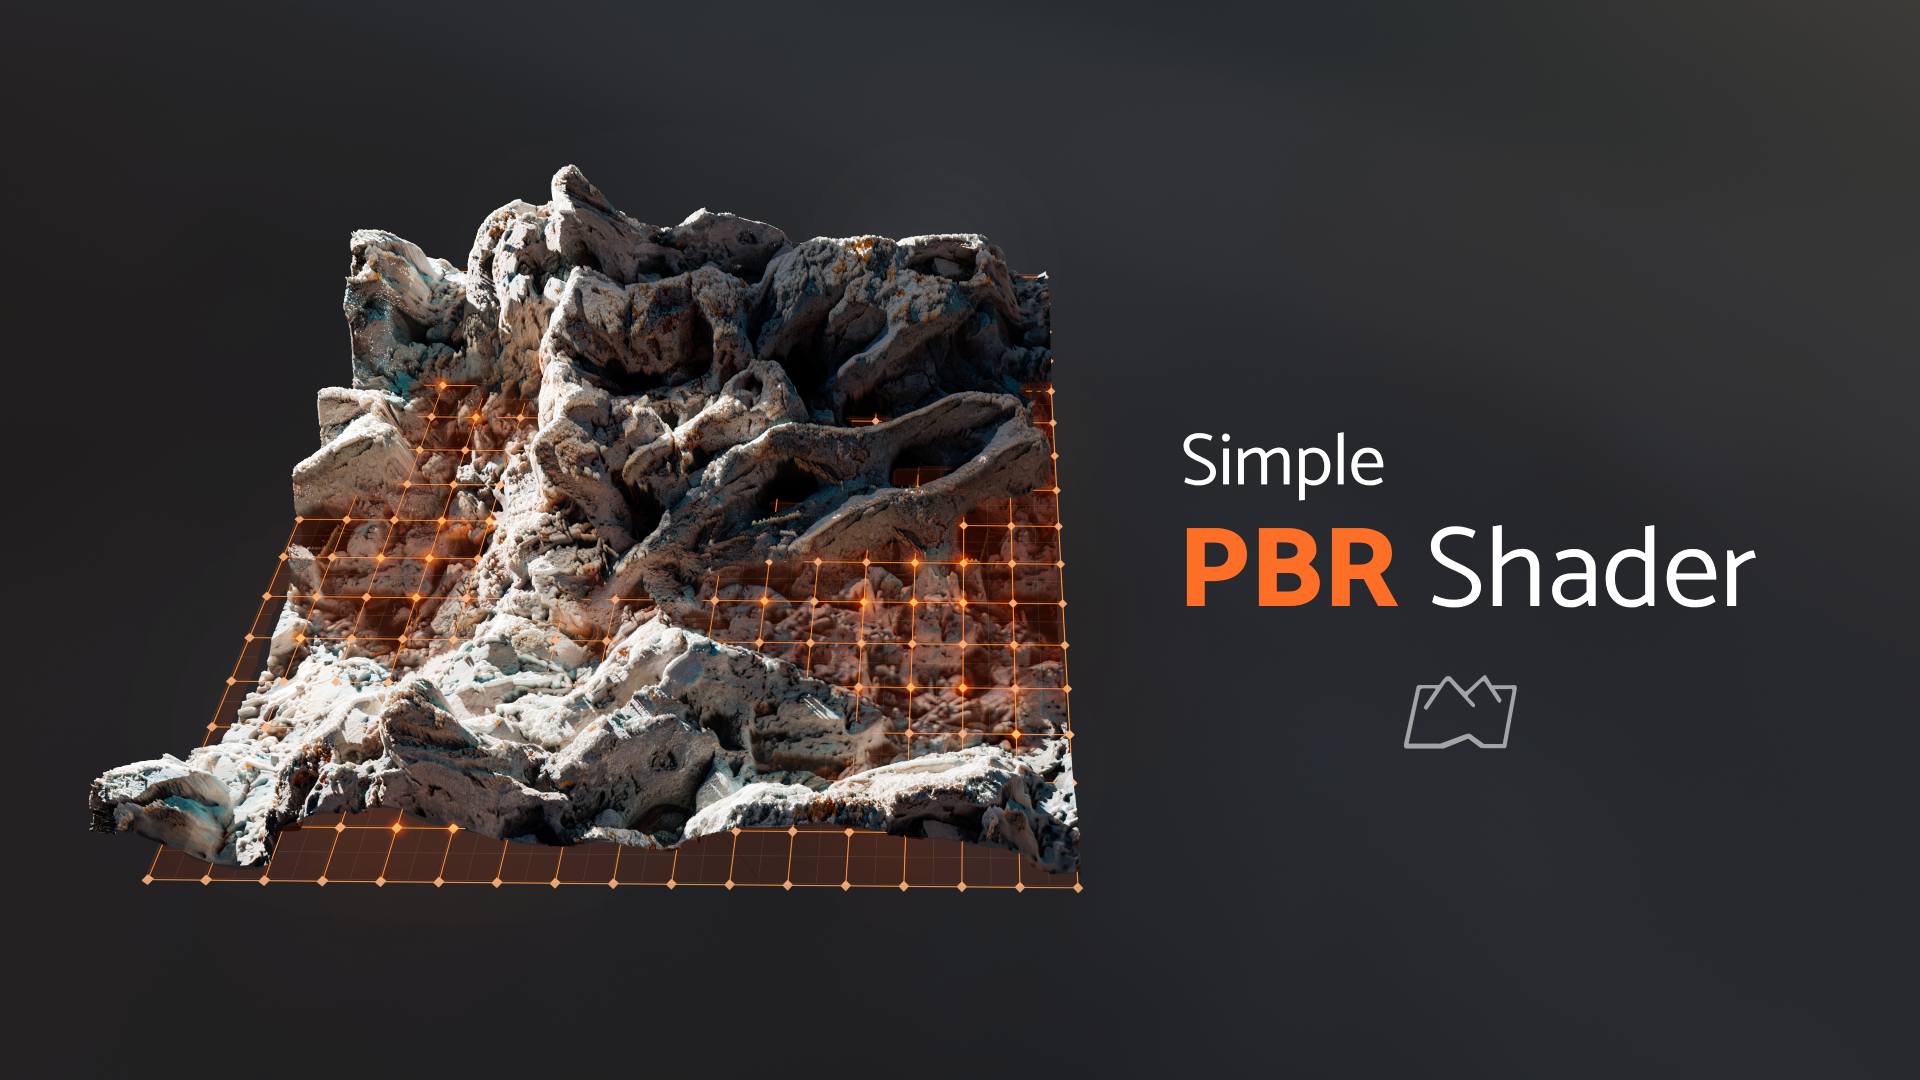
PBR Shader for True Depth textures
I made a PBR setup for using maps generated by the True Depth add-on and you can download it from our Gumroad for free. It replicates the way True Depth organizes its shaders (the base vs detail displacement split and more).
PBR Shader for Truedepth – Gumroad (Free)
- Choose the base color texture and set its color space to sRGB
- Choose the depth texture and set its color space to Non-Color (since it’s height data)
- Control base displacement strength via the Displacement node
- Control the detail displacement in the Add node
- Control the micro detail (bump) via the Bump node
- There’s also a Mapping node included to scale and move the texture (so you can see how seamless it is indeed)
—
Perspective Mode – V3
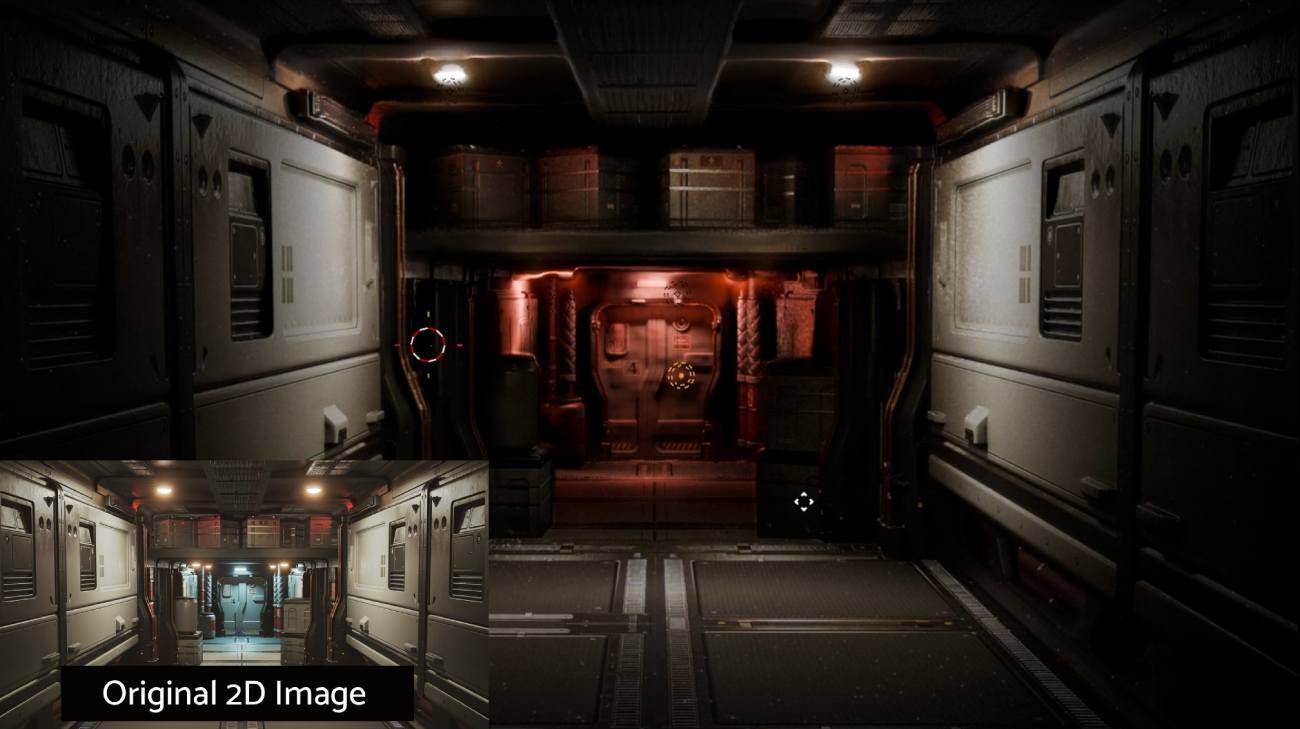
Perspective is a new mode, introduced in V3. Compared to Flat Relief, it creates the environment-like depth, which spans much further into the z-depth of the scene. Think camera-projection and pseudo-3d cinematic shots.
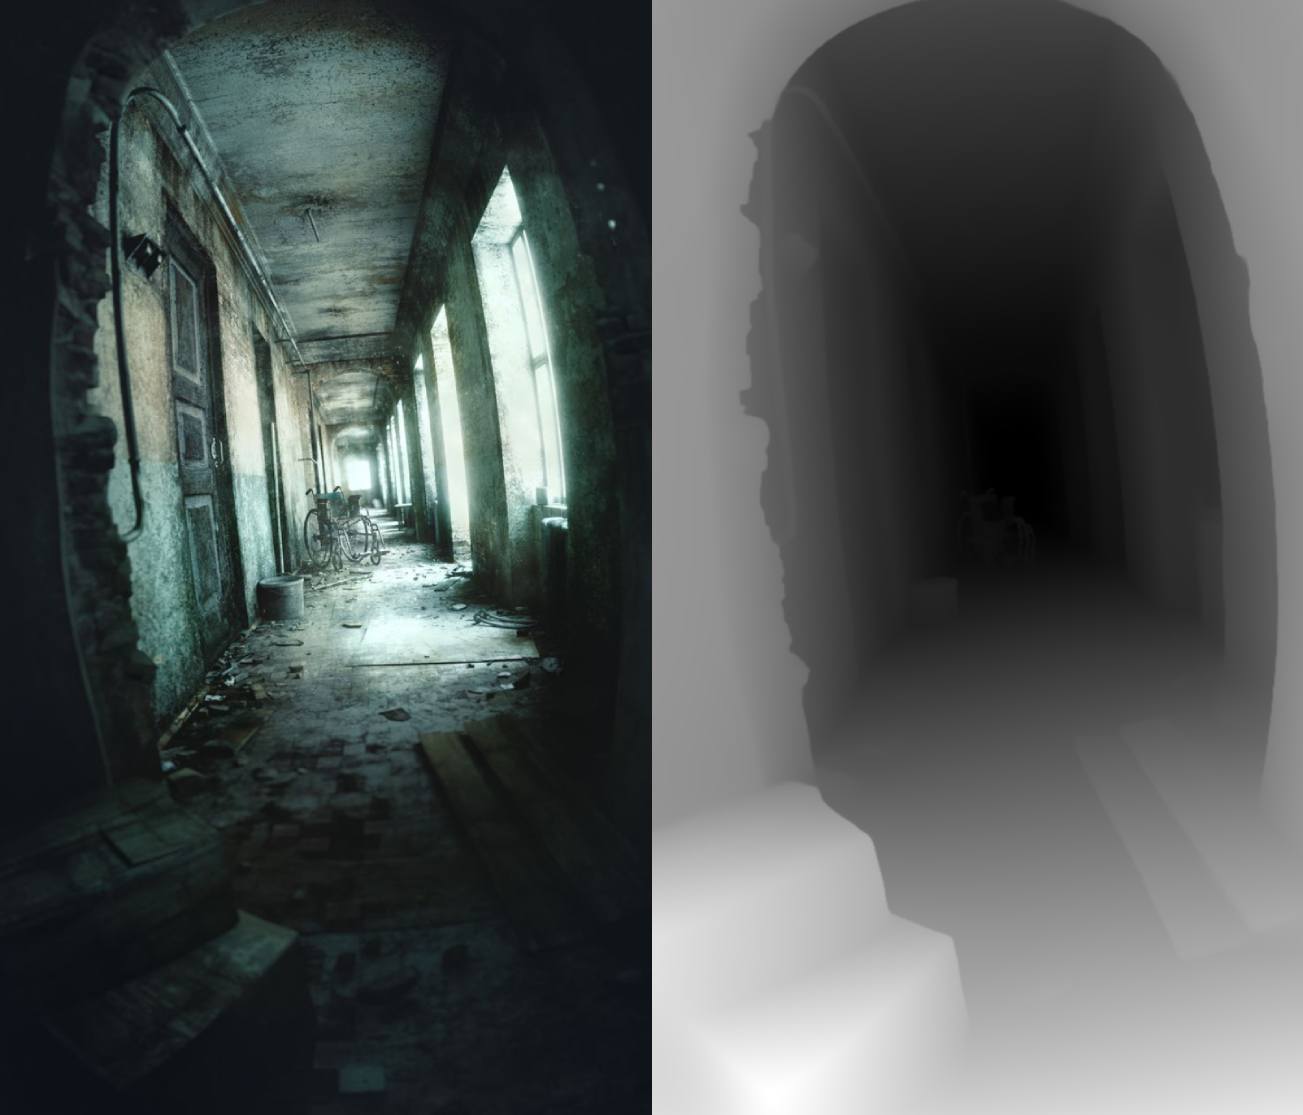
Render: The Hallway by Gleb Alexandrov
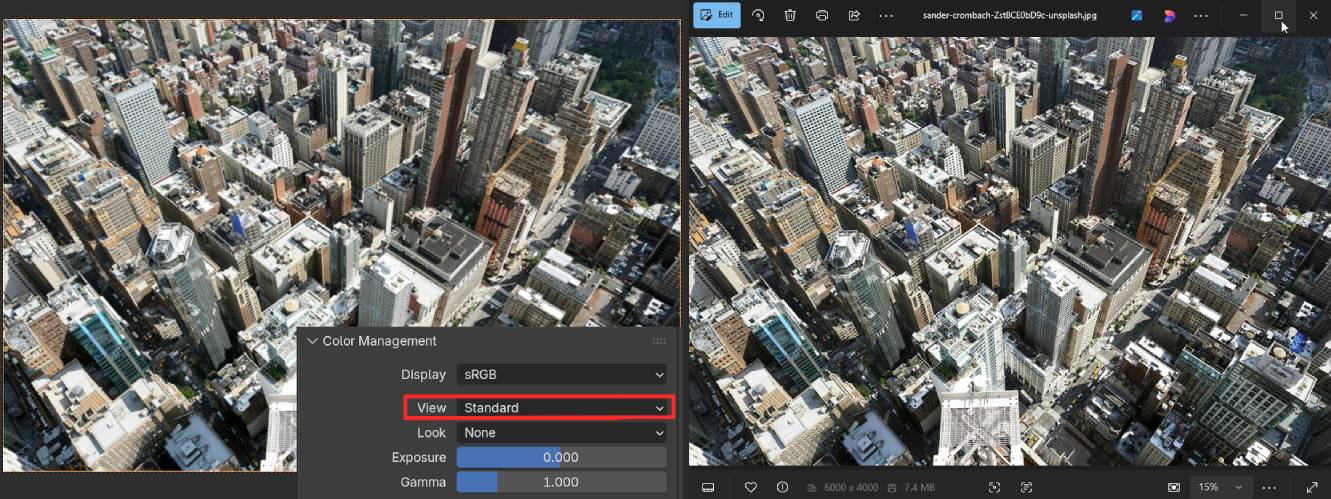
Select a source photo (like a city photo from Unsplash) and hit Generate Depth Map.
Before creating the mesh, choose Perspective as the mode, set the field of view to roughly correspond to the lens focal length, and set mapping to Inverse for realistic results.
Set grid resolution, choose Shadeless if you want the original image without extra shading, and press Create 3D Scene.
Scroll down and click Setup Camera Projection to create projection and view cameras.
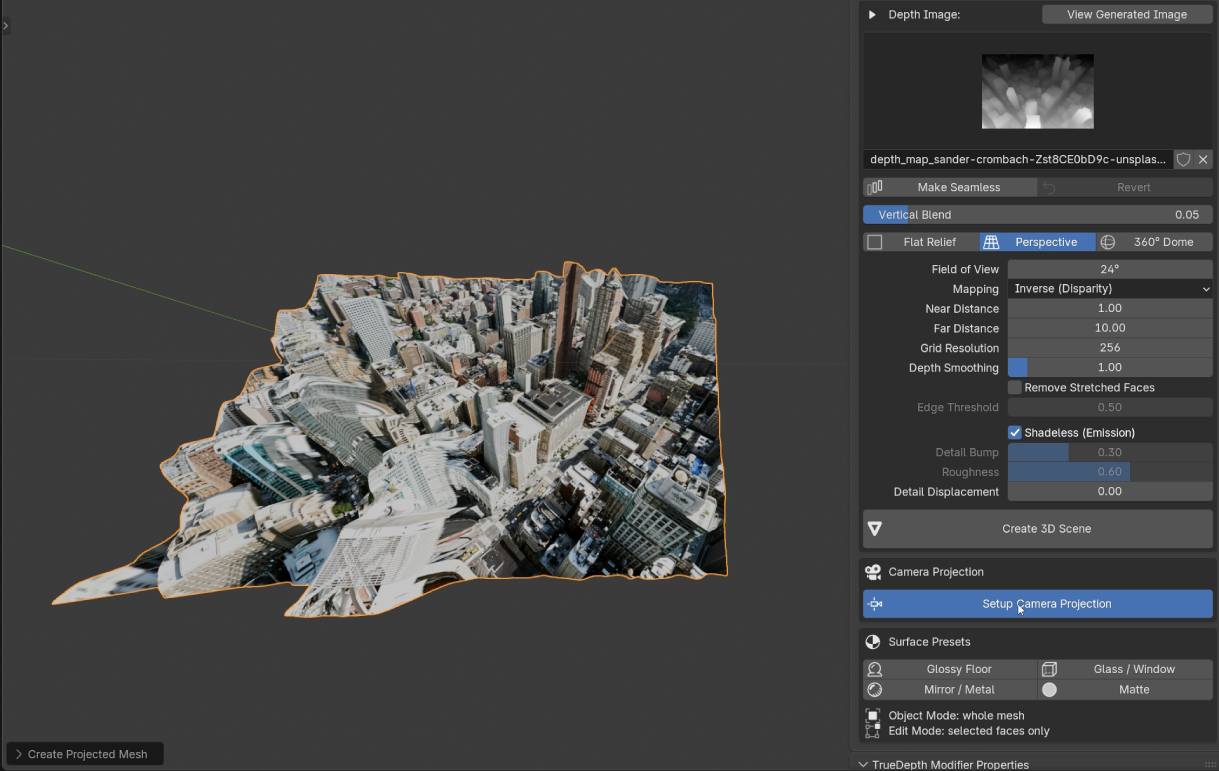
If the image looks washed out due to Blender’s default AgX or Filmic view transforms, set it to Standard for a 1:1 match.
You can select specific parts of the environment in edit mode (like floors) to apply different materials using True Depth’s surface presets: matte (default and safest), glossy floor, or mirror/metal.
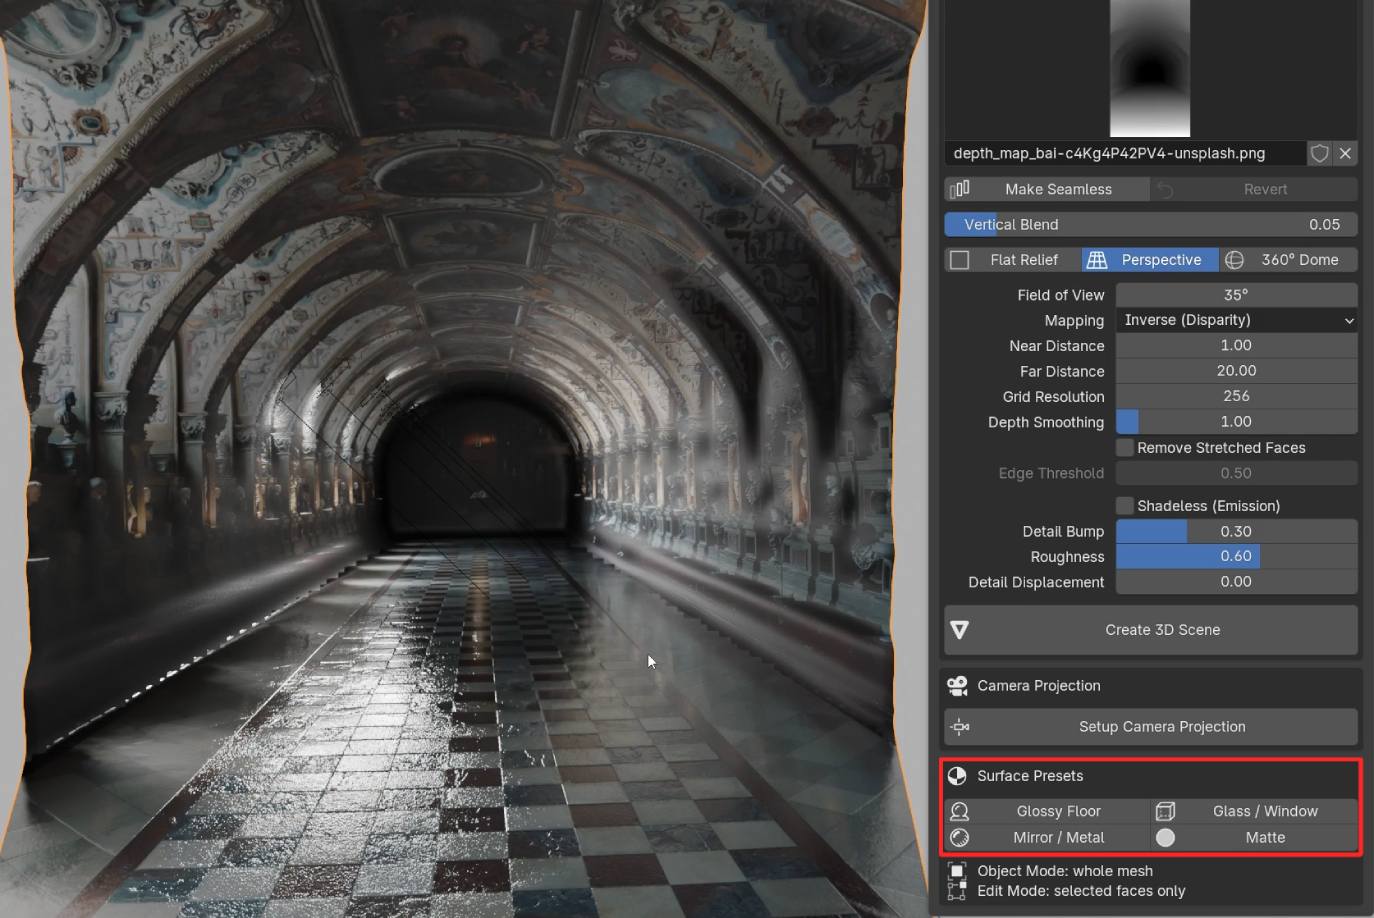
The more reflective the material, the easier it is to break the illusion, so matte holds up best if you’re adding multiple lights.
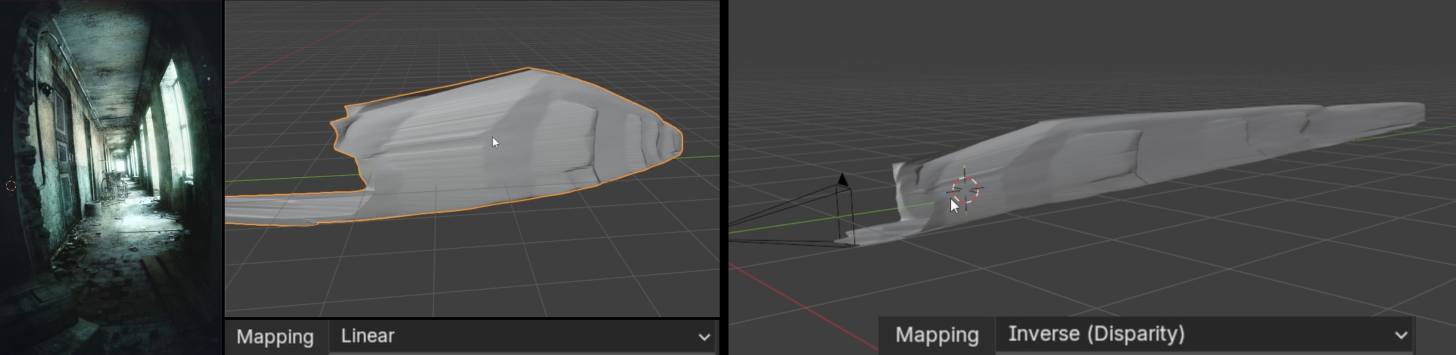
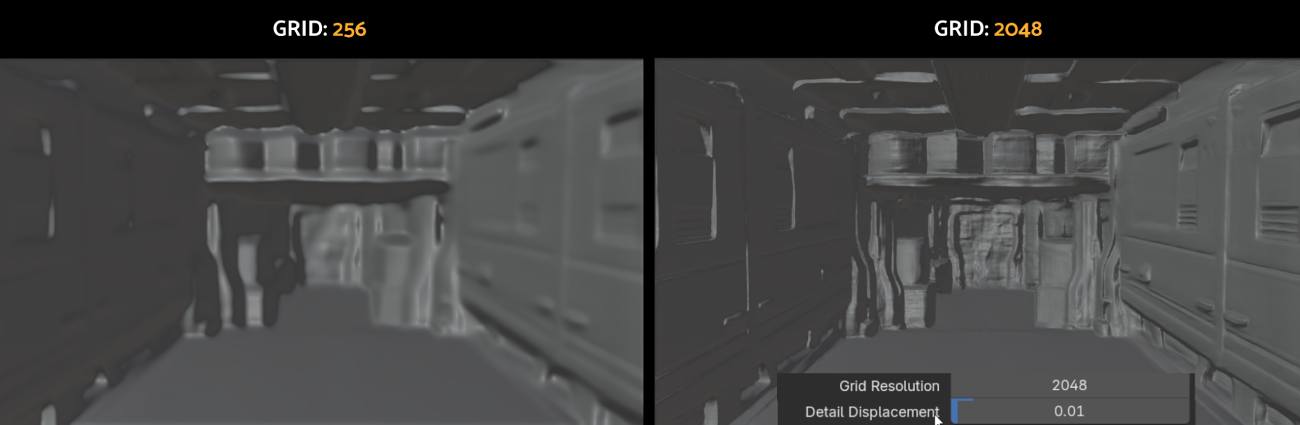
Mapping (yeah, again). Linear mapping gives a flatter, more contracted, tamer result that’s easier to work with but looks less realistic once you dolly-zoom into the scene. Inverse mapping looks stretched in the viewport but way more correct (read: realistic) from the camera’s perspective.
Grid resolution and detail displacement are connected: add enough resolution, then crank up the detail level.
—
360° Dome & HDRI Studio Modes in True Depth
The biggest flaw of the vanilla HDRI setups is that 3D objects look floating and not integrated.
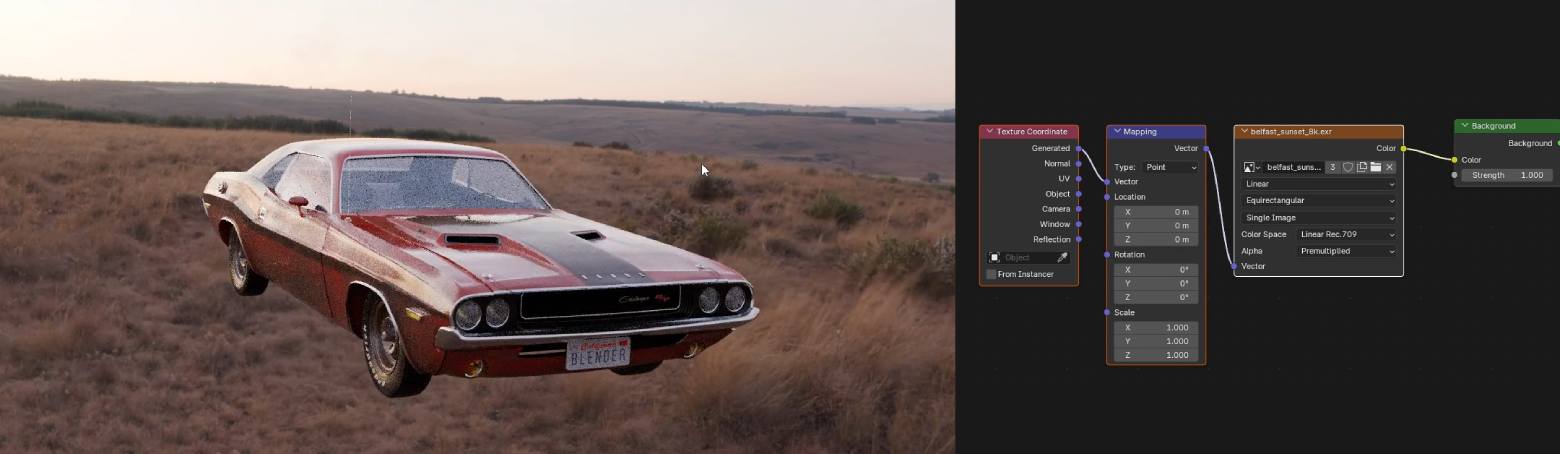
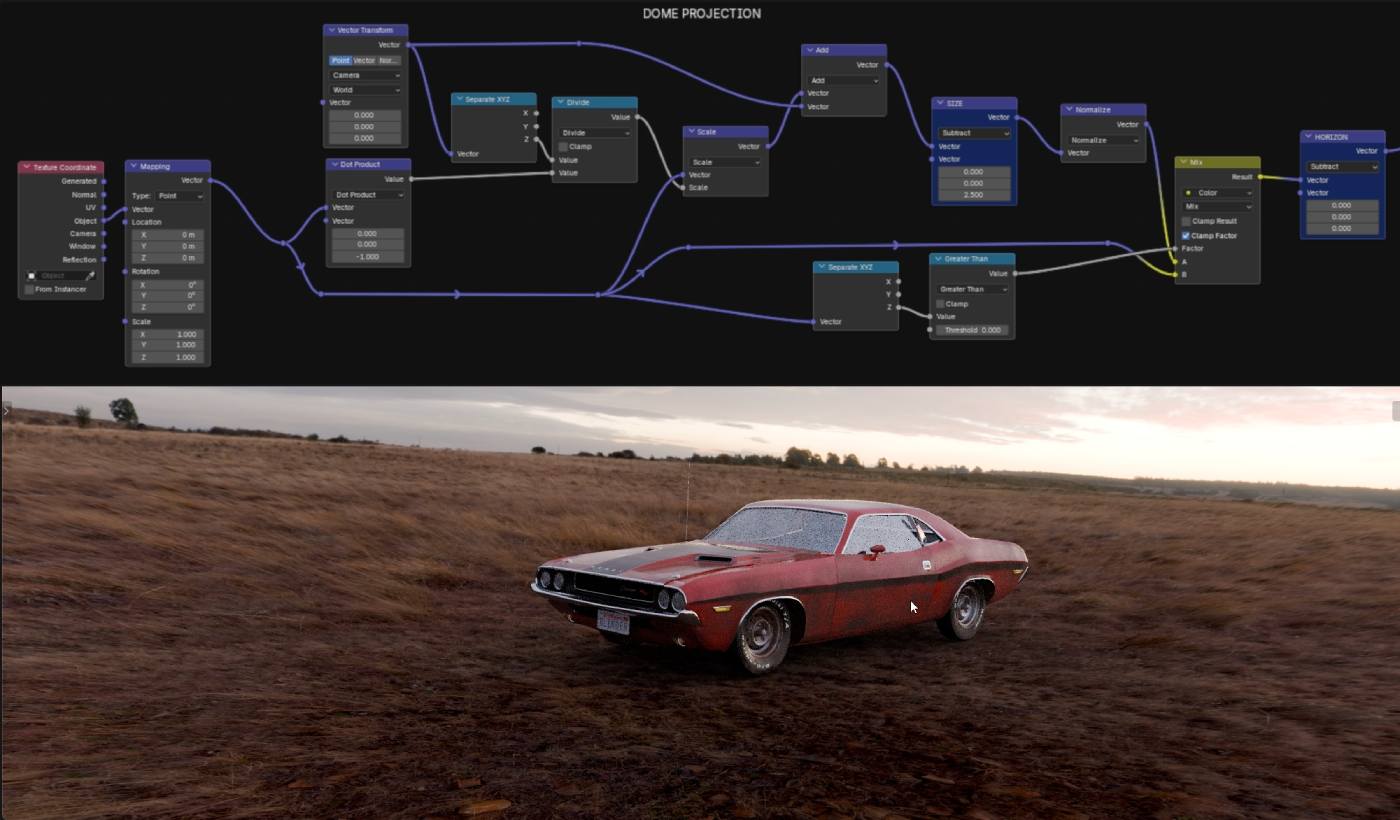
Achieving proper dome projection manually (to help ground the objects within the virtual scene) requires custom shader nodes.
HDRI dome projection – like this one (Gumroad freebie).
Ideally, it also requires a shadow catcher – though those don’t work in EEVEE yet.
HDRI Studio
True Depth’s new HDRI studio mode handles all of this out of the box.
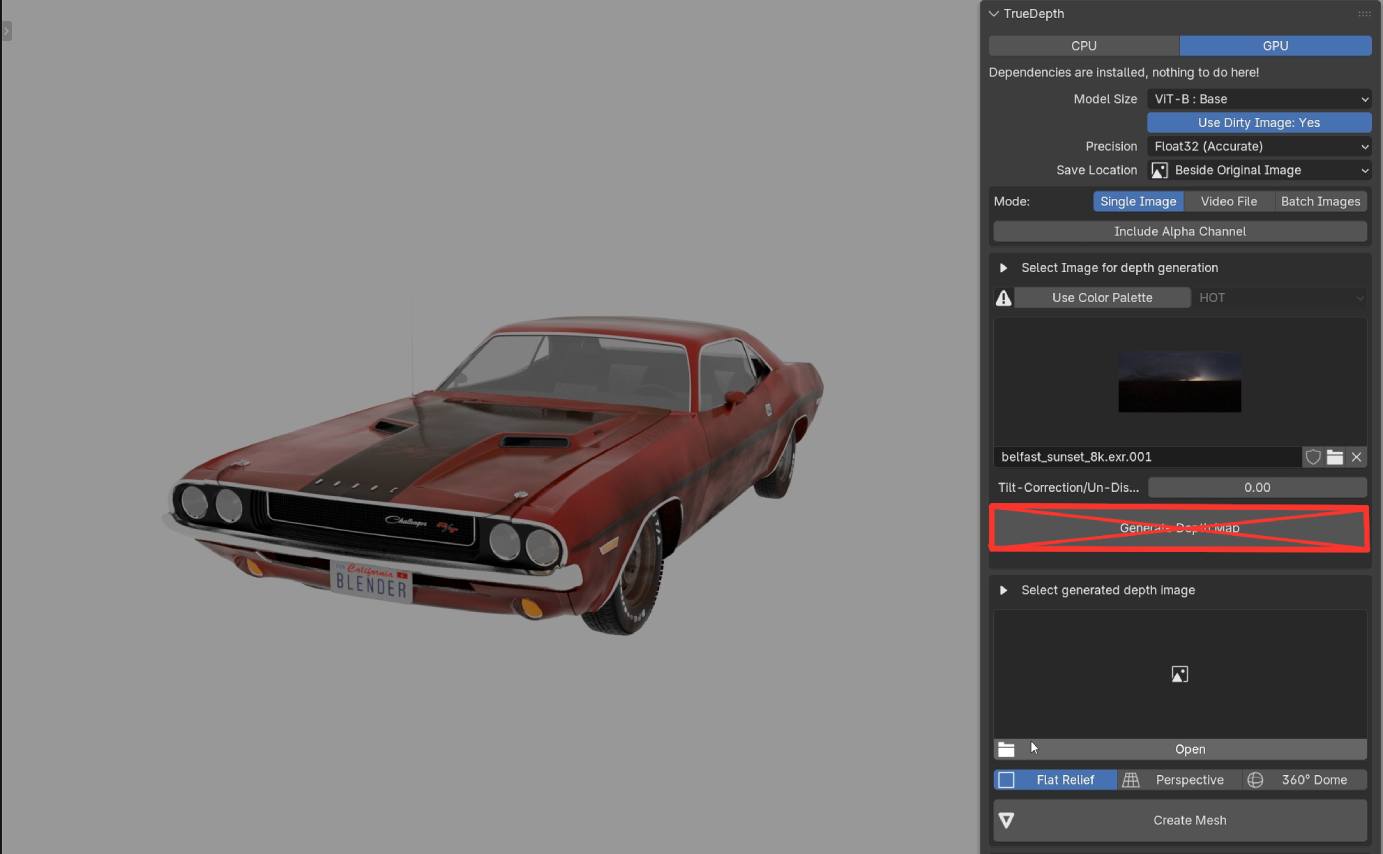
Select your HDRI image (no depth map needed), switch mode to 360 degrees and HDRI studio, and click Create HDRI Dome.
Tweak live parameters like ground sheen, heading, capture height, and horizon fit – these vary a lot depending on the HDRI, so testing is the best approach.
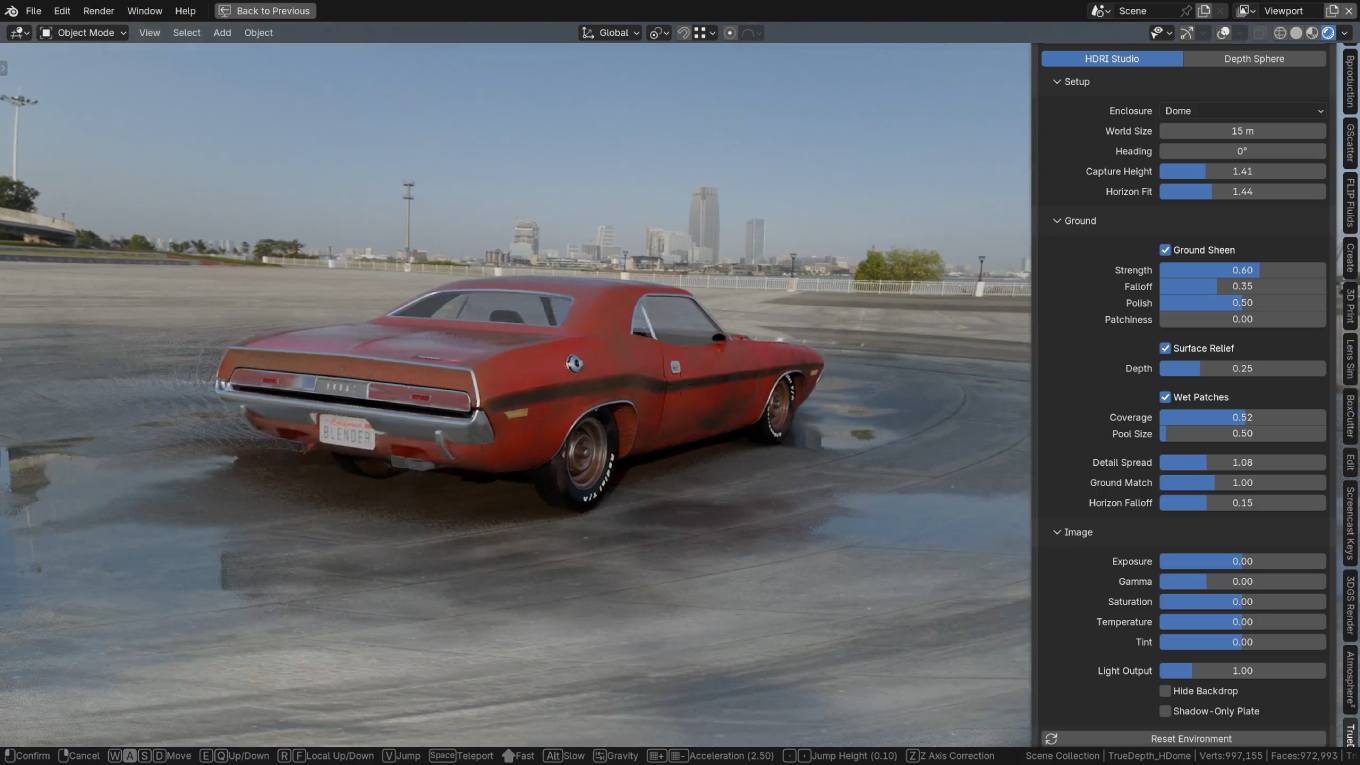
Note that ground sheen needs to be explicitly enabled for wet-patch effects to work.
For EEVEE renders, enable ray tracing and adjust Fast GI approximation for realistic ambient occlusion / heavier contact shadow; namely, adjust the Thickness (in both Fast GI and Screen-tracing panels). Turning off denoising also helps keep EEVEE’s GI sharp.
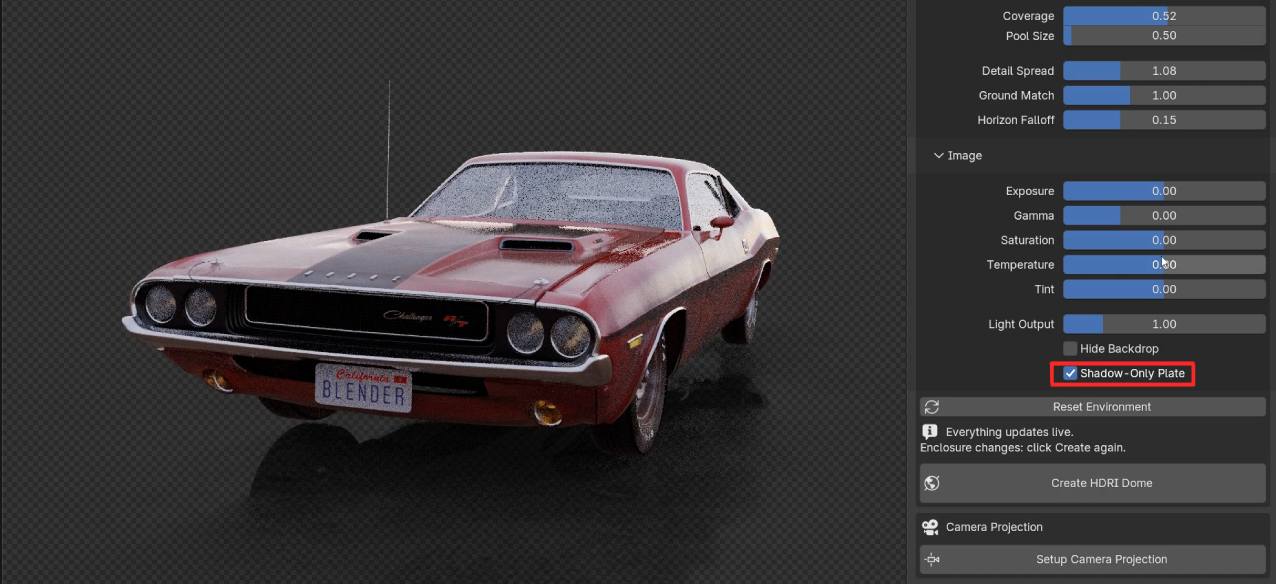
A few extra details worth knowing: you can hide the backdrop and show only the plate (Cycles only), which is handy for compositing.
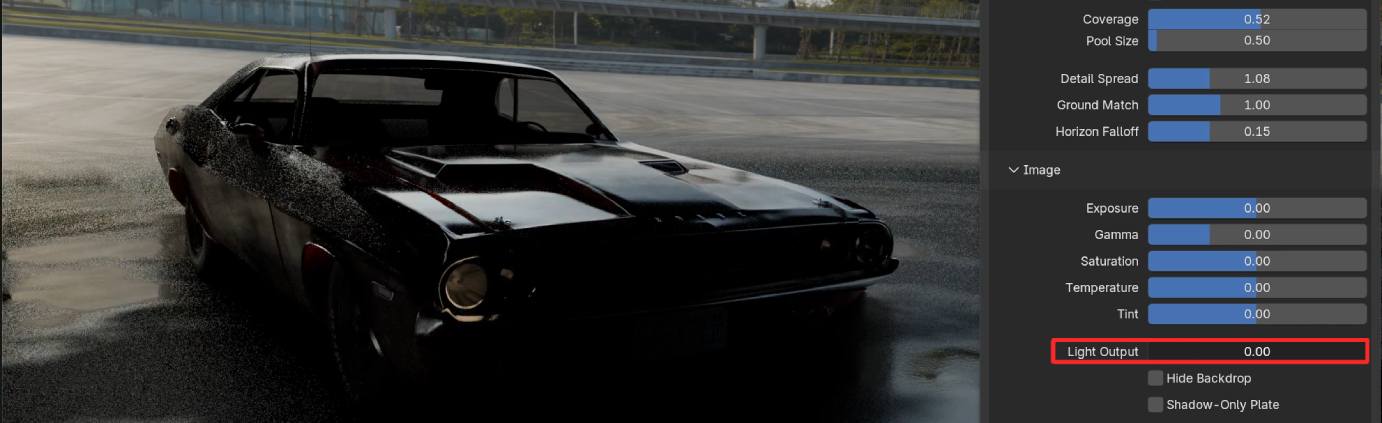
You can also reduce the light output or diffuse light contribution.
Depth Sphere
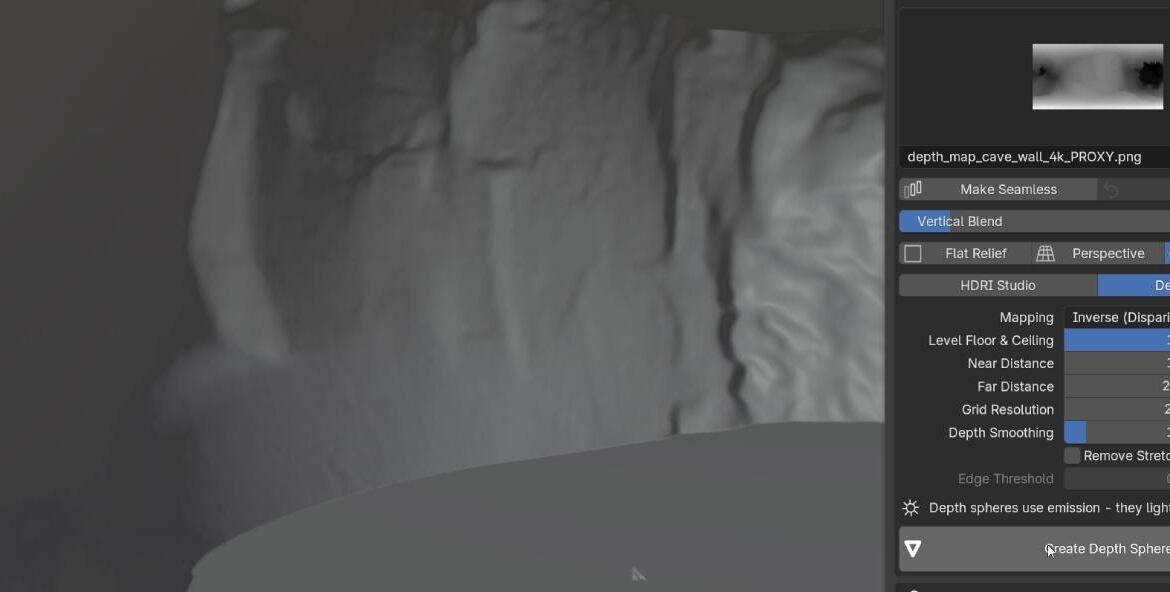
For HDRIs with objects close to the camera (like caves or garages), convert EXR files to PNG proxies first in Blender’s image editor. ‘Save as Render’ and choose a display-referred format, for instance PNG.
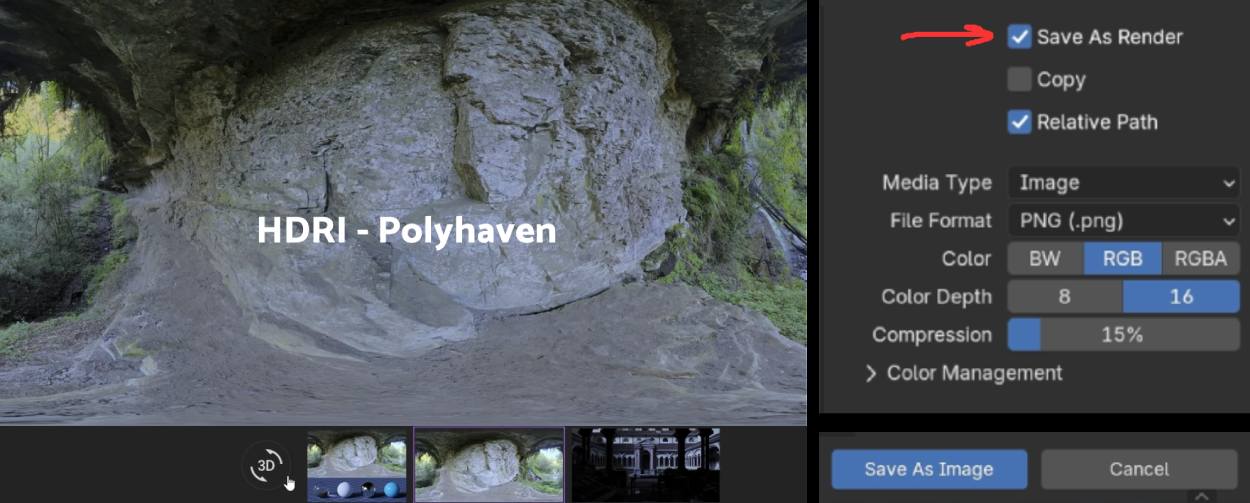
Load the proxy, set mode to 360 degrees dome / depth sphere, set mapping to inverse, adjust far distance, increase grid resolution (e.g., to 2048), and hit Create to approximate the environment.
—
Extra Features in True Depth V3
Video Mode
Select an image sequence or video file (like an MP4), uncheck Save as Video to prevent compression from ruining it, adjust the undistort factor, and add flicker-free depth.
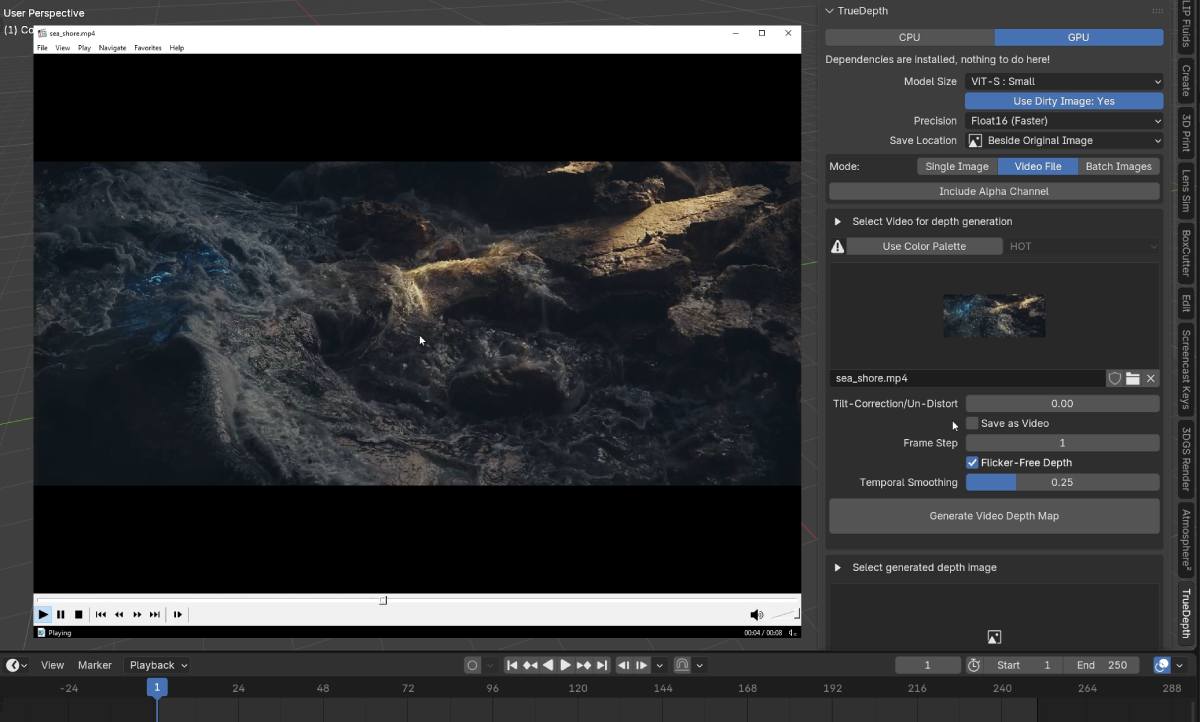
Once processed, use the frame sequence as a displacement map.
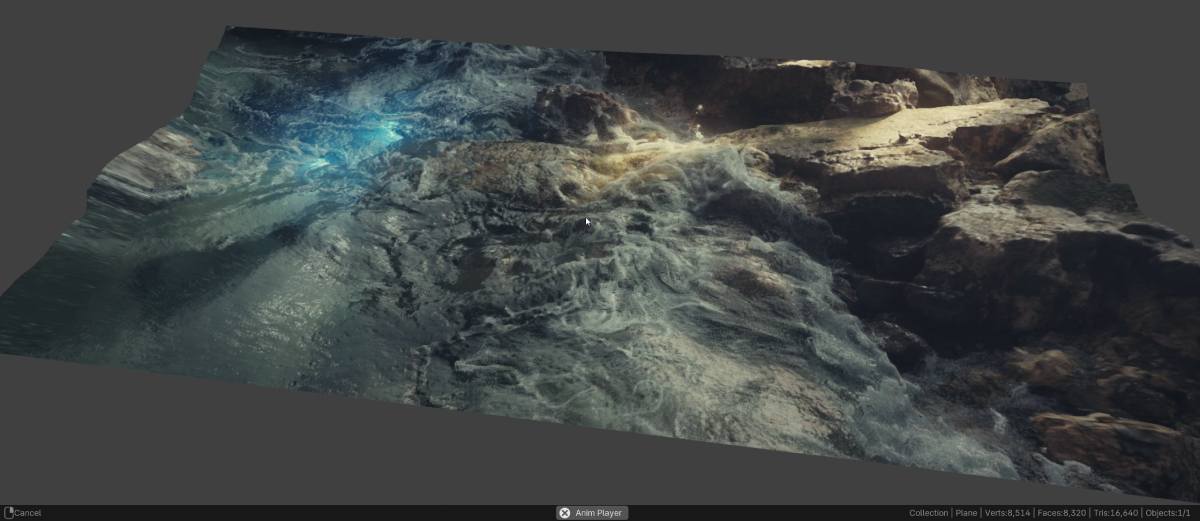
I imagine it can be very useful outside Blender – in DaVinci Resolve for instance (I know that the Studio version has own tools for generating depth maps, but anyway).
—
3D Printing Tab
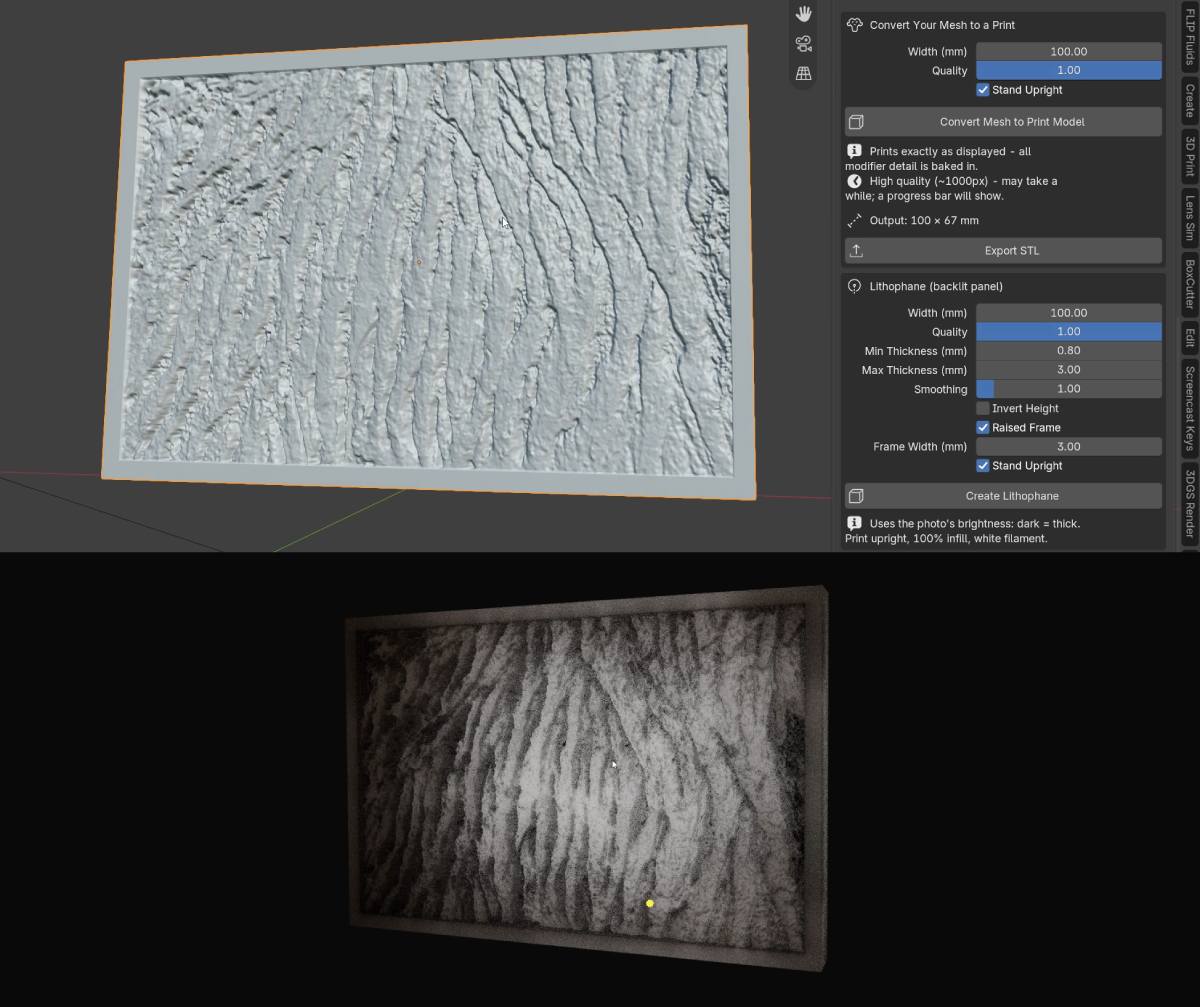
Use the new 3D Printing settings menu at the bottom to convert models into guaranteed watertight print models and save them as STL files.
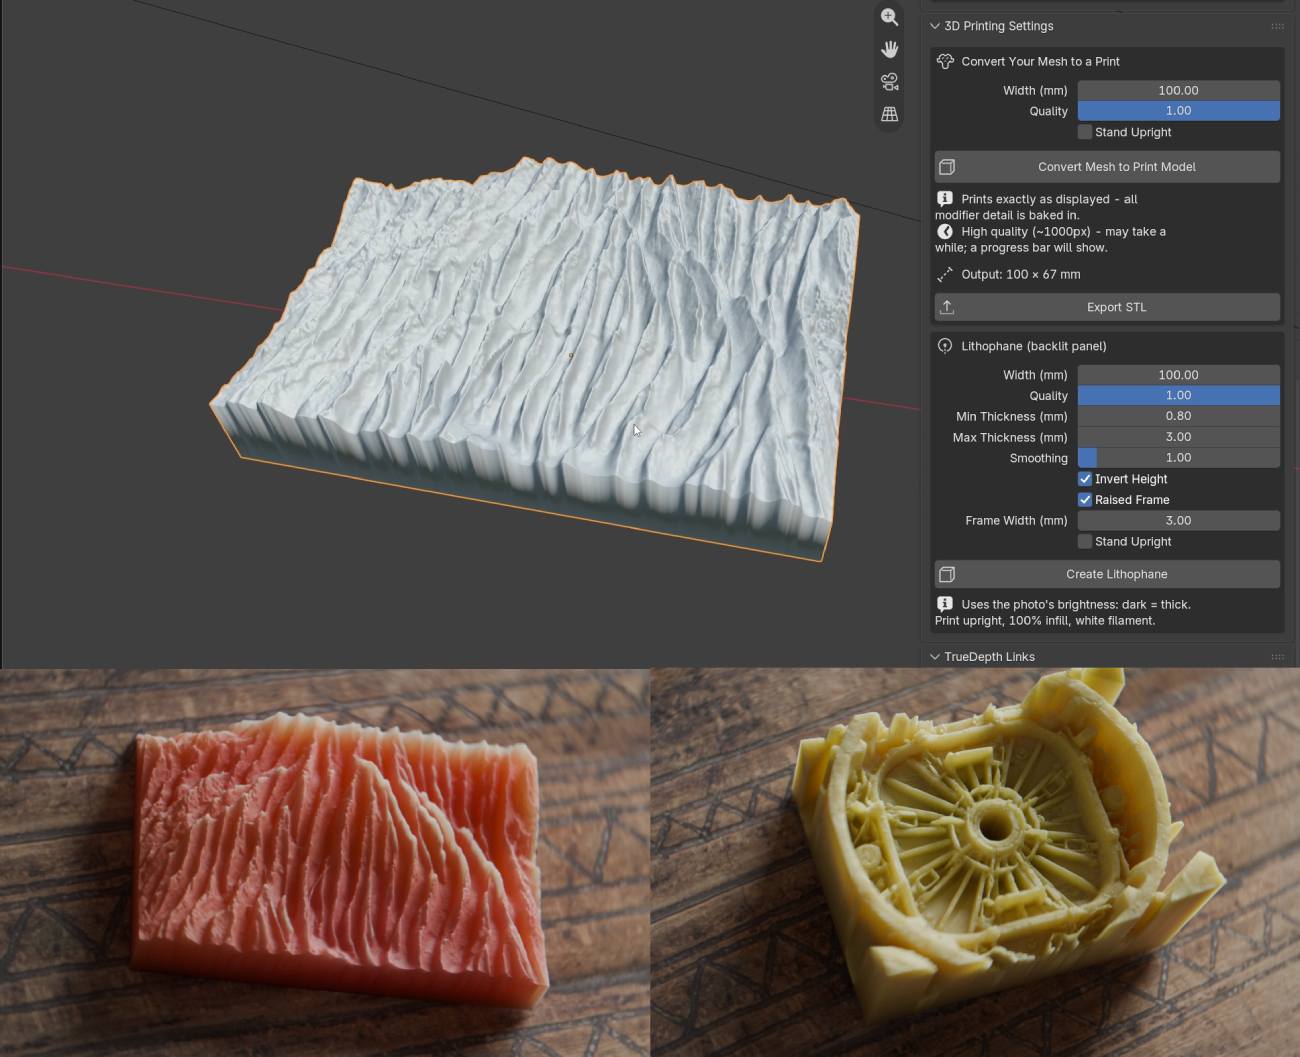
The Lithophane section allows you to set max thickness, add a raised frame, check Stand Upright, and create a lithophane – a thin translucent material that reveals textures when lit from behind.
—
Depth Anything V2
True Depth uses the 2nd generation of the DepthAnything machine learning model for monocular depth estimation.
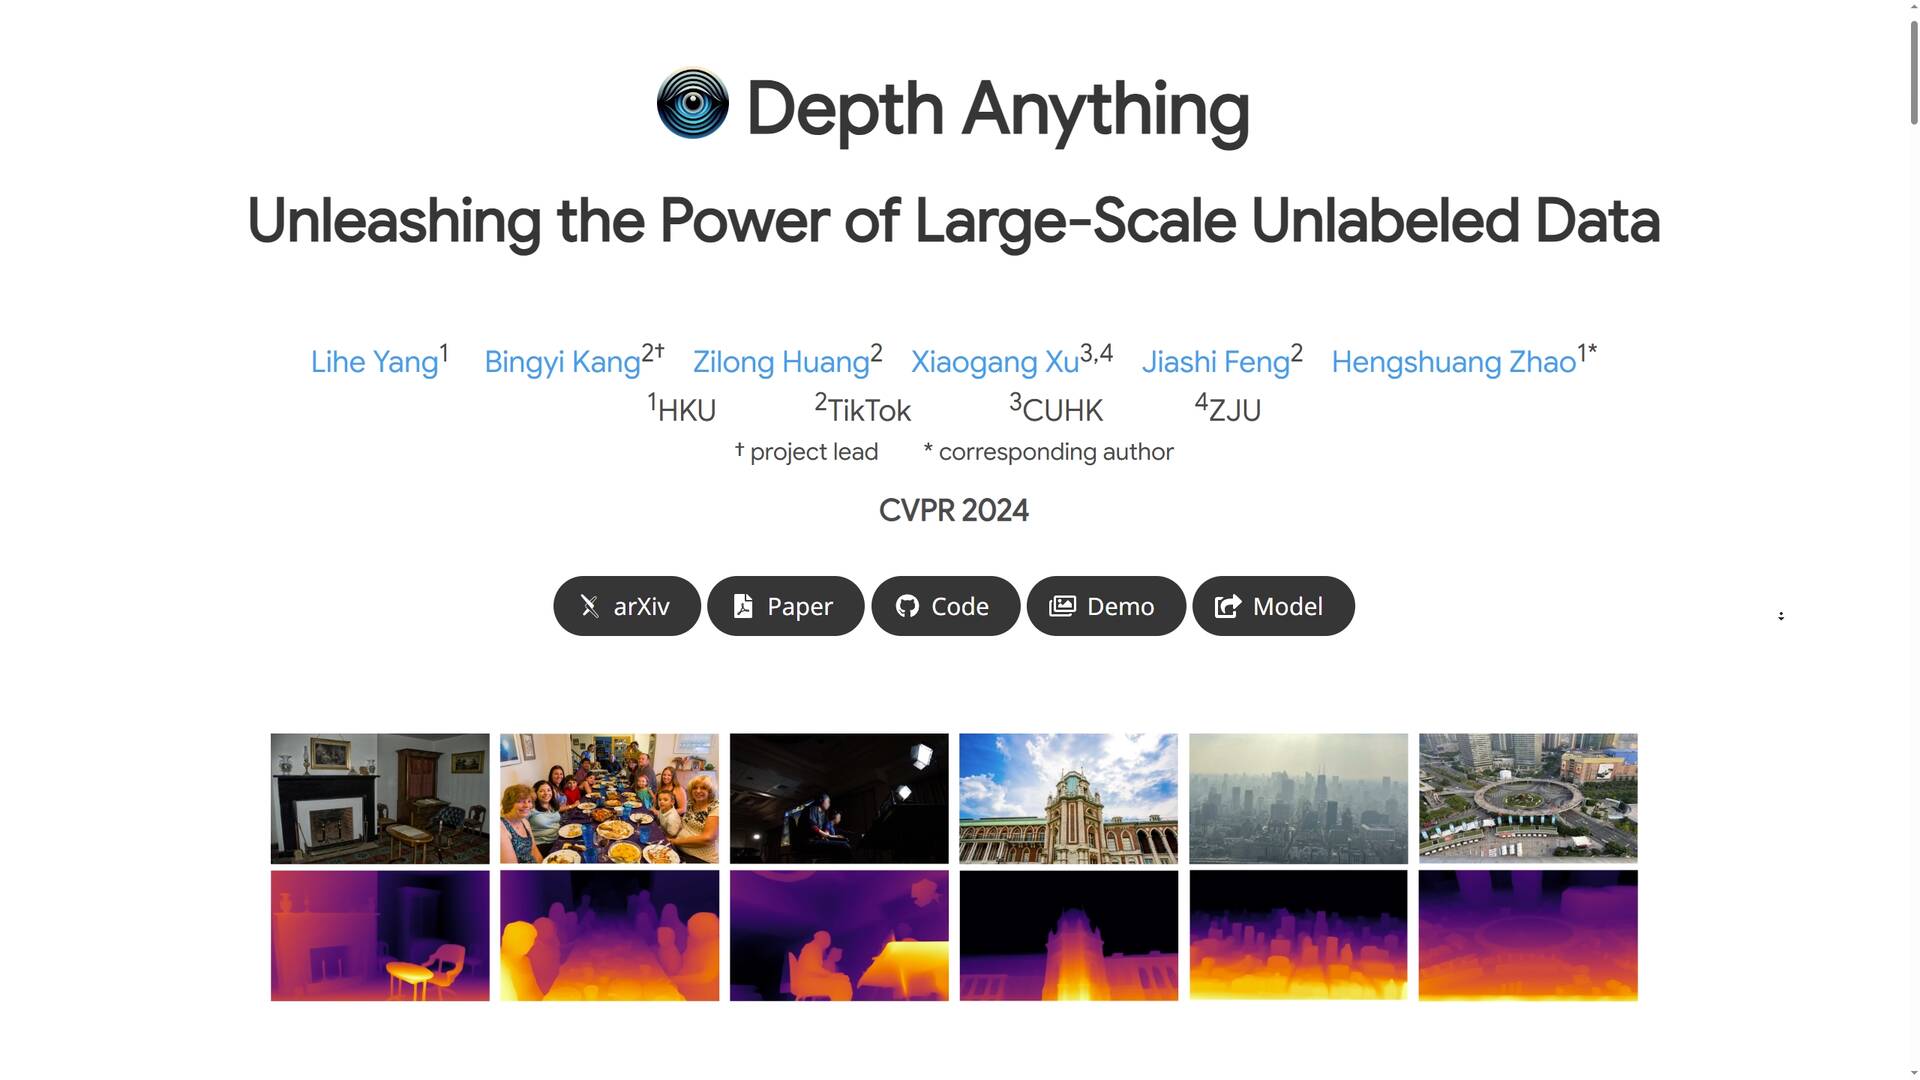
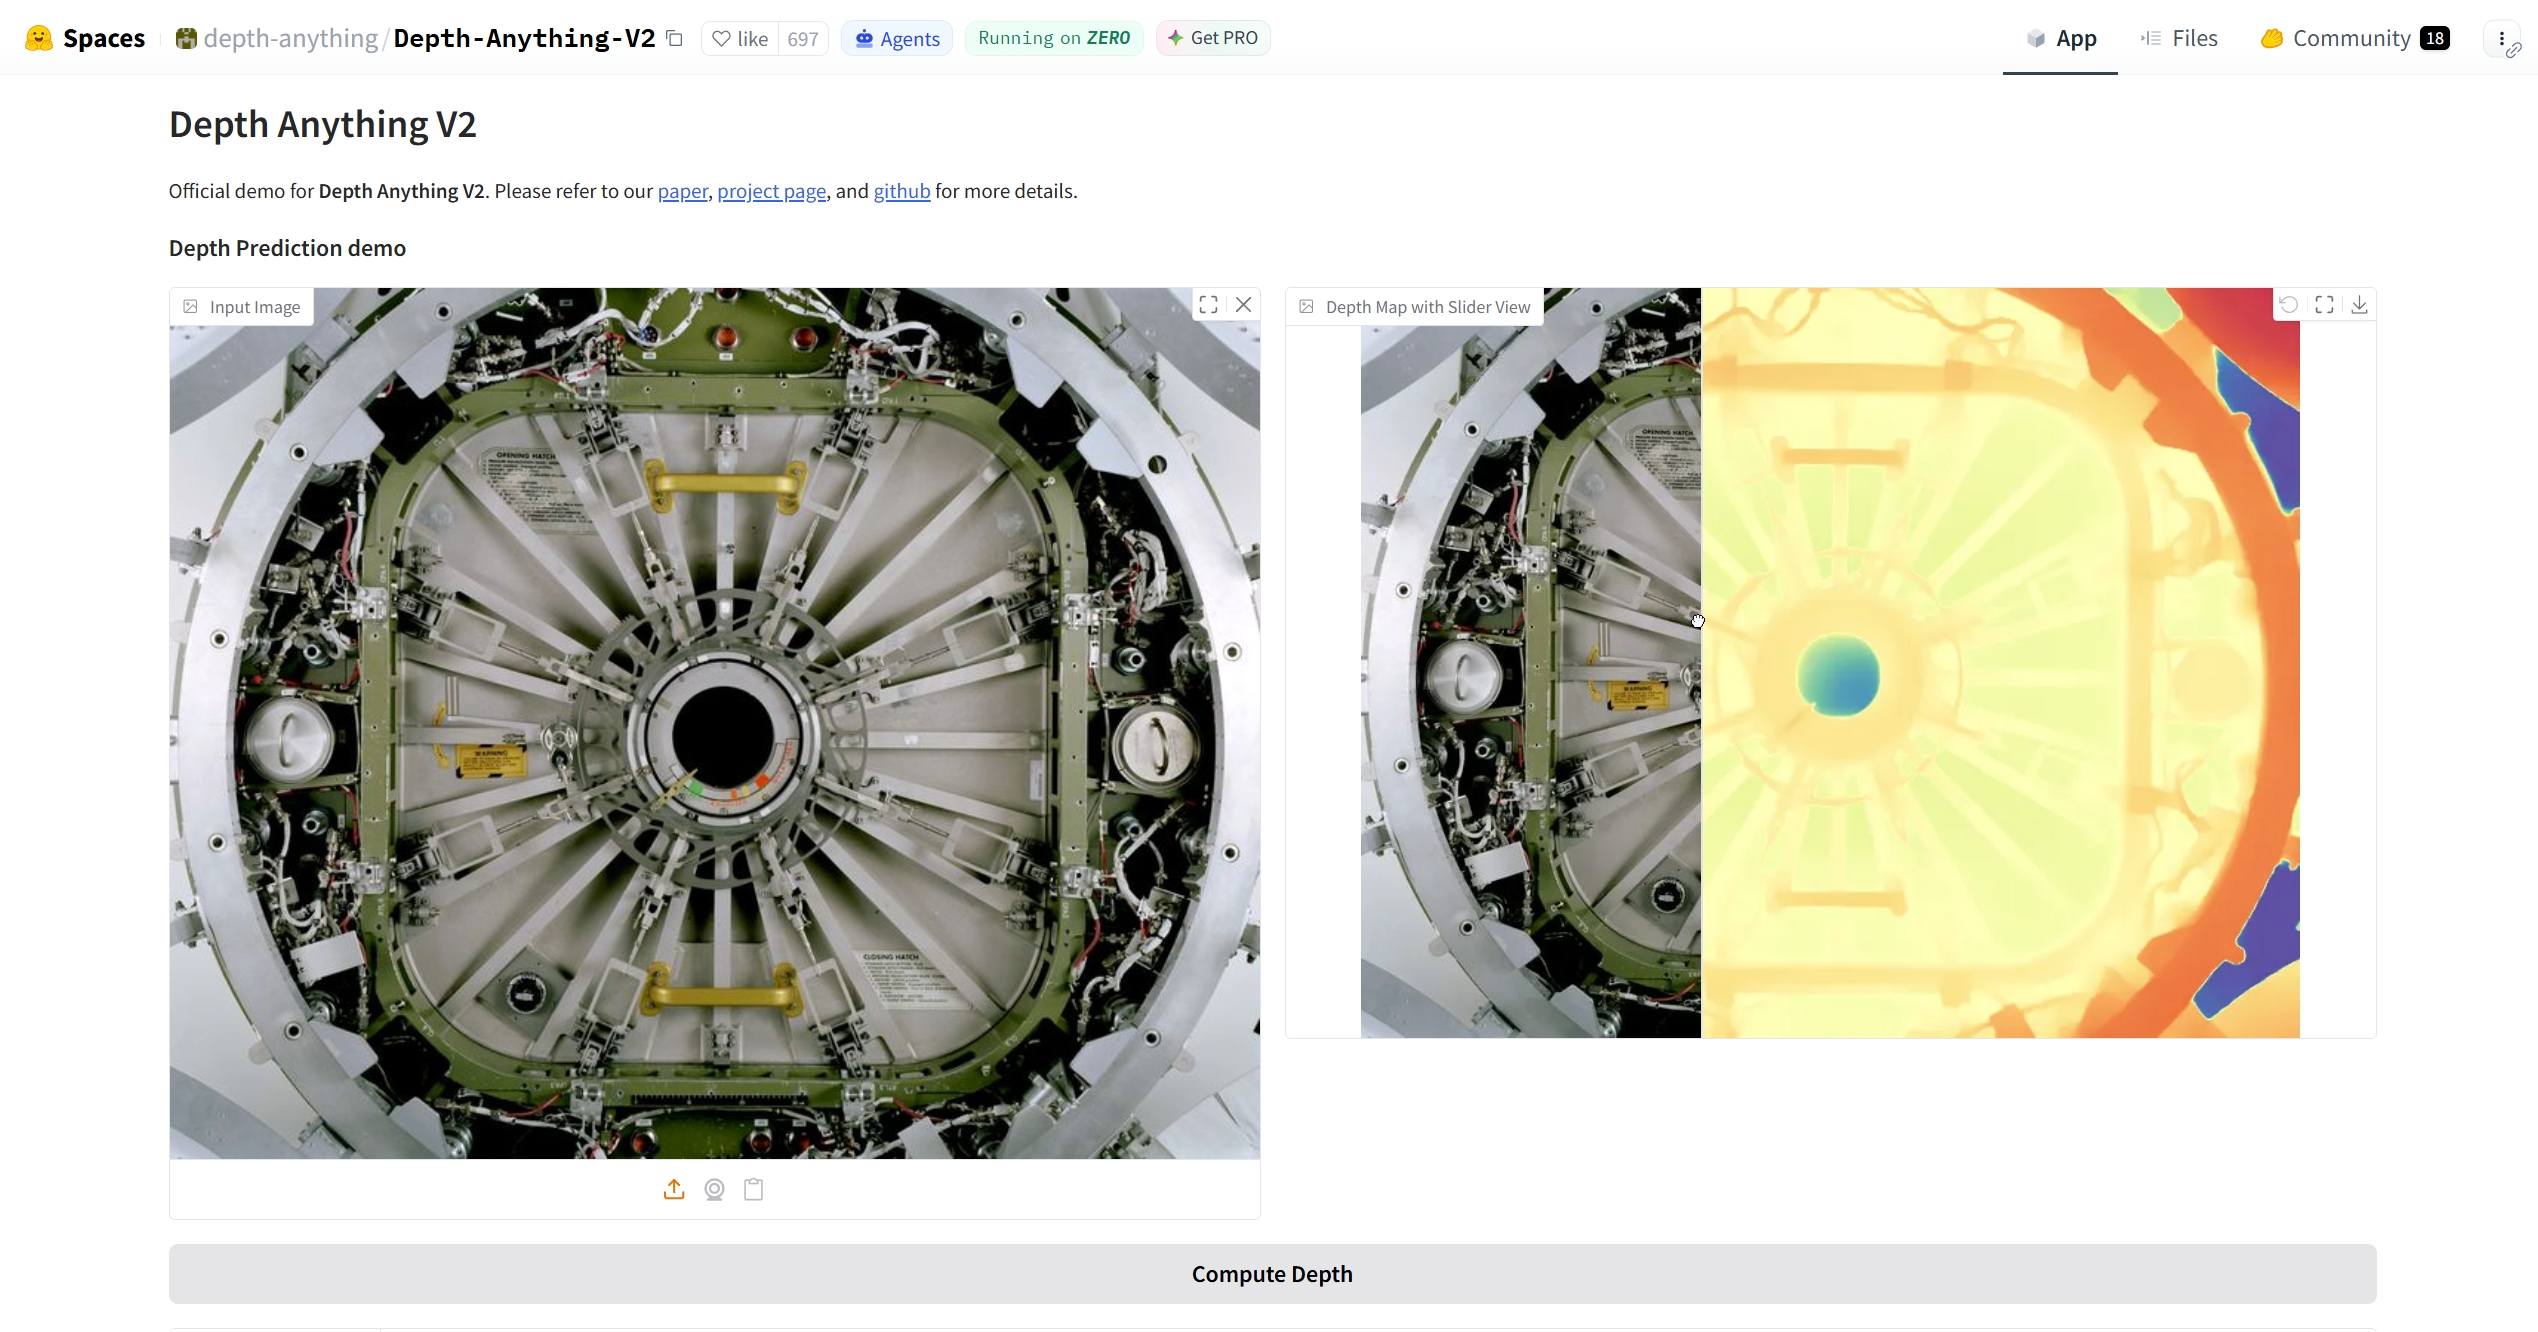
Depth-Anything-V2 is a widely used monocular depth estimation model, capable of predicting depth from a single image.
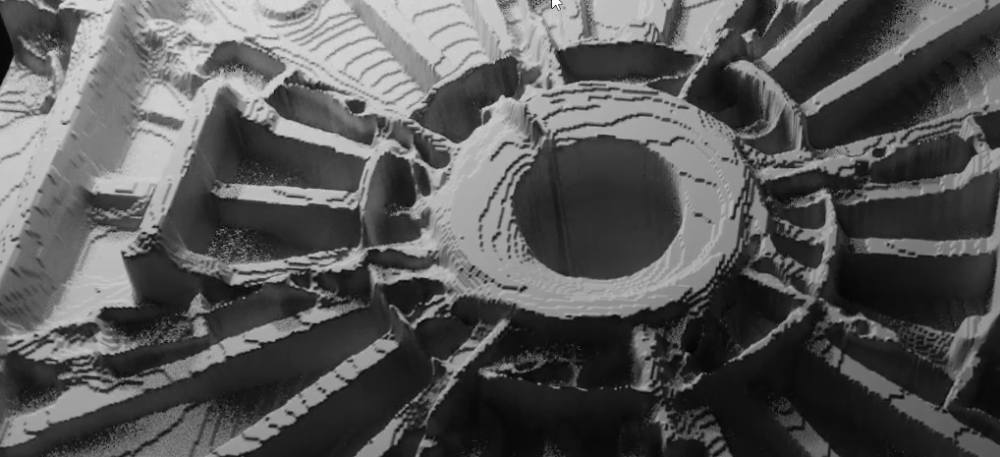
p.s. Resolution of the free demo is limited to 518px and color depth to 8-bit (256 grey levels). When used for displacement, it results in a stair-stepping effect.
Depth-Anything-V2 Training Set
- It was trained on labeled synthetic data (photoscans), but also on 62+ mln unlabeled images – some of which were scraped from the internet (Google Landmarks etc).
- All it learns is how to estimate depth, not generate artworks or imitate artist styles
- There are also potential licensing issues, so make sure to do your research before using it commercially. For instance, the ViT-S (small) model is cleared for commercial use, but the ViT-B (base) and ViT-L (large) aren’t.
TLDR: This is a bit of an uncharted territory, so do your research before using it in commercial projects.
Some AI researchers question whether the use of Google Landmarks and so on can be considered fair game for training, so it’s not a settled debate.
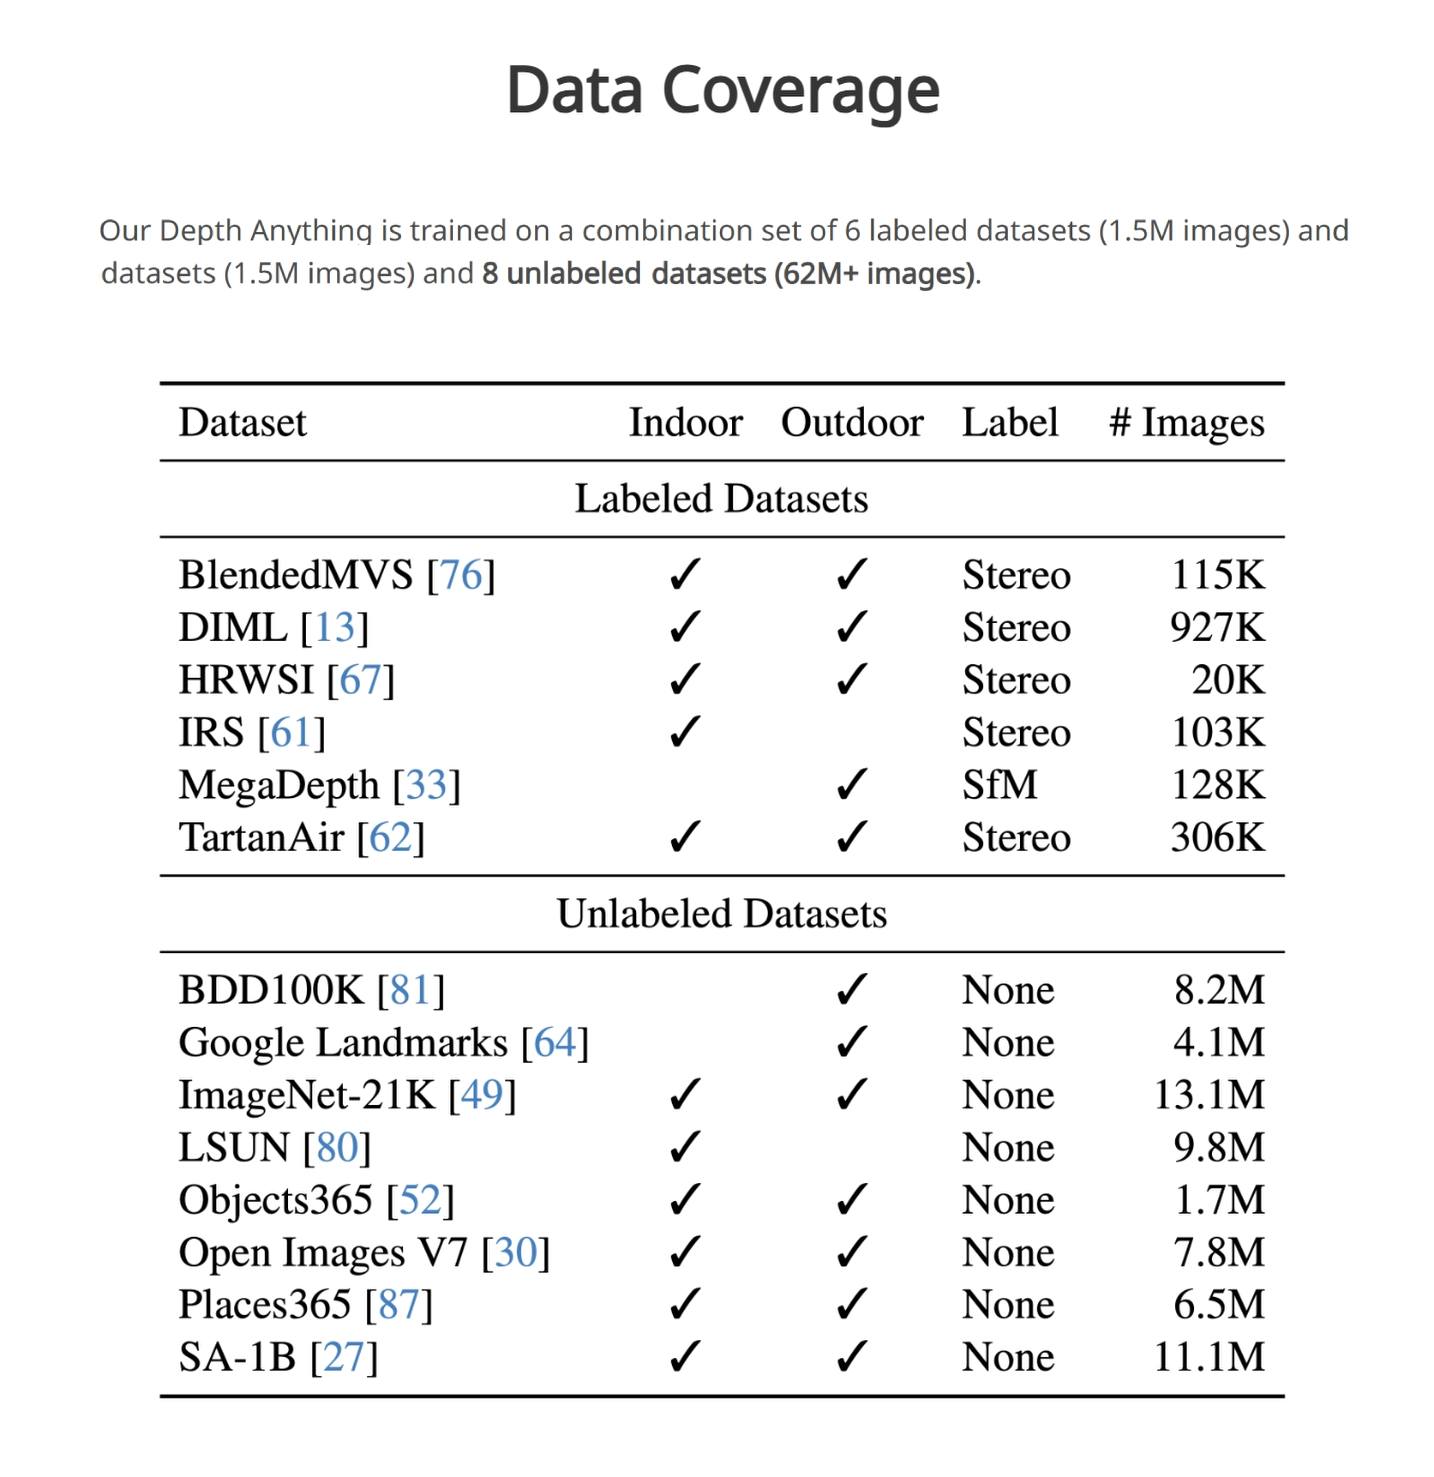
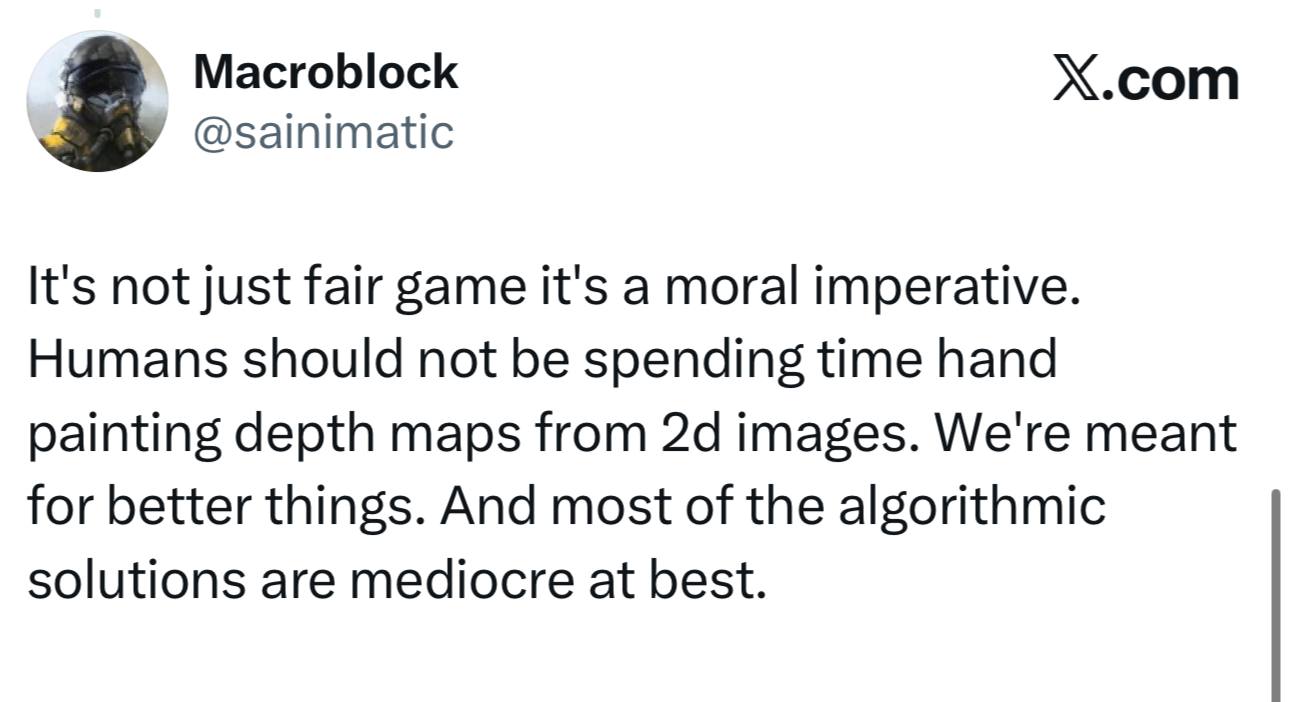
The consensus among 3D artists, however, seems to point in this direction: generating depth maps can’t be solved algorithmically, so a machine-learning based approach, even through not entirely transparent, still produces a genuinely useful tool.
As Macroblock put it: “Humans should not be spending time hand painting depth maps from 2d images.”
Yet, Sam Krug raises a valid counterpoint too:

—
Local Installation & 16-Bit Tweak
To use Depth Anything, you don’t even have to own the True Depth add-on. For instance, as we’ve mentioned, it’s available on Hugging Face so you can compute depth there for free. The caveats are low resolution and 8-bit output, which lead to (very visible!) banding when used for displacement.
Alternatively, you can use it locally by downloading it from GitHub to crank up the resolution.
The local installation process may seam a bit… emm… technical – if you haven’t done that before – but it’s actually fairly easy.
Here’s the commands I used for cloning the official repository via Git (in Windows cmd or command prompt).
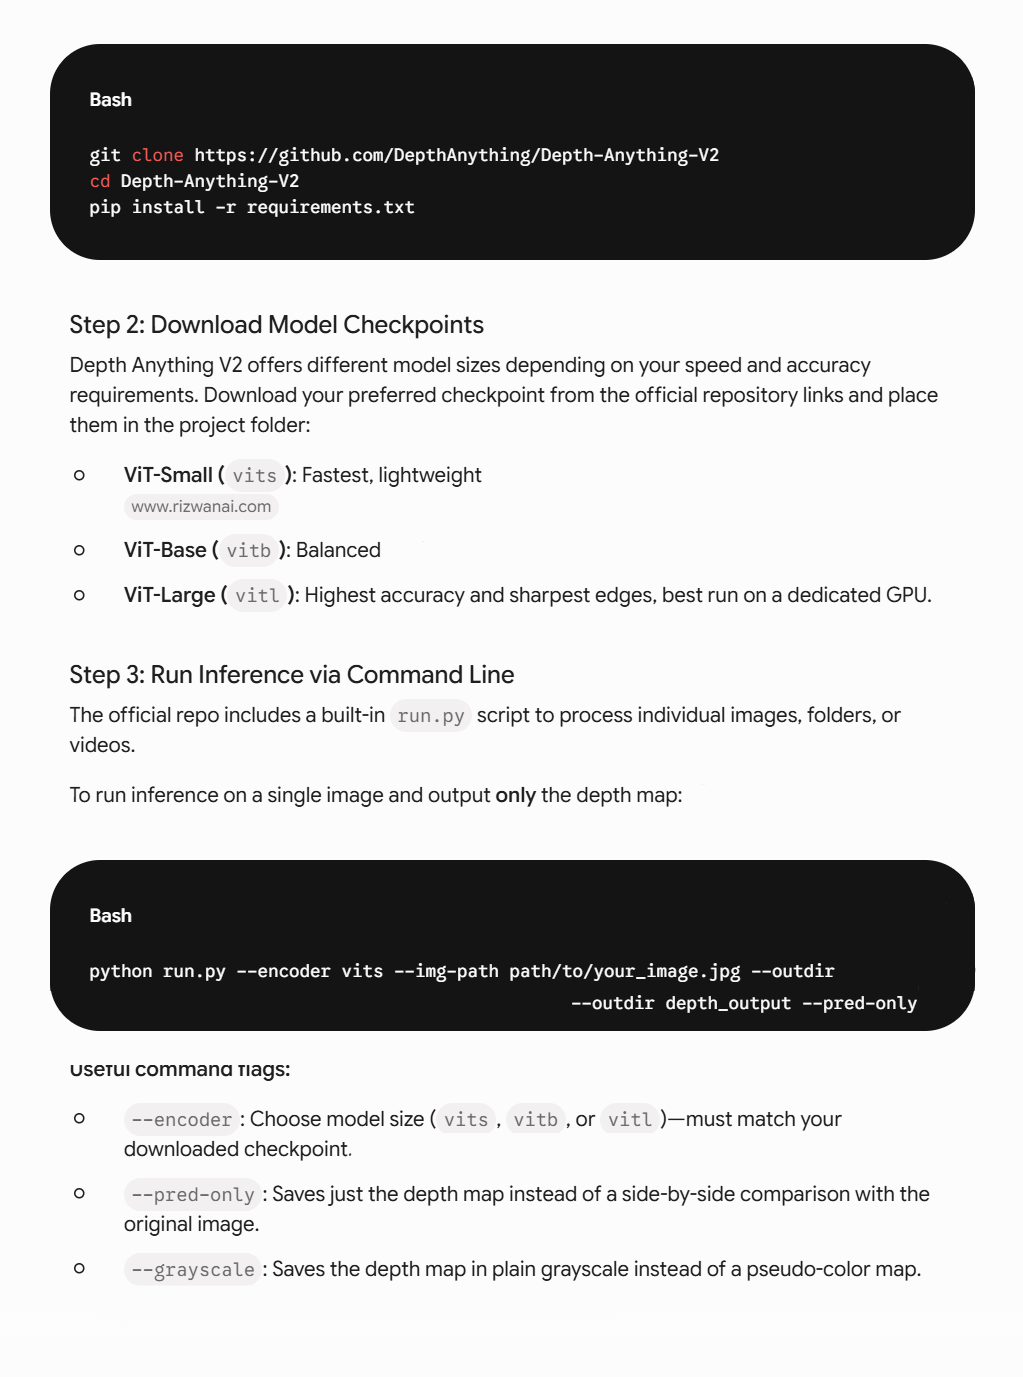
Here’s the exact command I used for generating depthmaps locally on my Windows PC: C:\Users\[YourUserName]\Depth-Anything-V2>python run.py –encoder vitl –img-path [here goes your image path] –outdir depth_output –pred-only –grayscale –input-size 1540
Modified run.py for 16-bit Output
Also, I tweaked the run.py file to unlock the 16-bit output, which is crucial for rendering smooth displacement (without the awful stepping).
Needless to say, I did that with the help of LLMs.
P.S. Depth-Anything-V2 does support 16-bit files output out of the box – but for some reason it isn’t exposed in the run.py by default, as for today.
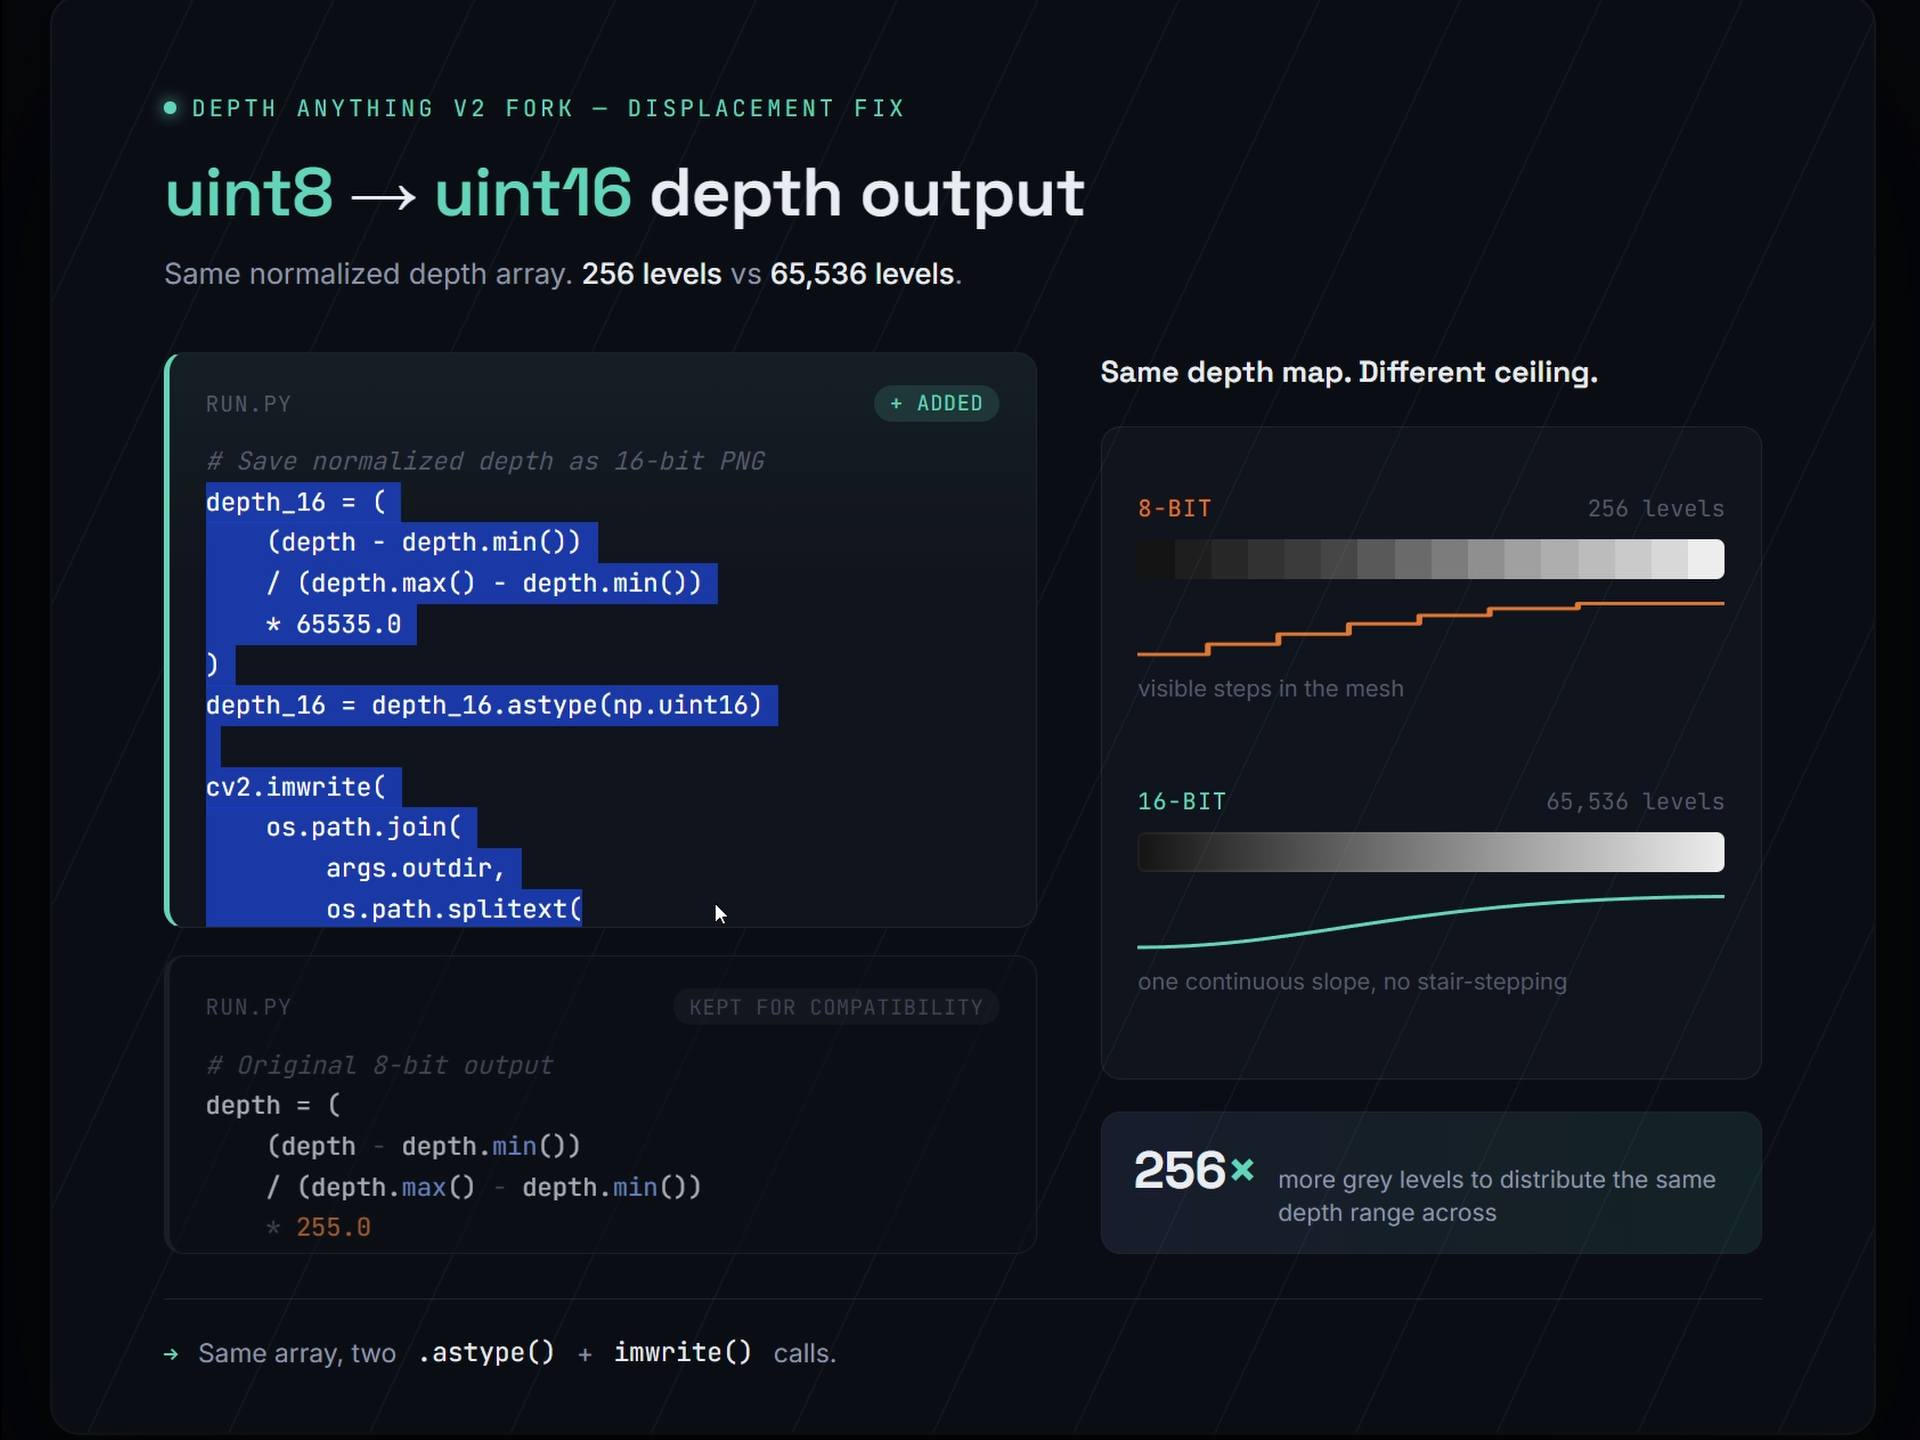
There are custom forks that do something similar, too.
https://github.com/petermg/Depth-Anything-V2_16bitPNG_Touchly1 – I haven’t personally tested it, though
—
Depth Map Resolution and VRAM
The issue with fitting all the details into a high-resolution depth map is that it requires a lot of VRAM. I ran out of VRAM trying to calculate a 2048 depth map on my 11GB GPU locally.

By the way, True Depth works around this issue by splitting the displacement pass into two: base displacement and detail. This way, the depth pass doesn’t have to be too crisp – hence no crazy VRAM requirements. We discuss it in more detail further (no pun intended).
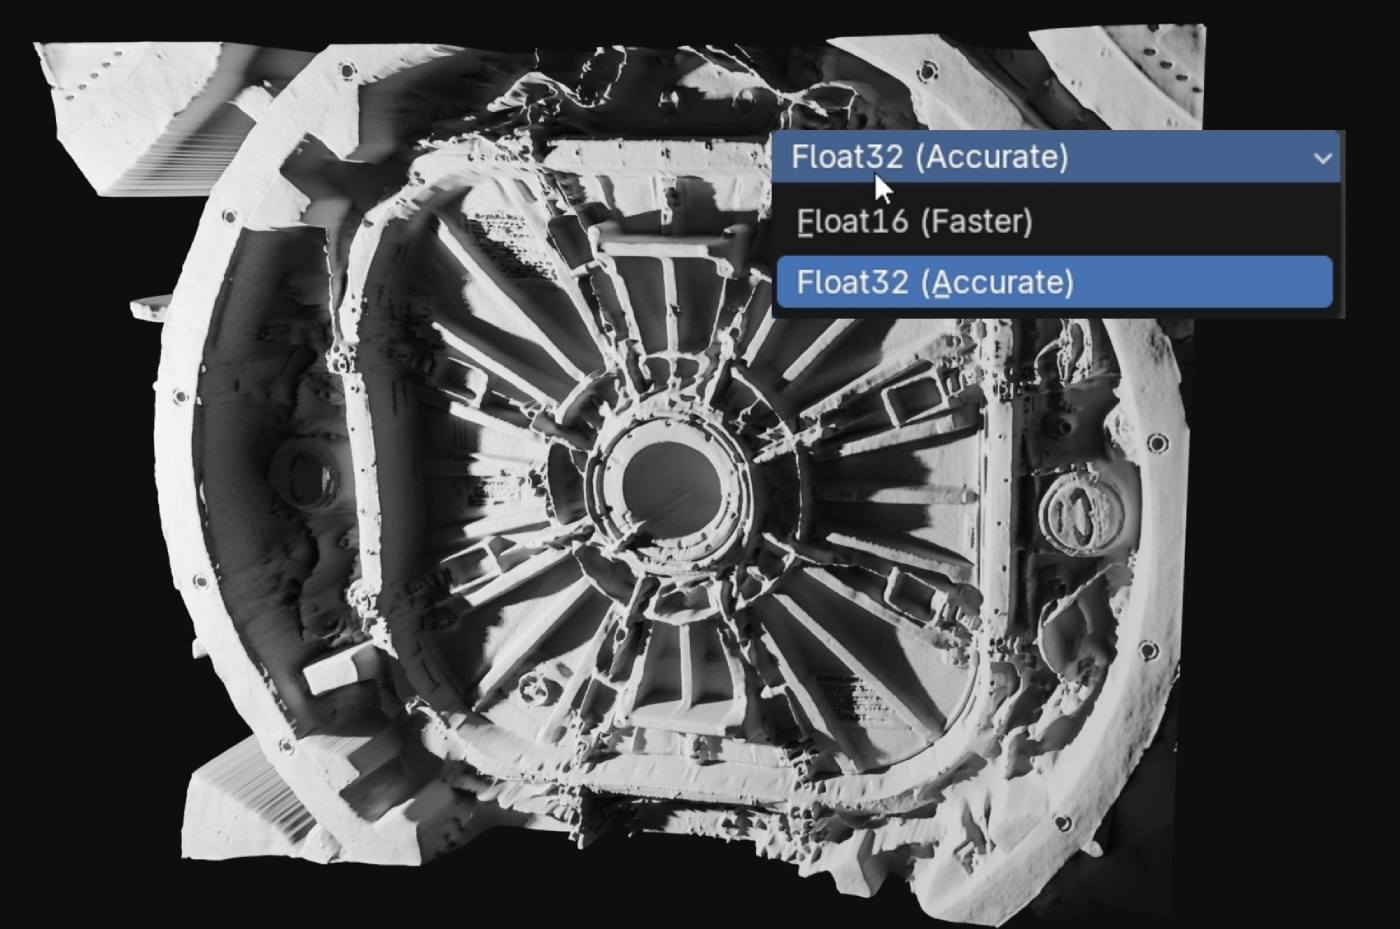
And just for posterity: True Depth renders depth in 16-bit.
—
How to Install True Depth
After downloading it from SuperHive, go to Preferences, Add-ons, and simply drag the zip archive over there then click OK.
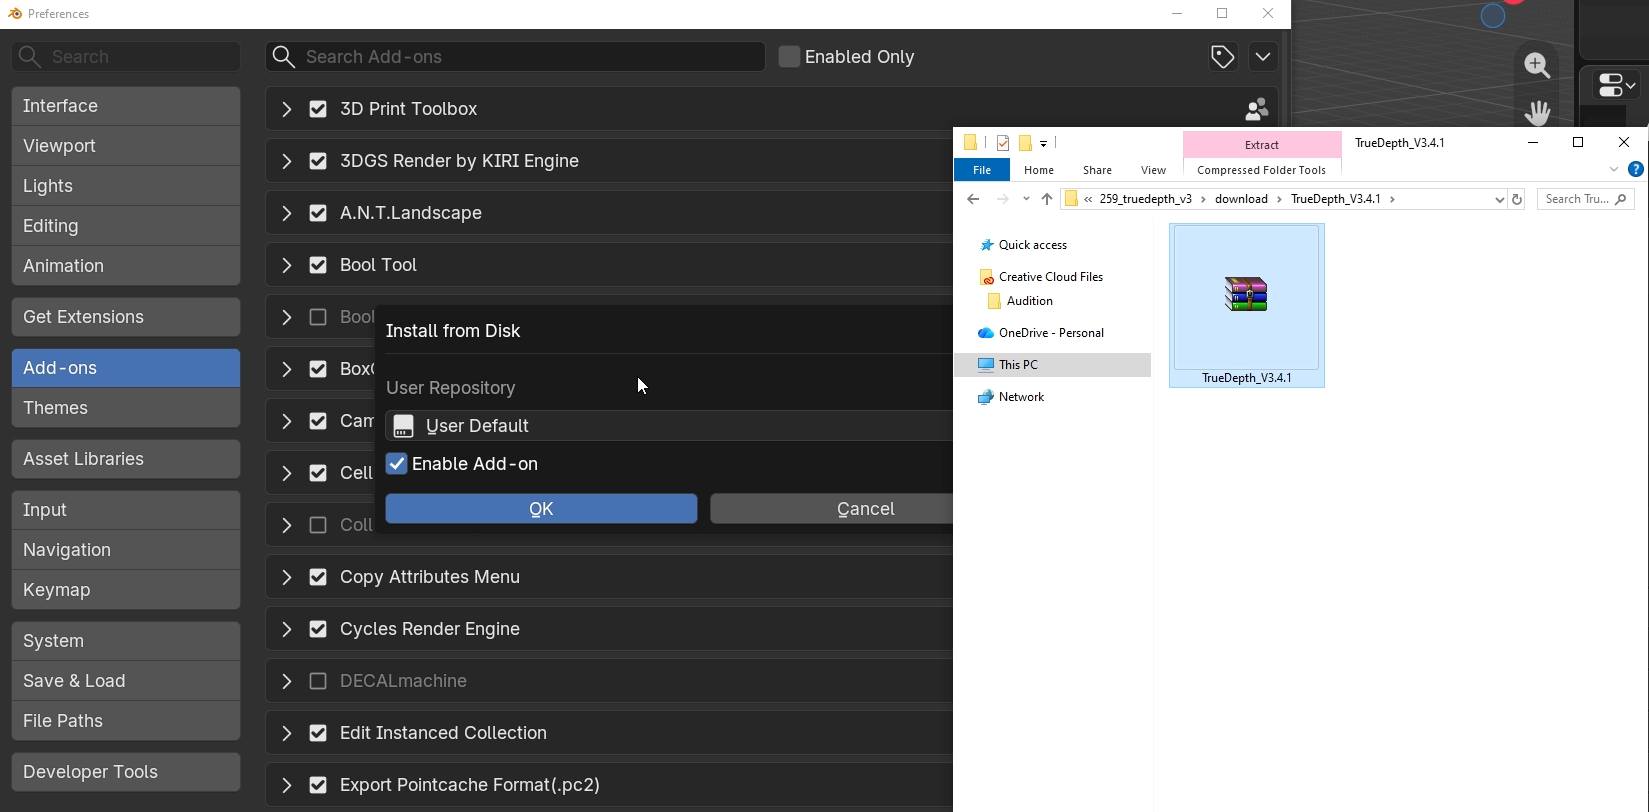
If you are updating True Depth, make sure to uninstall the previous version first and wipe out the entire folder with its remnants. In Windows, it’s usually located under C:\Users\[Your User]\True Depth…, or you can check the path in the Add-ons settings.

Next, you have to install the dependencies for CPU and GPU. Click Install, let it go through the process, and do the same for GPU. It may look dreadful if you haven’t done that before. After that’s done, reopen Blender.
Actually, closing and reopening Blender is *really important*. Don’t skimp on this.
If anything goes wrong at this stage – some dependencies like torch.py or whatever don’t want to get properly installed, for instance – also close and open Blender and try again.
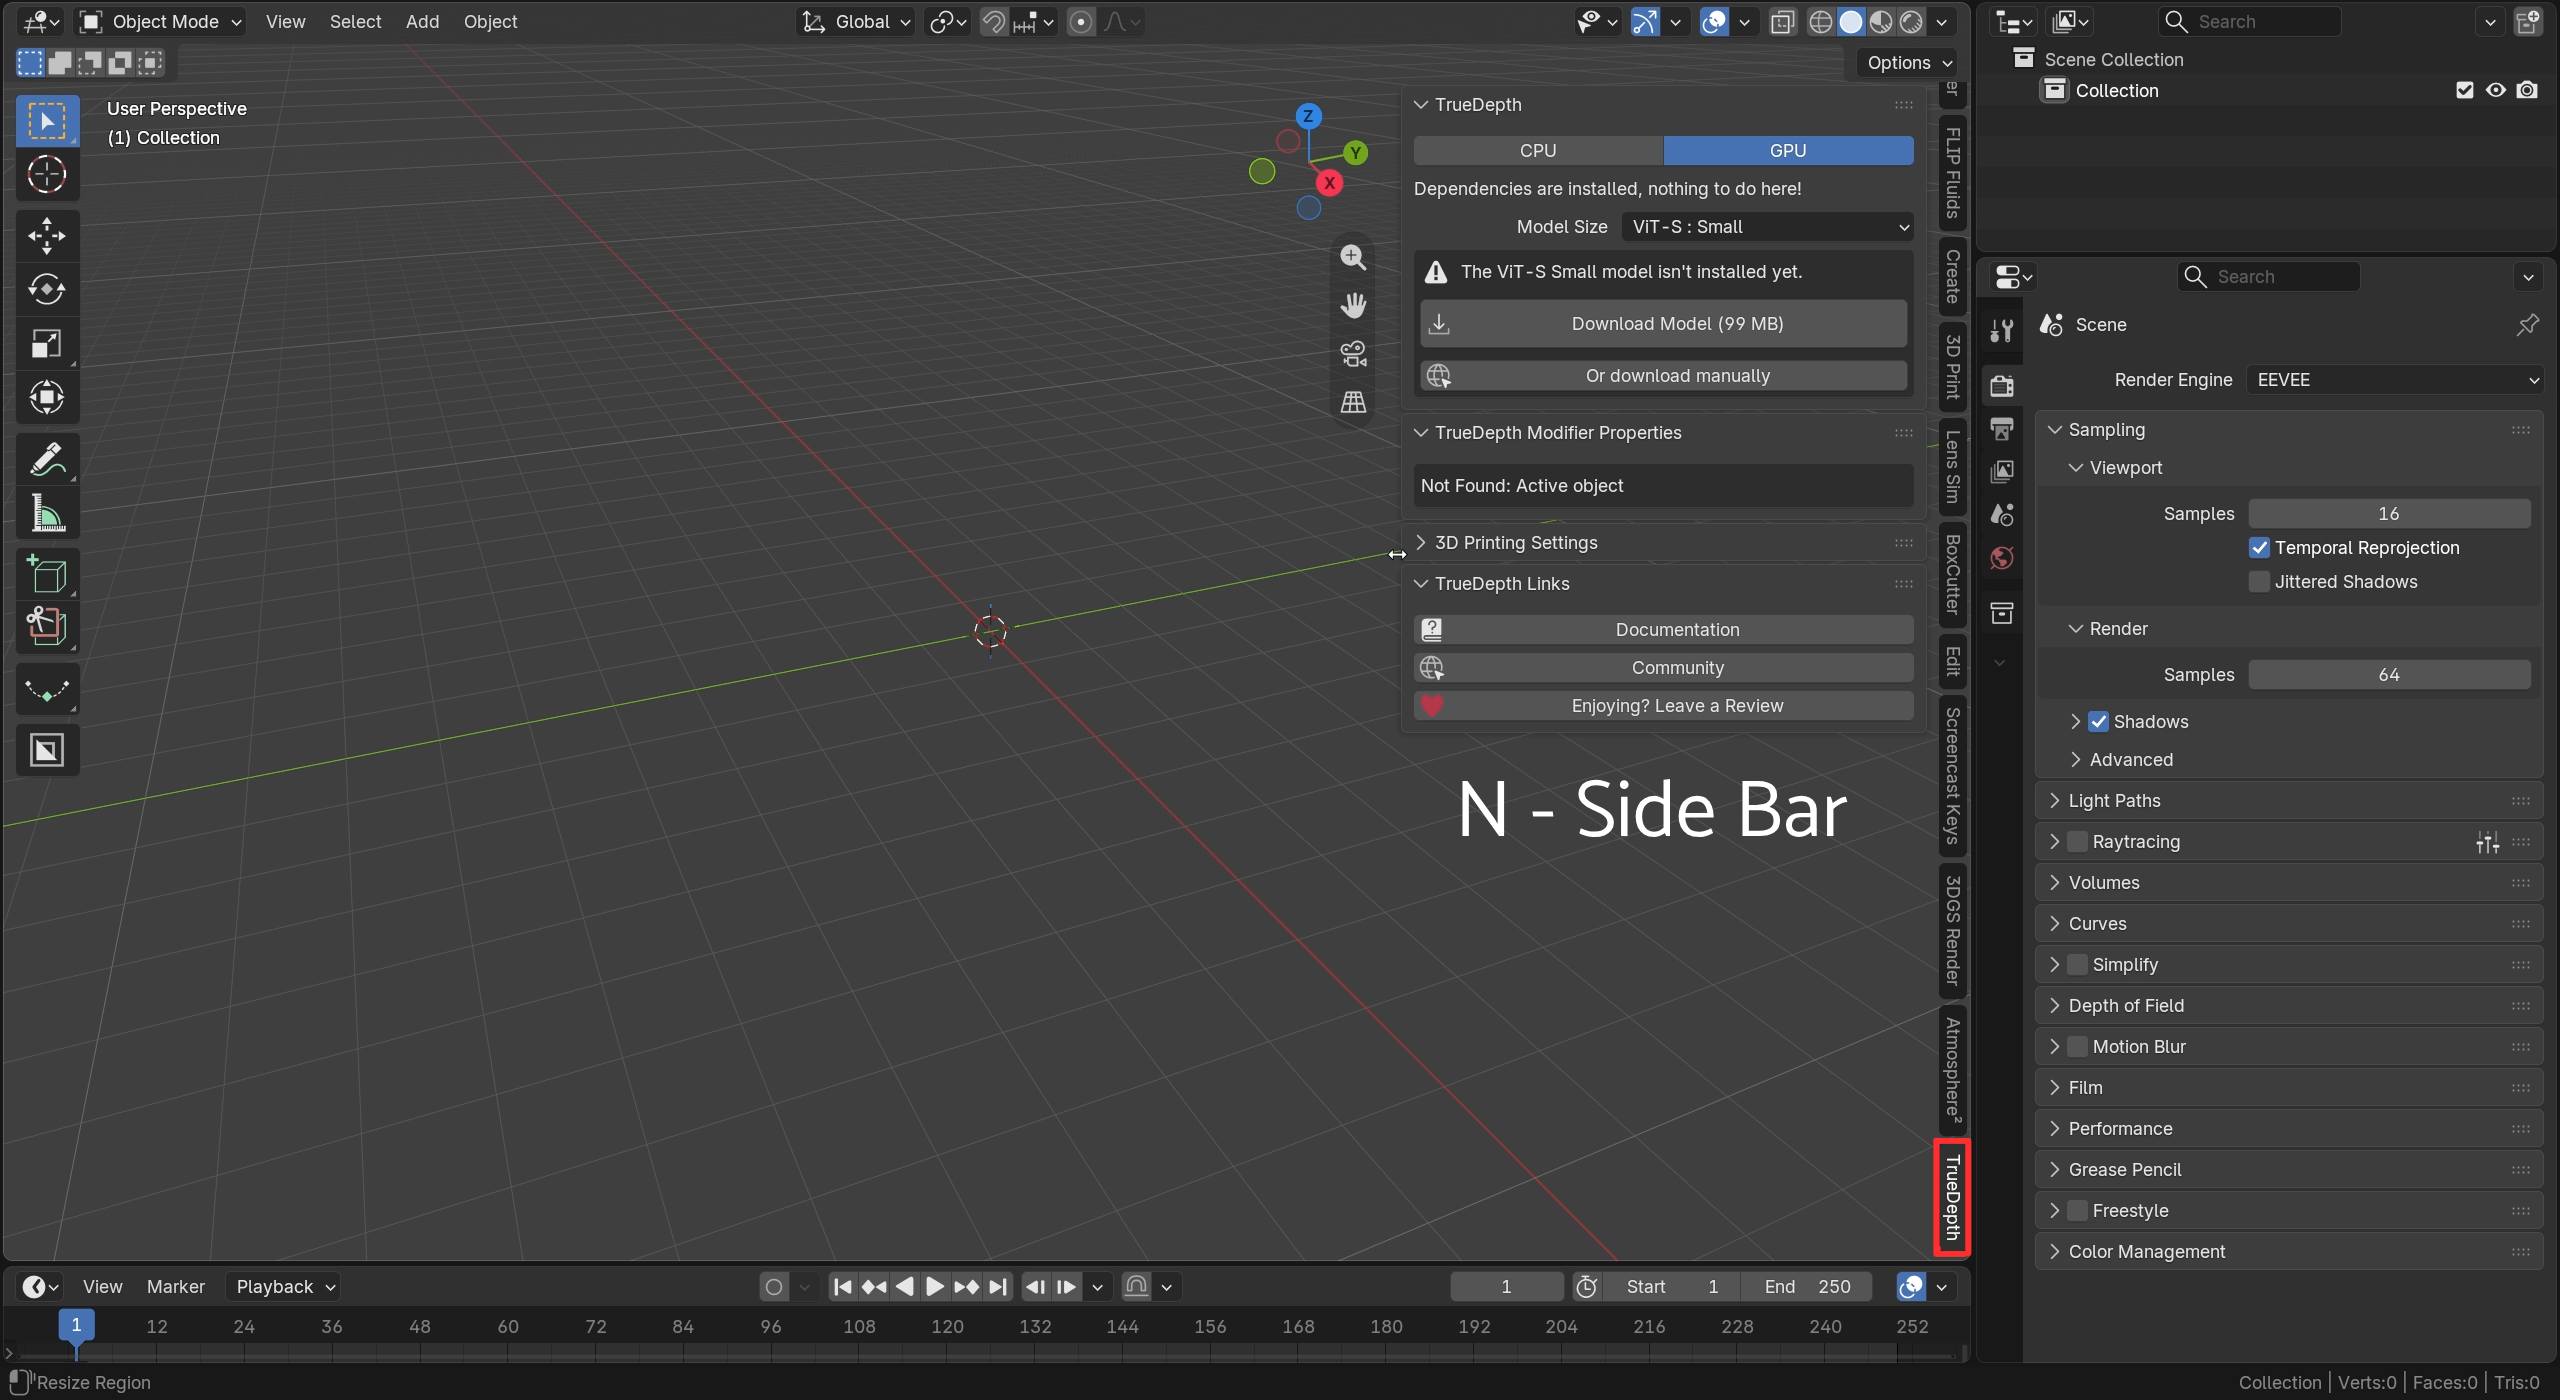
Once you open the sidebar and scroll down using the mouse wheel, you should be able to find True Depth there.
—
Download the Models
The models shown there have to be installed too. Previously, you had to download them manually from GitHub, but now you can just click Download Model to get them downloaded. I grab them all, including the large one.
Officially, the large model and base model are for non-commercial use only, while the small one is available for commercial use – though that’s a bit of uncharted territory, so do your research.
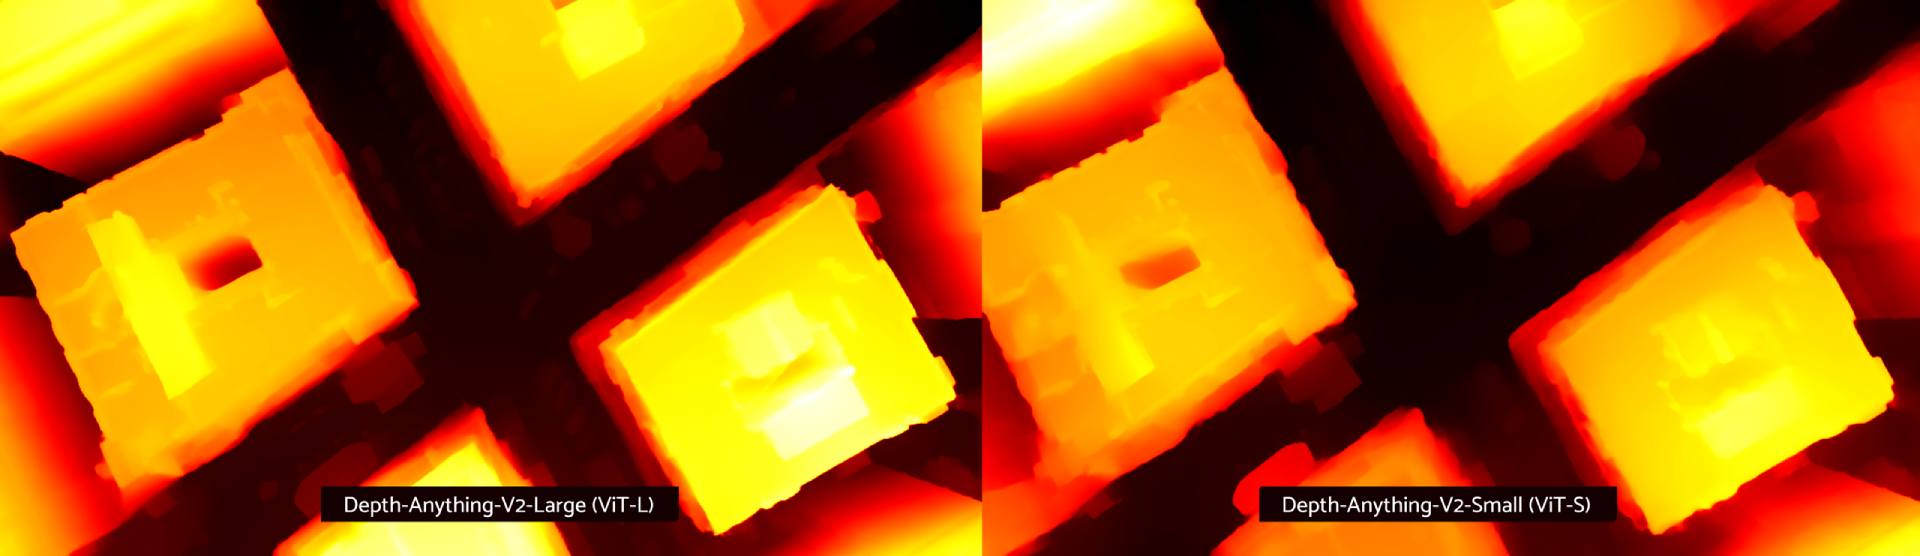
Also, technically the large model produces sharper, more precise results, but the smallest model is also pretty good and definitely usable.
—
Conclusion: Is True Depth for Blender Worth It?
True Depth brings machine learning-based monocular depth estimation straight into Blender. While you can compute solid depth maps for free online via Hugging Face or locally via the official GitHub repo, True Depth still earns my recommendation due to its Blender integration and extra conveniences.
—
F.A.Q.
Is True Depth free?
No, True Depth is a paid Blender add-on. The underlying AI model it’s built on, Depth-Anything-V2, is free to use on its own, either online via Hugging Face or locally via GitHub
—
Can I use True Depth / DepthAnything commercially?
It depends on the model size. Officially, the small DepthAnything model is available for commercial use, while the base and large models are non-commercial only.
Licensing here is still a bit of an evolving area, so it’s worth checking the current terms before using it in paid work.
—
Does True Depth work in EEVEE?
Yes. True Depth’s shader setups are render-engine agnostic and work in both Cycles and EEVEE. Actually, shader-based displacement works just fine in EEVEE (thanks to Blender devs). However, dynamic micropolygon tessellation only works in Cycles.
—
Links and Credits
True Depth Add-on
True Depth on SuperHive/Blender Market (affiliate link)
—
Depth Anything (Model & Resources)
Depth Anything V2 – official GitHub repo
Depth Anything V2 – free online demo on Hugging Face
My tweaked 16-bit run.py file (65,000 grey levels)
Other 16-bit output fork on GitHub
—
Custom Shader Setups
Free Seamless PBR shader setup (.blend file) for True Depth maps
Free HDRI dome-projection shader node setup (Cycles & EEVEE, non-True Depth method)
—
Software & Tools Mentioned
Adobe Photoshop (generative fill / content-aware fill / Firefly)
DaVinci Resolve (mentioned as a possible use for video-mode depth maps)
Poly Haven (referenced re: tileable/seamless textures)
—
Image & Asset Credits
Rocky images used in the Flat Relief demo (Unsplash, CC0):
andrey-nuraliev-875U3YejtnA-unsplash
jan-kopriva-uGbXPo31KGs-unsplash
moon-moons-hnDUxPJ9hMc-unsplash
tasha-k-F34cXeZPSo4-unsplash
thomas-ho-jukvktMOFv0-unsplash
zoshua-colah-yJjF7hiKsdY-unsplash
—
City photos used in the Perspective mode demo (Unsplash, CC0)):
grigorii-shcheglov-F3CVP9qrW9Q-unsplash
kristen-morith-IWpd8KixceA-unsplash
sander-crombach-Zst8CE0bD9c-unsplash
tommy4gsus-new-york-6578473
Space station hatch (CC0, public domain, NASA)
Cave Wall HDRI used in the Depth Sphere demo
Sea shore animation used in the Video mode demo
Space station corridor: Anton Dmitriev, Artstation
—
Other Monocular 2D to 3D Tools and Apps (Diffusion-based)
Another bas-relief depth map generation tutorial (with the comparison to Materialize app – algorithmic vs machine-learning)
—
Music
Ambient track: Coffee Jam 001 by Creative Shrimp (unpublished yet. ping us if you need it. Gleb)
—
Creative Shrimp
Website: https://www.creativeshrimp.com/
Discord – for comments and discussion
Thank you for reading!
– Gleb