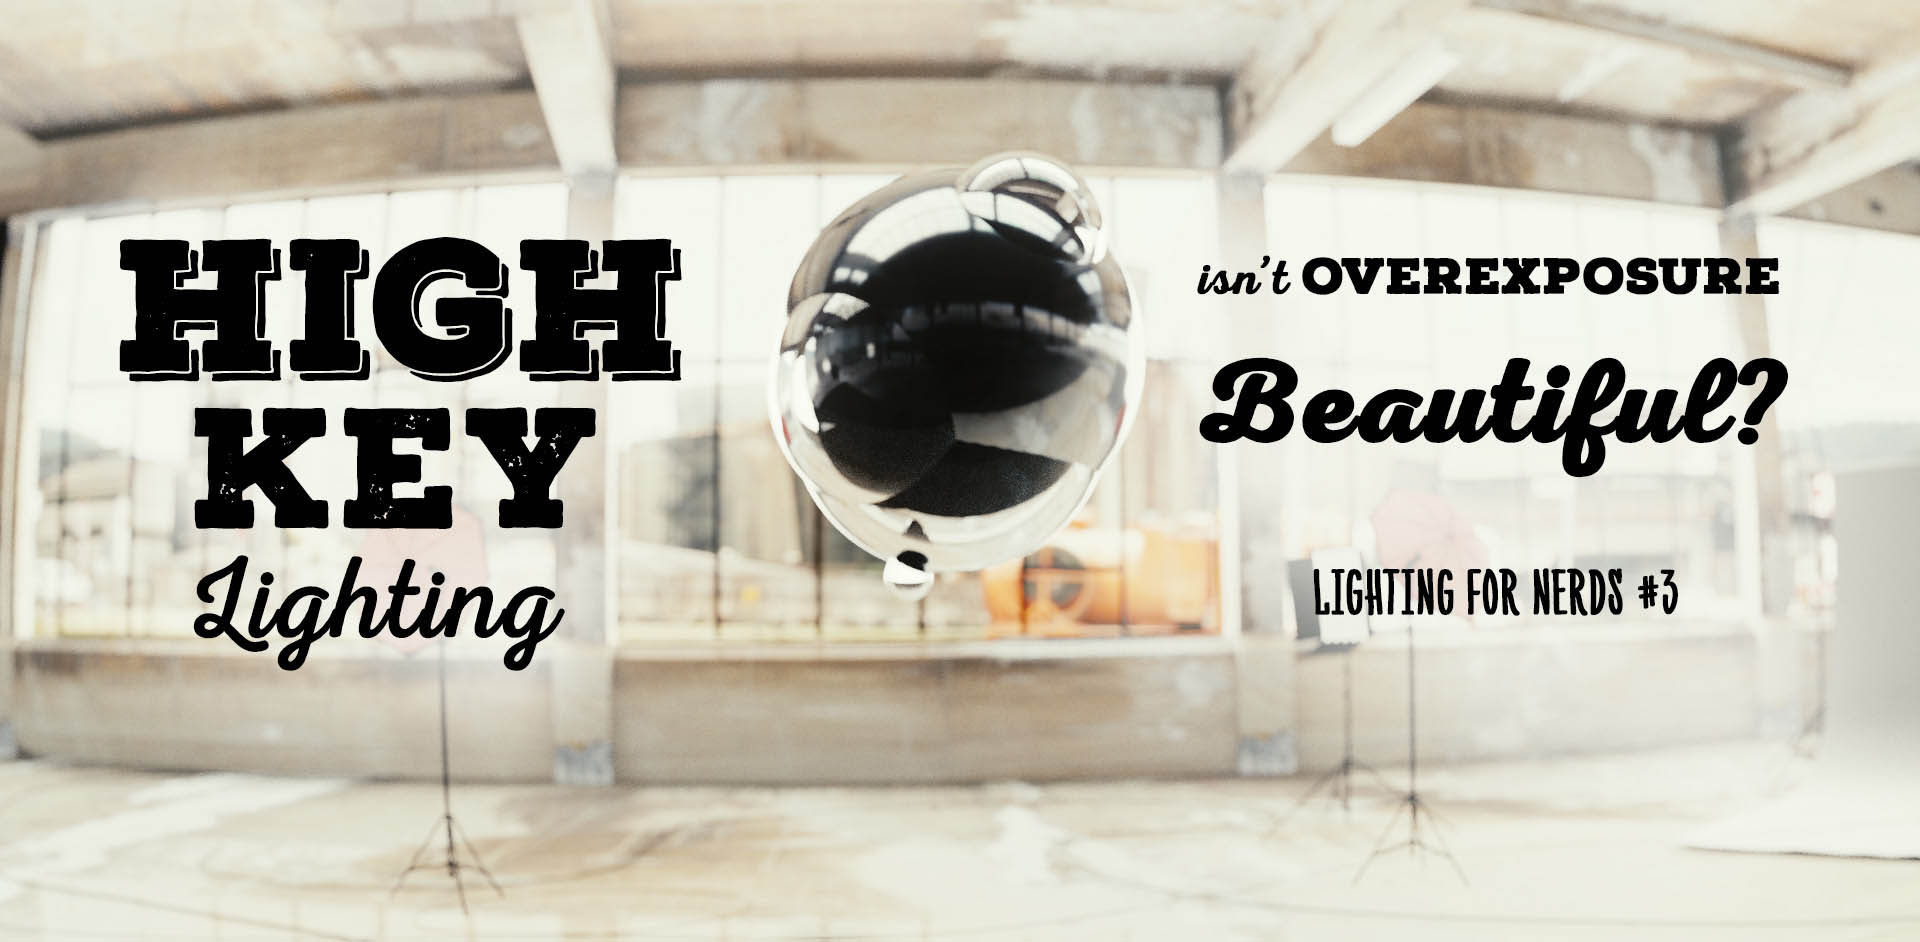
Discover how to use the high key lighting to your advantage, overexpose your 3d scene to death, and still get an awesome image.
WHAT IS HIGH KEY LIGHTING?
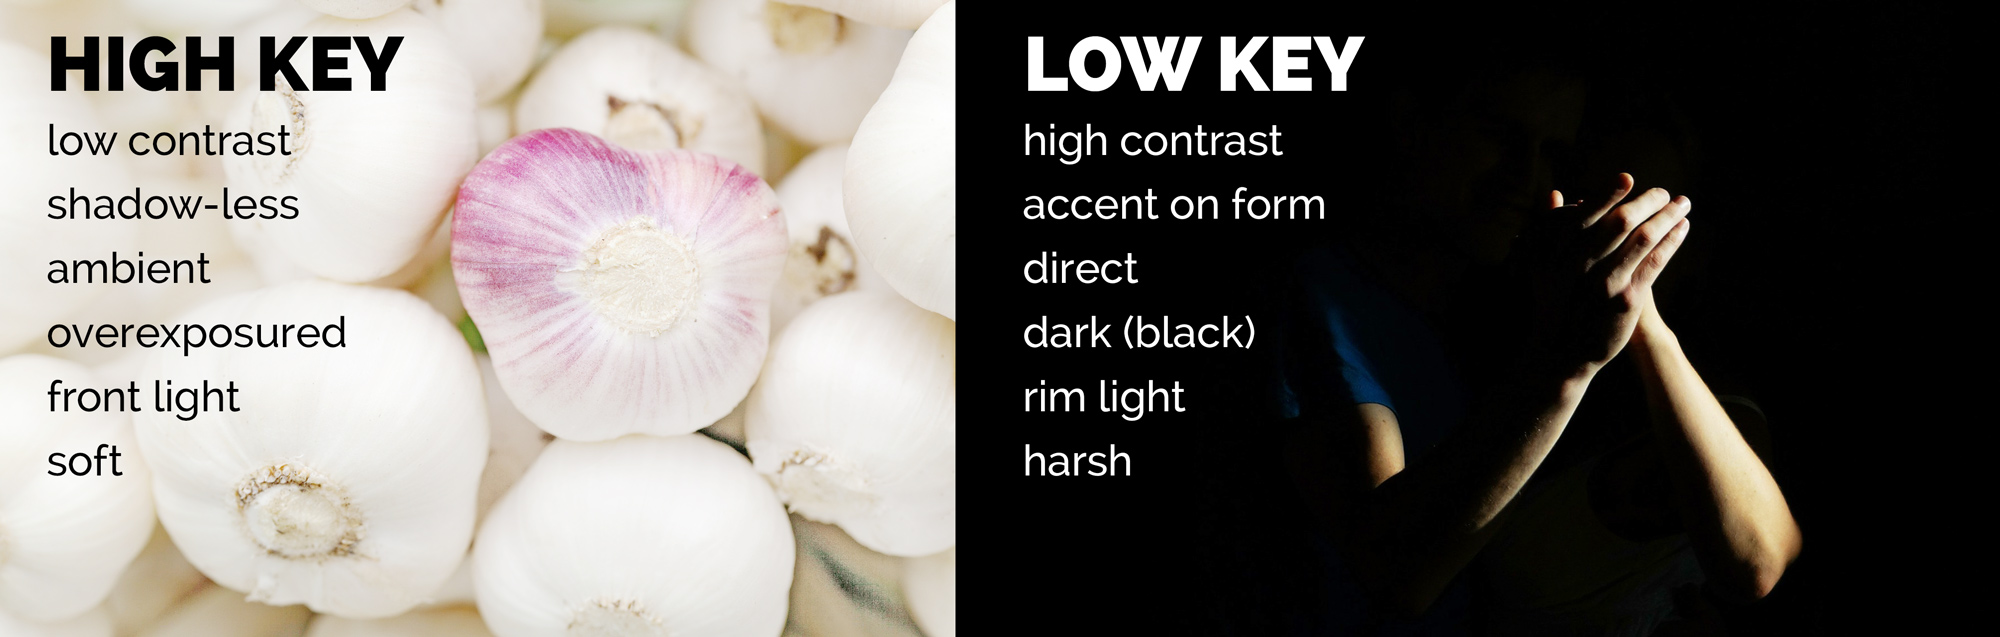
Imagine a very bright scene with a low contrast between light and dark areas. Imagine light is streaming from all directions and filling every corner.
High key lighting is all about a low lighting ratio. In another words, the low contrast between a key light and a fill light.
Photographers say, it makes people look younger. Fashion photography embraced this setup for it is strict and minimal. And flattering, as it makes wrinkles disappear.
In this tutorial, I’m making a link between high key lighting and overexposure. But apparently, overexprosure is NOT neccessary for this setup.
Christopher Grey (Master Lighting Guide for Portrait Photographers) emphasizes this point:
“High key” simply means that the vast majority of tones in the image are above middle gray, including any shadows.
And yeah, flat lighting has the drawbacks:
“However, you should use “beauty” lighting with care. The lack of shadows can also produce pictures that appear flat and formless and seem to be wholly without character.”
Light Science and Magic: An Introduction to Photographic Lighting
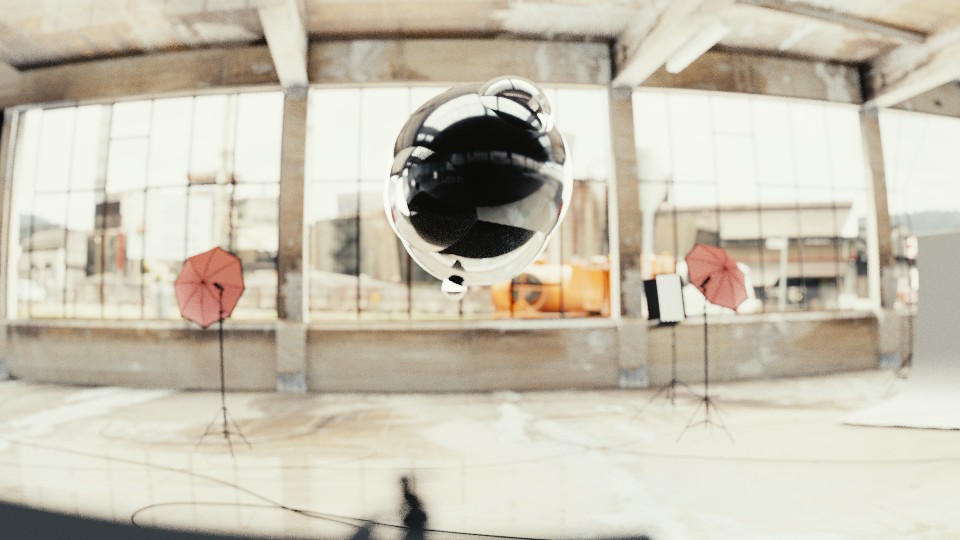
HOW TO SET UP HIGH KEY LIGHTING IN BLENDER?
Setting up high key lighting is surprisingly easy. In many cases, we can get away with just creating a soft front light, that fills the whole scene.
Or we can use an HDRi to get a nice and bright ambiance.
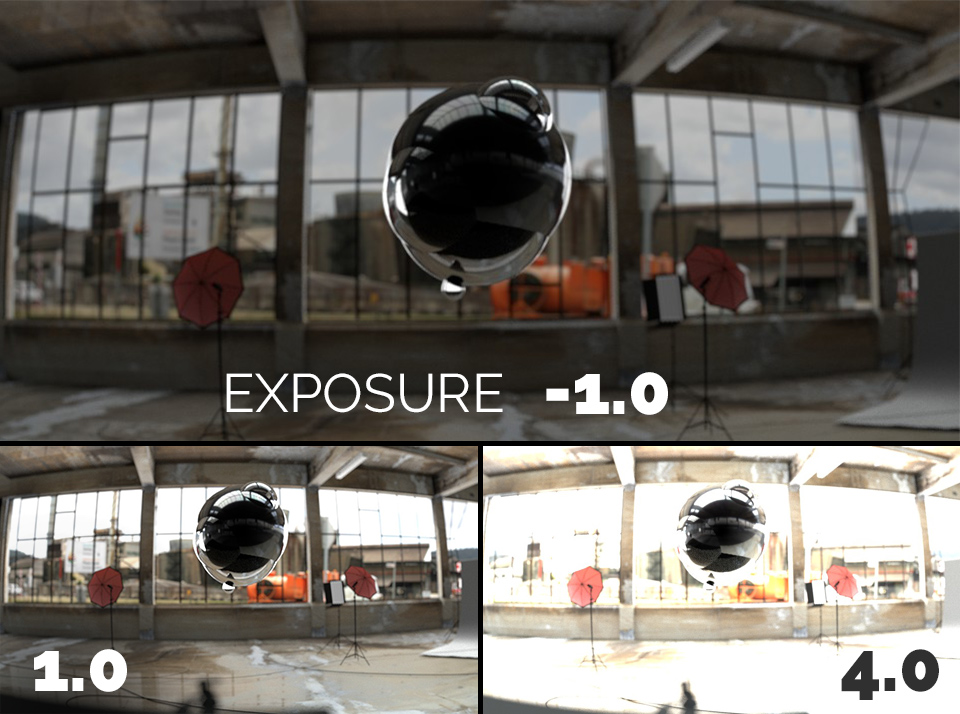
After setting up the basic lighting, all we need to do is to play with exposure.
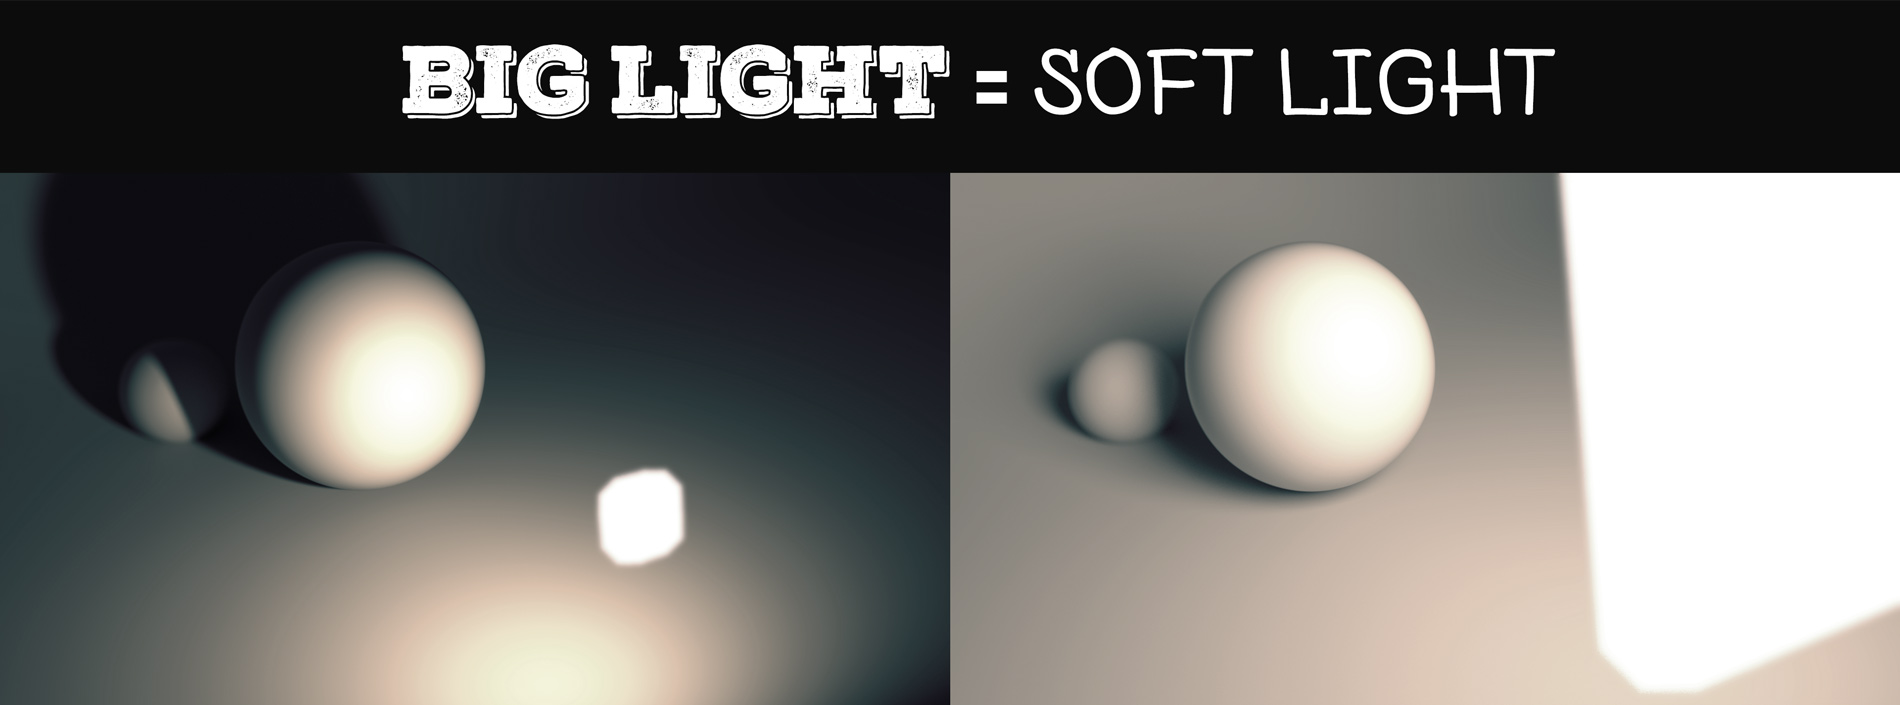
A SOFT LIGHT IS A BIG LIGHT
Alternative to HDRi is a soft area light. But what does soft actually mean?
When using area lights, a big light is a soft light. And vice versa. But what really matters is an actual size of the light source, that ultimately depends on the distance from the object.
As Dirk Fletcher, author of Digital Photography Lighting For Dummies points out, the sun is an enormous object, but it acts like a small light source as it is so far away. And bam! – we see the sharp shadows.
Dirk follows with a great tip: “When you photograph something that needs a softer touch, move the light closer to your subject or add a diffusion device like a soft box or umbrella.”
In another words, move the light closer or make it bigger.
4 GOOD REASONS TO USE HIGH KEY LIGHTING
1. It looks fresh
2. It makes your render stay apart from the crowd
3. It devours unnecessary details
4. It’s highly formal
5. It’s nice to have a dominantly white render once in a while
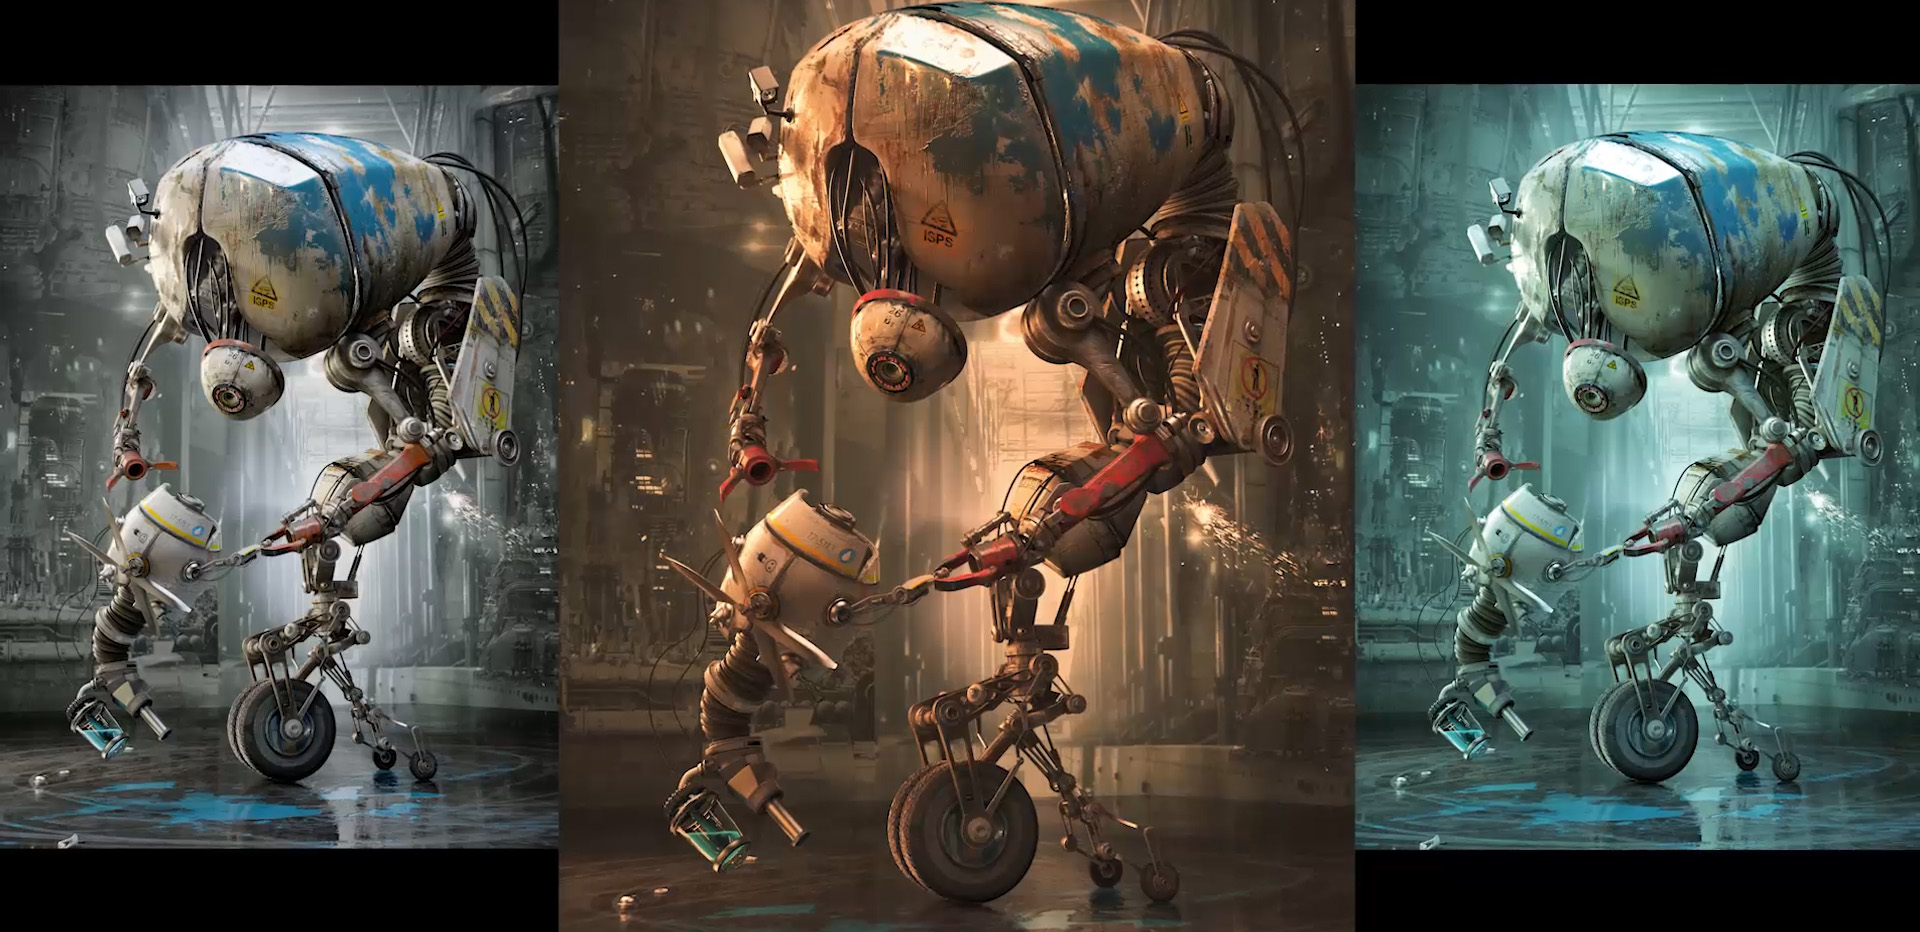
COLOR MANAGEMENT AND FILM EMULATION
If you go all in with cranking up the exposure, be ready to sacrifice pretty much all information on the bright end of the color range. It either goes over the 1.0 value and becomes pure white, or it gets clipped.
Do you remember those beautiful overexposed photos of old? A great deal of their charm is caused by how film reacts to light. As we’ve said, it narrows down the color range.
Let’s try to emulate the old film look using Blender Color Management.
Enable Film or RRT (Reference Render Transform) and that’s it. Algorithms will do the film emulation for you.

CLAMP
If your scene starts to look like an empty white environment, where Morpheus introduced Neo to Matrix, you probably need to activate the clamp.
How does the clamp work? When the pixel brightness goes over some value, the clamp prevents it from getting brighter. So, set it to 1 to keep lighting at bay.
HIGH KEY VS LOW KEY LIGHTING
Of course, this style of lighting has its counterpart, low key lighting.
Dramatic, dark and mysterious, this style goes along the lines of modeling with light.
In my point of view, it tends to produce very heavy and bold kind of images. In an extreme form, even disturbing ones.
To feel the difference between high key and low key lighting, remember how in Silent Hill game and movie, high key foggy town was changing to low key bizarre dimension.
Hollywood-style three point lighting setup often gravitates towards the drama of the low key, especially when featuring a dominant rim light. I have an impression, that high key lighting is often overlooked in 3d and that in video games and movies we see low key stuff way more often.
WHY DO WE OVERLOOK HIGH KEY LIGHTING?
Maybe it’s because high key lighting doesn’t accentuate the form (doesn’t model the object)?
On the contrary, it consumes the form and shadows. But you know, I like the freshness of overexposed photos and renders, even though they have lost some details. If it looks beautiful, who cares?
BONUS TIP FOR NERDS:
Learn how to use Color Management and the ‘Looks’ in Blender for color grading (sort of).
LIGHTING BOOK OPEN PROJECT
Friendly reminder: I will publish lighting tutorials in my blog every two weeks (or weekly, if possible). Along with making of’s, work in progress and other exciting stuff, that will go straight to social media, namely Twitter, Facebook and Youtube.
After publishing around 10 articles I’ll start packing it into a book, full of interesting things.

Pingback: High Key Lighting in Blender | Blenderlounge
TheGraphicBoy
Thanks a lot Gleb. Love all your tutorials, you are amazing! Its amazing how you manage to make your work standout and make it look extremely beautiful!
Girum
Nice…thanks
Jeffrey Wilson
good stuff, I can tell your coffee sucked because you where not flying off the handle….. i think i prefer flying off the handle lol
Gleb Alexandrov
:))
arnaud_couturier
Very interesting, thanks 🙂
Gleb Alexandrov
Arnaud, glad you like it. Does this format (text+video) work for you? And the second question, what do you feel about article length?
arnaud_couturier
Gleb, I didn’t notice the video before reading your reply, I thought it was an image like the rest… I personally prefer text when I’m in a hurry, it allows much faster skipping to what I’m interested in. I prefer video when I’m totally new to the subject, for an easier introduction. As for the length, I would have liked it a bit longer, maybe half longer
Gleb Alexandrov
Thanks, mate.
Nathan L.
Do you have examples of high key lighting in your portfolio- just want to see how it is used in a larger scene.
TSAnimation
Great, loved it !!!
CVETKO
Gleb, i have one question, do is this even posible with blender? I mean to be good like this.
https://www.youtube.com/watch?v=0pXYp72dwl0
Gleb Alexandrov
This was rendered in Krakatoa – very advanced stuff. Unfortunately, we don’t have Krakatoa add-on in Blender yet. You can try to achieve (a bit) similar result with smoke sim + particles + particle info node.
CVETKO
I undrestand, thanks for answering, i hope that and Blender wil got that posibility, becouse, a that mutch of particles is offff… 🙂
Pingback: How To Set Up High Key Lighting in Blender_ Lighting Project #3
Pingback: Lighting Tutorials: My Way To Write a Book about Lighting • Creative Shrimp
Ethan Hansen
“This coffee is so good” at the beginning made my day. Thanks, Gleb!
kman
Please upload the finished .BLEND file for this project…..
Douglas
IMOHO, you overlooked a very important point of lighting. Yes soft light is about having a big light source up close but there is another point; fade out. Basically if you have a light that is VERY close to the model it will change intensity very quickly with distance because of the formula intensity = 1/(distance squared) . This means that the models nose will be quite bright but as you come to the ears the light as already fading out quite a lot. On the other hand if your light in back a lot more but much bigger giving an equal softness you will have the nose and the ears at almost equal brightness. This is a big tool of pros in photography to shape the lighting of a face or whatever.
http://www.softschools.com/formulas/physics/inverse_square_law_formula/82/
Hope this helps! It took me a long time to learn this little fact.
Douglas E Knapp.
Gleb Alexandrov
Douglas, thanks for a nice tip! Indeed, I overlooked the inverse square falloff. When I be updating the article, I will include your tip for sure. And it will make its way into the book. 🙂
Douglas
I clicked on reply in the email and I got a 404 error. You might want to check up on that!
Thanks. I have been fighting for years to understand lighting and although most of what you are writing is old hat for me, I am still learning lots of cool tips. Thanks for making this great web site.
I always fight with one basic question, what is good lighting of a face and why? I mean you can find lots of setups of how to photograph a face but the reasons behind why they are doing what they are doing are VERY hard to find.
If you have cash to spend, I recommend this video. The promo is informative.
https://www.youtube.com/watch?v=IbJ05yNblwg
You have not yet answered my big question yet. I wonder if you have found it? 🙂
Gleb Alexandrov
Hehe, that question is like the philosopher’s stone. Or like the secret ingredient 🙂 I suppose that our answers will pretty much depend on the cultural (and pop-cultural), gender, social, political and art history background of the particular group of people, in the particular time frame.
But that doesn’t mean we don’t need to search! 🙂
Douglas
You answer can not be denied and not to forget style, mood, movement and emotion! However it is a very high level answer and skips over the needs of the beginner. It is a bit light the law of thirds.
The law of thirds is a great answer to give to beginners that have no idea and after that you can give them the golden rule and then at some point as they have internalized that you can tell them that there is no rule and they should just go with their gut but beginners need rules and laws, ideas to keep an eye on. There are these rules and laws for lighting but finding them is hard because you mostly talk with experts who are past the rules or beginners that don’t know them.
Answering my own question I would go with a spark of light must be in the eyes and mostly at the 9 o’clock or 3 o,clock position. The length of the nose shadow speaks to how long the nose is so you might give a big noised woman a short nose shadow to make her look better. You might position the face so that the big eye is back to make the eyes look more even. Doing Rembrandt lighting you want a nice shadow on one cheek with a triangle of light under one eye.
Do you know other, “rules”?
Gleb Alexandrov
From what I’ve read in the books, aimed at photographers, I can name a few general things for an appealing portrait lighting:
1. Soft lighting is often more forgiving than hard lighting. Small light sources create harsh shadows (under the eyes, from the nose as you mentioned). Soft diffuse lighting helps to hide wrinkles and skin imperfections.
2. Regarding positioning of the light source – Rembrandt lighting is often mentioned, that’s true. Also ‘loop’ lighting pattern comes to mind, when the light sources are positioned on both sides of the subject.
In Fil Hunter words (Light Science and Magic): “Most good lighting is, at least to some extent, side lighting.”
Of course, it’s a broad statement.
3. Simplicity – limiting amount of light sources to bare minimum and using only what’s needed. “The real reason we use multiple light is to solve some kind of lighting problem that we couldn’t fix with only a single light or simply by moving the subject into different light” – Neil Van Niekerk (Direction and Quality of Light)
Douglas
I got to thinking of another thing that is basic and important to lighting. When we have a hard light that is very distant, like the sun and we shine it on two sticks in the earth, the shadows are almost parallel. Take an equally sharp light and place it 1 meter in front of our meter high sticks and you will find that the shadows (in both cases) point at the light. This can lead to some interesting shadows! For example take 8 sticks in a circle and place the light in the middle and then put the camera over it all and take a picture and you have a cool spokey looking shadow (not the best example but you get the idea).
BTW I always wondered about how high to place my lights in loop lighting. Answer: the nose shadow should not touch the lip. 🙂
BTW Light Science and Magic is one of my favorite books! I also love Micheal Freeman’s 3 books on composition (Eye, Mind and Vision)!
You made an English mistake that is a problem. In no lighting is the best you state that one object is round and the other is flat. This is false. Both are round (2d) but one does not look like a sphere (3d).
I live in Germany and come from the USA so I know what it is like to try and live outside of your mother tongue! Most of your mistakes give character but this one is best changed. Keep up the good work! Thanks! Having fun with this chat.
Gleb Alexandrov
Thanks for pointing out my mistake to me, I appreciate it 🙂 My initial thought was that I can use the “illusion of roundness” concept to define the 2d versus 3d relationship. Maybe I was wrong and we need to find other words to describe it.
Douglas
Round means that it is a circle, it is 2d. A sphere is 3d, a ball. A ball is round and a ball is a sphere. A circle is round but it is not a sphere. Hope this helps.