Discover how to use Light Texture in Blender to create excruciatingly evocative pictures. Being boring is no good, and with Light Texture you will, hopefully, breathe life into renders that suck. I do it literally every day and I like this technique so much, that I want to share it with you, folks.
As a bonus, I included some tricks that will help you along the way.
Lighting Book Open Project: I need Your Feedback
I want to make a plug here and tell you about my plans regarding this series of tutorials about lighting.
I will publish lighting tutorials in my blog every two weeks (or weekly, if possible). Along with making of’s, work in progress and other exciting stuff, that will go straight to social media, namely Twitter, Facebook and Youtube. After publishing around 10 articles I’ll start packing it into a book, full of interesting things.
I want to keep this project open in terms of communication. I need to hear your voice, so please leave a comment and tell me, what do you like/dislike about the article, and what do you want to see in THE NEXT one.
Let’s keep it open and do this book together.
Highlights of the Tutorial:
1. 5 Good Reasons to use Light Texture.
2. Can I play with madness lighting?
3. Using Light Texture VS blocking the light (video)
What is Light Texture?
I bet you won’t be surprised, if I say that light texture is nothing more than texture, applied to light source.
We all know, how textures look on 3d model, but how on the Earth it relates to lighting?
Basically, it works like a projector in cinema. Honestly, I can’t come up with a simpler example: it just works like a projector.
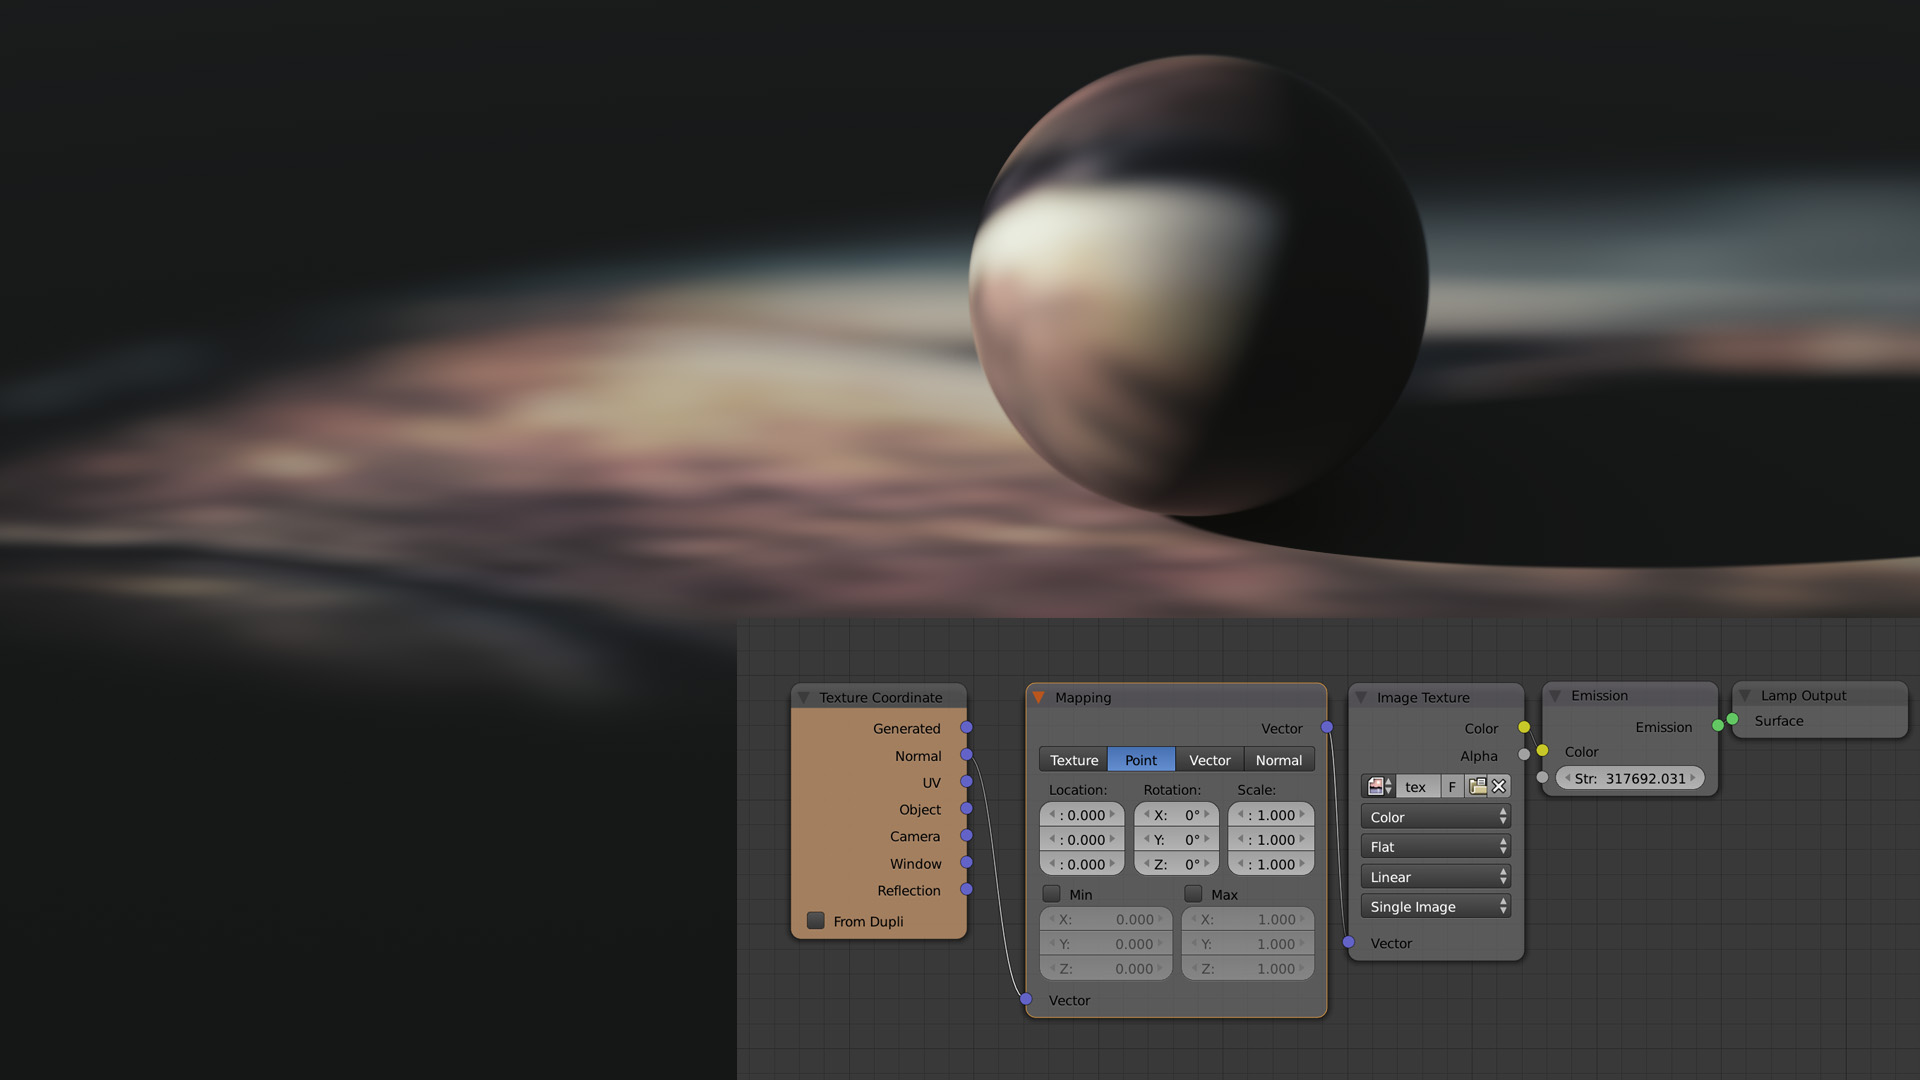
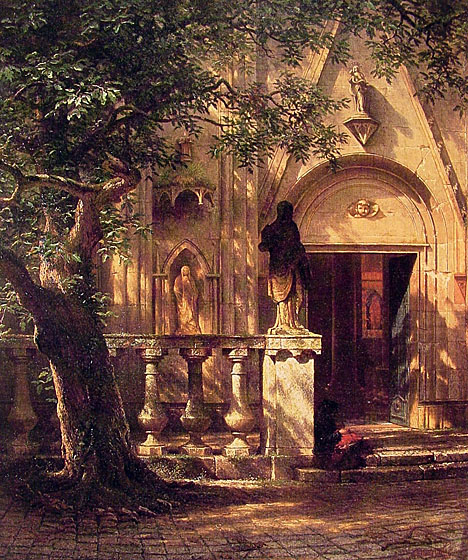
In Blender, we can either add texture to light to fake the variance (as you see in the picture above), or we can take another route.
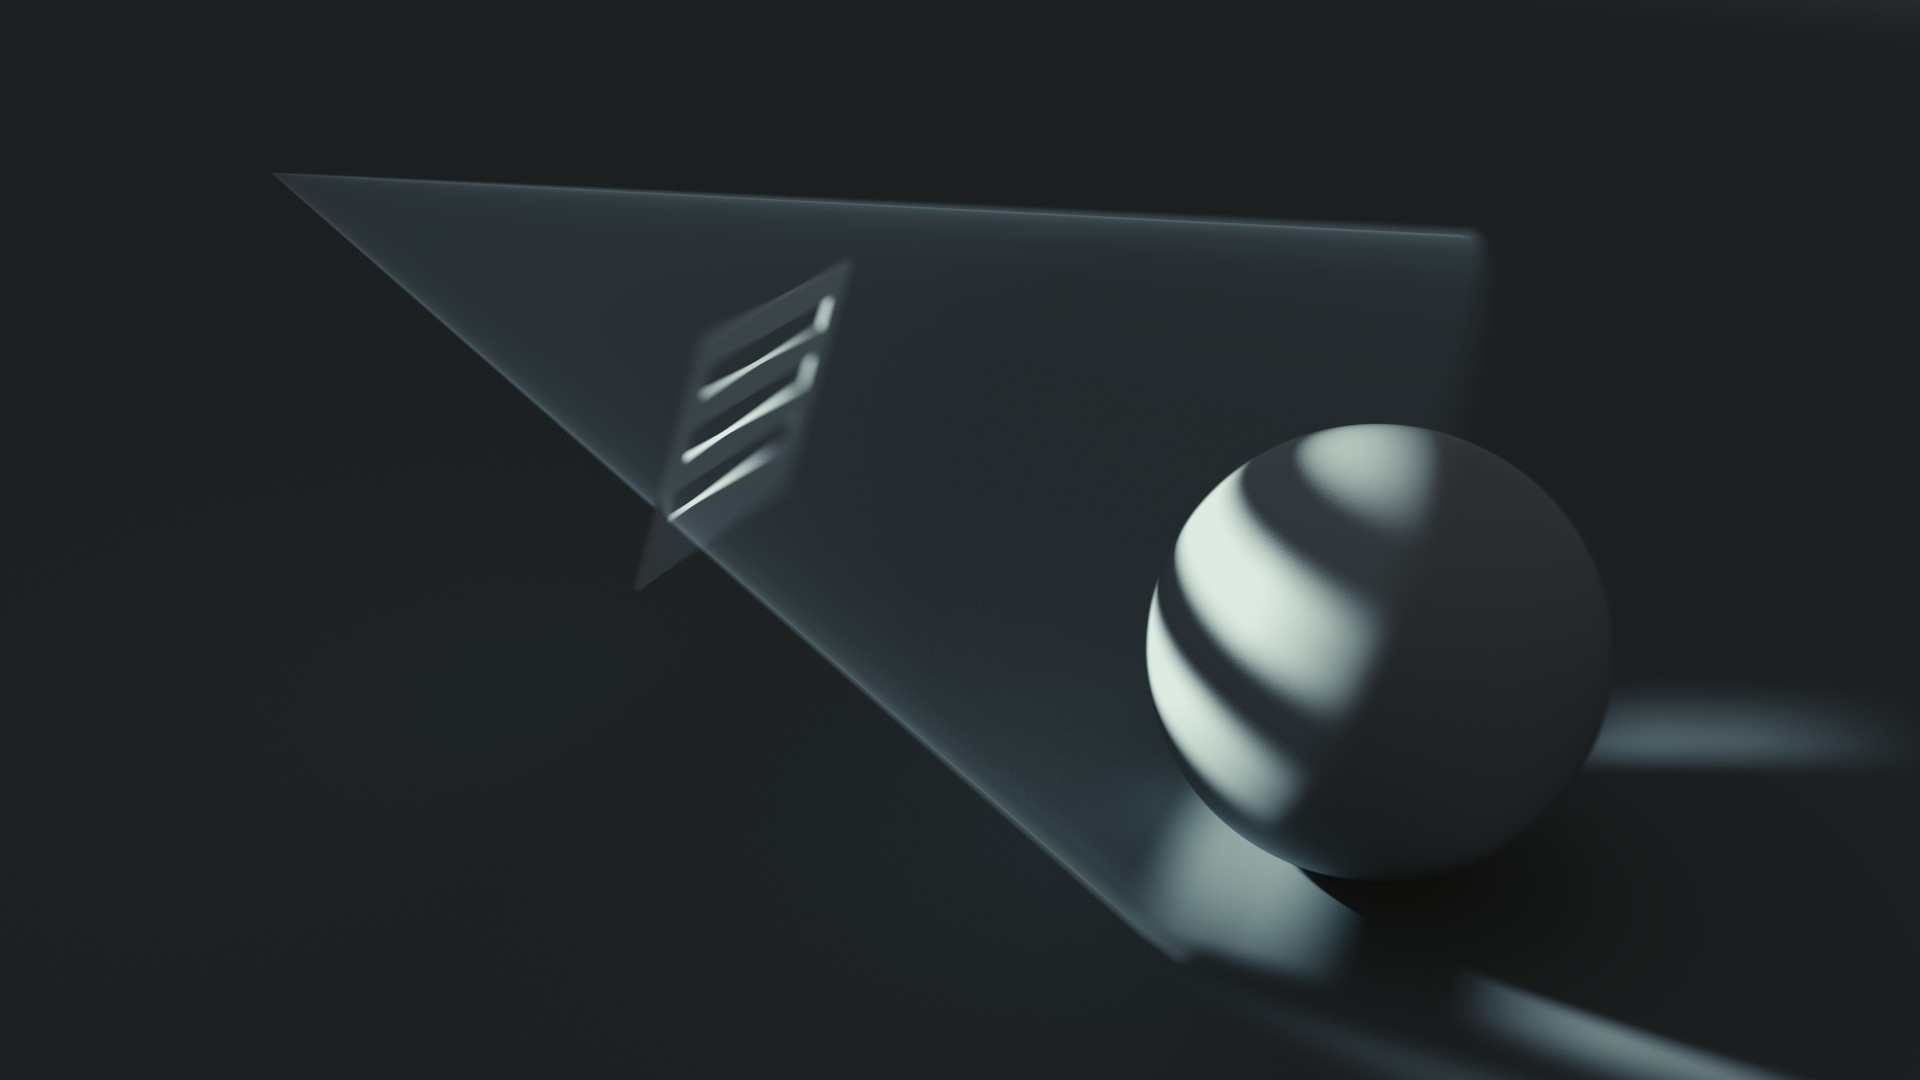
In photography the similar effect is accomplished using gobo, or cookie. These are the means of blocking the part of light or reflection.
Of course, we can recreate gobo in 3d. You know, that’s convergence. I find it very interesting and productive to adapt photography techniques to virtual scenes.
5 Good Reasons to Use Light Texture
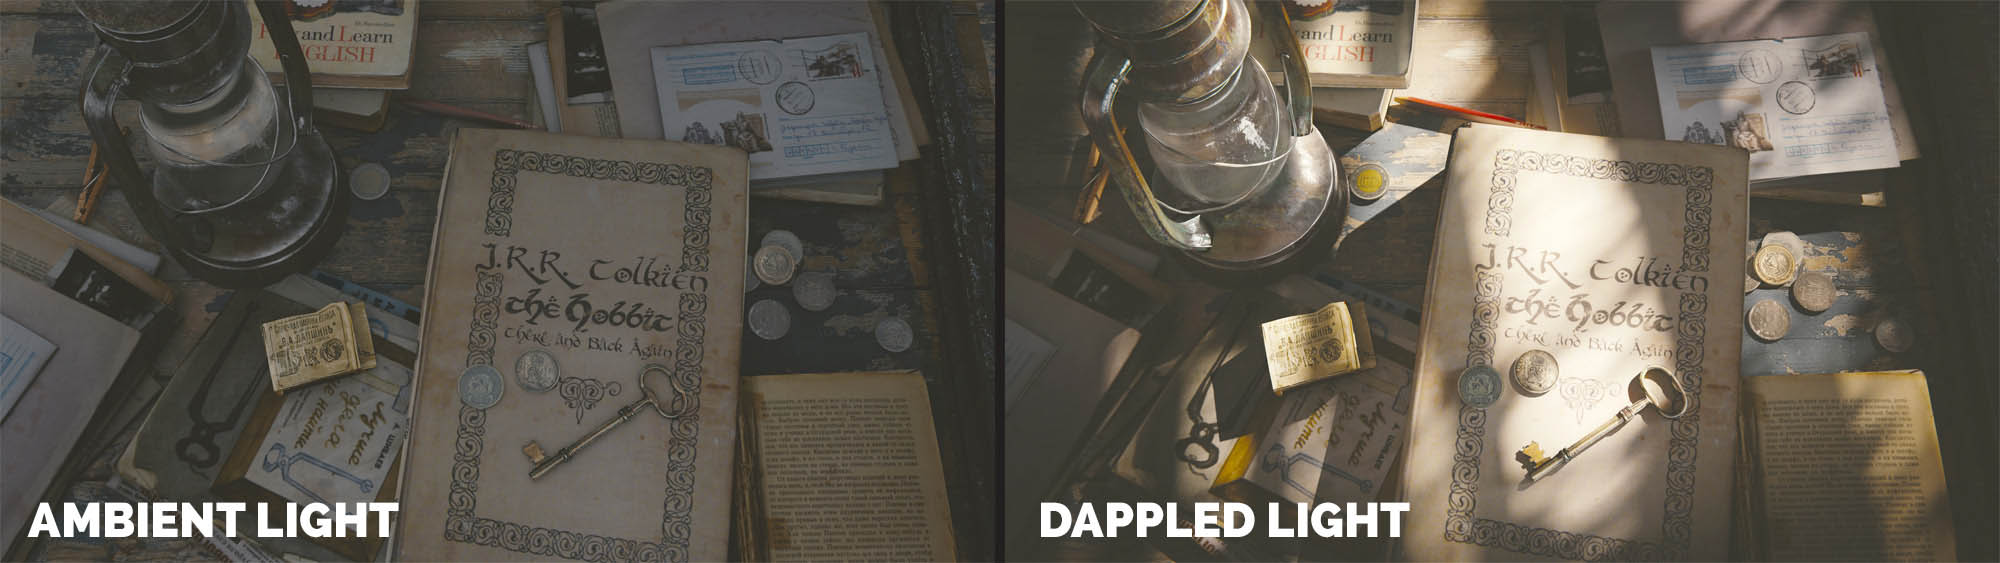
It’s no secret, that dull lighting often leads to dull picture. Indeed, lighting alone can transform otherwise monotonous scene to mysterious, evocative environment.
Rich on atmosphere and goosebumps (hopefully, you feel the same about my Hobbit: There and Back Again tribute).
Compare these two renders and see for yourself. Light texture breaks up the monotony of the ambient lighting. That said, I should mention that ambient lighting is the best creative decision in MANY cases, just not in this one.
Personally, I see enormous potential to use light texture in these situations:
1. Scene lacks the subject
2. Subject needs to be emphasized
3. Scene has a cool rhythm to geometry
4. Lighting is a HERO of a scene
5. You need to invoke certain atmosphere (dusty attic with light coming through the holes in the roof)
Play, not Reveal
We often speak about lighting as the way to reveal the form.
While it’s true, and every photographer will tell you that, lighting can be the subject of the scene. And light texture manifest lighting as the subject.
Thus, not only can lighting reveal the form. It can play with the form, make fun out of the form, and spill the paint all over the form.
If your 3d Scene sucks, try Light Texture
Think formal, think playful.
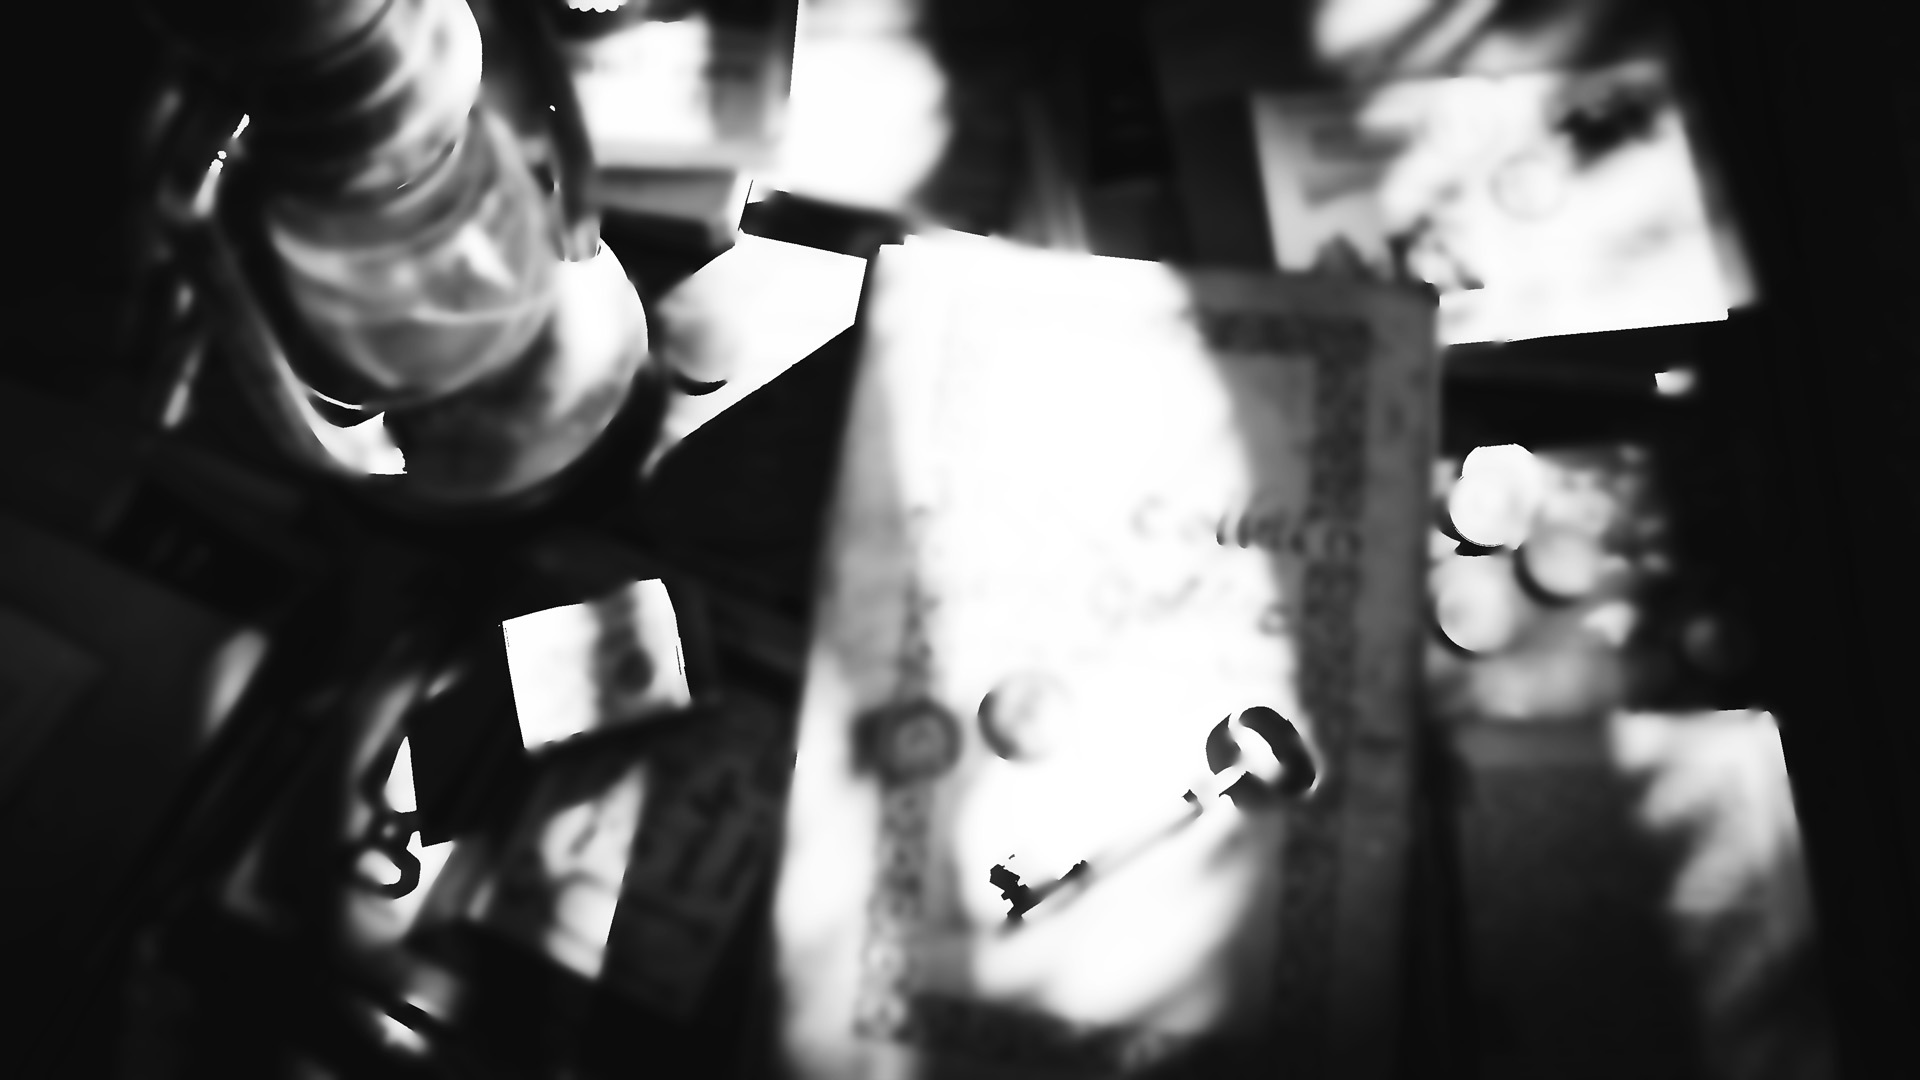
Break your pictures into areas, filled with value. Convert the picture to black and white to take the color (chroma) out of the equation.
Squint the eyes and try to see what shapes does lighting produce. See Pools of Light, not 3d models.
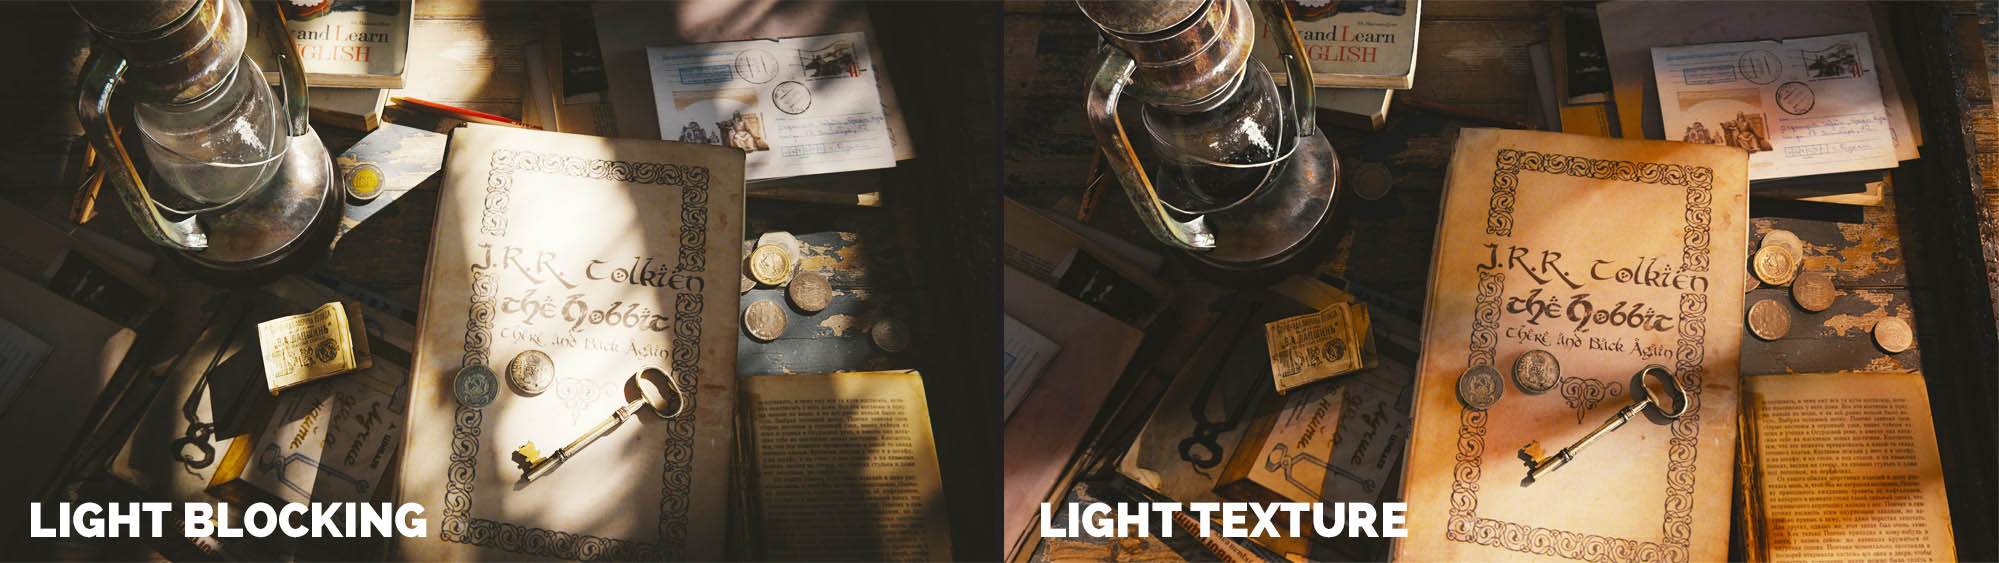
Blender tutorial: Light Blocking vs Light Texture
Compare the results of these 2 techniques, highlighted in the video and see the difference. As for me, the biggest pro of light texture is that we can play not only with value (luminance), but also with color (chrominance). And that’s something to keep in mind while planning the lighting for your scene.
Bonus Tips for Nerds:
Show your World
Shadows indicate what is going on outside the camera view. The character of shadows give us the clue about the setting. It’s montage in static.
Eliminate Noise in Cycles
Soft shadows are going to be noisy. That problem can be solved in Branched Path Tracer. Turn up the light samples count in the light source.
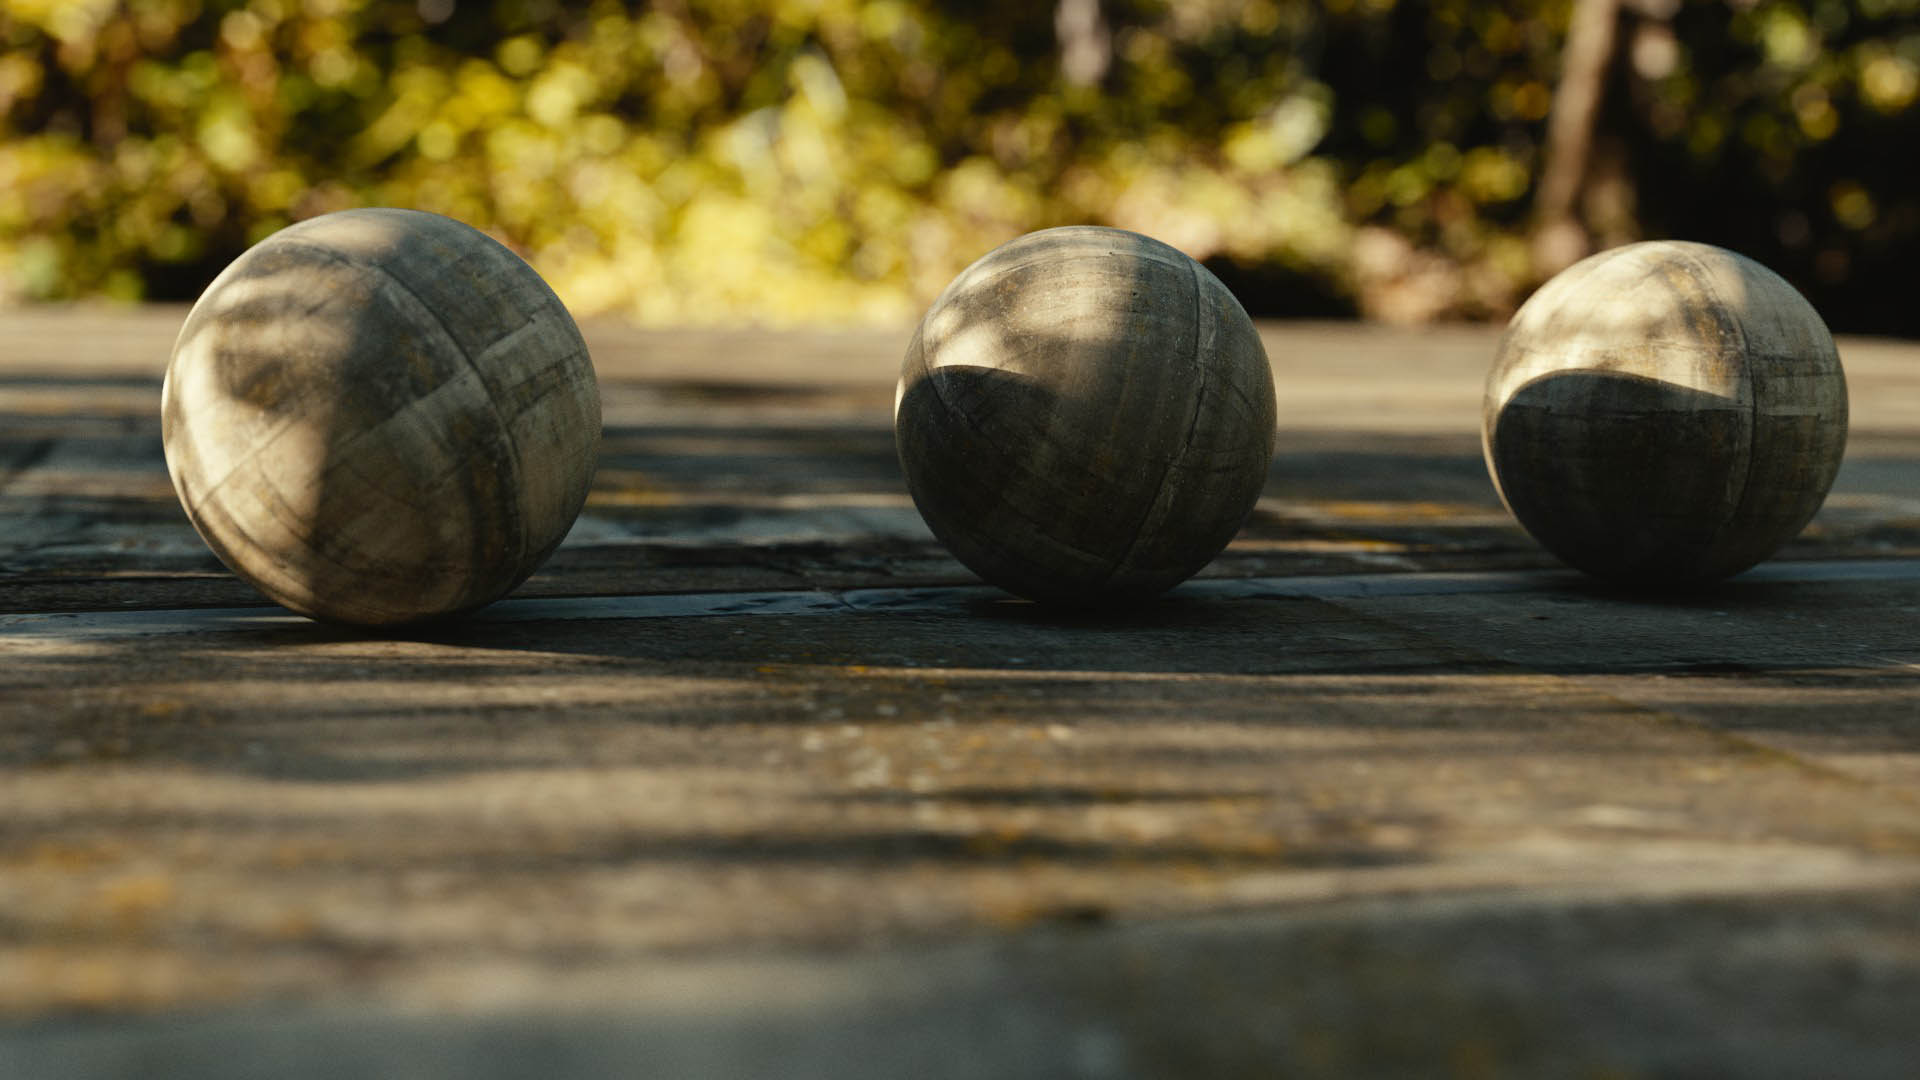
Art perspective: James Gurney and Dappled Light
James Gurney, I call him lighting guru artist, talks about Dappled Light in his book “Color and Light – A guide for the Realist Painter”.
“As sunlight passes through the upper leaves of a tree, it covers the ground with a hodgepodge of circular or elliptical spots of illumination, called dappled light.”
Essentially, that’s art implementation of light texture.
If you consider yourself to be an artist, I strongly encourage you to read this book. It’s the most full and comprehensible reading on lighting from the art perspective, that’s it.
What comes next in Lighting series?
Thanks for reading/watching this tutorial. Leave a comment and tell me, what do you desperately want to learn about lighting?

Greg P
Looking forward to this series.
Perhaps an underwater lighting scene, or maybe just shallow water in a small river, using cheats instead of caustics?
Gergely Roboz
Hi, I’m working on a project and the beginning of this week I found a really handy solution for this. I created an image as an explanation: http://i.imgur.com/KpZiKxe.jpg
Gleb Alexandrov
Gergely, that’s interesting. You are projecting caustics on top of geometry?
Gleb Alexandrov
Greg, that’s a nice idea, and something that I have planned to do. But my thought was to make something like a piece of ice and the light passes through it. Though, water stream can be very interesting to make.
Amrulla Khan
i am starting in blender, this post surely help me in trying new dimension of lighting. Your podcast on blender guru is good. Thanks.
januz
Excellent tut Gleb. One of the very few that actually explains the meaning of “pools of light”. Some tricks for reducing noise or getting better render times in cycles would be great!
Patrick Depoix
A great Thanks Gleb and too a Merry Chrimas soon!
Mason Menzies
fantastic! keep it up!
BMF
Thanks. I like your short tips videos. Often the 30 plus minute tutorials have a lot of techniques, but I think there is a rather large potential audience for the short tutorial that focuses on a single techniques or a series of related ones.
For example, a lot of new Blender users are often confused as to the different ways to scale an object in object and edit modes. The Blender documentation is not all that helpful.
Your lighting tutorial falls into this category. These were very good tips on lighting compressed into a short tutorial where is really isn’t necessary to follow along. You can get the relevant information just by watching for a couple of minutes.
Keep up the good work.
With regard to future light tutorial suggestions, I think there would be interest in creating lighting that represents different times of day or weather conditions. What is a good way to create sunsets, sunrises, early morning, noon, late afternoon, dusk, moon lit nights, fog, overcast, stormy, etc. There is indoor lighting techniques that run the gambit as well. There is studio lighting techniques. And you could have an entire series of short tutorials on how to use lighting to create moods such as mystery, drama, humor, tranquil, horror, etc.
There is an endless list of fascinating topics that concern lighting and how to achieve the effect you want in a scene as lighting is probably just as important as the models and the staging of those models within a scene.
In fact, thinking about the lighting effect you want to achieve before you start modeling can influence all of the rest of your decisions about the models and scene.
I can probably think of another dozen or so categories of lighting a scene that would keep you busy making tutorials for a long time.
Take care,
Gleb Alexandrov
Thanks for a very elaborate comment, I appreciate it.
“you could have an entire series of short tutorials on how to use lighting to create moods such as mystery, drama, humor, tranquil, horror, etc.” – nice idea. that is definitely in plans, the relationship between lighting and moods. Maybe I’ll take 1 environment, and by changing lighting will try to evoke certain mood.
Indoor lighting, especially in Cycles, is closely related to noise management, so this may address Cycles settings along the way. How about this more or less technical approach? or maybe I should keep it more broad and abstract.
BMF
I like the idea of lighting a single scene different ways to demonstrate how light and lighting (to me there is a difference) can change moods. It would be a challenge to actually cause the viewers to feel a change in mood.
I have especially been intrigued with the lighting techniques used in film nior. With only shades of black and white, the lighting expressed everything from motivations, attitudes, character, and emotions to telling the story. Watch several of the classic film nior movies and one will come away with a treasure chest of ideas on lighting techniques.
I think one of the commenters above (Deanna Johnson) appears to have happened upon the concept when she changed her color test to a black and white using a gel over the light. It impressed me as a film noir discovery moment. In fact, I think it’s a good practice to create the lighting and mood without the color and textures (clay mode) and then add the textures. The lighting will influence the colors one chooses. Perhaps it’s just me. I find it easier to establish the mood with light without the distraction of colors and textures. However, that doesn’t hold true in every case for me.
I also have always been interested in the lighting of the great master artists. I love how many used the subtleties of light to evoke feelings. And then there is Rembrandt’s often not so subtle use of light to create drama.
They were experts at letting the light help to tell the stories of their art. So many times I look at a wonderful painting of perhaps a peasant girl in a medieval kitchen and because of the mood of the lighting there seemed to be a story there. I then realize that my imagination is attempting to complete the story–or at least one of many possible stories.
My apologies for rambling on. Of course you are already aware of these things or you wouldn’t be writing a book on lighting.
But I have a question for you: do you consider atmospherics (e.g., dust, mist, fog, steam, etc.) to be part of lighting or do you think of it more as part of the scene to be lighted.
Take care…
Gleb Alexandrov
The relationship between color and mood is largely based on cultural conventions, so it’s ambiguous topic. Still, I’ll try to touch it, carefully and trying not to push with assumptions.
Taking color out of equation is good for feeling the lighting, I agree with you and Deanna. Personally, I almost always start playing with lighting on clay material. Colors (and textures) distract from the process.
Regarding your question about atmospherics – I think that it depends on the context of the scene. Sometimes, I think of it as merely as a pretty effect (like a godrays or a lens flare); in other cases I feel that dust particles in the air, or atmospheric perspective enhances the scale and depth impression, or even adds to realism. And sometimes I just try to make light path visible.
Pingback: The Hobbit: There and Back Again • Creative Shrimp
Ricardo Andrade
Hey Gleb I found this article really useful. In your future lighting articles/tutorials it would be great to see other photography technics used in Blender. Particularly I recall an article that explained how to reduce noise in indoor scenes adding invisible light sources such as sun/sky portals. However that article was intended for Maxwell Render and I’d love to see an explanation of that with Cycles. That’d be awesome!
Ricardo Andrade
BTW I forgot to add that there is a really interesting topic in architecture which I’ve heard of but never really found an in depth explanation about. It’s called “luce alla Bernina” a lighting method created by the sculptor and architect Bernini. If you find it to be actually an interesting topic you could include it.
Gleb Alexandrov
Fantastic! Thanks for pointing me in that direction, I’ll try to find some info about that method.
Chuck Ian Gordon
Hi Gleb, thanks. This is a great intro into lighting – as all your tutorials truly are! As you ask for ideas: One thing I came across was the terminator problem. I don’t know if it is still there in cycles but with blender render I had it. I created a nice shpere of the moon with a normal map which both looked perfect in openGL render but had the ugly staircases on the sphere with blender render. Turning up faces with a subsurf modifier is not always the solution, but I found a combination of soft shadows with more samples plus a medium level subsurf modifier did the job. Maybe you have some more thougts on that.
Deanna Johnston
My work in progress.
Gleb Alexandrov
Nice!
Deanna Johnston
I decided to try again with a different set up and take out the materials as I think that was throwing me off. I used objects to block the light. Worked much better. In my first set up I couldn’t see any difference in the lighting.
Bintang Senja
Hi Gleb, thanks for everything you made, all of them are great !
I’ve one request, could you share about linear workflow in Blender ?
Bintang Senja
I’ve tested simple ball with Gamma scene 2.2 and de-gamma the ground image texture by turn down RGB Curves, is that correct ?
Gleb Alexandrov
Bintang, that’s a great question. I should check it out first before answering, as I’m not quite sure myself how to handle linear workflow in Blender. My guess is that Blender color management handles it for us automatically.
Markus
Thank you very much Gleb for this wonderful video! I also have a tip you might want to take into account. 😀 Use multiple lights with different colors and slightly different positions. I created this image to show it’s effect…Thank you Markus http://markusbilz.com/wp-content/uploads/2014/12/final3.jpg
Gleb Alexandrov
Markus, cool tip! Something like a barely visible light sources that add extra level of polish and visual interest.
Markus
I got one more tip. : D In another post you were writing to talk about photographic techniques in detail. One technique that’s often used in photography to soften the light is to use net’s that look like combs to distort the lighting. I often use a grid, delete only the faces and apply some randomness to it. It kind of works, the only downside of this method is that it requires more samples. Sometimes I use some gradient on the emission shader to apply some “darkness” towards the edges of my light box. Thank you. Cheers Markus
Gleb Alexandrov
Yeah, photography-inspired devices like grids and combs add to the noise considerably, but l like how it soften the light too. Thanks!
Amrulla Khan
Please provide your feedback on my first full scale 3D work.
Ricky Colson
Your videos have fit perfectly into the realm of Blender tutorials. I can’t believe how much good information you convey in such a short amount of time.
I’ve love to suggest a topic that I’ve been trying to tackle for some time: the combination of realistic fire sim lighting through different types of glass (street lamps). It’s difficult to balance amount of light, correct blackbody colors, using the light path node properly, and not having to render with 10,000 samples each test render.
Keep up the great work!
vetrax
а на русском?
Cédric Born
Hi Gleb,
Thanks for this great tutorial …
here is a subject that I think would be interesting : when you try to include a 3d element inside an existing 2d picture (using Blam for exemple) how do you reproduce the lighting of the 3d scene to match the lighting of the picture ?
Gleb Alexandrov
Cédric, that’s a great question. And something that is on the ‘to do’ list, along with matching light with photoscanned geometry.
Cédric Born
Great, thanks.
I look forward to watch your next tutorial.
Oliver
Personally I prefer the look you created with obstacles. Where did you get that floral texture you used to block the light? I love the way it breaks up the unrealistically perfect lines of the shadows.
Pingback: How To Create Realistic Ice in Blender | Blenderlounge
Pingback: Blender Blog - Lighting by G.Alexandrov - KOPILOT - Blender 3D video tutorials and news
Veselin Hristov
Hello Gleb, I red most of the comments below and i saw you said something about particles in the air to make the atmosphere better, so can you make a tutorial about that. I have not used particles in my scenes so far and i would like to learn how to use them so i will really appreciate it if you make one. Thanks for your great tutorials!!!
TheBeachdancer
Some say that yoyu should use objects and emission rather than the traditional lamps. I see you using a SUN lamp. What is your opinion on lamps vs emitter objects?
Marcello Perez Maciel
oww.. simple, but still awesome !!! Thank you Gleb.. you and Andrew are the best Blender teachers
Gleb Alexandrov
Marcello, I’m glad you find it helpful. It’s a great motivation force for me.
Pingback: Why Personality Matters So Much (Even If You Are a Table Lamp) • Creative Shrimp
cgxev
Hey Gleb,
Your tutorials are super educational and fun to follow. Thank you so much. In terms of light and composition I would like to hear from you what you’re thoughts are on this piece I did for school. https://www.artstation.com/artwork/skyrim-still-life
Thank you again!
Beau,
Krishnan Vivek
i like your way of work
Frédéric Duquette
did that by following your tips!
Sebastien HENRIO
thanks a lot (sorry for my english level, i’m french 🙂 ), i used your different tricks for test one render : thanks a lot! can you give me your opinion? thanks !
Decebal Junior
Can you make available the project files for this tut ?
Pingback: MDU115 Production Pipeline Research – Jack's Blog
Pingback: How to Capture Attention in Social Feeds with Texture | MavSocial
Pingback: 20190108겨울방학워크샵2 – Lhar 3D 작업일지
Pingback: Blender Tutorial: Light Texture or How to Breathe Life into Dull Scene – My Website 2020
Pingback: Big Lights, Small Budget: How to Rock With Cheap Stage Lights - Virtuoso Central