I’m excited to present the making of “Her Majesty’s Zeppelins”, full version. We’ll touch various aspects of Blender: modelling, making uv layouts, texturing, lighting, rendering layers and passes, optimizing viewport performance, establishing project structure and so on, to make a detailed picture.
Video version
1 Idea
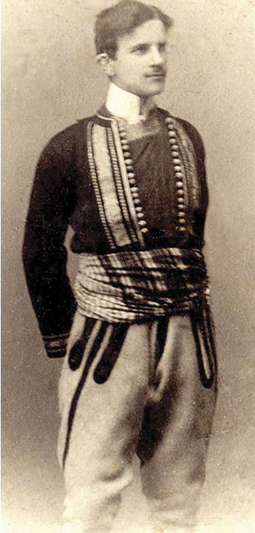
In 1880 young Nikola Tesla proved the existence of the Ether and capability to use rotating magnetic field to create the lift force directed upwards. Tesla believed that the technology was the common heritage of mankind, thus he sent packages with the detailed description of the technology and all the instructions for the production of “Ethereal engine” to Governments of all the major world powers. The British Empire, wanting to establish the status of not only the greatest sea power, but also the greatest air power, first managed to build a shipyards and lay the fleet of armored airships on them. Invulnerable to anti-aircraft fire, carrying a heavy armor, well-armed and maneuverable airships of Her Majesty’s Air Fleet started to terrify enemies of the Empire.
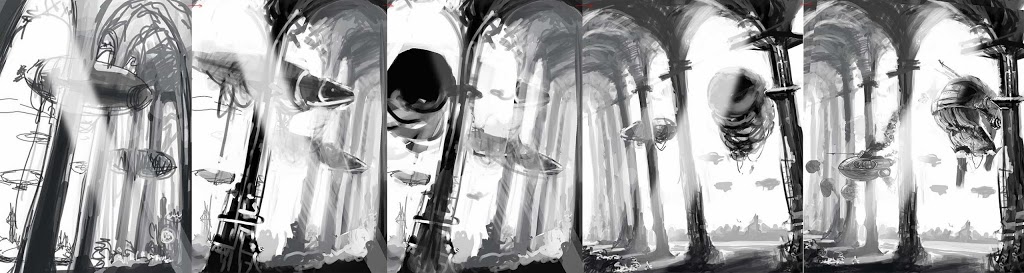
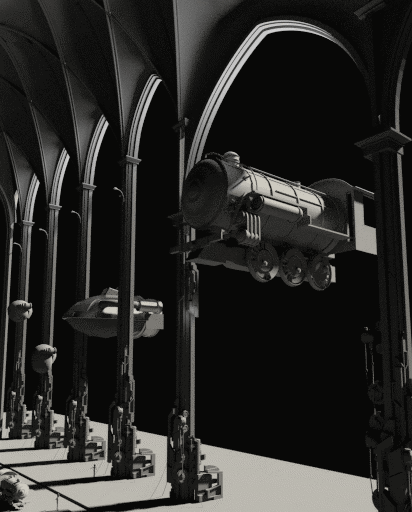
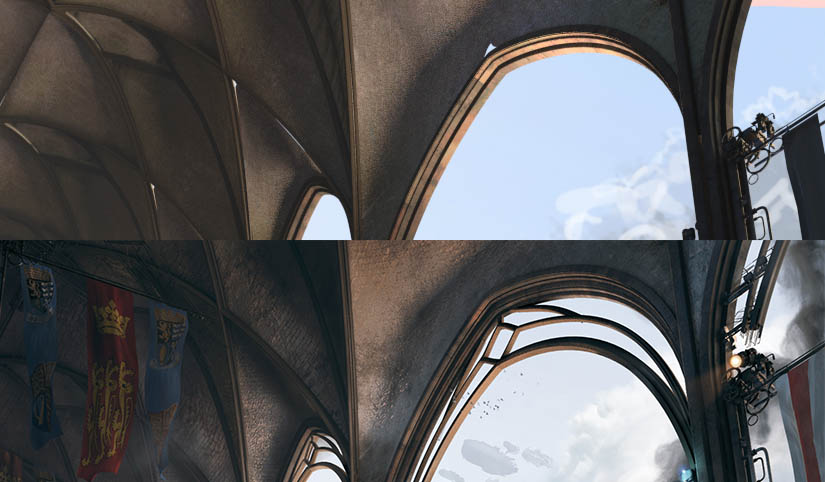
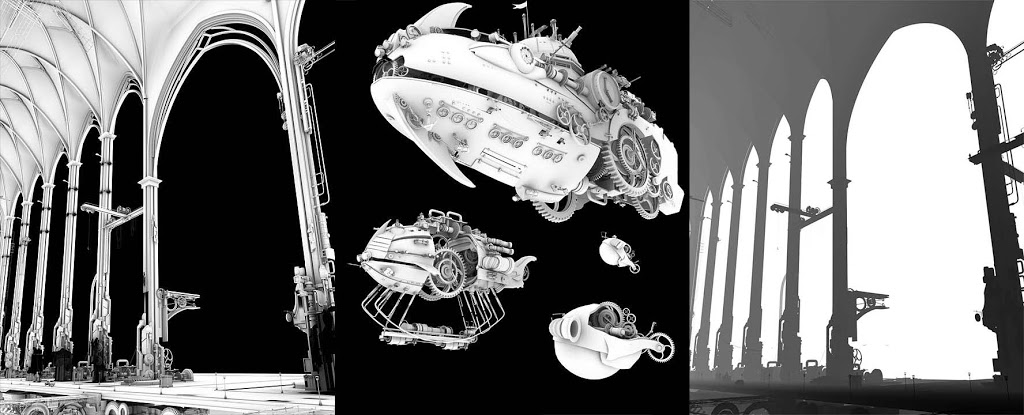
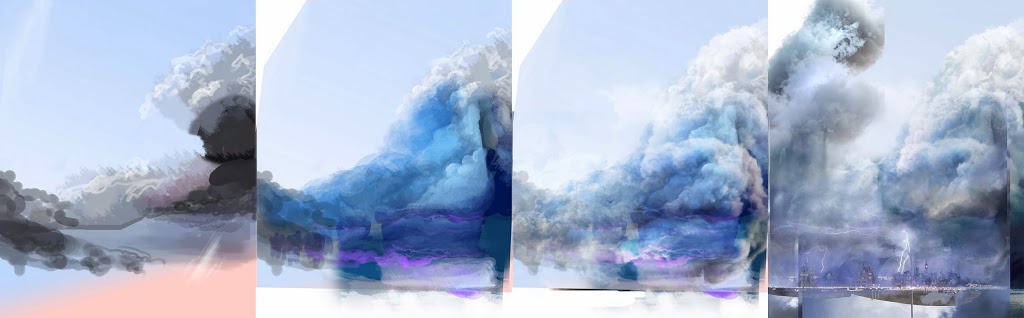
The idea of the picture can be described like this. However, it has begun with searching of composition for the blurred image in my mind: huge zeppelins flying through the archway. Right away I was trying to formalize this image on paper. I came up with open environment, light and shadow play, Gothic cathedral with ribs on the arches, dark spots of the ships on a light background of the sky.
[space size=”20″]
2Sketch and references
St. Vitus Cathedral in Prague served as a starting point for the sketch. This epic structure contains rhythm, movement, contrast in its forms. It inspired me a lot during sketching phase.
[space size=”20″]
After sketching out tonal values of arcade and also a heavy blob of zeppelin, I opened Blender and prepared to modeling.
3Workflow
Before speaking about modeling, let me briefly explain how my workflow is organized and say few words about folder structure. I find it really easy to underestimate the meaning of organized folder structure and then to lose track of project. Thus, it’s highly advisable to create some sort of structure that will protect the project from chaos and entropy.
Download – virtually everything that’s downloaded from internet goes here. Folder contains subfolders – steampunk, trains, zeppelins etc.
Export — exchange between software
Feedback – draft renders for tracking progress and for communicating with others
Output — layers and passes for composing
Ref – nuff said
Saves (blender) — .blend source files
Saves (ps) – same goes for photoshop of gimp files. Usually, source files for textures.
Test – this folder contains experiments and alternative versions of the scene. Essentially, it’s a testing chamber for things that can break scene, crash Blender or whatever. Quick tests are being done in an empty scene and later on are merged into the ”trunk” scene.
Textures – textures which are referenced by the scene.
[/box]
[space size=”20″]
Files are given descriptive names: scene_zeppelins__01, tex_metal_rusty_02, ps_compose_final and so on.
[icon icon=”th-large” size=”1x”] Layers
Personally, I can rarely move consistently from sketch to modeling, from modeling to texturing and so on. If a scene is full of objects, there comes a time when separation on stages becomes meaningless. When it happens, it becomes easier to think of groups and layers rather than stages.
[space size=”20″]
This is partly due to the fact that all the components of the scene interact with each other. For example, if we move the light — the specular highlight on material changes, if we add a model — we introduce a shadow. If color of the texture on the columns is tweaked — the ship is being lit differently by secondary global illumination bounces. In turn, all of the above influences render setup.
[space size=”20″]
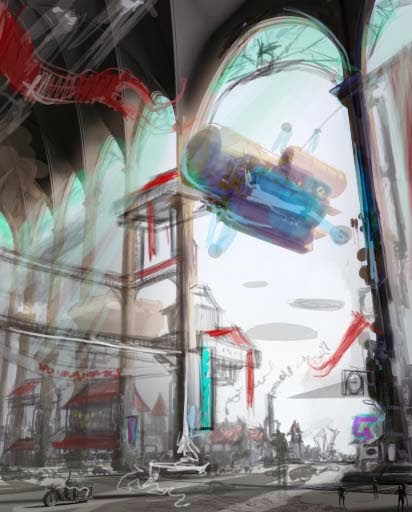
I often return to sketch phase to take a look at what can be improved and changed about composition.
[space size=”20″]
Sometimes modeling of the details distracts from seeing overall picture. When it happens, it’s cool to return to sketch and continue searching for the impulse that drives the composition.
If nothing comes to mind, try searching for the pictures of cg artists that inspire you. Or generate some random shape to start the ball rolling (who said fractals?).
Blender proves itself as a reliable tool to make this kind of stuff. Scene contains nearly 7 mln. polygons and many layers of things – and continues to be manageable.
Let’s briefly outline some useful Blender addons, especially ones which accelerate viewport.
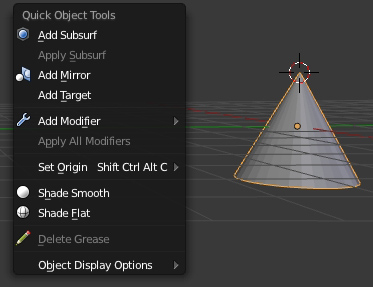
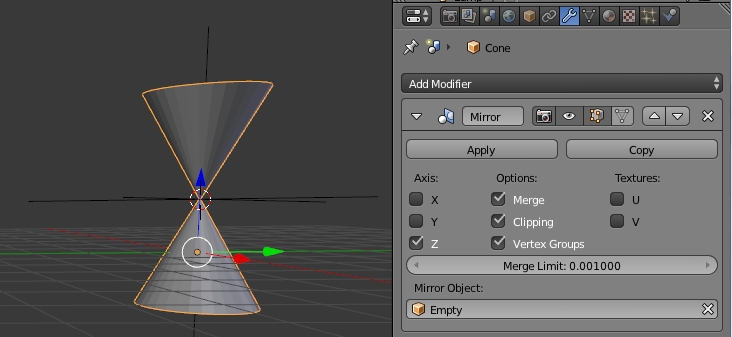
Quick tools – macro by Johnathan Williamson from CgCookie. On pressing Q we get menu with a pretty useful stuff: symmetry, modifiers, shading modes.
[space size=”20″]
The main purpose of this addon is to save our clicks. For example, we can press Q and slide to Add Mirror, than press Q – and click Add Target. This way, Mirror modifier is activated and Empty Object is created on 3d cursor coordinates. This Empty is automatically set as Mirror Object. Very convenient.
Material Utils – tool to assign materials to multiple objects at once.
[space size=”20″]
Display Tools – tools for viewport setup, made by Jordi Vall-llovera Medina “JordiArt”. Let’s take a look at some of the most useful functions.
[space size=”20″]
Fast Navigate — during navigation viewport switches to bounding box mode. There is a similar feature in 3ds max.
[space size=”20″]
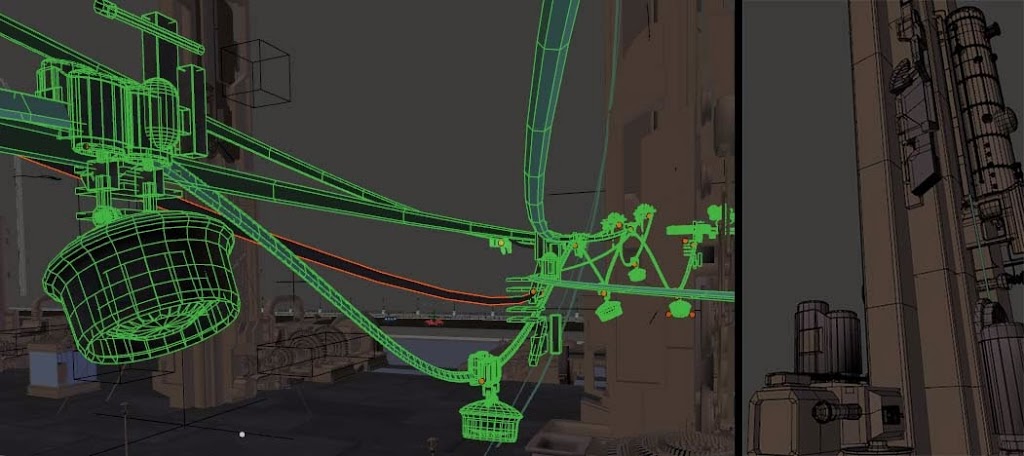
Wire On – similar to 3ds max F4 function, displays wire over mesh on multiple objects at once.
[space size=”20″]
Double Sided off – mass disables property “show double-sided” on selected objects. This setting alone makes the viewport much more responsive. Without it the viewport begins to feel slower on approximately 1 mln polygons, and goes completely slow on 2 mln (on my Geforce 550m).
[space size=”20″]
With double-sided off it feels smooth on 5-7 million polys.
Another crucial setting for viewport acceleration is VBO (Vertex Buffer Objects), which is found in system settings. Also, subsurf modifier on top of modifier stack ignores VBO, therefore, we can add empty modifier (simple deform with zero value) on top of stack to override this bug.
[space size=”20″]
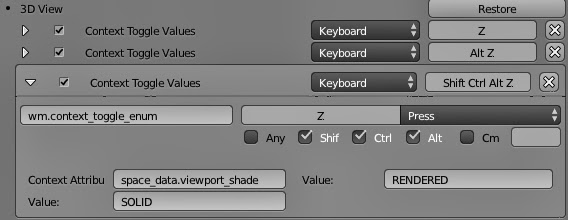
Hotkeys. We often need to switch viewport to rendered mode and back again. By default, there is no hotkey for this function. Fortunately, it can be set manually by changing some values in input section.
[space size=”20″]
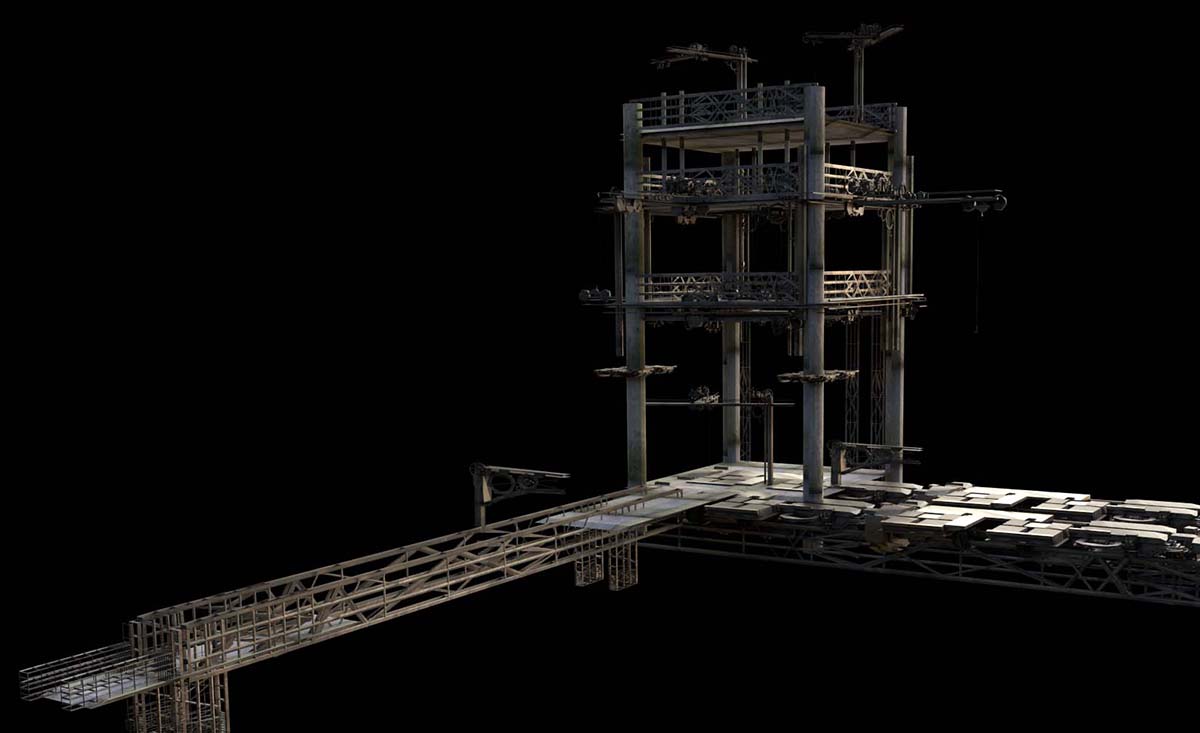
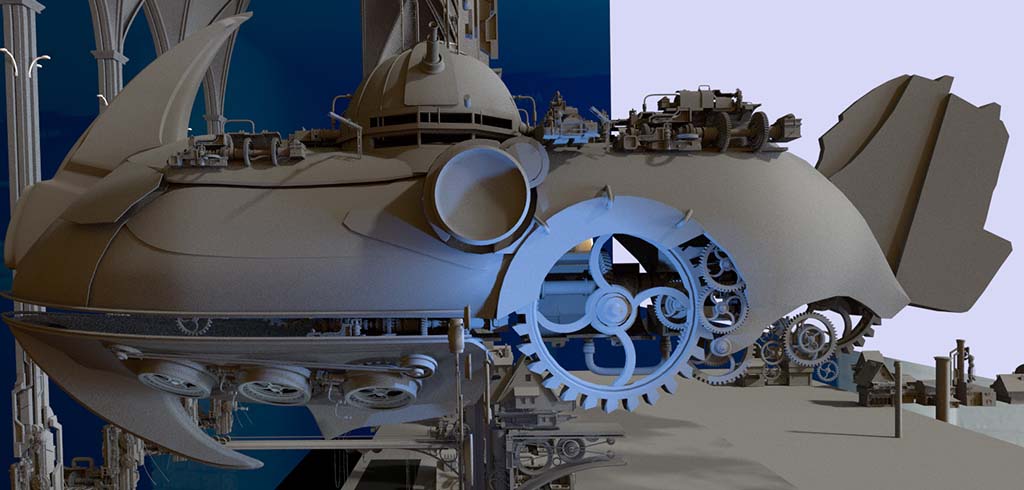
5Environment modelling
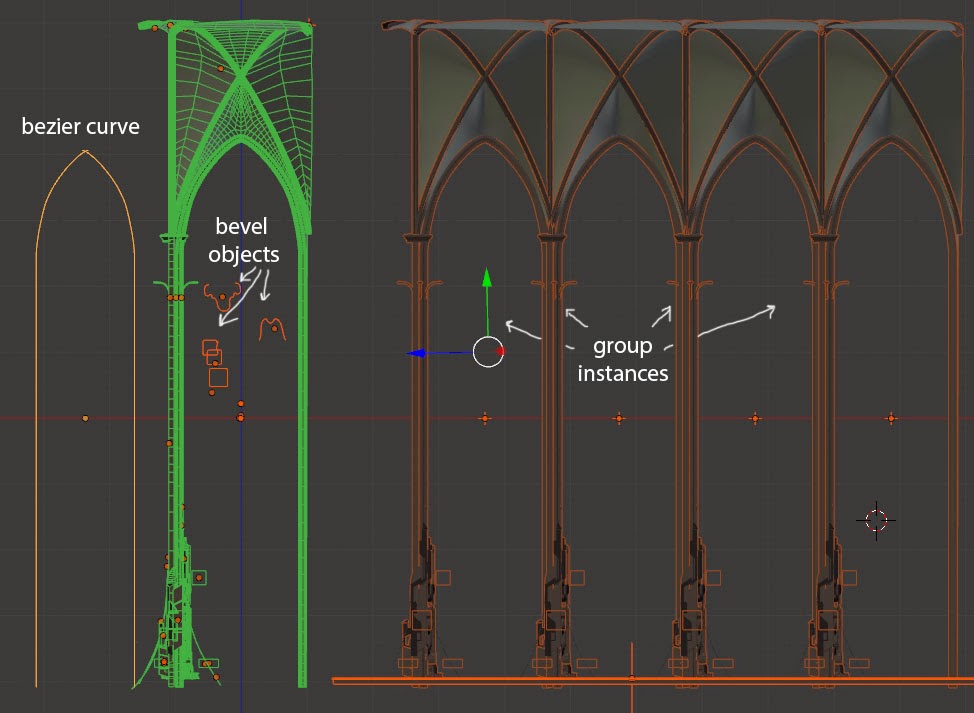
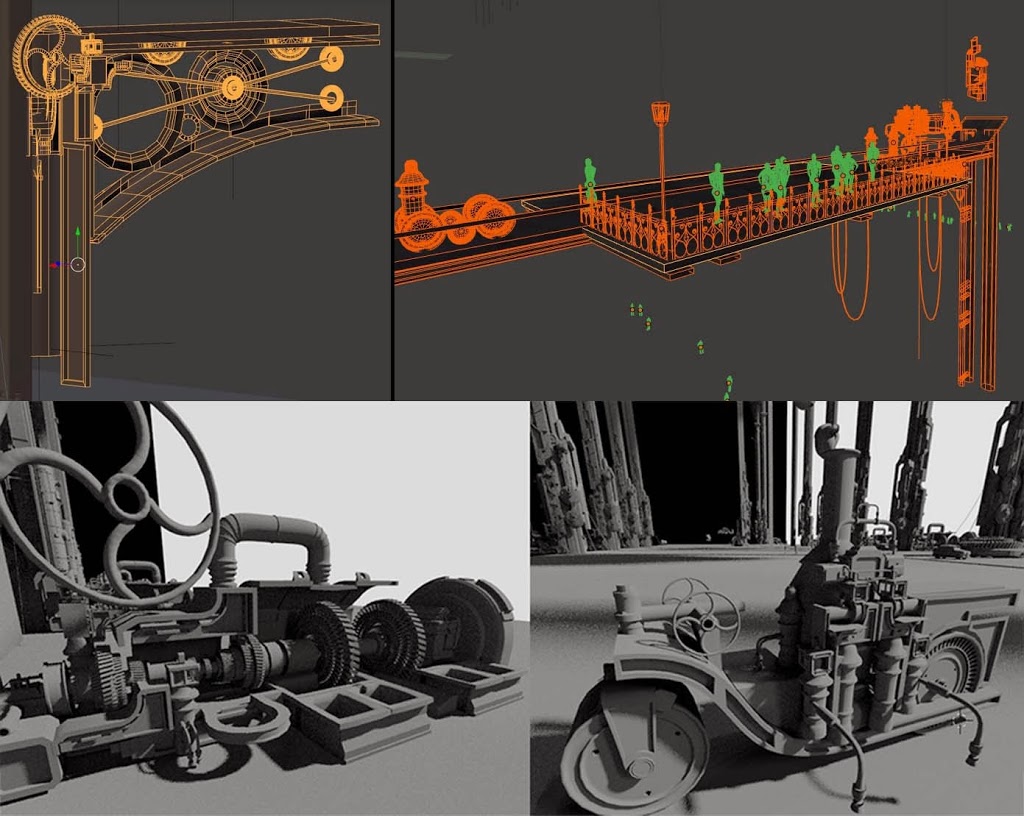
During the arcade modeling group instances were used. Changes to original group propagated to all instances. For example, when mechanisms were added to the source group, they appeared in every instanced group.
[space size=”20″]
Arch is bezier curve with bevel object. Some objects were modeled using the new grid fill tool.
[space size=”20″]
[space size=”20″]
At first, camera was positioned high in the air. Later on, it was positioned roughly at eye level to enhance the feeling of a huge environment.
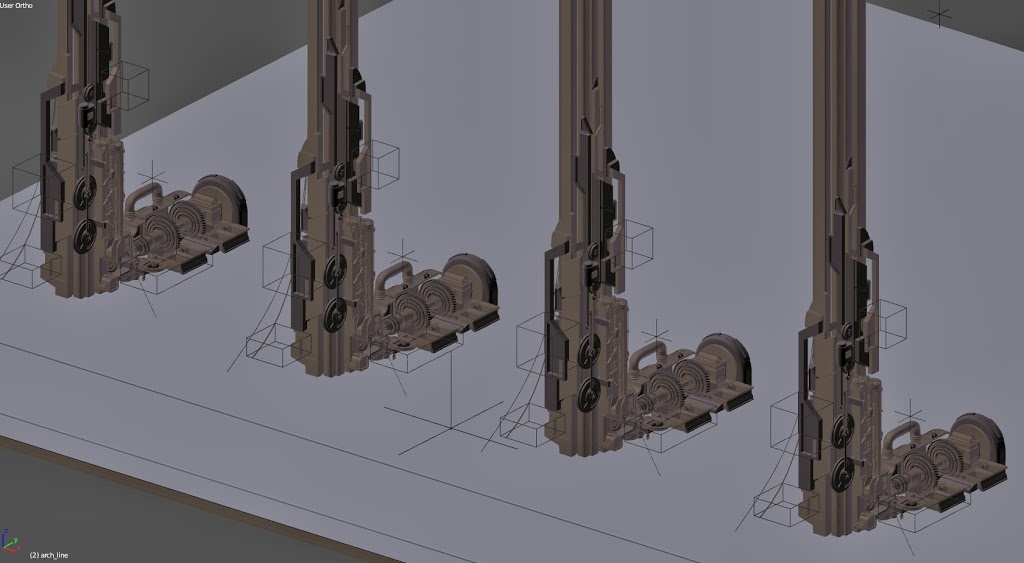
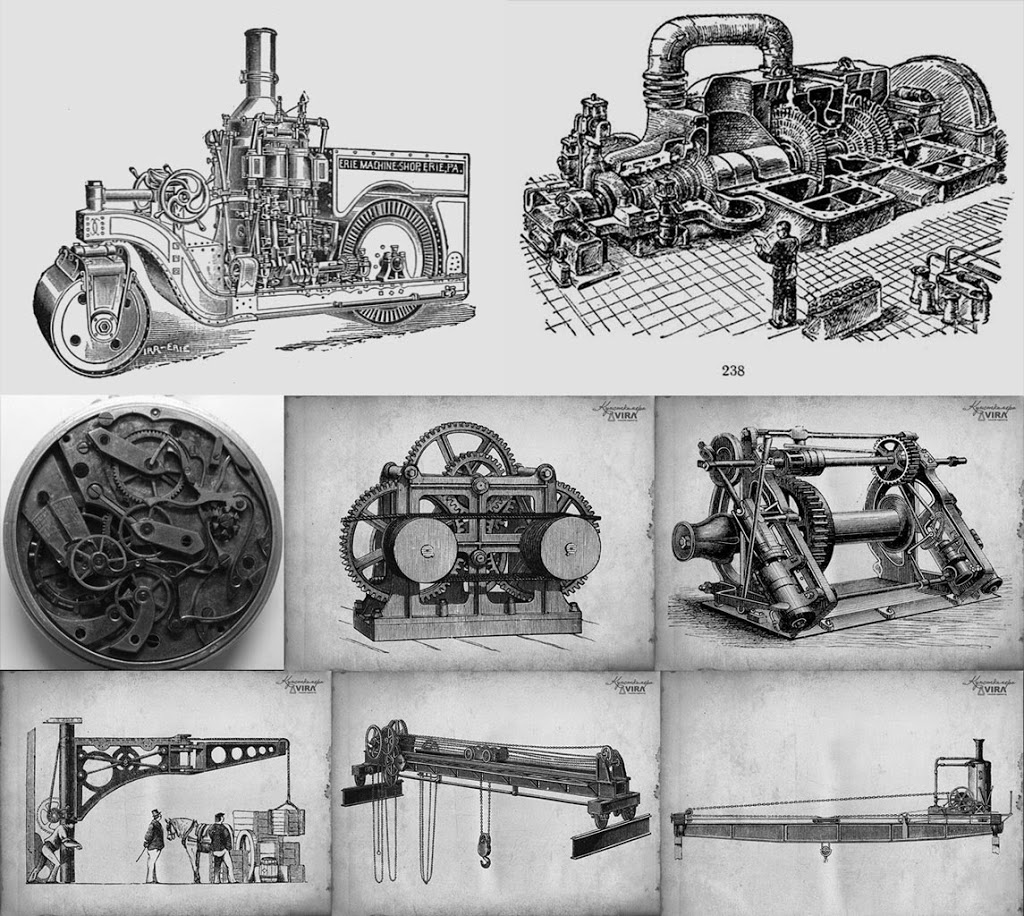
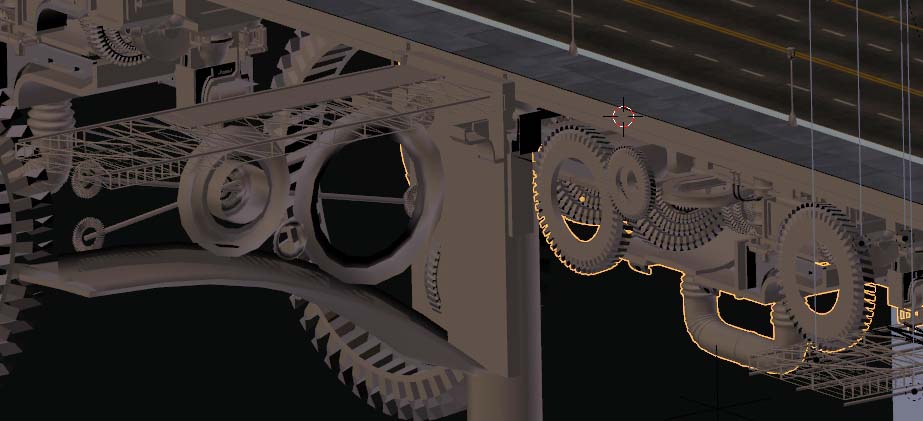
Tiny figures were placed here and there for scale reference. Mechanisms were done according to the references of steam engines, locomotives, clock mechanisms, cranes.
[space size=”20″]
[space size=”20″]
[space size=”20″]
From time to time some details were being copypasted, then rotated and scaled before placing.
[space size=”20″]
[space size=”20″]
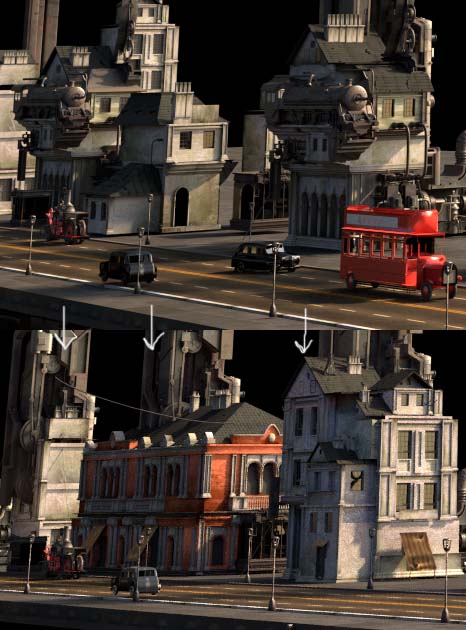
Later on I decided to add a pit at the foreground, to make things look more technological. Once it was done, I thought that it would be cool to make entire cathedral float on anti-gravitational engine. But soon this idea was left behind because I wanted to be closer to London street life. Once again, already modeled elements were transformed and used.
[space size=”20″]
[space size=”20″]
To make city believable, it was decided to add a road with cars and change design of houses from fantasy-styled to more grounded.
[space size=”20″]
6Details
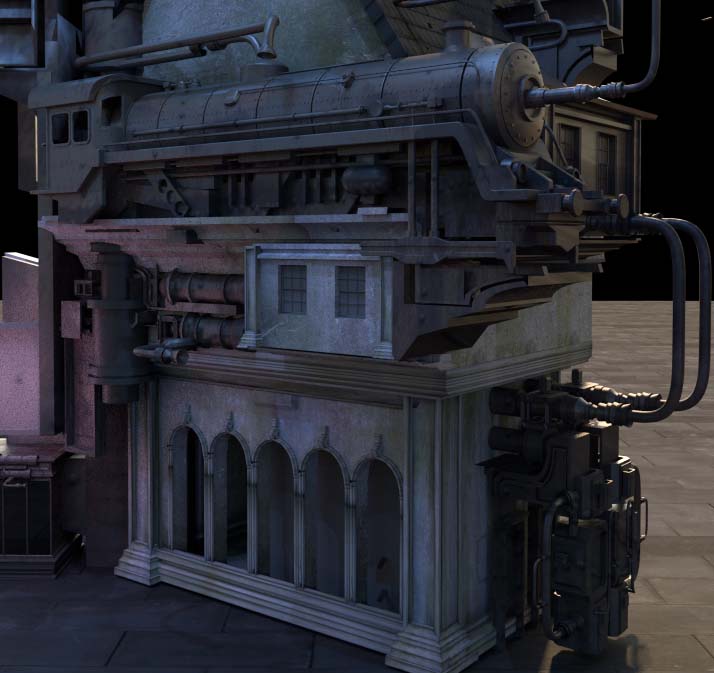
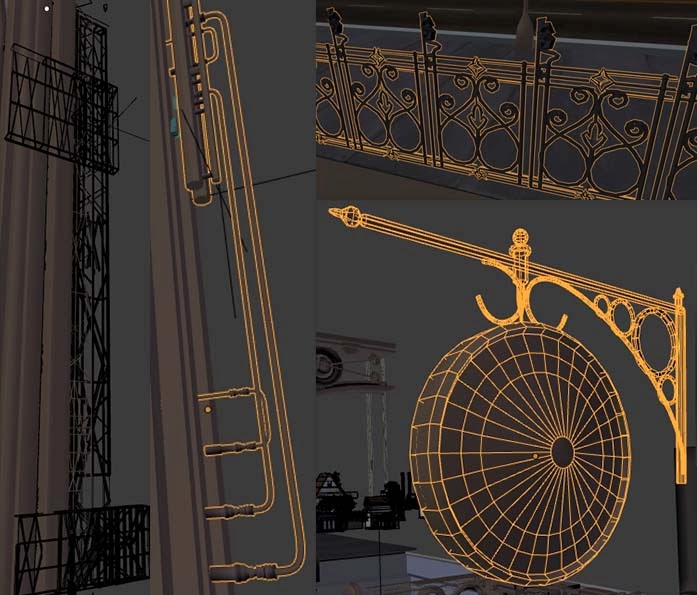
When the basis of the scene was done, detailing phase has begun. The column (also the symmetry) was broken, then lanterns, spotlights, lamps and elevators were created.
After that cloth was simulated, dome material was changed to add visual interest and provide one more scale reference – tiled bricks.
[space size=”20″]
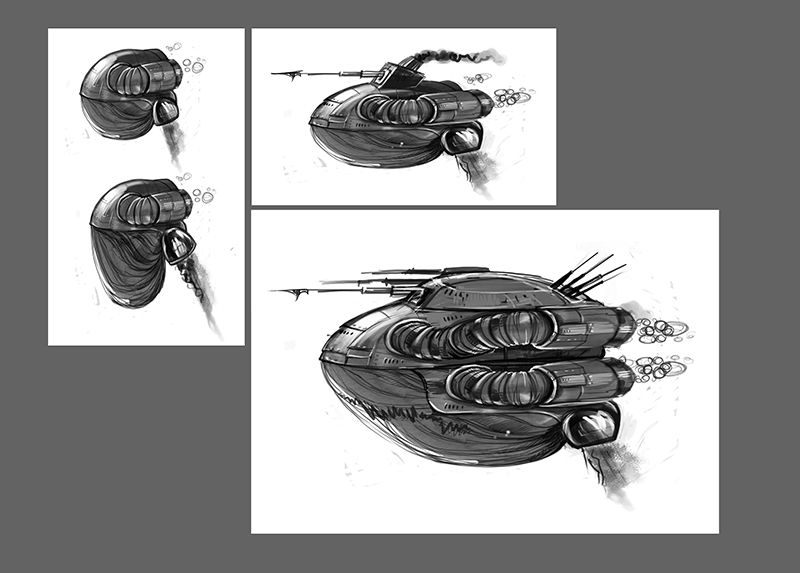
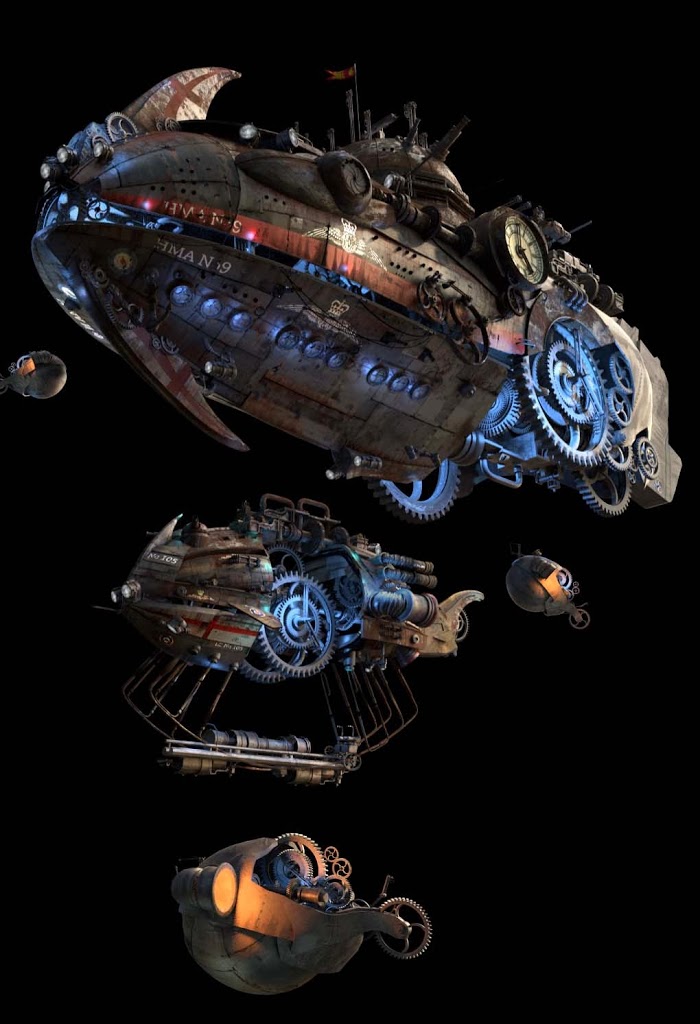
7Zeppelins – in search of a concept
Ship concepts were reworked at least three times. Nevertheless, all three versions are shaped like a zeppelin – thought stubbornly refused to depart from steampunk motive. The first version of the ship was a funny fish with a harpoon and a soft belly.
[space size=”20″]
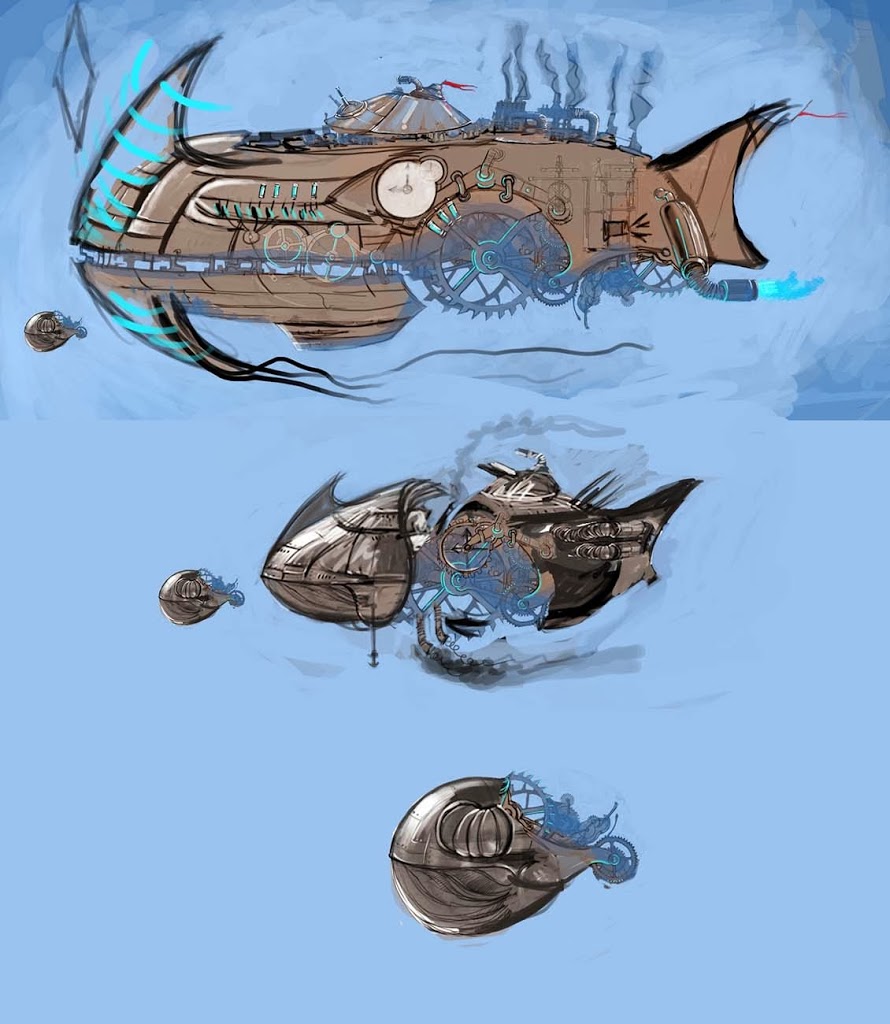
Then came the idea to do something like an air locomotive assembled from parts of the “terrestrial” trains. But this idea did not work. The third version was the final – a zeppelin with a rotating magnetic field (we can also fantasize about chrono-engines and how they distort time and gravity).
[space size=”20″]
[space size=”20″]
[space size=”20″]
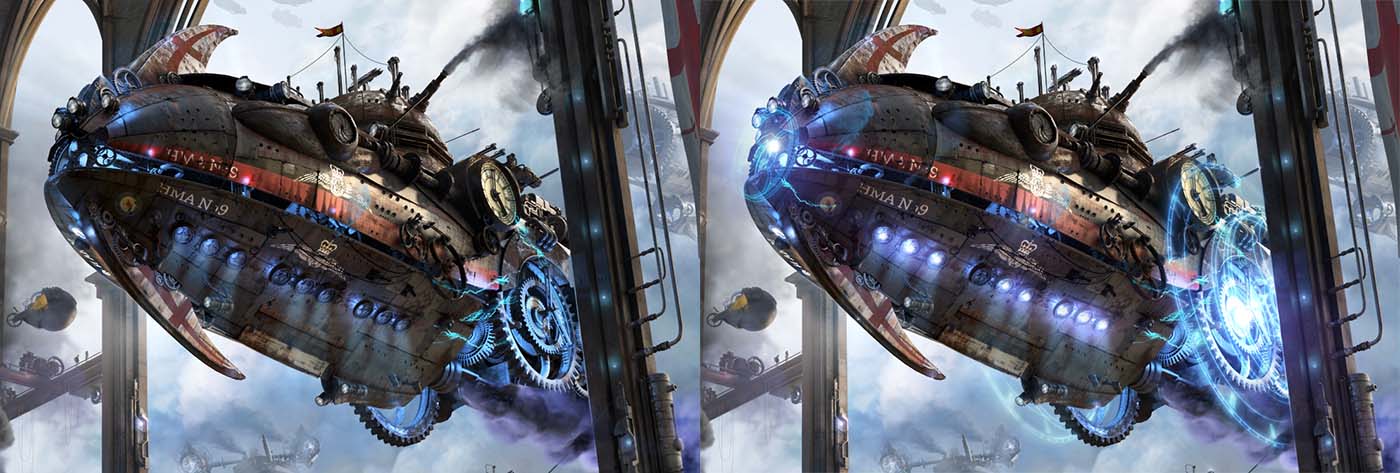
The fins on the front of the ship have been added to break up the phallic shape and enhance the silhouette. Later, they came in handy when I was looking for a place for marking. Moreover, it was funny to imagine zeppelins as fishes or submarines in a surreal air-water world.
[icon icon=”gear”] Ship details
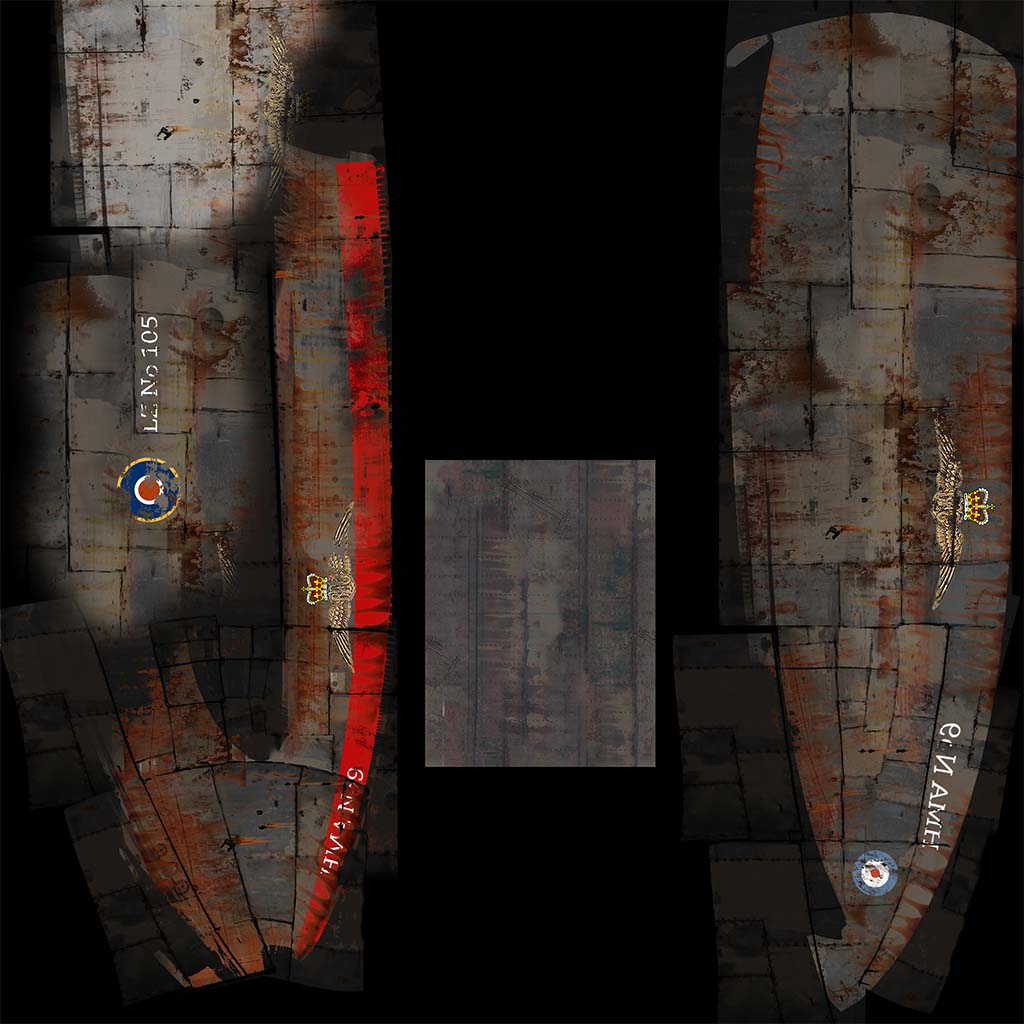
To determine the function of a ship and its belonging to Her Majesty’s Navy, special details were added. Flagship got bomb doors, guns, heavy armor (gears are protected by magnetic field), extra antigrav engines to maneuver and the spotlights. Tactical designator – HMA – stands for Her Majesty’s Air Fleet. Such labeling existed in reality. Also used winged badge of Royal Flying Corps.
[space size=”20″]
[space size=”20″]
The remaining zeppelins were unwrapped mainly through smart uv project, box mapping and project from view. Uv islands obtained during unwrap were located on the texture of the main flagship.
[space size=”20″]
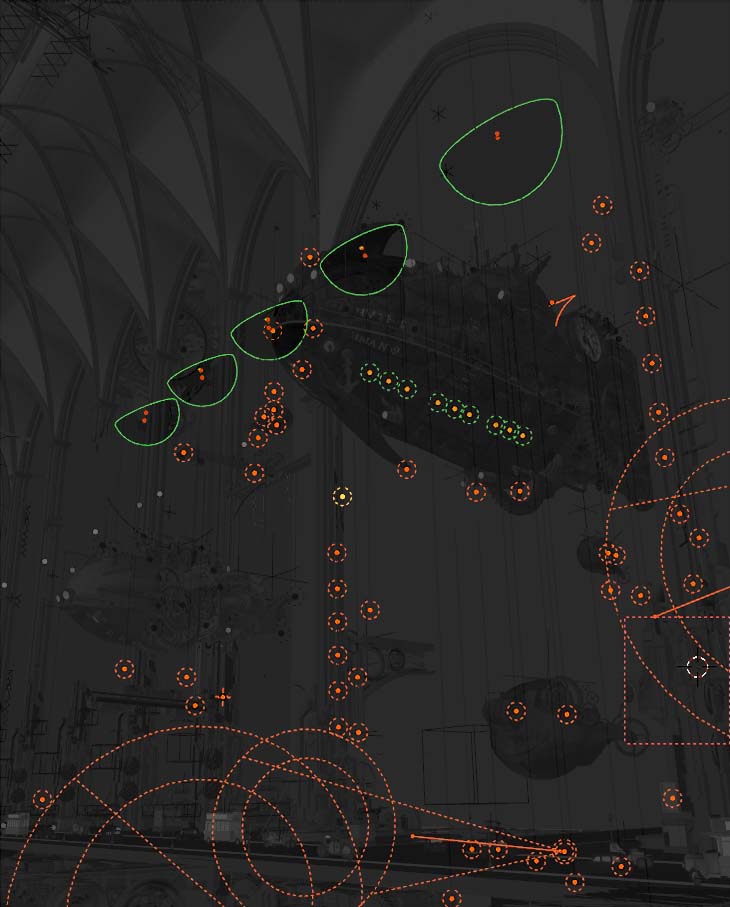
8Lighting
Lighting was set at the very beginning, and since then the base has not changed. The main light sources are the sun and the hdri. While processing hdri, I was trying to tint one side of the “sphere” in cool tones, and the opposite side in warm.
Dome was highlighted separately to achieve rhytmical light and shadow separation. I was constantly adding omnis to illuminate details and accentuate colors.
[space size=”20″]
All additional light sources were put on a separate layer, so they don’t clutter viewport and slow down the renders. Now I think that lights could be placed more rationally. But such scheme worked and it I decided to let it be.
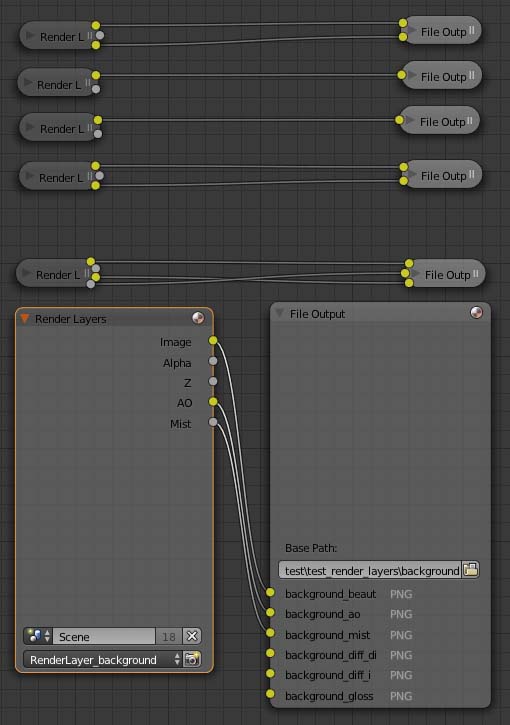
9Render Layers
Separated scene on layers like this:
1. cathedral, arcade, foreground with the pit
2. flags, lanterns
3. houses (near)
4. houses (far), scaffolding
5. zeppelin – the flagship
6. zeppelin – loader-transporter
7. zeppelins – workers
8. cranes, people, fence
9. additional light sources
12. wire, a distant embankment, decorative elements of the arcade
13. dam, spline basis for the “magnetic field” of the ships
To automatically export all this stuff I used addon called Save Layers and Passes in respectively named folders by Tamir Lousky and Luciano Munoz. Very handy thing, did not have to manually set the node compositor, indicate the names and folders.
[space size=”20″]
Rendered on CPU, because video card refused to handle 10 million triangles. On average, the level of noise in the picture was getting satisfactory after 500-1000 samples. Although, layer with an arcade demanded 4,000 samples because of small omni lights.
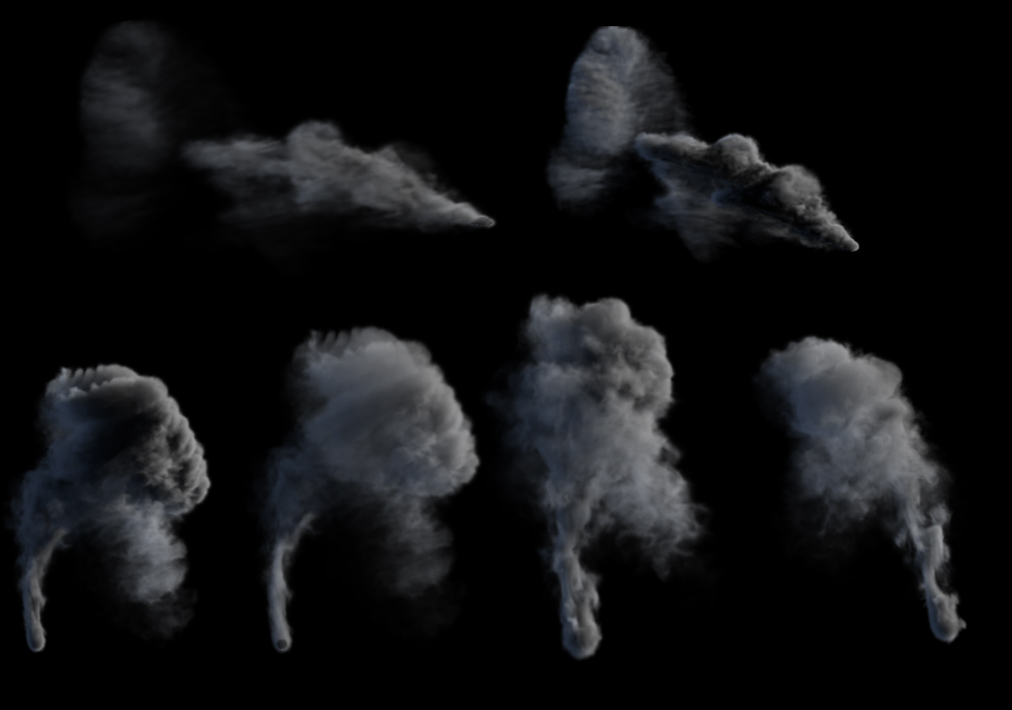
11Smoke simulation
Smoke was simulated in Blender then added on top of the compose. Emitter smoke density is animated from zero till one (0-80 frame) to eliminate big smoke puff. Also, smoke was blown away by the wind.
[space size=”20″]
[space size=”20″]
[space size=”20″]
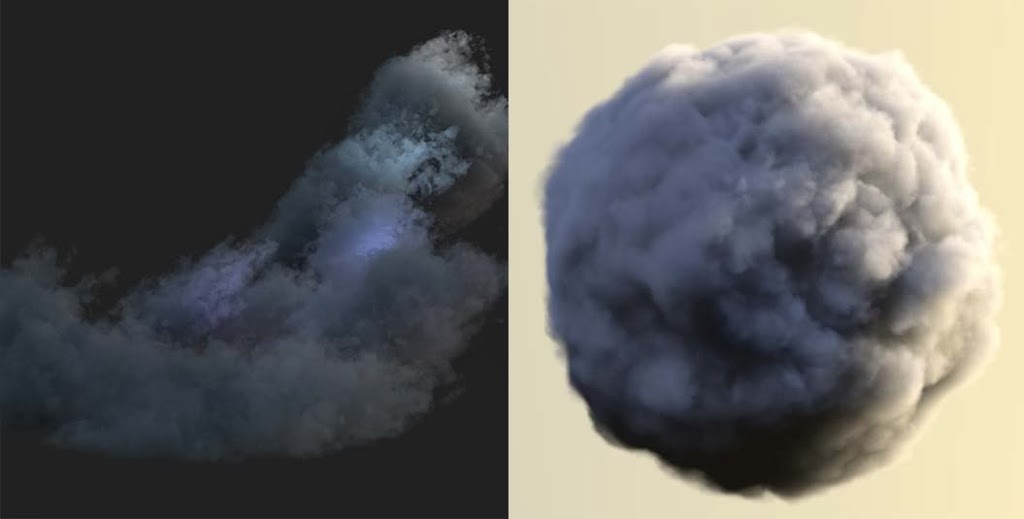
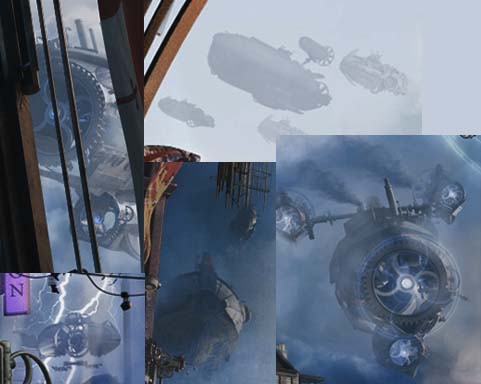
Tried to render cloud for background using Nick Keeline’s impressive addon called Cloud Generator. During the tests realized that results are only suitable for mixing with main background in small doses. Nevertheless, pointed out for myself that such clouds can fit somewhere in the future.
For ships, buildings and arcade ambient occlusion pass was mixed with rgb pass (multiply mode). Later on aerial perspective was added with the help of z-depth pass. Painted/collaged backdrop. Tried to achieve the atmosphere of approaching storm. The city with Big Ben, a fixture of Englishness, had to serve as a reference to London.
[space size=”20″]
[space size=”20″]
People were replaced and background ships added. A small lanterns were lit and also a side lights and beacons. Volumetric light came into play.
[space size=”20″]
[space size=”20″]
Decision was made to focus on the ships and to visualize the magnetic field generated by the antigrav-engines. The basis for the field was modeled and then in post-processing it was given a glow.
[space size=”20″]
[space size=”20″]
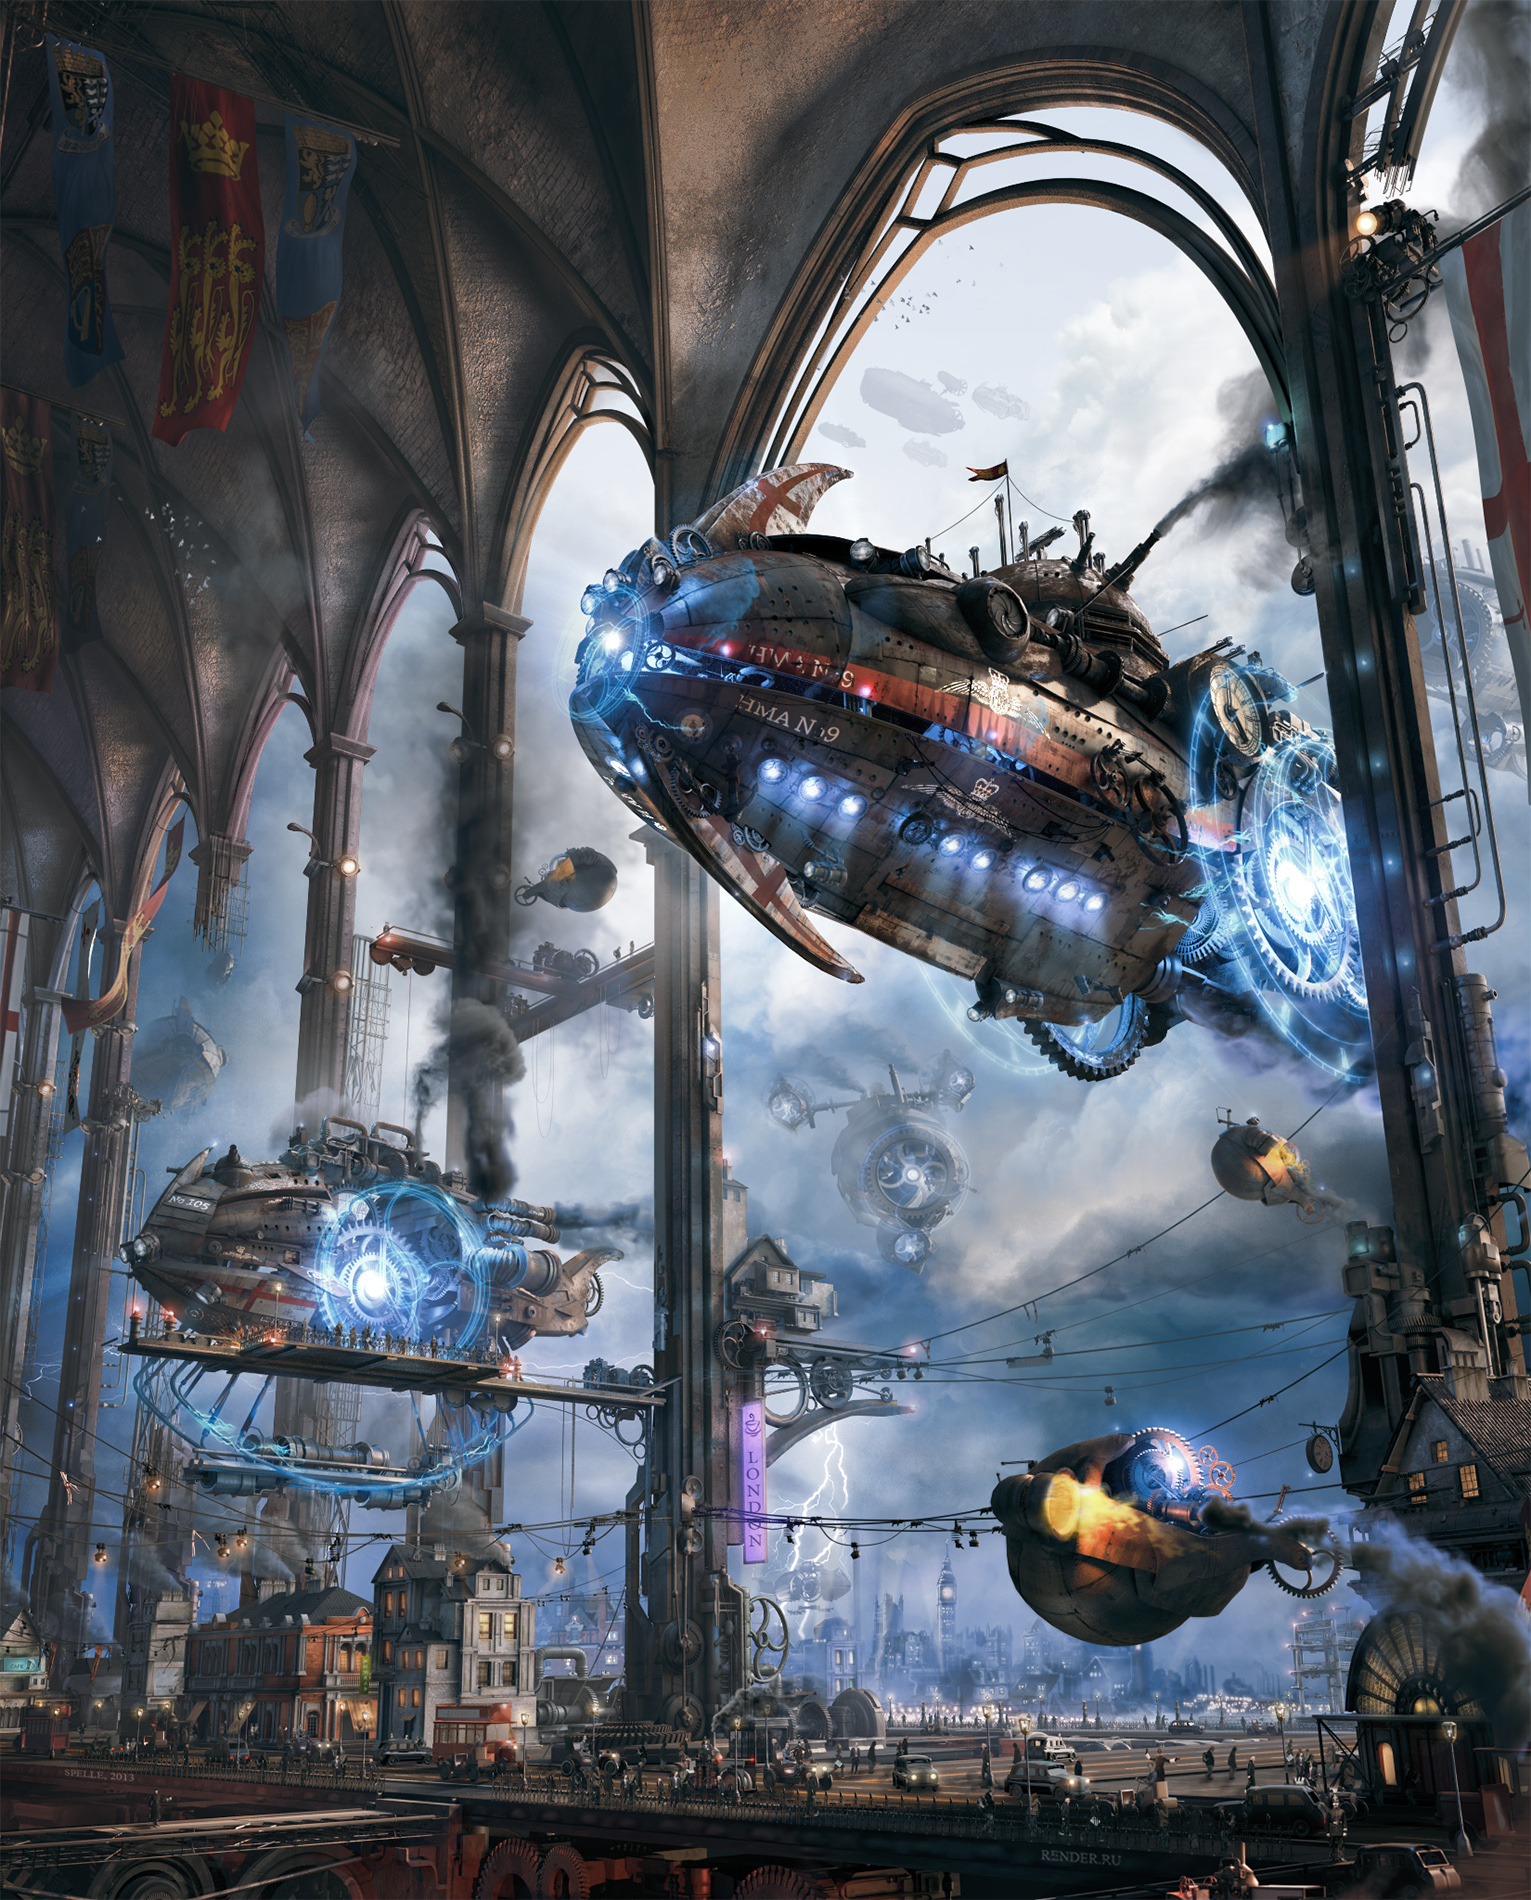
Vignette and color correction glued all parts of the picture together. Color range was driven by complementary colors, shades of cool blue and warm orange-brown. All in all, the picture became sufficiently solid to be finalized.
Her Majesty’s Zeppelins
[space size=”20″]
Conclusion
Some ideas about what could be done better: some items are not logical at all, for example, gears floating in the air without any anti-gravity. Humans and machines, for sure, demand more polish. Perhaps gone too far with the smoke (although I like how smoke looks in steampunk setting).
[space size=”20″]
Overall, I was pleasantly surprised by the positive reviews that picture have received in the discussion on Render.ru, Blenderartists and Blender3d.org.ua. It’s really motivating.
[space size=”20″]
I want to express my deep gratitude to my wife, who was helping me with practical advice and delicious coffee during the process of production. On top of that, many composition and stylistic decisions were taken in tandem with her. Thank you. All the luck and success!
interesting making of !!!! I congratulate on the first place on a render.ru!
0
Anonymous
Thanks so much for this write up! As someone kind of new this piece is really inspirational to me. I would love to have a print of this, is there one up for purchase anywhere?


Anonymous
interesting making of !!!! I congratulate on the first place on a render.ru!
Anonymous
Thanks so much for this write up! As someone kind of new this piece is really inspirational to me. I would love to have a print of this, is there one up for purchase anywhere?
Gleb Alexandrov
Thank you! I hope we will see it printed. But not for now.
Marcotronic
Wow!!! You are a crazy genius! One of the best 3D images I have ever seen.
Marco
nonamegiven
This is crazy good. Really genius with all the detail and work you put into this. Fantastic man!
Gleb Alexandrov
Nonamegiven, really glad you like this revisited making of.
John Cardozo
Awesome work, wonderful!!!
Ryan Sweeney
“While processing hdri, I was trying to tint one side of the “sphere” in cool tones, and the opposite side in warm”
How does one accomplish this? Do you multiply the environment texture with some sort of mask?
I enjoyed reading this lengthy breakdown. I will make something cool someday
Ethan Lew
This page is definitely going to be added to my bookmarks. So informative 😀
Spencer Magnusson
Holy zeppelins Gleb! Fantastic render and clear walkthrough of your process!
D Brown
Wow! Every single one of your steampunk pieces blows me away, every time. You sir, are a huge inspiration to me. Thank you!
es
Hey Gleb, pressing shift z toggles viewport render
Catherine Cook
IT has totally inspired me. Thank you
Pingback: Blender艺术家Gleb Alexandrov视频教程合计|BlenderGET